
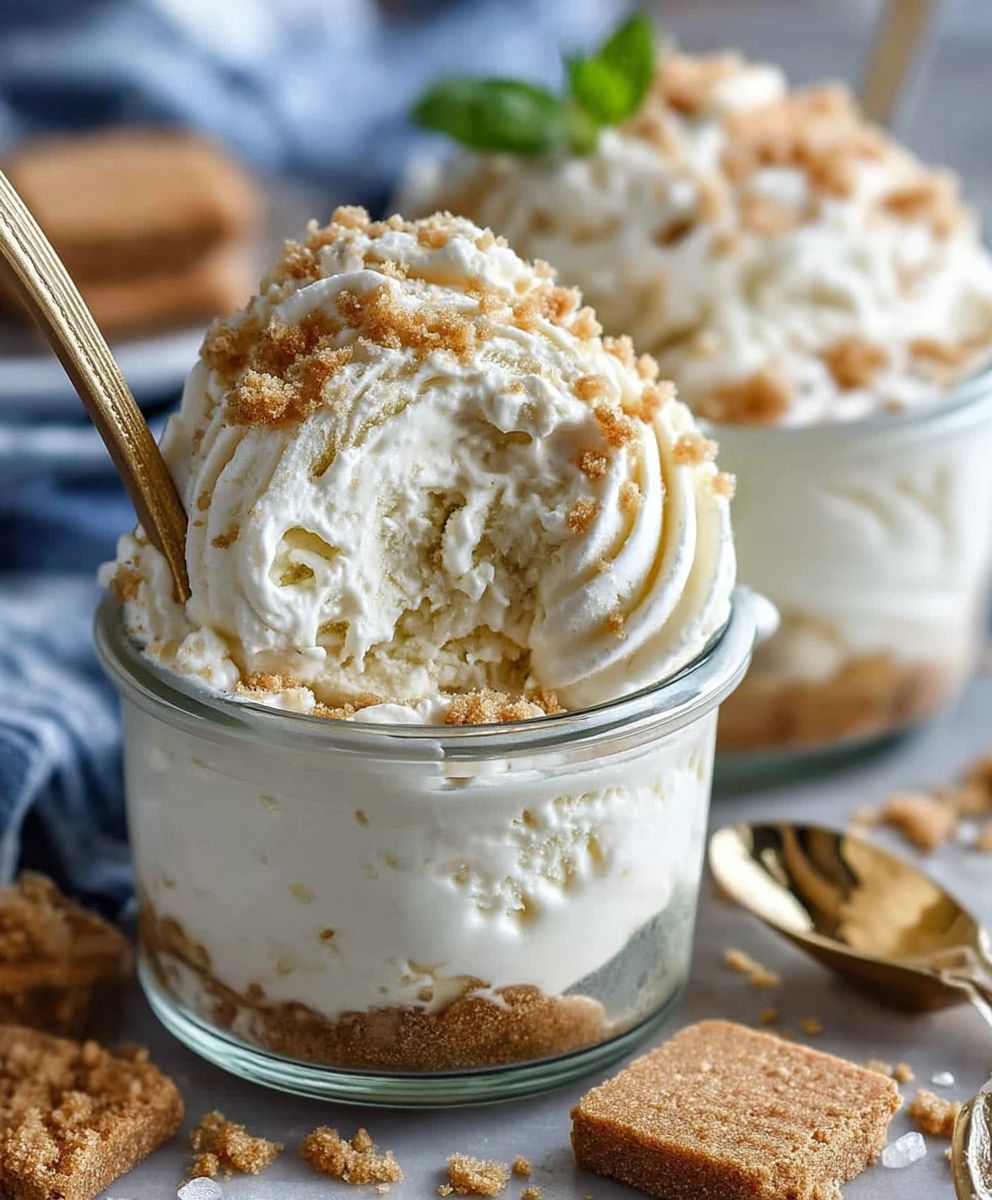
Key Lime Pie Ice Cream: Prepare to embark on a flavor adventure that perfectly marries the tangy zest of Key lime pie with the creamy coolness of homemade ice cream! Imagine the bright, citrusy burst of Key lime, swirled into a velvety smooth ice cream base, punctuated by the satisfying crunch of graham cracker crumbles. It’s a dessert that’s both refreshingly tart and indulgently sweet, a true symphony of textures and tastes that will leave you craving more.
Key lime pie itself boasts a fascinating history, originating in the Florida Keys where the unique Key lime thrives. Its distinctive tartness and aromatic qualities have made it a beloved dessert for generations. We’ve taken that classic flavor profile and transformed it into a frozen delight, perfect for beating the summer heat or enjoying a taste of sunshine any time of year. This Key Lime Pie Ice Cream recipe is not only incredibly delicious but also surprisingly easy to make at home.
People adore this dish for its vibrant flavor, the delightful contrast between the creamy ice cream and the crunchy graham cracker, and its ability to transport you to a tropical paradise with every spoonful. It’s a guaranteed crowd-pleaser, perfect for parties, potlucks, or simply a special treat for yourself. So, ditch the store-bought ice cream and get ready to create a homemade masterpiece that will tantalize your taste buds and impress your friends and family!

Ingredients:
- 1 (14 ounce) can sweetened condensed milk
- 1 cup heavy cream
- ½ cup key lime juice (freshly squeezed is best!)
- 2 teaspoons key lime zest
- ¼ teaspoon sea salt
- 1 cup whole milk
- 1/2 cup granulated sugar
- 1/4 cup light corn syrup
- 1 teaspoon vanilla extract
- Optional: Graham cracker crumbs for garnish
Preparing the Key Lime Base
Okay, let’s get started with the heart of our Key Lime Pie Ice Cream the key lime base! This is where all that tangy, citrusy goodness comes from. Don’t be intimidated; it’s super easy.
- Combine the Sweetened Condensed Milk and Heavy Cream: In a large bowl, pour in the entire can of sweetened condensed milk. Then, add the heavy cream. Using a whisk, gently combine these two ingredients until they are smooth and well incorporated. You don’t want to over-whisk at this stage; just make sure there are no lumps.
- Add the Key Lime Juice and Zest: Now for the star of the show the key lime juice! Measure out ½ cup of freshly squeezed key lime juice. I highly recommend using fresh juice for the best flavor. Bottled juice can sometimes have a slightly artificial taste. Add the juice to the bowl along with 2 teaspoons of key lime zest. The zest will add an extra layer of citrusy aroma and flavor.
- Incorporate the Salt: Don’t forget the salt! A pinch of salt (¼ teaspoon) will enhance the sweetness and balance the tartness of the key lime. Add it to the bowl.
- Whisk Until Smooth: Using your whisk, gently combine all the ingredients until they are completely smooth and homogenous. The mixture will thicken slightly as the key lime juice reacts with the dairy. This is perfectly normal.
- Taste and Adjust (If Needed): Give the mixture a taste. If you prefer a tangier flavor, you can add a little more key lime juice, a teaspoon at a time, until you reach your desired level of tartness. If it’s too tart, you can add a tablespoon of sweetened condensed milk to balance it out.
- Chill the Key Lime Base: Cover the bowl with plastic wrap, pressing it directly onto the surface of the mixture to prevent a skin from forming. Place the bowl in the refrigerator and let it chill for at least 2 hours, or preferably overnight. This chilling time is crucial for allowing the flavors to meld together and for the mixture to thicken properly.
Preparing the Custard Base
Next, we’ll create a rich and creamy custard base. This step adds body and smoothness to the ice cream, preventing it from becoming icy. Don’t worry, it’s not as complicated as it sounds!
- Combine Milk, Sugar, and Corn Syrup: In a medium saucepan, combine the whole milk, granulated sugar, and light corn syrup. The corn syrup helps to prevent ice crystal formation, resulting in a smoother ice cream.
- Heat Over Medium Heat: Place the saucepan over medium heat and stir constantly until the sugar is completely dissolved. You don’t want the mixture to boil at this stage; just heat it gently until the sugar is gone.
- Temper the Egg Yolks (Optional, but Recommended for Extra Richness): For an even richer and smoother ice cream, you can temper egg yolks into the custard base. In a separate bowl, whisk together 3 large egg yolks. Slowly drizzle a small amount of the warm milk mixture into the egg yolks, whisking constantly to prevent the eggs from scrambling. Continue adding the warm milk mixture gradually until the egg yolks are warmed through. Then, pour the egg yolk mixture back into the saucepan with the remaining milk mixture.
- Cook Until Slightly Thickened: Continue cooking the custard base over medium heat, stirring constantly with a spatula or wooden spoon, until it thickens slightly. The mixture should be thick enough to coat the back of a spoon. To test this, dip a spoon into the custard and run your finger across the back of the spoon. If the line remains distinct and doesn’t immediately run back together, the custard is ready. Be careful not to overcook the custard, as it can curdle.
- Remove from Heat and Stir in Vanilla: Once the custard has thickened, remove the saucepan from the heat and stir in the vanilla extract.
- Strain the Custard (Optional): For an extra smooth custard, you can strain it through a fine-mesh sieve into a clean bowl. This will remove any small lumps or cooked egg particles.
- Chill the Custard Base: Cover the bowl with plastic wrap, pressing it directly onto the surface of the custard to prevent a skin from forming. Place the bowl in the refrigerator and let it chill for at least 4 hours, or preferably overnight. The custard base needs to be completely cold before you churn it into ice cream.
Churning the Ice Cream
Now for the fun part churning the ice cream! This is where all your hard work pays off.
- Combine the Key Lime Base and Custard Base: Once both the key lime base and the custard base are thoroughly chilled, remove them from the refrigerator. Pour the chilled key lime base into the chilled custard base and whisk them together until they are completely combined and smooth.
- Prepare Your Ice Cream Maker: Follow the manufacturer’s instructions for your ice cream maker. Most ice cream makers require you to freeze the bowl for at least 24 hours before churning. Make sure your bowl is completely frozen solid before you begin.
- Churn the Ice Cream: Pour the combined key lime and custard mixture into the frozen ice cream maker bowl. Turn on the ice cream maker and churn according to the manufacturer’s instructions. The churning time will vary depending on your ice cream maker, but it usually takes between 20 and 30 minutes. The ice cream is ready when it has thickened to the consistency of soft-serve ice cream.
- Transfer to a Freezer-Safe Container: Once the ice cream has reached the desired consistency, transfer it to a freezer-safe container. I like to use a loaf pan or a plastic container with a tight-fitting lid.
- Freeze to Harden: Cover the container tightly and place it in the freezer for at least 2-3 hours, or preferably overnight, to allow the ice cream to harden completely.
Serving and Enjoying Your Key Lime Pie Ice Cream
Finally, the moment you’ve been waiting for serving and enjoying your homemade Key Lime Pie Ice Cream!
- Let it Soften Slightly: Before serving, remove the ice cream from the freezer and let it sit at room temperature for a few minutes to soften slightly. This will make it easier to scoop.
- Scoop and Serve: Scoop the ice cream into bowls or cones.
- Garnish (Optional): For an extra touch of Key Lime Pie flavor, sprinkle some graham cracker crumbs over the top of the ice cream. You can also add a dollop of whipped cream or a lime wedge for garnish.
- Enjoy! Savor the creamy, tangy, and refreshing taste of your homemade Key Lime Pie Ice Cream. It’s the perfect treat for a hot summer day or any time you’re craving a taste of the tropics.
Tips for Success:
- Use Fresh Key Lime Juice: As mentioned earlier, fresh key lime juice is essential for the best flavor.
- Chill Thoroughly: Make sure both the key lime base and the custard base are thoroughly chilled before churning. This will help the ice cream freeze properly and prevent it from becoming icy.
- Don’t Overchurn: Be careful not to overchurn the ice cream, as it can become grainy. Churn it until it reaches the consistency of soft-serve ice cream.
- Store Properly: Store the ice cream in a freezer-safe container with a tight-fitting lid to prevent freezer burn.
Variations:
- Add Graham Cracker Swirl: Crumble some graham crackers and swirl them into the ice cream before freezing for an extra layer of Key Lime Pie flavor.
- Add Meringue Pieces: Fold in some meringue pieces for a textural contrast.
- Make it Vegan: Substitute the dairy ingredients with plant-based alternatives, such as coconut milk and vegan condensed milk.
I hope you enjoy making and eating this Key Lime Pie Ice Cream as much as I do! It’s a truly special treat that’s sure to impress your friends and family. Happy churning!
Conclusion:
Well, there you have it! I truly believe this Key Lime Pie Ice Cream recipe is a must-try for anyone who loves the tangy zest of key lime pie and the creamy coolness of ice cream. It’s the perfect marriage of two classic desserts, resulting in a flavor explosion that’s both refreshing and utterly addictive. The bright, citrusy notes dance on your tongue, perfectly balanced by the rich, creamy base and the satisfying crunch of the graham cracker swirl. Forget choosing between pie and ice cream now you can have the best of both worlds in every single bite!
But why is this recipe so special? It’s more than just a novelty. It’s the carefully considered balance of flavors and textures that elevates it to something truly exceptional. The key lime juice provides that signature tartness, while the cream cheese adds a subtle tang and richness that complements the sweetness perfectly. And let’s not forget the graham cracker swirl! It’s not just there for show; it adds a delightful textural contrast and a hint of warm, buttery flavor that ties everything together. This isn’t just ice cream; it’s an experience.
And the best part? It’s surprisingly easy to make! You don’t need any fancy equipment or culinary expertise to whip up a batch of this frozen delight. With just a few simple ingredients and a little bit of patience, you can create a dessert that will impress your friends and family and leave them begging for more.
Now, let’s talk serving suggestions and variations! While this Key Lime Pie Ice Cream is absolutely divine on its own, there are plenty of ways to customize it to your liking. For a truly decadent treat, try serving it with a dollop of whipped cream and a sprinkle of lime zest. Or, if you’re feeling adventurous, you could even drizzle it with some melted white chocolate or a homemade key lime curd.
Looking for even more ways to personalize your ice cream? Consider adding some toasted coconut flakes for a tropical twist, or incorporating some chopped macadamia nuts for a bit of crunch. You could also experiment with different types of graham crackers, such as chocolate or cinnamon, to add a unique flavor dimension. And if you’re feeling really creative, why not try making your own homemade graham cracker crumble to swirl into the ice cream? The possibilities are endless!
Another fun variation is to make ice cream sandwiches using graham crackers. Simply spread a generous scoop of the Key Lime Pie Ice Cream between two graham crackers and freeze for a few hours. These ice cream sandwiches are perfect for a quick and easy dessert on a hot summer day.
Or, for a more elegant presentation, try scooping the ice cream into martini glasses and garnishing with a lime wedge and a sprig of mint. This is a great way to impress your guests at your next dinner party.
I’m so excited for you to try this recipe and experience the magic of Key Lime Pie Ice Cream for yourself! I know you’re going to love it. So, grab your ingredients, dust off your ice cream maker, and get ready to create a dessert that will become a new family favorite.
And most importantly, don’t forget to share your experience with me! I’d love to hear what you think of the recipe, what variations you tried, and how you served it. Leave a comment below, tag me on social media, or send me an email. I can’t wait to see your creations! Happy ice cream making!
Key Lime Pie Ice Cream: The Ultimate Summer Dessert Recipe
Tangy and refreshing homemade Key Lime Pie Ice Cream! This creamy treat combines the classic flavors of key lime pie with a smooth, rich ice cream base.
Ingredients
- 1 (14 ounce) can sweetened condensed milk
- 1 cup heavy cream
- ½ cup key lime juice (freshly squeezed is best!)
- 2 teaspoons key lime zest
- ¼ teaspoon sea salt
- 1 cup whole milk
- 1/2 cup granulated sugar
- 1/4 cup light corn syrup
- 1 teaspoon vanilla extract
- Optional: Graham cracker crumbs for garnish
Instructions
- Combine the Sweetened Condensed Milk and Heavy Cream: In a large bowl, pour in the entire can of sweetened condensed milk. Then, add the heavy cream. Using a whisk, gently combine these two ingredients until they are smooth and well incorporated.
- Add the Key Lime Juice and Zest: Measure out ½ cup of freshly squeezed key lime juice and add it to the bowl along with 2 teaspoons of key lime zest.
- Incorporate the Salt: Add ¼ teaspoon of sea salt to the bowl.
- Whisk Until Smooth: Using your whisk, gently combine all the ingredients until they are completely smooth and homogenous. The mixture will thicken slightly.
- Taste and Adjust (If Needed): Taste the mixture. If you prefer a tangier flavor, add a little more key lime juice, a teaspoon at a time, until you reach your desired level of tartness. If it’s too tart, you can add a tablespoon of sweetened condensed milk to balance it out.
- Chill the Key Lime Base: Cover the bowl with plastic wrap, pressing it directly onto the surface of the mixture. Place the bowl in the refrigerator and let it chill for at least 2 hours, or preferably overnight.
- Combine Milk, Sugar, and Corn Syrup: In a medium saucepan, combine the whole milk, granulated sugar, and light corn syrup.
- Heat Over Medium Heat: Place the saucepan over medium heat and stir constantly until the sugar is completely dissolved.
- Temper the Egg Yolks (Optional, but Recommended for Extra Richness): For an even richer and smoother ice cream, you can temper egg yolks into the custard base. In a separate bowl, whisk together 3 large egg yolks. Slowly drizzle a small amount of the warm milk mixture into the egg yolks, whisking constantly to prevent the eggs from scrambling. Continue adding the warm milk mixture gradually until the egg yolks are warmed through. Then, pour the egg yolk mixture back into the saucepan with the remaining milk mixture.
- Cook Until Slightly Thickened: Continue cooking the custard base over medium heat, stirring constantly with a spatula or wooden spoon, until it thickens slightly. The mixture should be thick enough to coat the back of a spoon.
- Remove from Heat and Stir in Vanilla: Once the custard has thickened, remove the saucepan from the heat and stir in the vanilla extract.
- Strain the Custard (Optional): For an extra smooth custard, you can strain it through a fine-mesh sieve into a clean bowl.
- Chill the Custard Base: Cover the bowl with plastic wrap, pressing it directly onto the surface of the custard. Place the bowl in the refrigerator and let it chill for at least 4 hours, or preferably overnight.
- Combine the Key Lime Base and Custard Base: Once both the key lime base and the custard base are thoroughly chilled, remove them from the refrigerator. Pour the chilled key lime base into the chilled custard base and whisk them together until they are completely combined and smooth.
- Prepare Your Ice Cream Maker: Follow the manufacturer’s instructions for your ice cream maker.
- Churn the Ice Cream: Pour the combined key lime and custard mixture into the frozen ice cream maker bowl. Turn on the ice cream maker and churn according to the manufacturer’s instructions. The churning time will vary depending on your ice cream maker, but it usually takes between 20 and 30 minutes. The ice cream is ready when it has thickened to the consistency of soft-serve ice cream.
- Transfer to a Freezer-Safe Container: Once the ice cream has reached the desired consistency, transfer it to a freezer-safe container.
- Freeze to Harden: Cover the container tightly and place it in the freezer for at least 2-3 hours, or preferably overnight, to allow the ice cream to harden completely.
- Let it Soften Slightly: Before serving, remove the ice cream from the freezer and let it sit at room temperature for a few minutes to soften slightly.
- Scoop and Serve: Scoop the ice cream into bowls or cones.
- Garnish (Optional): Sprinkle some graham cracker crumbs over the top of the ice cream. You can also add a dollop of whipped cream or a lime wedge for garnish.
- Enjoy!
Notes
- Use fresh key lime juice for the best flavor.
- Chill both the key lime base and the custard base thoroughly before churning.
- Don’t overchurn the ice cream.
- Store the ice cream in a freezer-safe container with a tight-fitting lid to prevent freezer burn.
- Add Graham Cracker Swirl: Crumble some graham crackers and swirl them into the ice cream before freezing for an extra layer of Key Lime Pie flavor.
- Add Meringue Pieces: Fold in some meringue pieces for a textural contrast.
- Make it Vegan: Substitute the dairy ingredients with plant-based alternatives, such as coconut milk and vegan condensed milk.