
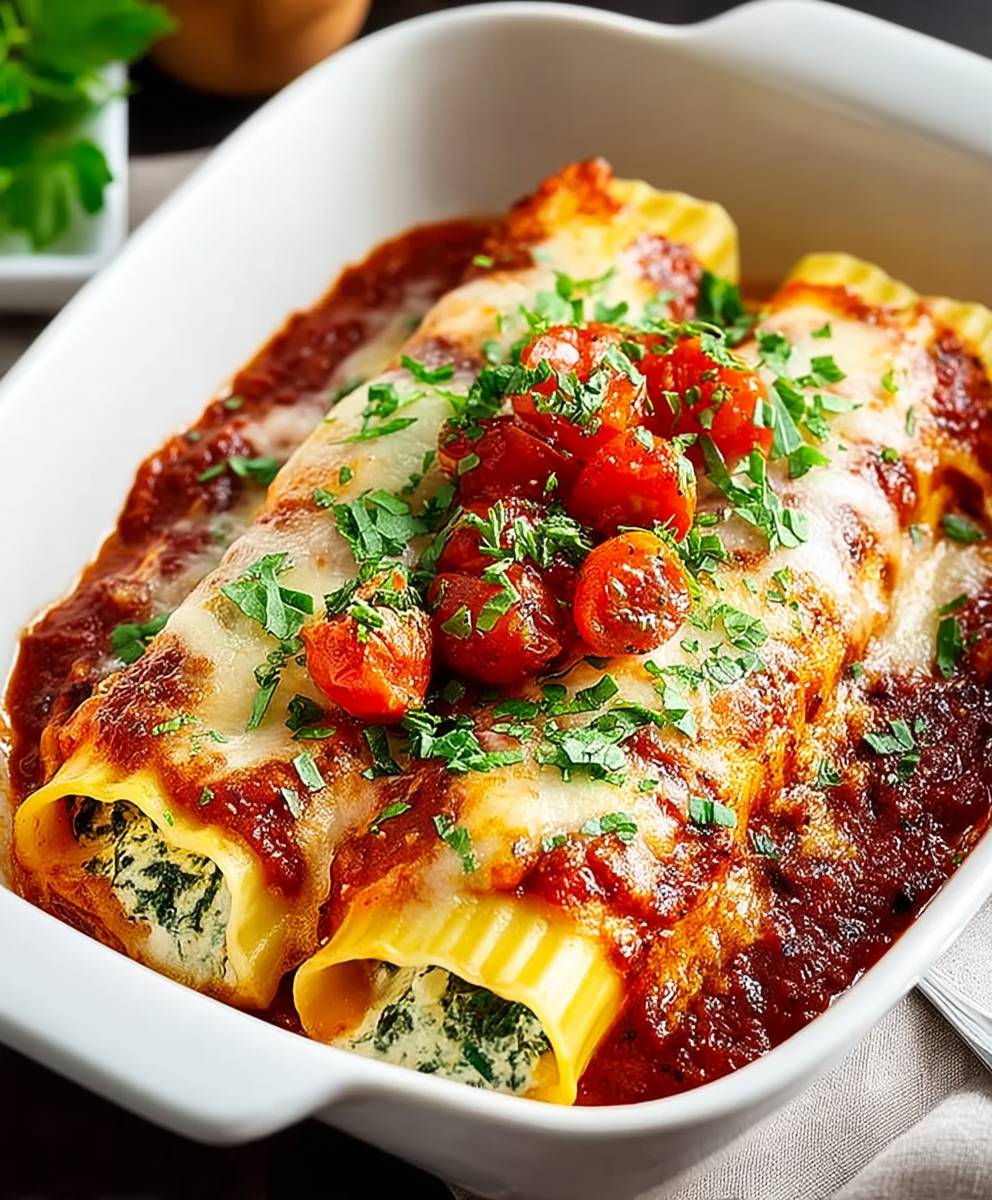
Irresistible Manicotti, a dish that whispers of cozy Italian kitchens and Sunday family gatherings, is about to become your new weeknight favorite. Imagine tender pasta tubes, overflowing with a creamy, ricotta-based filling, blanketed in a rich, homemade tomato sauce, and then baked to golden, bubbly perfection. Sounds divine, doesn’t it?
Manicotti, meaning “sleeves” in Italian, has a rich history rooted in Southern Italian cuisine. While the exact origins are debated, it’s clear that this stuffed pasta dish evolved from a tradition of resourceful cooks using simple ingredients to create a satisfying and flavorful meal. It’s a testament to the power of humble ingredients transformed into something truly special.
But what makes irresistible manicotti so universally loved? It’s the perfect combination of textures and flavors. The smooth, creamy filling contrasts beautifully with the slightly chewy pasta and the tangy tomato sauce. It’s also incredibly versatile you can customize the filling with different cheeses, vegetables, or even meat, making it a dish that can be adapted to suit any taste. Plus, it’s a fantastic make-ahead meal, perfect for busy weeknights or for entertaining guests. Get ready to experience the comforting magic of homemade manicotti!

Ingredients:
- For the Manicotti Shells:
- 1 cup all-purpose flour
- 1/2 teaspoon salt
- 1 large egg
- 1/2 cup milk
- 1/4 cup water
- 2 tablespoons melted butter, plus more for greasing the pan
- For the Ricotta Filling:
- 30 ounces ricotta cheese (full-fat, drained)
- 1 cup grated Parmesan cheese
- 1/2 cup chopped fresh parsley
- 1 large egg, lightly beaten
- 1/4 teaspoon ground nutmeg
- 1/2 teaspoon salt
- 1/4 teaspoon black pepper
- For the Meat Sauce:
- 1 pound ground beef (or Italian sausage, or a mixture)
- 1 medium onion, chopped
- 2 cloves garlic, minced
- 1 (28 ounce) can crushed tomatoes
- 1 (15 ounce) can tomato sauce
- 1 (6 ounce) can tomato paste
- 1 teaspoon dried oregano
- 1/2 teaspoon dried basil
- 1/4 teaspoon red pepper flakes (optional)
- 1 teaspoon sugar
- 1/2 teaspoon salt
- 1/4 teaspoon black pepper
- 2 tablespoons olive oil
- For the Cheese Topping:
- 2 cups shredded mozzarella cheese
- 1/2 cup grated Parmesan cheese
Making the Manicotti Shells:
Okay, let’s start with the shells. Don’t be intimidated! They’re basically thin crepes, and once you get the hang of it, it’s super easy. I promise!
- Whisk the Dry Ingredients: In a medium bowl, whisk together the flour and salt. This ensures the salt is evenly distributed.
- Combine Wet and Dry: In a separate bowl, whisk together the egg, milk, water, and melted butter. Pour the wet ingredients into the dry ingredients and whisk until just combined. Don’t overmix! A few small lumps are okay.
- Heat the Pan: Heat a lightly greased 8-inch non-stick skillet over medium heat. I like to use a little butter for extra flavor, but cooking spray works too. The pan is ready when a drop of water sizzles and evaporates quickly.
- Pour the Batter: Pour about 1/4 cup of batter into the hot skillet. Immediately swirl the pan to spread the batter into a thin, even circle. You want it to be nice and thin, like a crepe.
- Cook the Shell: Cook for about 1-2 minutes, or until the edges start to lift and the bottom is lightly golden brown. Use a thin spatula to carefully flip the shell.
- Cook the Other Side: Cook for another 30-60 seconds, or until the other side is lightly golden brown. You don’t want it to be too crispy, just cooked through.
- Stack the Shells: Transfer the cooked shell to a plate and cover it with plastic wrap to keep it warm and pliable. This prevents them from drying out and cracking when you fill them.
- Repeat: Repeat steps 4-7 with the remaining batter, greasing the pan as needed. You should get about 10-12 shells.
Preparing the Ricotta Filling:
Now for the delicious ricotta filling! This is where the magic happens. Make sure your ricotta is well-drained, otherwise, your manicotti might be a little watery.
- Drain the Ricotta: If your ricotta seems watery, place it in a cheesecloth-lined colander set over a bowl. Let it drain in the refrigerator for at least 30 minutes, or even better, overnight.
- Combine Ingredients: In a large bowl, combine the drained ricotta cheese, Parmesan cheese, parsley, egg, nutmeg, salt, and pepper.
- Mix Well: Mix all the ingredients together until well combined. Be careful not to overmix, as this can make the ricotta tough.
- Taste and Adjust: Taste the filling and adjust the seasonings as needed. You might want to add a little more salt, pepper, or Parmesan cheese to your liking.
Making the Meat Sauce:
A good meat sauce is essential for amazing manicotti. I like to let mine simmer for a while to really develop the flavors. You can use ground beef, Italian sausage, or a combination of both. I often use a mix for extra flavor!
- Brown the Meat: In a large skillet or Dutch oven, heat the olive oil over medium-high heat. Add the ground beef (or sausage) and cook, breaking it up with a spoon, until browned. Drain off any excess grease.
- Sauté the Vegetables: Add the chopped onion and minced garlic to the skillet and cook until softened, about 5-7 minutes.
- Add the Tomatoes: Stir in the crushed tomatoes, tomato sauce, and tomato paste.
- Add the Seasonings: Add the oregano, basil, red pepper flakes (if using), sugar, salt, and pepper.
- Simmer the Sauce: Bring the sauce to a simmer, then reduce the heat to low, cover, and simmer for at least 30 minutes, or up to 1 hour, stirring occasionally. The longer it simmers, the richer the flavor will be.
- Taste and Adjust: Taste the sauce and adjust the seasonings as needed. You might want to add a little more sugar if the sauce is too acidic, or more salt and pepper to your liking.
Assembling the Manicotti:
This is the fun part! Get ready to roll those manicotti!
- Preheat the Oven: Preheat your oven to 375°F (190°C).
- Grease the Baking Dish: Lightly grease a 9×13 inch baking dish with butter or cooking spray.
- Spoon Sauce into the Dish: Spread a thin layer of meat sauce over the bottom of the baking dish. This will prevent the manicotti from sticking and add flavor.
- Fill the Shells: Place a manicotti shell on a flat surface. Spoon about 1/4 cup of the ricotta filling onto the center of the shell.
- Roll the Shell: Gently roll the shell up, starting from one end, to enclose the filling.
- Place in Baking Dish: Place the filled manicotti seam-side down in the prepared baking dish.
- Repeat: Repeat steps 4-6 with the remaining shells and filling, arranging the manicotti in a single layer in the baking dish.
- Top with Sauce: Pour the remaining meat sauce over the manicotti, making sure they are evenly covered.
- Sprinkle with Cheese: Sprinkle the mozzarella cheese and Parmesan cheese over the top of the sauce.
Baking the Manicotti:
Almost there! Now it’s time to bake the manicotti until they’re bubbly and golden brown.
- Cover with Foil: Cover the baking dish with aluminum foil. This will prevent the cheese from burning and help the manicotti cook evenly.
- Bake: Bake for 25 minutes.
- Remove Foil: Remove the foil and bake for another 15-20 minutes, or until the cheese is melted and bubbly and the manicotti are heated through. The top should be nicely browned.
- Let Rest: Let the manicotti rest for 10-15 minutes before serving. This will allow the filling to set slightly and make it easier to serve.
Serving:
Serve hot, garnished with fresh parsley, if desired. This manicotti is delicious on its own, or with a side salad and some crusty bread for dipping in the sauce. Enjoy!
Conclusion:
This isn’t just another pasta dish; it’s an experience. The creamy ricotta filling, the tangy tomato sauce, and the perfectly baked pasta shells combine to create a symphony of flavors that will have everyone at your table begging for seconds. This Irresistible Manicotti recipe is a must-try because it’s comforting, satisfying, and surprisingly easy to make. Forget complicated weeknight dinners; this is the kind of meal that brings people together.
But the best part? It’s incredibly versatile! While I’ve shared my go-to recipe, feel free to get creative.
Serving Suggestions and Variations:
* Meat Lovers’ Manicotti: Brown some Italian sausage or ground beef and mix it into the ricotta filling for an extra layer of savory goodness. You could even add a layer of meat sauce between the manicotti and the tomato sauce before baking.
* Vegetarian Delight: Add sautéed spinach, mushrooms, or zucchini to the ricotta mixture for a veggie-packed version. A sprinkle of roasted red peppers on top before baking adds a touch of sweetness and color.
* Spice It Up: A pinch of red pepper flakes in the ricotta filling or a dash of hot sauce in the tomato sauce will give your manicotti a delightful kick.
* Creamy Dreamy: For an even richer flavor, stir in a dollop of mascarpone cheese into the ricotta mixture. You can also add a splash of heavy cream to the tomato sauce for extra creaminess.
* Serving Suggestions: Serve your Irresistible Manicotti with a simple side salad dressed with a light vinaigrette. Garlic bread is always a welcome addition, perfect for soaking up all that delicious sauce. A glass of Chianti or Pinot Noir complements the flavors beautifully. For a lighter meal, serve with steamed asparagus or green beans. Don’t forget a generous sprinkle of fresh basil or parsley on top for a final touch of freshness.
I truly believe this recipe will become a family favorite. It’s perfect for a cozy weeknight dinner, a potluck gathering, or even a special occasion. The beauty of this dish is that it can be prepared ahead of time, making it ideal for busy schedules. Simply assemble the manicotti, cover it tightly, and refrigerate it for up to 24 hours before baking.
So, what are you waiting for? Gather your ingredients, preheat your oven, and get ready to create some magic in the kitchen. I’m confident that you’ll love this Irresistible Manicotti as much as I do.
And now for the most important part: I want to hear about your experience! Did you try the recipe? Did you make any variations? What did your family and friends think? Please share your thoughts, photos, and tips in the comments below. I can’t wait to see your creations and hear your stories. Happy cooking! Let me know if you have any questions, I’m always happy to help. Enjoy your delicious, homemade manicotti!
Irresistible Manicotti: The Ultimate Guide to Making Perfect Manicotti
Homemade manicotti filled with creamy ricotta, smothered in rich meat sauce, and topped with melted mozzarella and Parmesan. A classic Italian comfort food!
Ingredients
- 1 cup all-purpose flour
- 1/2 teaspoon salt
- 1 large egg
- 1/2 cup milk
- 1/4 cup water
- 2 tablespoons melted butter, plus more for greasing the pan
- 30 ounces ricotta cheese (full-fat, drained)
- 1 cup grated Parmesan cheese
- 1/2 cup chopped fresh parsley
- 1 large egg, lightly beaten
- 1/4 teaspoon ground nutmeg
- 1/2 teaspoon salt
- 1/4 teaspoon black pepper
- 2 tablespoons olive oil
- 1 pound ground beef (or Italian sausage, or a mixture)
- 1 medium onion, chopped
- 2 cloves garlic, minced
- 1 (28 ounce) can crushed tomatoes
- 1 (15 ounce) can tomato sauce
- 1 (6 ounce) can tomato paste
- 1 teaspoon dried oregano
- 1/2 teaspoon dried basil
- 1/4 teaspoon red pepper flakes (optional)
- 1 teaspoon sugar
- 1/2 teaspoon salt
- 1/4 teaspoon black pepper
- 2 cups shredded mozzarella cheese
- 1/2 cup grated Parmesan cheese
Instructions
- Make the Manicotti Shells:
- In a medium bowl, whisk together the flour and salt.
- In a separate bowl, whisk together the egg, milk, water, and melted butter. Pour the wet ingredients into the dry ingredients and whisk until just combined. Don’t overmix! A few small lumps are okay.
- Heat a lightly greased 8-inch non-stick skillet over medium heat. The pan is ready when a drop of water sizzles and evaporates quickly.
- Pour about 1/4 cup of batter into the hot skillet. Immediately swirl the pan to spread the batter into a thin, even circle.
- Cook for about 1-2 minutes, or until the edges start to lift and the bottom is lightly golden brown. Use a thin spatula to carefully flip the shell.
- Cook for another 30-60 seconds, or until the other side is lightly golden brown. You don’t want it to be too crispy, just cooked through.
- Transfer the cooked shell to a plate and cover it with plastic wrap to keep it warm and pliable.
- Repeat steps 4-7 with the remaining batter, greasing the pan as needed. You should get about 10-12 shells.
- Prepare the Ricotta Filling:
- If your ricotta seems watery, place it in a cheesecloth-lined colander set over a bowl. Let it drain in the refrigerator for at least 30 minutes, or even better, overnight.
- In a large bowl, combine the drained ricotta cheese, Parmesan cheese, parsley, egg, nutmeg, salt, and pepper.
- Mix all the ingredients together until well combined. Be careful not to overmix, as this can make the ricotta tough.
- Taste the filling and adjust the seasonings as needed.
- Make the Meat Sauce:
- In a large skillet or Dutch oven, heat the olive oil over medium-high heat. Add the ground beef (or sausage) and cook, breaking it up with a spoon, until browned. Drain off any excess grease.
- Add the chopped onion and minced garlic to the skillet and cook until softened, about 5-7 minutes.
- Stir in the crushed tomatoes, tomato sauce, and tomato paste.
- Add the oregano, basil, red pepper flakes (if using), sugar, salt, and pepper.
- Bring the sauce to a simmer, then reduce the heat to low, cover, and simmer for at least 30 minutes, or up to 1 hour, stirring occasionally. The longer it simmers, the richer the flavor will be.
- Taste the sauce and adjust the seasonings as needed.
- Assemble the Manicotti:
- Preheat your oven to 375°F (190°C).
- Lightly grease a 9×13 inch baking dish with butter or cooking spray.
- Spread a thin layer of meat sauce over the bottom of the baking dish.
- Place a manicotti shell on a flat surface. Spoon about 1/4 cup of the ricotta filling onto the center of the shell.
- Gently roll the shell up, starting from one end, to enclose the filling.
- Place the filled manicotti seam-side down in the prepared baking dish.
- Repeat steps 4-6 with the remaining shells and filling, arranging the manicotti in a single layer in the baking dish.
- Pour the remaining meat sauce over the manicotti, making sure they are evenly covered.
- Sprinkle the mozzarella cheese and Parmesan cheese over the top of the sauce.
- Bake the Manicotti:
- Cover the baking dish with aluminum foil.
- Bake for 25 minutes.
- Remove the foil and bake for another 15-20 minutes, or until the cheese is melted and bubbly and the manicotti are heated through. The top should be nicely browned.
- Let the manicotti rest for 10-15 minutes before serving.
- Serve: Serve hot, garnished with fresh parsley, if desired.
Notes
- Draining the ricotta cheese is crucial to prevent watery manicotti.
- Simmering the meat sauce for a longer time will result in a richer, more flavorful sauce.
- You can use ground beef, Italian sausage, or a combination of both for the meat sauce.
- Covering the baking dish with foil during the first part of baking prevents the cheese from burning.
- Letting the manicotti rest before serving allows the filling to set slightly, making it easier to serve.