
Pickled Eggs Sausage Onions: Prepare yourself for a flavor explosion that will tantalize your taste buds! This isn’t your average snack; it’s a delightful combination of tangy, savory, and slightly sweet that’s surprisingly addictive. Have you ever craved a snack that’s both satisfying and unique? Look no further!
Pickled eggs, in various forms, have been a culinary staple for centuries, a testament to their ability to preserve food and provide a burst of flavor. While the exact origins of combining them with sausage and onions are a bit murky, this particular combination likely evolved from resourceful cooks looking to create a hearty and flavorful snack or appetizer. Think of it as a sophisticated, grown-up version of a lunchable!
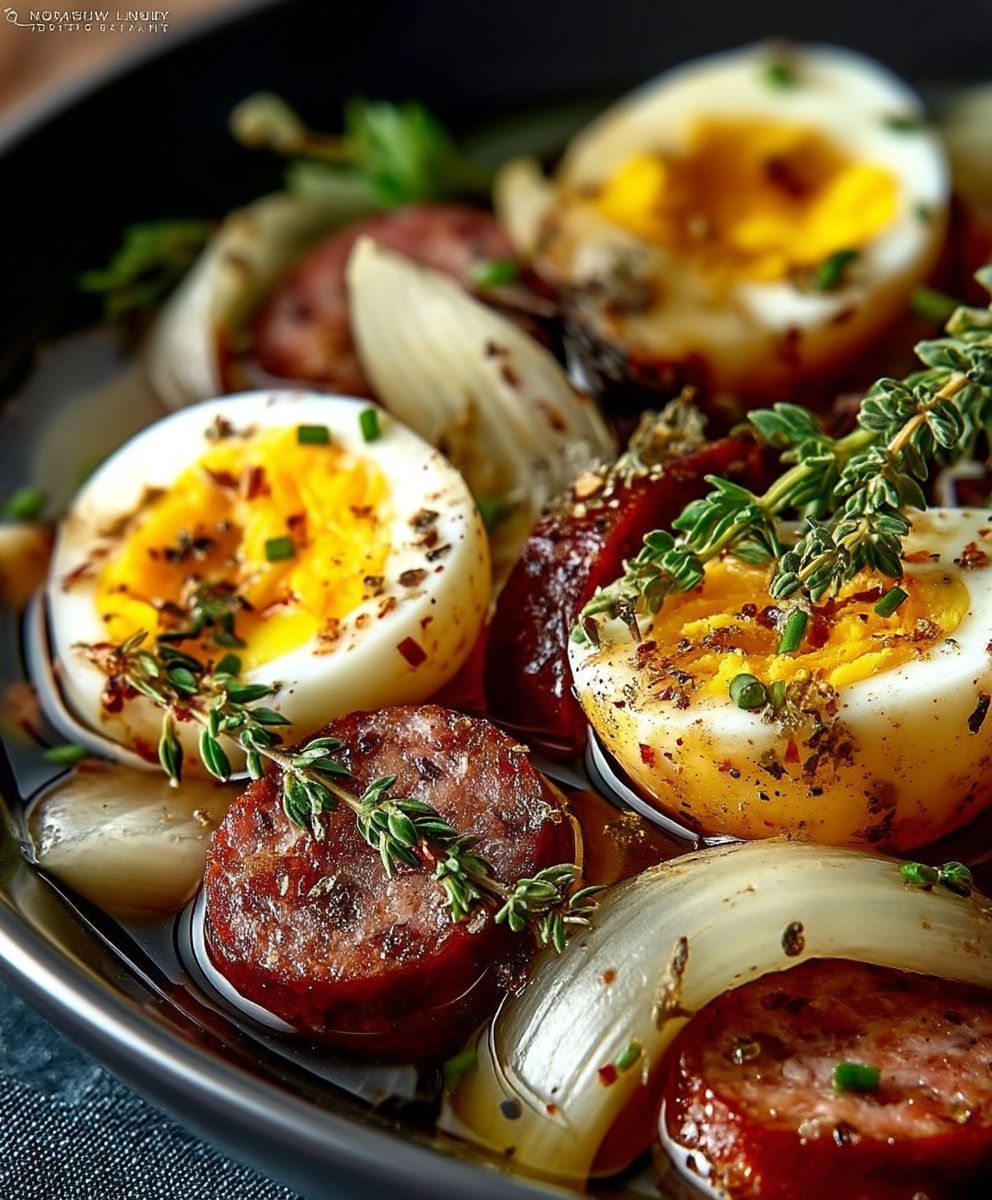
What makes pickled eggs sausage onions so irresistible? It’s the perfect balance of textures and tastes. The firm, slightly rubbery texture of the pickled egg contrasts beautifully with the savory, meaty bite of the sausage and the sharp, sweet tang of the onions. The pickling brine infuses everything with a delightful acidity that cuts through the richness, making it incredibly moreish. Plus, it’s incredibly convenient! Prepare a batch ahead of time, and you’ll have a delicious and satisfying snack ready whenever hunger strikes. Whether you’re serving it as an appetizer at your next gathering or enjoying it as a quick and easy lunch, this recipe is sure to become a new favorite.

Ingredients:
- 12 large eggs
- 1 cup white vinegar (5% acidity)
- 1 cup water
- 1/4 cup sugar
- 1 tablespoon pickling spice
- 1 teaspoon salt
- 1/2 teaspoon black peppercorns
- 1 large onion, thinly sliced
- 1 pound smoked sausage, cut into 1/2-inch thick slices
- Optional: 1-2 jalapenos, sliced (for added heat)
- Optional: 1 clove garlic, minced
- Optional: 1/4 teaspoon red pepper flakes
Hard-Boiling the Eggs:
This is the most crucial step, so pay close attention! We want perfectly hard-boiled eggs without any green rings around the yolks.
- Place the eggs in a large saucepan: Gently arrange the eggs in a single layer at the bottom of the saucepan. Avoid overcrowding the pan, as this can lead to uneven cooking and cracked shells.
- Cover with cold water: Add enough cold water to completely cover the eggs by about an inch. Using cold water helps the eggs heat up gradually, which prevents cracking.
- Bring to a boil: Place the saucepan over high heat and bring the water to a rolling boil. Watch carefully, as the water can boil over quickly.
- Turn off the heat and cover: Once the water reaches a rolling boil, immediately turn off the heat. Cover the saucepan tightly with a lid.
- Let the eggs sit: Allow the eggs to sit in the hot water, covered, for 12-15 minutes. This cooking time will depend on the size of your eggs. For large eggs, 14 minutes is usually perfect. For extra-large eggs, you might need 15 minutes.
- Prepare an ice bath: While the eggs are sitting, prepare an ice bath in a large bowl. Fill the bowl with ice and cold water. This will stop the cooking process and make the eggs easier to peel.
- Transfer the eggs to the ice bath: After the 12-15 minutes are up, carefully transfer the eggs from the hot water to the ice bath using a slotted spoon. Let the eggs cool completely in the ice bath for at least 10 minutes. This will help the shells separate from the egg whites.
- Peel the eggs: Once the eggs are cool enough to handle, gently tap each egg all over to crack the shell. Start peeling from the larger end of the egg, where there is usually an air pocket. Peel the eggs under cold running water to help remove any stubborn pieces of shell.
- Rinse the peeled eggs: Rinse the peeled eggs under cold water to remove any remaining shell fragments. Pat them dry with a paper towel.
Preparing the Pickling Brine:
The brine is what gives these pickled eggs their tangy and flavorful taste. Don’t be afraid to adjust the ingredients to your liking!
- Combine the ingredients in a saucepan: In a medium saucepan, combine the white vinegar, water, sugar, pickling spice, salt, black peppercorns, and optional red pepper flakes (if using).
- Bring to a boil: Place the saucepan over medium-high heat and bring the mixture to a boil, stirring occasionally to dissolve the sugar and salt.
- Simmer for 5 minutes: Once the mixture reaches a boil, reduce the heat to low and simmer for 5 minutes. This will allow the flavors to meld together.
- Remove from heat and let cool slightly: Remove the saucepan from the heat and let the brine cool slightly for about 10-15 minutes. This will prevent the hot brine from cooking the eggs further.
Assembling the Pickled Eggs, Sausage, and Onions:
Now comes the fun part putting everything together! Make sure you have a clean jar or container ready.
- Prepare your jar or container: Choose a clean, wide-mouth glass jar or a non-reactive plastic container with a tight-fitting lid. Make sure the jar is large enough to hold all the eggs, sausage, and onions. A quart-sized jar is usually sufficient.
- Layer the ingredients: Start by placing a layer of sliced onions at the bottom of the jar. Then, add a layer of sliced sausage. Next, carefully arrange a layer of hard-boiled eggs on top of the sausage. Repeat these layers until all the ingredients are used, ending with a layer of onions and sausage on top. If you’re using jalapenos or minced garlic, scatter them throughout the layers.
- Pour the brine over the ingredients: Carefully pour the slightly cooled pickling brine over the layered ingredients, making sure to completely submerge the eggs, sausage, and onions. If necessary, gently press down on the ingredients to release any trapped air bubbles.
- Add more liquid if needed: If the brine doesn’t completely cover the ingredients, add a mixture of equal parts white vinegar and water until they are fully submerged. It’s important that everything is submerged to ensure proper pickling and prevent spoilage.
- Seal the jar or container: Securely seal the jar or container with a tight-fitting lid.
Refrigerating and Pickling Time:
Patience is key! The longer the eggs, sausage, and onions sit in the brine, the more flavorful they will become.
- Refrigerate for at least 3 days: Place the sealed jar or container in the refrigerator and let the pickled eggs, sausage, and onions sit for at least 3 days, or preferably longer. This allows the flavors to fully develop and penetrate the ingredients.
- Turn the jar occasionally: During the pickling process, turn the jar or container upside down once or twice a day. This will help ensure that all the ingredients are evenly exposed to the brine.
- Taste and adjust: After 3 days, taste the pickled eggs, sausage, and onions. If you prefer a stronger flavor, let them pickle for a few more days. You can also add more vinegar or sugar to the brine to adjust the taste to your liking.
- Storage: Once the pickled eggs, sausage, and onions have reached your desired flavor, store them in the refrigerator for up to 2 weeks. Make sure the ingredients remain submerged in the brine.
Tips and Variations:
Here are some extra tips and ideas to customize your pickled eggs, sausage, and onions:
- Experiment with different spices: Try adding other spices to the pickling brine, such as mustard seeds, celery seeds, bay leaves, or cloves.
- Use different types of vinegar: You can use apple cider vinegar, red wine vinegar, or malt vinegar instead of white vinegar for a different flavor profile.
- Add some heat: For a spicier kick, add more jalapenos, red pepper flakes, or a dash of hot sauce to the brine.
- Use different types of sausage: Try using kielbasa, andouille sausage, or even hot dogs instead of smoked sausage.
- Add other vegetables: You can also add other vegetables to the jar, such as bell peppers, carrots, or cauliflower.
- For a sweeter pickle: Increase the amount of sugar in the brine. Start with an extra tablespoon and adjust to taste.
- For a more sour pickle: Increase the amount of vinegar in the brine. Start with an extra 1/4 cup and adjust to taste.
- Safety Note: Always ensure that the eggs are fully submerged in the brine to prevent spoilage. If you notice any signs of spoilage, such as a foul odor or discoloration, discard the pickled eggs, sausage, and onions immediately.
Serving Suggestions:
These pickled eggs, sausage, and onions are delicious on their own as a snack or appetizer. They also make a great addition to charcuterie boards, sandwiches, and salads.
Enjoy!
Conclusion:
So, there you have it! This isn’t just another recipe; it’s a flavor explosion waiting to happen. The tangy zest of the pickled eggs, the savory depth of the sausage, and the sharp bite of the onions create a symphony of tastes that will leave you craving more. Trust me, once you try this combination, you’ll wonder where it’s been all your life. It’s the perfect balance of salty, sour, and savory, making it an incredibly satisfying and surprisingly addictive snack or meal component.
Why This Recipe is a Must-Try
Honestly, the simplicity alone makes it a winner. You’re not spending hours in the kitchen, slaving over a complicated dish. This is about quick, easy, and delicious. But beyond the convenience, it’s the unique flavor profile that truly sets it apart. The pickling process transforms ordinary eggs into tangy treasures, while the sausage adds a hearty richness that complements the acidity perfectly. And the onions? They provide that crucial sharpness that cuts through the richness and keeps your palate engaged. It’s a culinary adventure in every bite!
Serving Suggestions and Variations
Now, let’s talk about how you can enjoy this delightful concoction. My personal favorite is to serve it as a standalone snack, perfect for game day or a casual get-together. But don’t limit yourself! You can chop it up and add it to a salad for a protein-packed lunch. Imagine it tossed with some mixed greens, a light vinaigrette, and maybe some crumbled blue cheese divine! Another fantastic option is to use it as a topping for crackers or crusty bread. Spread a little cream cheese or mustard on the bread, then pile on the pickled eggs sausage onions mixture for a truly unforgettable appetizer.
Feeling adventurous? Let’s explore some variations! For a spicier kick, add a pinch of red pepper flakes or a dash of hot sauce to the pickling brine. You could also experiment with different types of sausage. Chorizo would add a smoky, spicy dimension, while Italian sausage would bring a touch of sweetness. And don’t forget about the onions! Red onions offer a milder flavor, while shallots provide a more delicate sweetness. Get creative and find the combination that best suits your taste buds.
Don’t Be Afraid to Experiment!
The beauty of this recipe is that it’s incredibly adaptable. Feel free to adjust the ratios of ingredients to your liking. If you’re a big fan of pickled eggs, add more! If you prefer a milder onion flavor, use less. The most important thing is to have fun and make it your own. I’ve even tried adding a touch of dill to the pickling brine, and it was absolutely delicious! The possibilities are endless.
So, what are you waiting for? Gather your ingredients, put on your apron, and get ready to experience a flavor sensation. I’m confident that this recipe will become a new favorite in your household. And when you do try it, please, please, please share your experience! I’d love to hear what you think, what variations you tried, and how you served it. Leave a comment below and let me know. Happy cooking!
Pickled Eggs Sausage Onions: The Ultimate Guide to Making and Enjoying
Tangy pickled eggs, sausage, and onions, perfect for snacking or adding a zesty kick.
Ingredients
- 12 large eggs
- 1 cup white vinegar (5% acidity)
- 1 cup water
- 1/4 cup sugar
- 1 tablespoon pickling spice
- 1 teaspoon salt
- 1/2 teaspoon black peppercorns
- 1 large onion, thinly sliced
- 1 pound smoked sausage, cut into 1/2-inch thick slices
- Optional: 1-2 jalapenos, sliced (for added heat)
- Optional: 1 clove garlic, minced
- Optional: 1/4 teaspoon red pepper flakes
Instructions
- Place the eggs in a large saucepan in a single layer.
- Cover with cold water (about an inch above the eggs).
- Bring to a rolling boil over high heat.
- Turn off the heat, cover the saucepan tightly, and let sit for 12-15 minutes (14 minutes for large eggs, 15 for extra-large).
- Prepare an ice bath in a large bowl.
- Transfer the eggs to the ice bath and cool completely for at least 10 minutes.
- Gently tap each egg all over to crack the shell. Peel under cold running water.
- Rinse the peeled eggs and pat them dry.
- In a medium saucepan, combine the white vinegar, water, sugar, pickling spice, salt, black peppercorns, and optional red pepper flakes (if using).
- Bring to a boil over medium-high heat, stirring occasionally to dissolve the sugar and salt.
- Reduce the heat to low and simmer for 5 minutes.
- Remove from heat and let cool slightly for about 10-15 minutes.
- Choose a clean, wide-mouth glass jar or a non-reactive plastic container with a tight-fitting lid.
- Layer the sliced onions, sausage, and hard-boiled eggs in the jar, repeating until all ingredients are used, ending with onions and sausage on top. Scatter jalapenos or minced garlic throughout the layers, if using.
- Carefully pour the slightly cooled pickling brine over the layered ingredients, ensuring they are completely submerged.
- If needed, add a mixture of equal parts white vinegar and water until everything is fully submerged.
- Securely seal the jar or container with a tight-fitting lid.
- Refrigerate for at least 3 days, or preferably longer, to allow the flavors to fully develop.
- Turn the jar or container upside down once or twice a day during the pickling process.
- After 3 days, taste and adjust if needed. Let them pickle for a few more days for a stronger flavor.
- Store in the refrigerator for up to 2 weeks, ensuring the ingredients remain submerged in the brine.
Notes
- Experiment with different spices like mustard seeds, celery seeds, bay leaves, or cloves.
- Use apple cider vinegar, red wine vinegar, or malt vinegar for a different flavor profile.
- Adjust the amount of sugar or vinegar to your liking for a sweeter or more sour pickle.
- Always ensure the eggs are fully submerged in the brine to prevent spoilage. Discard if you notice any signs of spoilage.