
Pineapple Tepache Drink: Prepare to unlock a refreshing explosion of flavor with this traditional Mexican beverage! Have you ever tasted something so unexpectedly delicious that it instantly transports you to a sun-drenched paradise? That’s precisely what this fermented pineapple drink does. It’s a bubbly, slightly sweet, and subtly tangy concoction that’s incredibly easy to make at home.
Tepache boasts a rich history, dating back to pre-Columbian Mexico, where it was originally made with corn. Over time, pineapple became the star ingredient, transforming it into the vibrant drink we know and love today. It was a popular drink among the indigenous people and has been passed down through generations.
What makes Pineapple Tepache Drink so irresistible? Beyond its fascinating history, it’s the perfect balance of sweet and tart, with a subtle effervescence that tickles your taste buds. Its incredibly refreshing, especially on a hot day, and offers a delightful alternative to sugary sodas. Plus, the fermentation process creates beneficial probiotics, making it a gut-friendly treat. Whether you’re looking for a unique party beverage or simply a healthy and flavorful drink to enjoy at home, this tepache recipe is sure to become a new favorite!

Ingredients:
- 1 ripe pineapple (about 3-4 pounds), skin and core included
- 8 cups of water (filtered is best!)
- 1 cup piloncillo sugar (or packed brown sugar as a substitute)
- 2 cinnamon sticks
- 3-5 cloves (optional, but adds a nice warmth)
- 1-2 dried chiles (optional, for a little kick I like using chiles de árbol)
- Filtered water (for topping off during fermentation)
Preparing the Pineapple
Okay, let’s get started! The first thing we need to do is prep our pineapple. Don’t be intimidated by the prickly skin; it’s easier than you think. We’re using the whole pineapple skin, core, and flesh so make sure it’s nice and clean.
- Wash the Pineapple Thoroughly: Give your pineapple a good scrub under running water. You can even use a vegetable brush to get into all those little crevices. We want to remove any dirt or debris that might be clinging to the skin.
- Cut off the Top and Bottom: Using a large, sharp knife, carefully cut off the top (the leafy crown) and the bottom of the pineapple. Make sure you have a stable cutting board.
- Remove the Skin: Now, stand the pineapple upright on one of the cut ends. Slice off the skin in strips, following the curve of the pineapple. Try to remove as little of the flesh as possible, but don’t worry too much about getting every single “eye.” We’ll take care of those in the next step.
- Remove the “Eyes”: After you’ve removed the majority of the skin, you’ll likely still see some of those little brown “eyes” embedded in the flesh. Use a small paring knife to carefully cut these out. You can create a spiral pattern as you go around the pineapple, which looks kind of cool!
- Chop the Pineapple: Now that the pineapple is peeled, it’s time to chop it up. I like to cut it into roughly 1-inch chunks. Don’t worry about being too precise; the size doesn’t matter too much. The goal is to increase the surface area so the sugars can be extracted more easily during fermentation.
Setting Up the Fermentation Vessel
Next, we need to get our fermentation vessel ready. A glass jar is ideal, but you can also use a food-grade plastic container. Just make sure it’s clean and large enough to hold all the ingredients.
- Choose Your Vessel: I usually use a gallon-sized glass jar. It’s easy to clean and allows me to see what’s happening during the fermentation process.
- Sanitize the Vessel (Optional but Recommended): While not strictly necessary, sanitizing your vessel can help prevent unwanted bacteria from taking over. You can do this by washing it thoroughly with hot, soapy water and then rinsing it with a diluted bleach solution (1 tablespoon of bleach per gallon of water). Make sure to rinse it very well with clean water afterward to remove any traces of bleach.
Combining the Ingredients and Starting Fermentation
Alright, now for the fun part! We’re going to combine all the ingredients in our vessel and let the magic happen.
- Add the Pineapple to the Vessel: Place all the chopped pineapple into your chosen vessel. It should fill up a good portion of the jar or container.
- Add the Piloncillo (or Brown Sugar): Sprinkle the piloncillo sugar (or brown sugar) over the pineapple. The sugar is what the yeast will feed on during fermentation, creating the delicious tepache.
- Add the Spices: Toss in the cinnamon sticks, cloves (if using), and dried chiles (if using). These spices will add depth and complexity to the flavor of your tepache.
- Pour in the Water: Pour the 8 cups of filtered water over the pineapple, sugar, and spices. Make sure the water covers all the ingredients. If not, you can add a little more filtered water to top it off.
- Stir Gently: Use a clean spoon or spatula to gently stir the mixture. This will help dissolve the sugar and distribute the spices.
- Weigh it Down (Optional but Helpful): To prevent mold growth, it’s important to keep the pineapple submerged below the water line. You can do this by using a fermentation weight, a small glass jar filled with water, or even a clean ziplock bag filled with water. Place the weight on top of the pineapple to keep it submerged.
- Cover the Vessel: Cover the vessel with a breathable cloth, such as cheesecloth or a clean kitchen towel, secured with a rubber band or string. This will allow air to circulate while keeping out fruit flies and other unwanted critters. You can also use an airlock if you have one.
Fermentation Process
Now comes the waiting game! The fermentation process typically takes 2-5 days, depending on the temperature of your environment. Warmer temperatures will speed up the fermentation, while cooler temperatures will slow it down.
- Store in a Cool, Dark Place: Place the vessel in a cool, dark place, away from direct sunlight. A pantry or cupboard is ideal.
- Observe the Fermentation: Over the next few days, you’ll start to see bubbles forming in the liquid. This is a sign that the yeast is active and fermentation is taking place. You might also notice a slight foam forming on the surface.
- Taste Test (After 2 Days): After 2 days, start tasting the tepache to check its progress. Use a clean spoon to sample the liquid. It should be slightly sweet and tangy, with a hint of pineapple and spices.
- Continue Fermenting (If Needed): If the tepache isn’t tangy enough for your liking, continue fermenting it for another day or two, tasting it periodically. The longer it ferments, the more tangy and less sweet it will become. Be careful not to over-ferment it, as it can become too sour.
- Monitor for Mold: Keep an eye out for any signs of mold growth. If you see any mold, discard the entire batch. This is why it’s important to keep the pineapple submerged during fermentation.
Bottling and Refrigeration
Once the tepache has reached your desired level of tanginess, it’s time to bottle it and refrigerate it to stop the fermentation process.
- Strain the Tepache: Line a fine-mesh sieve with cheesecloth or a nut milk bag. Place the sieve over a large bowl or pitcher. Pour the tepache through the sieve to strain out the pineapple solids and spices.
- Bottle the Tepache: Pour the strained tepache into clean bottles. You can use glass bottles with swing tops or plastic bottles with tight-fitting lids. Leave about an inch of headspace at the top of each bottle.
- Refrigerate Immediately: Refrigerate the bottled tepache immediately to stop the fermentation process. This will also help to preserve its flavor and prevent it from becoming too sour.
- Optional: Second Fermentation (for Fizz): For a fizzy tepache, you can do a second fermentation in the bottles. Leave the bottles at room temperature for 12-24 hours before refrigerating. Be careful, as this can create a lot of pressure and the bottles could explode if left too long. Burp the bottles (open them briefly to release pressure) every few hours to prevent this. I usually skip this step for safety reasons.
Serving and Enjoying Your Tepache
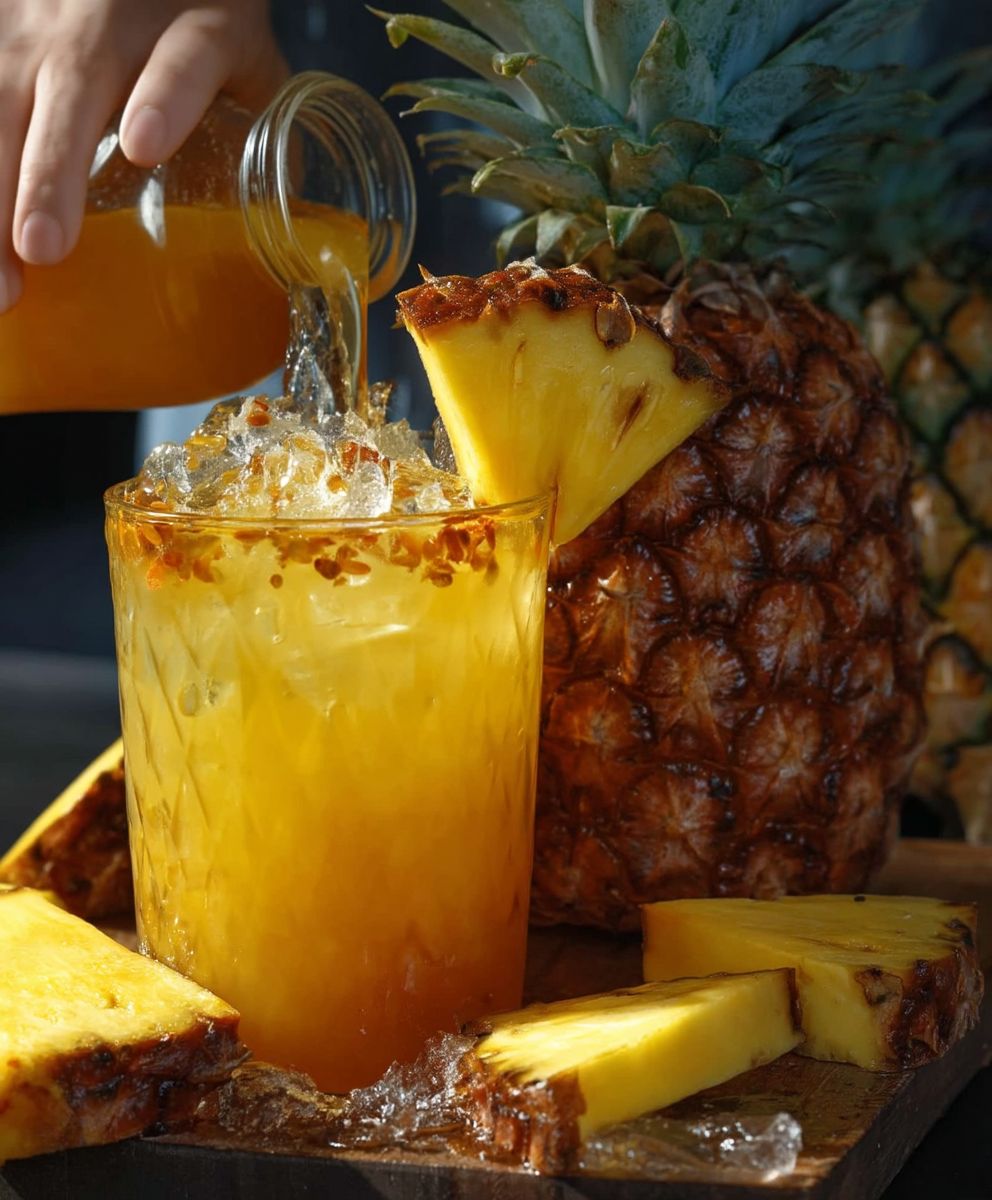
Your homemade pineapple tepache is now ready to enjoy! Serve it chilled, over ice, and garnish with a slice of pineapple or a lime wedge. It’s a refreshing and probiotic-rich drink that’s perfect for hot summer days.
- Serve Chilled: Tepache is best served ice cold.
- Pour Over Ice: Fill a glass with ice and pour the tepache over it.
- Garnish (Optional): Garnish with a slice of pineapple, a lime wedge, or a sprig of mint.
- Enjoy! Sip and savor the delicious and refreshing flavor of your homemade pineapple tepache.
Tips and Variations:
- Adjust the Sweetness: If you prefer a sweeter tepache, add more sugar at the beginning of the fermentation process. If you prefer a less sweet tepache, use less sugar or ferment it for a longer period of time.
- Experiment with Spices: Feel free to experiment with different spices to create your own unique
Conclusion:
This Pineapple Tepache Drink isn’t just another beverage; it’s a vibrant, effervescent experience waiting to happen. The subtle sweetness of the pineapple, balanced by the warmth of the spices and the gentle tang of fermentation, creates a flavor profile that’s both refreshing and deeply satisfying. It’s a must-try because it’s incredibly easy to make, uses ingredients you likely already have on hand, and offers a healthy, probiotic-rich alternative to sugary sodas. Plus, the natural fermentation process adds a unique depth of flavor you simply can’t find in store-bought drinks.
But the best part? It’s incredibly versatile! Serve it chilled on a hot summer day as a revitalizing afternoon pick-me-up. Imagine sipping it poolside, the bubbles tickling your nose as the sweet and tangy flavors dance on your tongue. Or, pair it with spicy Mexican food; the tepache’s subtle sweetness perfectly complements the heat, creating a harmonious balance. For a more sophisticated twist, try using it as a mixer in cocktails. A splash of tequila or mezcal elevates the tepache into a truly memorable drink.
Looking for variations? Don’t be afraid to experiment! Add a few slices of ginger to the fermentation process for an extra zing. A cinnamon stick or two will deepen the warm, spicy notes. For a spicier kick, include a few slices of jalapeño. And if you’re feeling adventurous, try adding other fruits like mango or guava to the mix. The possibilities are endless! You can even adjust the sweetness level to your liking by adding more or less piloncillo or brown sugar. Remember, the beauty of homemade tepache is that you can customize it to perfectly suit your taste.
Serving Suggestions:
* Classic Tepache: Serve chilled with a lime wedge.
* Spicy Tepache: Add a few slices of jalapeño during fermentation.
* Ginger Tepache: Include fresh ginger slices for a zesty kick.
* Tepache Cocktail: Mix with tequila or mezcal and a squeeze of lime.
* Fruity Tepache: Add mango or guava during fermentation.I truly believe that once you try this recipe, you’ll be hooked. It’s a simple, rewarding, and delicious way to enjoy the natural goodness of pineapple. It’s also a fantastic conversation starter! Imagine sharing a batch of homemade tepache with friends and family, explaining the fermentation process and the health benefits. It’s a unique and thoughtful way to show your love and appreciation.
So, what are you waiting for? Gather your ingredients, follow the simple steps, and get ready to experience the magic of homemade Pineapple Tepache Drink. I’m confident you’ll love it as much as I do. And most importantly, I want to hear about your experience! Share your photos, your variations, and your thoughts in the comments below. Let’s create a community of tepache enthusiasts and inspire others to try this amazing recipe. Happy fermenting! I can’t wait to see what delicious creations you come up with!
Pineapple Tepache Drink: A Refreshing & Gut-Friendly Guide
Refreshing, probiotic-rich fermented drink made from pineapple rinds, piloncillo sugar, and spices. A delicious and easy way to enjoy the benefits of fermentation.
Ingredients
- 1 ripe pineapple (about 3-4 pounds), skin and core included
- 8 cups of water (filtered is best!)
- 1 cup piloncillo sugar (or packed brown sugar as a substitute)
- 2 cinnamon sticks
- 3-5 cloves (optional, but adds a nice warmth)
- 1-2 dried chiles (optional, for a little kick I like using chiles de árbol)
- Filtered water (for topping off during fermentation)
Instructions
- Wash the Pineapple Thoroughly: Scrub the pineapple under running water, using a vegetable brush if needed.
- Cut off the Top and Bottom: Cut off the leafy crown and the bottom of the pineapple.
- Remove the Skin: Slice off the skin in strips, removing as little flesh as possible.
- Remove the “Eyes”: Use a paring knife to carefully cut out the brown “eyes.”
- Chop the Pineapple: Cut the pineapple into roughly 1-inch chunks.
- Choose Your Vessel: Use a gallon-sized glass jar.
- Sanitize the Vessel (Optional but Recommended): Wash it thoroughly with hot, soapy water and then rinsing it with a diluted bleach solution (1 tablespoon of bleach per gallon of water).
- Add the Pineapple to the Vessel: Place all the chopped pineapple into your chosen vessel.
- Add the Piloncillo (or Brown Sugar): Sprinkle the piloncillo sugar (or brown sugar) over the pineapple.
- Add the Spices: Toss in the cinnamon sticks, cloves (if using), and dried chiles (if using).
- Pour in the Water: Pour the 8 cups of filtered water over the pineapple, sugar, and spices.
- Stir Gently: Use a clean spoon or spatula to gently stir the mixture.
- Weigh it Down (Optional but Helpful): Use a fermentation weight, a small glass jar filled with water, or even a clean ziplock bag filled with water.
- Cover the Vessel: Cover the vessel with a breathable cloth, such as cheesecloth or a clean kitchen towel, secured with a rubber band or string.
- Store in a Cool, Dark Place: Place the vessel in a cool, dark place, away from direct sunlight.
- Observe the Fermentation: Over the next few days, you’ll start to see bubbles forming in the liquid.
- Taste Test (After 2 Days): After 2 days, start tasting the tepache to check its progress.
- Continue Fermenting (If Needed): If the tepache isn’t tangy enough for your liking, continue fermenting it for another day or two, tasting it periodically.
- Monitor for Mold: Keep an eye out for any signs of mold growth.
- Strain the Tepache: Line a fine-mesh sieve with cheesecloth or a nut milk bag. Place the sieve over a large bowl or pitcher. Pour the tepache through the sieve to strain out the pineapple solids and spices.
- Bottle the Tepache: Pour the strained tepache into clean bottles. You can use glass bottles with swing tops or plastic bottles with tight-fitting lids. Leave about an inch of headspace at the top of each bottle.
- Refrigerate Immediately: Refrigerate the bottled tepache immediately to stop the fermentation process.
- Optional: Second Fermentation (for Fizz): For a fizzy tepache, you can do a second fermentation in the bottles. Leave the bottles at room temperature for 12-24 hours before refrigerating. Be careful, as this can create a lot of pressure and the bottles could explode if left too long. Burp the bottles (open them briefly to release pressure) every few hours to prevent this. I usually skip this step for safety reasons.
- Serve Chilled: Tepache is best served ice cold.
- Pour Over Ice: Fill a glass with ice and pour the tepache over it.
- Garnish (Optional): Garnish with a slice of pineapple, a lime wedge, or a sprig of mint.
- Enjoy! Sip and savor the delicious and refreshing flavor of your homemade pineapple tepache.
Notes
- Fermentation Time: The fermentation process typically takes 2-5 days, depending on the temperature. Warmer temperatures speed up fermentation.
- Mold Prevention: Keep the pineapple submerged during fermentation to prevent mold growth.
- Sweetness Adjustment: Adjust the amount of sugar to your preference.
- Spice Variations: Experiment with different spices to customize the flavor.
- Second Fermentation Caution: Be cautious when doing a second fermentation for fizz, as bottles can explode. Burp the bottles frequently.
- Serving: Serve chilled over ice with a pineapple slice or lime wedge.