
Chocolate Cream Cheese Danish is a delightful pastry that perfectly marries the rich flavors of chocolate and the creamy texture of cream cheese, making it a beloved treat for breakfast or dessert. Originating from the Danish pastry tradition, this delectable creation has roots that trace back to the 19th century, when bakers in Denmark began experimenting with laminated doughs. Today, the Chocolate Cream Cheese Danish has transcended borders, captivating taste buds around the world with its flaky layers and luscious filling.
People adore this dish not only for its irresistible taste but also for its convenience; it can be prepared ahead of time and baked fresh when needed. The combination of sweet chocolate and tangy cream cheese creates a harmonious balance that leaves a lasting impression. Whether enjoyed with a cup of coffee in the morning or as a sweet indulgence in the afternoon, the Chocolate Cream Cheese Danish is sure to bring joy to any occasion.

Ingredients:
- 1 package (8 oz) cream cheese, softened
- 1/2 cup powdered sugar
- 1 teaspoon vanilla extract
- 1 package (17.3 oz) frozen puff pastry, thawed
- 1/2 cup semi-sweet chocolate chips
- 1 egg, beaten (for egg wash)
- 1 tablespoon milk (for egg wash)
- 1/4 cup sliced almonds (optional, for topping)
- Additional powdered sugar for dusting (optional)
Preparing the Cream Cheese Filling
- In a medium mixing bowl, combine the softened cream cheese, powdered sugar, and vanilla extract.
- Using a hand mixer or a whisk, beat the mixture until it is smooth and creamy, ensuring there are no lumps. This should take about 2-3 minutes.
- Once the mixture is well combined, set it aside to allow the flavors to meld while you prepare the puff pastry.
Preparing the Puff Pastry
- Preheat your oven to 400°F (200°C). Line a baking sheet with parchment paper to prevent sticking.
- On a lightly floured surface, unfold the thawed puff pastry sheets. You should have two sheets in the package.
- Using a rolling pin, gently roll out each sheet to smooth out creases and to slightly increase the size. Aim for a rectangle shape, about 1/8 inch thick.
- Cut each sheet into 4 equal squares (you should have a total of 8 squares). Use a sharp knife or pizza cutter for clean edges.
Assembling the Danish
- Take one square of puff pastry and place it on the prepared baking sheet.
- In the center of the square, spoon about 1-2 tablespoons of the cream cheese filling. Be careful not to overfill, as it may spill out during baking.
- Sprinkle a few chocolate chips on top of the cream cheese filling for added flavor.
- To create a Danish shape, fold the corners of the pastry square towards the center, pinching them together to seal the filling inside. You can also leave the corners open for a more rustic look.
- Repeat this process with the remaining squares of puff pastry, cream cheese filling, and chocolate chips.
Applying the Egg Wash
- In a small bowl, whisk together the beaten egg and milk to create an egg wash.
- Using a pastry brush, gently brush the egg wash over the tops of each assembled Danish. This will give them a beautiful golden color when baked.
- If desired, sprinkle sliced almonds on top of each Danish for added texture and flavor.
Baking the Danish
- Place the baking sheet in the preheated oven and bake for 15-20 minutes, or until the pastries are puffed and golden brown.
- Keep an eye on them during the last few minutes of baking to prevent over-browning.
- Once baked, remove the Danish from the oven and allow them to cool on the baking sheet for about 5 minutes.
Serving the Danish
- After cooling slightly, transfer the Danish to a wire rack to cool completely.
- If desired, dust the tops with additional powdered sugar for a sweet finish.
- Serve warm or at room temperature. These Danish are perfect for breakfast, brunch, or as a delightful dessert.
Storage Tips
- Store any leftover Danish in an airtight container at room temperature for up to 2 days.
- For longer storage, refrigerate them for up to a week. Reheat in the oven at 350°F (175°C) for about 5-10 minutes to restore their flaky texture.
- You can also freeze the unbaked assembled Danish. To do this, place them on a baking sheet and freeze until solid, then transfer to a freezer-safe bag. Bake
Conclusion:
In summary, this Chocolate Cream Cheese Danish is a delightful treat that perfectly balances the rich, velvety chocolate with the creamy tang of cream cheese, making it a must-try for any pastry lover. Whether you’re enjoying it for breakfast, as a snack, or as a dessert, this recipe is sure to impress your family and friends. For serving suggestions, consider pairing your Danish with a hot cup of coffee or a refreshing glass of milk to enhance the flavors. You can also experiment with variations by adding fresh fruits like raspberries or strawberries on top, or even a sprinkle of nuts for added texture. If you’re feeling adventurous, try swapping the chocolate for different fillings such as almond paste or fruit preserves to create your own unique twist on this classic pastry. We encourage you to give this Chocolate Cream Cheese Danish a try and share your experience with us! Whether you follow the recipe to the letter or make your own modifications, we would love to hear how it turned out for you. Dont forget to share your photos and thoughts on social media, and inspire others to indulge in this delicious treat. Happy baking! Print
Chocolate Cream Cheese Danish: A Decadent Recipe for Breakfast or Dessert
- Total Time: 40 minutes
- Yield: 8 Danish 1x
Description
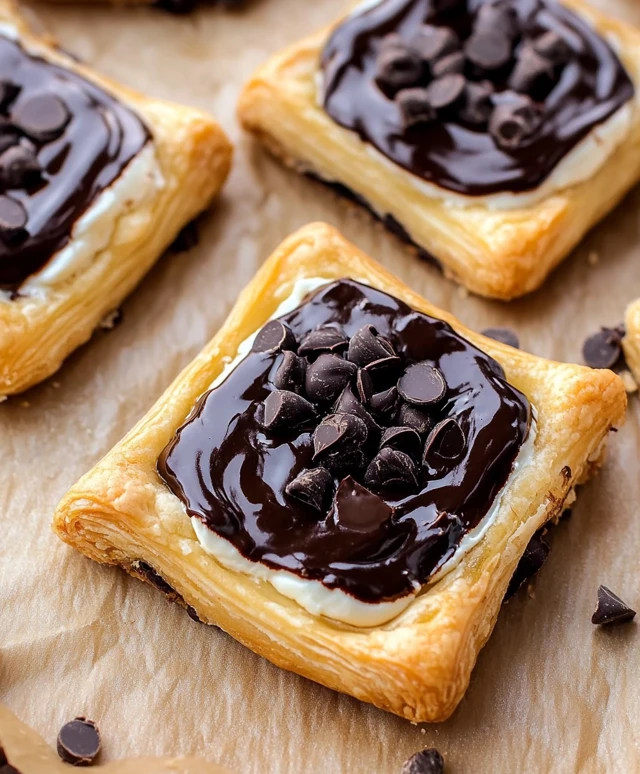
Enjoy these Cream Cheese and Chocolate Puff Pastry Danishes, featuring a rich cream cheese filling and chocolate chips wrapped in flaky pastry. Ideal for breakfast, brunch, or dessert, they are sure to delight your taste buds!
Ingredients
Scale- 1 package (8 oz) cream cheese, softened
- 1/2 cup powdered sugar
- 1 teaspoon vanilla extract
- 1 package (17.3 oz) frozen puff pastry, thawed
- 1/2 cup semi-sweet chocolate chips
- 1 egg, beaten (for egg wash)
- 1 tablespoon milk (for egg wash)
- 1/4 cup sliced almonds (optional, for topping)
- Additional powdered sugar for dusting (optional)
Instructions
- In a medium mixing bowl, combine the softened cream cheese, powdered sugar, and vanilla extract.
- Using a hand mixer or a whisk, beat the mixture until it is smooth and creamy, ensuring there are no lumps. This should take about 2-3 minutes.
- Once the mixture is well combined, set it aside to allow the flavors to meld while you prepare the puff pastry.
- Preheat your oven to 400°F (200°C). Line a baking sheet with parchment paper to prevent sticking.
- On a lightly floured surface, unfold the thawed puff pastry sheets. You should have two sheets in the package.
- Using a rolling pin, gently roll out each sheet to smooth out creases and to slightly increase the size. Aim for a rectangle shape, about 1/8 inch thick.
- Cut each sheet into 4 equal squares (you should have a total of 8 squares). Use a sharp knife or pizza cutter for clean edges.
- Take one square of puff pastry and place it on the prepared baking sheet.
- In the center of the square, spoon about 1-2 tablespoons of the cream cheese filling. Be careful not to overfill, as it may spill out during baking.
- Sprinkle a few chocolate chips on top of the cream cheese filling for added flavor.
- To create a Danish shape, fold the corners of the pastry square towards the center, pinching them together to seal the filling inside. You can also leave the corners open for a more rustic look.
- Repeat this process with the remaining squares of puff pastry, cream cheese filling, and chocolate chips.
- In a small bowl, whisk together the beaten egg and milk to create an egg wash.
- Using a pastry brush, gently brush the egg wash over the tops of each assembled Danish. This will give them a beautiful golden color when baked.
- If desired, sprinkle sliced almonds on top of each Danish for added texture and flavor.
- Place the baking sheet in the preheated oven and bake for 15-20 minutes, or until the pastries are puffed and golden brown.
- Keep an eye on them during the last few minutes of baking to prevent over-browning.
- Once baked, remove the Danish from the oven and allow them to cool on the baking sheet for about 5 minutes.
- After cooling slightly, transfer the Danish to a wire rack to cool completely.
- If desired, dust the tops with additional powdered sugar for a sweet finish.
- Serve warm or at room temperature. These Danish are perfect for breakfast, brunch, or as a delightful dessert.
- Store any leftover Danish in an airtight container at room temperature for up to 2 days.
- For longer storage, refrigerate them for up to a week. Reheat in the oven at 350°F (175°C) for about 5-10 minutes to restore their flaky texture.
- You can also freeze the unbaked assembled Danish. To do this, place them on a baking sheet and freeze until solid, then transfer to a freezer-safe bag.
Notes
- Der Teig darf während der Ruhezeit nicht bewegt werden.
- Für ein intensiveres Knoblaucharoma können mehr Zehen verwendet werden.
- Prep Time: 20 minutes
- Cook Time: 20 minutes