
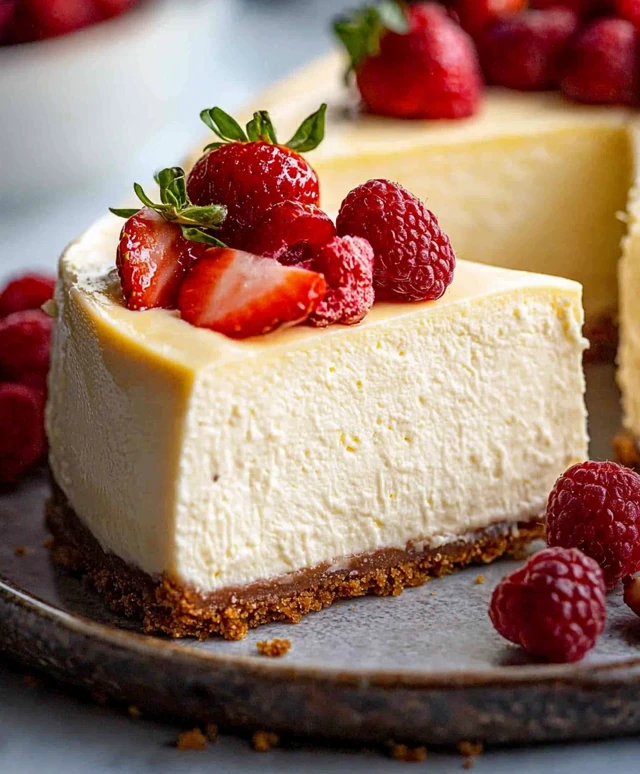
No bake cheesecake is a delightful dessert that has captured the hearts of many dessert lovers around the world. This creamy, rich treat is not only easy to make but also requires no oven, making it a perfect choice for warm weather gatherings or last-minute celebrations. Originating from the classic cheesecake recipes of ancient Greece, this modern no bake version has evolved into a beloved staple in many households. I absolutely adore how the velvety texture and sweet, tangy flavor come together to create a dessert that feels indulgent yet is surprisingly simple to prepare.
People love no bake cheesecake for its convenience and versatility. You can customize it with various toppings, from fresh fruits to decadent chocolate, allowing everyone to enjoy their favorite flavors. Plus, the fact that it sets in the refrigerator means you can prepare it ahead of time, freeing you up to enjoy your time with family and friends. Join me as we dive into this easy and delicious no bake cheesecake recipe that is sure to impress your guests and satisfy your sweet tooth!

Ingredients:
- For the crust:
- 1 ½ cups graham cracker crumbs
- ½ cup unsalted butter, melted
- ¼ cup granulated sugar
- 1 teaspoon vanilla extract
- For the cheesecake filling:
- 16 oz cream cheese, softened
- 1 cup powdered sugar
- 1 teaspoon vanilla extract
- 1 cup heavy whipping cream
- 2 tablespoons lemon juice (freshly squeezed is best)
- For the topping (optional):
- Fresh berries (strawberries, blueberries, raspberries)
- Chocolate shavings
- Whipped cream
Preparing the Crust
Lets start with the crust, which is the foundation of our no-bake cheesecake. Its super easy to make and adds a delightful crunch to the creamy filling.
- In a medium mixing bowl, combine the graham cracker crumbs, melted butter, granulated sugar, and vanilla extract. Use a fork or your hands to mix everything together until the crumbs are evenly coated and the mixture resembles wet sand.
- Next, take a 9-inch springform pan and press the crumb mixture firmly into the bottom and slightly up the sides of the pan. I like to use the bottom of a measuring cup to really pack it down. This helps create a sturdy crust that wont crumble when you slice into the cheesecake.
- Once the crust is pressed down, place the pan in the refrigerator to chill while we prepare the cheesecake filling. This will help the crust set up nicely.
Preparing the Cheesecake Filling
Now that the crust is chilling, lets whip up that luscious cheesecake filling. This part is where the magic happens!
- In a large mixing bowl, beat the softened cream cheese with an electric mixer on medium speed until its smooth and creamy. This usually takes about 2-3 minutes. Make sure there are no lumps, as we want a silky texture.
- Gradually add the powdered sugar to the cream cheese, mixing on low speed until combined. Once its incorporated, increase the speed to medium and beat for another minute until smooth.
- Add the vanilla extract and lemon juice to the mixture. The lemon juice adds a nice tang that balances the sweetness of the cheesecake. Mix until everything is well combined.
- In a separate bowl, whip the heavy cream until stiff peaks form. This means that when you lift the beaters out of the cream, it should hold its shape. Be careful not to over-whip, or it can turn into butter!
- Gently fold the whipped cream into the cream cheese mixture using a spatula. I like to do this in three parts: add one-third of the whipped cream, fold it in gently, then repeat until all the whipped cream is incorporated. This keeps the filling light and airy.
Assembling the Cheesecake
With the crust and filling ready, its time to assemble our cheesecake!
- Take the crust out of the refrigerator and pour the cheesecake filling into the crust. Use a spatula to spread it evenly, smoothing the top as you go.
- Once the filling is spread out, gently tap the pan on the counter a few times to remove any air bubbles. This helps ensure a smooth finish.
- Cover the cheesecake with plastic wrap or aluminum foil and place it back in the refrigerator. Let it chill for at least 4 hours, but if you can, overnight is even better. This allows the flavors to meld and the cheesecake to set properly.
Serving the Cheesecake
After the cheesecake has chilled and set, its time to serve! This is the moment weve all been waiting for.
- To remove the cheesecake from the springform pan, run a knife around the edge to loosen it. Then, carefully release the sides of the pan.
- Transfer the cheesecake to a serving platter. If you want to make it extra
Conclusion:
In summary, this no bake cheesecake is an absolute must-try for anyone who loves a creamy, indulgent dessert without the hassle of baking. Its smooth texture and rich flavor make it a perfect treat for any occasion, whether you’re celebrating a birthday, hosting a dinner party, or simply craving something sweet. Plus, the versatility of this recipe allows you to get creative with toppings and variations. You can add fresh fruits like strawberries or blueberries, drizzle it with chocolate or caramel sauce, or even incorporate flavors like lemon or coffee to suit your taste. I encourage you to give this no bake cheesecake a try and experience the joy of making a dessert that is not only easy to prepare but also incredibly delicious. Once youve made it, Id love to hear about your experience! Share your thoughts, any variations you tried, or even a picture of your creation. Your feedback is invaluable, and it inspires others to dive into the world of no bake cheesecakes as well. So grab your ingredients, whip up this delightful dessert, and let the compliments roll in! Print
No Bake Cheesecake: The Ultimate Easy Recipe for a Delicious Dessert
- Total Time: 270 minutes
- Yield: 8–10 slices 1x
Description
Enjoy a delightful no-bake cheesecake with a crunchy graham cracker crust and a creamy filling. This easy-to-make dessert is perfect for any occasion and can be customized with fresh berries, chocolate shavings, or whipped cream for added sweetness.
Ingredients
- 1 ½ cups graham cracker crumbs
- ½ cup unsalted butter, melted
- ¼ cup granulated sugar
- 1 teaspoon vanilla extract
- 16 oz cream cheese, softened
- 1 cup powdered sugar
- 1 teaspoon vanilla extract
- 1 cup heavy whipping cream
- 2 tablespoons lemon juice (freshly squeezed is best)
- Fresh berries (strawberries, blueberries, raspberries)
- Chocolate shavings
- Whipped cream
Instructions
- In a medium mixing bowl, combine the graham cracker crumbs, melted butter, granulated sugar, and vanilla extract. Mix until the crumbs are evenly coated and resemble wet sand.
- Press the crumb mixture firmly into the bottom and slightly up the sides of a 9-inch springform pan. Use the bottom of a measuring cup to pack it down.
- Place the pan in the refrigerator to chill while preparing the cheesecake filling.
- In a large mixing bowl, beat the softened cream cheese with an electric mixer on medium speed until smooth and creamy, about 2-3 minutes.
- Gradually add the powdered sugar, mixing on low speed until combined, then increase to medium speed and beat for another minute until smooth.
- Add the vanilla extract and lemon juice, mixing until well combined.
- In a separate bowl, whip the heavy cream until stiff peaks form.
- Gently fold the whipped cream into the cream cheese mixture in three parts, ensuring the filling remains light and airy.
- Pour the cheesecake filling into the chilled crust and spread it evenly with a spatula.
- Tap the pan on the counter a few times to remove air bubbles.
- Cover with plastic wrap or aluminum foil and refrigerate for at least 4 hours, preferably overnight.
- To remove the cheesecake from the springform pan, run a knife around the edge to loosen it, then carefully release the sides.
- Transfer the cheesecake to a serving platter and top with fresh berries, chocolate shavings, or whipped cream as desired.
Notes
- For best results, use room temperature cream cheese to avoid lumps in the filling.
- Allowing the cheesecake to chill overnight enhances the flavor and texture.
- Feel free to customize the toppings based on your preferences or seasonal fruits.
- Prep Time: 30 minutes
- Cook Time: 0 minutes