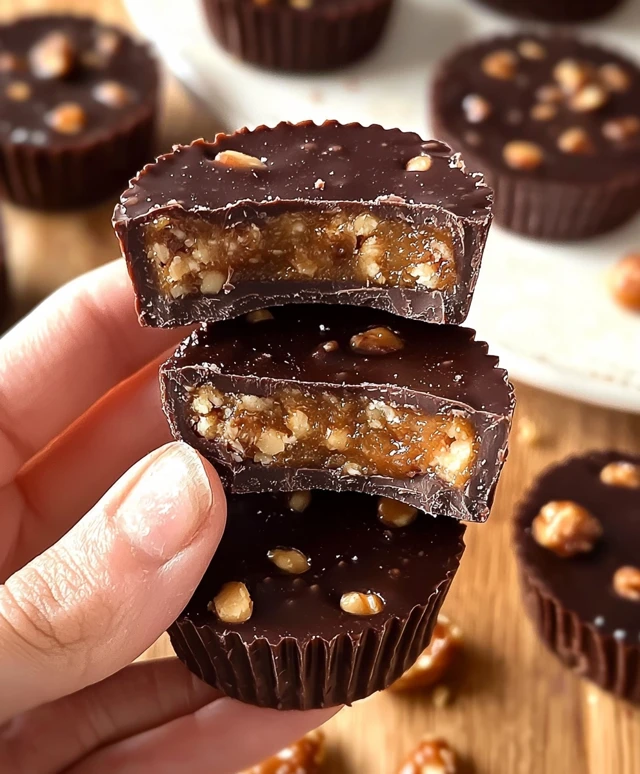
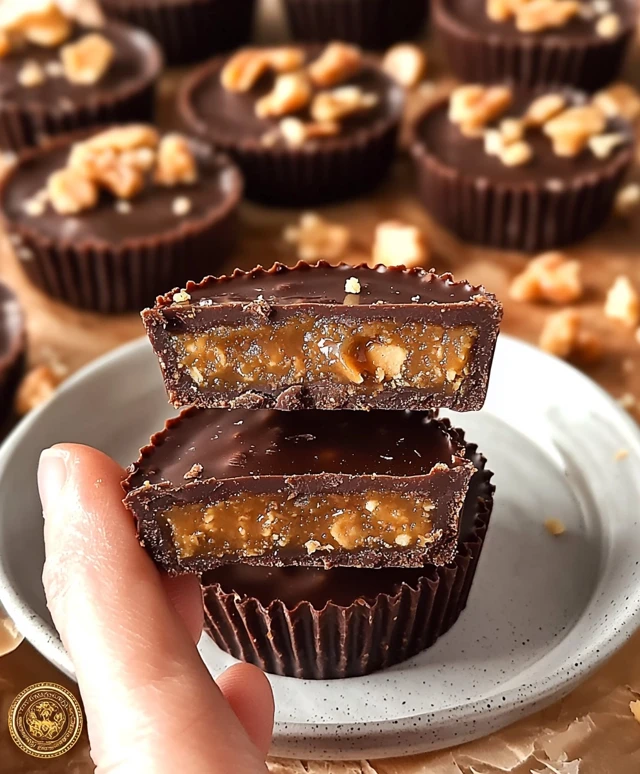
Chocolate Date Caramel Cups are a delightful treat that perfectly blend the rich, indulgent flavors of chocolate with the natural sweetness of dates. As someone who has always had a sweet tooth, I can confidently say that these little cups are not just a dessert; they are a celebration of taste and texture. The history of using dates in desserts dates back centuries, particularly in Middle Eastern cultures where they are cherished for their sweetness and health benefits.
What I love most about Chocolate Date Caramel Cups is how they manage to be both decadent and wholesome at the same time. The creamy, smooth date caramel filling contrasts beautifully with the crisp chocolate shell, creating a delightful experience with every bite. Plus, they are incredibly convenient to make, requiring minimal ingredients and effort. Whether youre looking for a quick snack or a show-stopping dessert for a gathering, these Chocolate Date Caramel Cups are sure to impress and satisfy your cravings!
Ingredients:
- 1 cup Medjool dates, pitted
- 1/4 cup almond butter (or any nut butter of your choice)
- 1/4 cup unsweetened cocoa powder
- 1/4 cup maple syrup (or honey for non-vegan option)
- 1/2 teaspoon vanilla extract
- 1/4 teaspoon sea salt
- 1 cup dark chocolate chips (dairy-free if needed)
- 1 tablespoon coconut oil
- Optional toppings: sea salt flakes, crushed nuts, or shredded coconut
Preparing the Caramel Filling
First things first, lets whip up that delicious date caramel filling. Its super easy and requires just a few ingredients!
- In a food processor, combine the pitted Medjool dates, almond butter, cocoa powder, maple syrup, vanilla extract, and sea salt.
- Blend the mixture until it becomes smooth and creamy. You may need to stop and scrape down the sides of the bowl a couple of times to ensure everything is well combined.
- Once the mixture is smooth, taste it! If you want it sweeter, feel free to add a little more maple syrup. Blend again to combine.
- Transfer the date caramel filling into a bowl and set it aside while we prepare the chocolate coating.
Melting the Chocolate
Now, lets get that chocolate ready for dipping! Melting chocolate can be a bit tricky, but Ill guide you through it.
- In a microwave-safe bowl, combine the dark chocolate chips and coconut oil. The coconut oil will help the chocolate to melt smoothly and give it a nice sheen.
- Microwave the chocolate in 30-second intervals, stirring in between each interval. This will help prevent the chocolate from burning. It usually takes about 1-2 minutes total to melt completely.
- Once the chocolate is melted and smooth, remove it from the microwave and let it cool slightly while we prepare the cups.
Assembling the Chocolate Date Caramel Cups
Now comes the fun partassembling our delicious cups! This is where you can really get creative.
- Line a muffin tin with cupcake liners. This will make it easier to remove the cups once theyre set.
- Using a spoon, pour a small amount of melted chocolate into the bottom of each cupcake liner. You want just enough to cover the bottom, about 1 tablespoon should do.
- Gently tilt the muffin tin to ensure the chocolate coats the sides of the liner as well. This will create a nice shell for our caramel filling.
- Place the muffin tin in the freezer for about 10-15 minutes, or until the chocolate is firm to the touch.
- Once the chocolate has set, remove the muffin tin from the freezer. Now, take your date caramel filling and scoop about 1 tablespoon into each chocolate-lined cup. Use the back of the spoon to smooth it out evenly.
- After youve filled all the cups with the date caramel, its time to top them off with more melted chocolate. Pour another tablespoon of melted chocolate over each cup, covering the caramel completely.
- Use a spatula or the back of a spoon to smooth out the chocolate on top, ensuring its evenly distributed.
- If youd like, sprinkle a few sea salt flakes, crushed nuts, or shredded coconut on top of each cup for added texture and flavor.
- Return the muffin tin to the freezer for another 15-20 minutes, or until the chocolate is completely set.
Storing and Serving
Once your chocolate date caramel cups are set, its time to enjoy them! Heres how to store and serve them:
- Carefully remove the cups from the muffin tin by peeling away the cupcake liners. They should come out easily if the chocolate has set properly.
- Store the chocolate cups in an airtight container in the refrigerator for up to two weeks. They can also be kept in the freezer for longer storagejust let them thaw for a few minutes before enjoying.

Conclusion:
In summary, these Chocolate Date Caramel Cups are an absolute must-try for anyone looking to indulge in a sweet treat thats both delicious and nutritious. The rich, velvety chocolate combined with the natural sweetness of dates creates a flavor explosion that is simply irresistible. Plus, theyre incredibly easy to make, making them perfect for both seasoned bakers and kitchen novices alike. For serving suggestions, I love to pair these delightful cups with a sprinkle of sea salt on top for that perfect sweet-and-salty contrast. You can also experiment with variations by adding a dash of vanilla extract or a pinch of cinnamon to the date caramel for an extra layer of flavor. If youre feeling adventurous, try incorporating nuts or seeds into the mix for added crunch and nutrition. I wholeheartedly encourage you to give this recipe a try! Once you take that first bite, Im sure youll be hooked. And dont forget to share your experience with friends and familywhether its through social media or a cozy gathering. Id love to hear how your Chocolate Date Caramel Cups turn out and any creative twists you add to the recipe. Happy baking! Print
Chocolate Date Caramel Cups: A Deliciously Healthy Treat You Can Make at Home
- Total Time: 30 minutes
- Yield: 12 cups 1x
Description
Enjoy these Chocolate Date Caramel Cups, a delicious and healthy dessert featuring a creamy date caramel filling encased in rich chocolate. Perfect for satisfying your sweet tooth without the guilt!
Ingredients
Scale- 1 cup Medjool dates, pitted
- 1/4 cup almond butter (or any nut butter of your choice)
- 1/4 cup unsweetened cocoa powder
- 1/4 cup maple syrup (or honey for non-vegan option)
- 1/2 teaspoon vanilla extract
- 1/4 teaspoon sea salt
- 1 cup dark chocolate chips (dairy-free if needed)
- 1 tablespoon coconut oil
- Optional toppings: sea salt flakes, crushed nuts, or shredded coconut
Instructions
- In a food processor, combine the pitted Medjool dates, almond butter, cocoa powder, maple syrup, vanilla extract, and sea salt.
- Blend the mixture until it becomes smooth and creamy. Stop to scrape down the sides of the bowl as needed.
- Taste the mixture; if you prefer it sweeter, add more maple syrup and blend again.
- Transfer the date caramel filling into a bowl and set aside.
- In a microwave-safe bowl, combine the dark chocolate chips and coconut oil.
- Microwave in 30-second intervals, stirring in between, until melted and smooth (about 1-2 minutes total).
- Let the melted chocolate cool slightly.
- Line a muffin tin with cupcake liners.
- Pour about 1 tablespoon of melted chocolate into the bottom of each liner, covering it.
- Tilt the muffin tin to coat the sides of the liners with chocolate.
- Freeze for 10-15 minutes until firm.
- Scoop about 1 tablespoon of date caramel filling into each chocolate-lined cup, smoothing it out.
- Top each cup with another tablespoon of melted chocolate, smoothing it out evenly.
- Optionally, sprinkle sea salt flakes, crushed nuts, or shredded coconut on top.
- Return to the freezer for another 15-20 minutes until completely set.
- Carefully peel away the cupcake liners to remove the cups.
- Store in an airtight container in the refrigerator for up to two weeks or freeze for longer storage. Thaw for a few minutes before enjoying.
Notes
- Feel free to customize the nut butter and toppings to your preference.
- Ensure the chocolate is fully melted to avoid clumping.
- Prep Time: 20 minutes
- Cook Time: 10 minutes

