
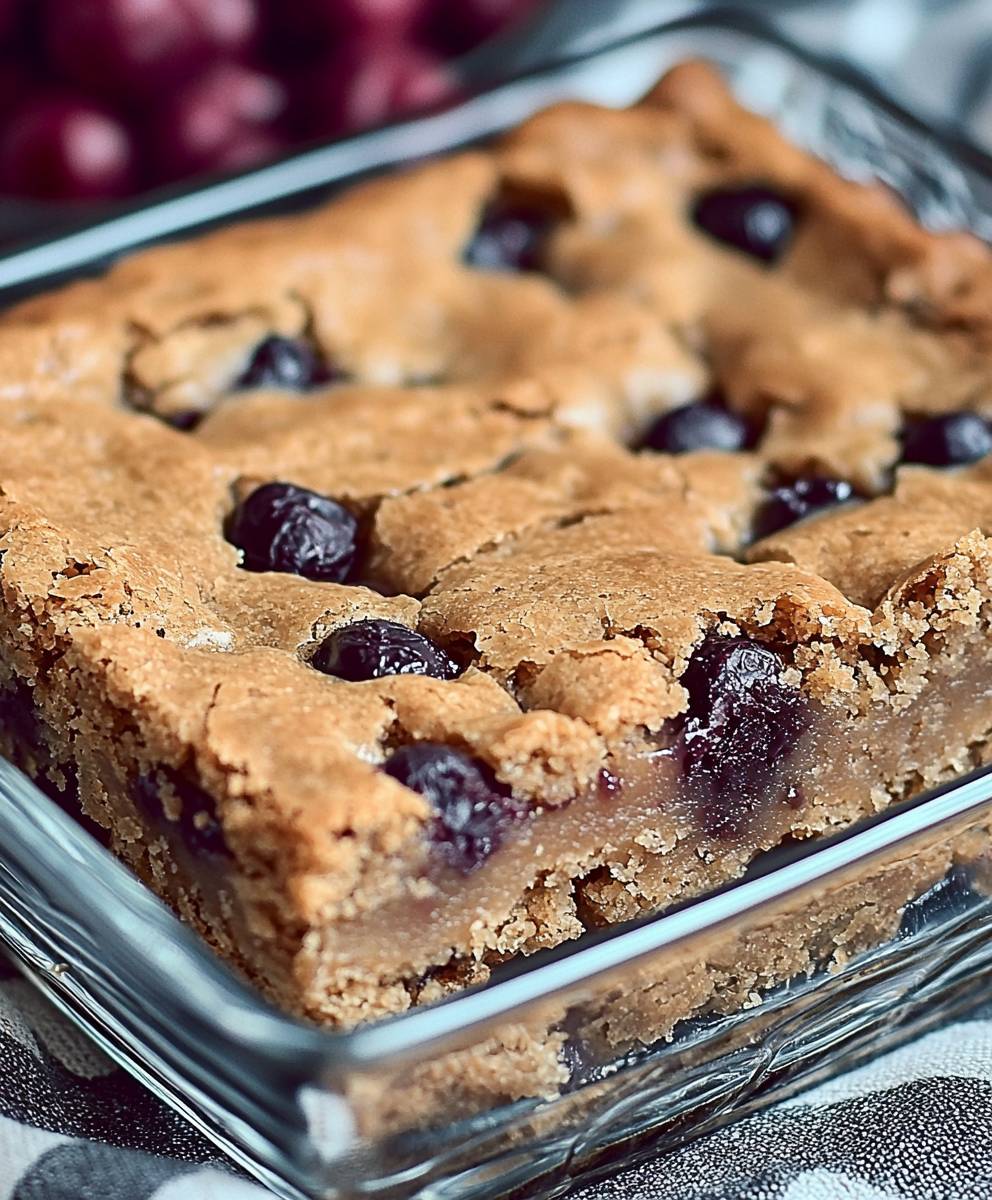
Better Than Anything Bars: the name alone promises an experience, and trust me, these bars deliver! Imagine sinking your teeth into layers of decadent goodness: a moist chocolate cake base, a river of caramel and sweetened condensed milk, a blanket of whipped topping, and a shower of crushed chocolate candy. It’s a symphony of textures and flavors that will have you reaching for seconds (and maybe thirds!).
While the exact origins of Better Than Anything Bars are shrouded in mystery, their popularity exploded in the latter half of the 20th century, becoming a potluck and bake sale staple across America. Some say the name originated from someone declaring them “better than anything” they’d ever tasted a sentiment I wholeheartedly agree with! The beauty of this dessert lies in its simplicity and crowd-pleasing nature. It’s incredibly easy to make, requiring minimal baking skills, and the combination of chocolate, caramel, and creamy textures is universally loved.
People adore these bars because they offer an indulgent treat without demanding hours in the kitchen. The rich, sweet flavor profile is undeniably satisfying, and the contrasting textures the soft cake, the gooey caramel, the light whipped topping, and the crunchy candy create a truly delightful experience. Whether you’re looking for a show-stopping dessert for a party or a comforting treat to enjoy at home, Better Than Anything Bars are guaranteed to be a hit. So, let’s get baking and discover why these bars have earned their legendary status!

Ingredients:
- 1 box (18.25 ounces) chocolate cake mix
- 1 cup (2 sticks) unsalted butter, melted
- 1 (14 ounce) can sweetened condensed milk
- 1 jar (12 ounces) caramel topping
- 1 container (8 ounces) frozen whipped topping, thawed
- 6 Heath candy bars (1.4 ounces each), crushed
Preparing the Cake Base:
Okay, let’s get started with the foundation of these amazing bars the cake base! This part is super simple, so don’t worry if you’re not a baking pro. I promise, you can totally nail this.
- Preheat your oven to 350°F (175°C). This is crucial! Make sure your oven is properly preheated before you even think about putting the cake in. A consistent temperature is key for even baking.
- Grease a 9×13 inch baking pan. I like to use baking spray with flour in it, but you can also grease it with butter or shortening and then dust it with flour. This will prevent the bars from sticking and make them easy to remove later. Trust me, you don’t want to skip this step!
- In a large bowl, combine the chocolate cake mix and melted butter. Just dump the dry cake mix into the bowl and pour in the melted butter.
- Mix well until the mixture resembles coarse crumbs. You can use a fork, a pastry blender, or even your hands (if you’re feeling adventurous!). The goal is to get a crumbly texture, not a smooth batter. Don’t overmix!
- Press half of the mixture into the prepared baking pan. This will form the base of your bars. Use your fingers or the bottom of a measuring cup to press it down firmly and evenly. You want a nice, solid layer.
- Bake for 10-12 minutes, or until lightly golden brown. Keep a close eye on it! You don’t want it to burn. The edges should be slightly golden, and the center should be set.
- Remove from oven and let cool slightly. This is important! You need to let the base cool down a bit before adding the next layer. Otherwise, the sweetened condensed milk will just melt right in.
Adding the Sweetness:
Now comes the fun part layering on the sweetness! This is where the “Better Than Anything” magic really happens. Get ready for some serious indulgence.
- Pour the sweetened condensed milk evenly over the warm cake base. Make sure to spread it all the way to the edges. This will soak into the cake and make it incredibly moist and delicious.
- Drizzle the caramel topping evenly over the sweetened condensed milk. Don’t be shy with the caramel! You want a generous layer of gooey goodness. I like to use a spoon to spread it around, but you can also use a squeeze bottle for more precise drizzling.
- Sprinkle the remaining cake mixture evenly over the caramel. This will create a crumbly topping that adds a nice texture to the bars. Try to distribute it as evenly as possible.
- Bake for another 10-15 minutes, or until the topping is golden brown. Again, keep a close eye on it! You want the topping to be nicely browned and the caramel to be bubbly.
- Remove from oven and let cool completely. This is crucial! You need to let the bars cool completely before adding the whipped topping and candy bars. Otherwise, the whipped topping will melt. I know it’s hard to wait, but trust me, it’s worth it.
Finishing Touches:
Almost there! Now for the final touches that will take these bars over the top. Get ready for some serious deliciousness!
- Spread the thawed whipped topping evenly over the cooled bars. Make sure to cover the entire surface. You can use a spatula or a knife to spread it smoothly.
- Sprinkle the crushed Heath candy bars evenly over the whipped topping. This is the perfect finishing touch! The crunchy candy bars add a nice texture and a delicious toffee flavor.
- Refrigerate for at least 2 hours before serving. This will allow the bars to set up properly and the flavors to meld together. I know it’s tempting to dig in right away, but trust me, they’re even better after they’ve been chilled.
- Cut into squares and serve. Use a sharp knife to cut the bars into squares. You can make them as big or as small as you like.
Tips and Variations:
Want to customize your Better Than Anything Bars? Here are a few ideas:
- Use a different flavor of cake mix. Chocolate is classic, but you could also try vanilla, yellow, or even red velvet.
- Use a different type of candy bar. Instead of Heath bars, you could use Snickers, Reese’s Peanut Butter Cups, or even M&Ms.
- Add nuts. Sprinkle chopped pecans, walnuts, or almonds over the caramel layer for added crunch and flavor.
- Add chocolate chips. Sprinkle chocolate chips over the caramel layer for extra chocolatey goodness.
- Make it a trifle. Cut the bars into small pieces and layer them with whipped cream and fresh fruit in a trifle bowl.
- Make it gluten-free. Use a gluten-free chocolate cake mix.
- Make it dairy-free. Use dairy-free butter, sweetened condensed milk, whipped topping, and candy bars.
Storing Your Bars:
These bars are best stored in the refrigerator. They will keep for up to 3-4 days. You can also freeze them for longer storage. Just wrap them tightly in plastic wrap and then place them in a freezer-safe bag or container. They will keep in the freezer for up to 2-3 months. When you’re ready to eat them, just thaw them in the refrigerator overnight.
Troubleshooting:
Sometimes things don’t go exactly as planned in the kitchen. Here are a few common problems and how to fix them:
- The cake base is too dry. Make sure you’re using the correct amount of butter. You can also add a tablespoon or two of milk to the cake mix to make it more moist.
- The caramel is too hard. Microwave the caramel topping for a few seconds before drizzling it over the cake. This will make it easier to spread.
- The whipped topping is melting. Make sure the bars are completely cool before adding the whipped topping. You can also put the whipped topping in the freezer for a few minutes before spreading it on the bars.
- The candy bars are sinking into the whipped topping. Sprinkle the candy bars on the whipped topping just before serving. This will prevent them from sinking.
Why These Bars Are “Better Than Anything”:
Okay, so the name might be a little bit of an exaggeration, but these bars are seriously good. They’re rich, decadent, and incredibly addictive. The combination of chocolate cake, sweetened condensed milk, caramel, whipped topping, and candy bars is simply irresistible. Plus, they’re so easy to make! Even if you’re not a confident baker, you can totally pull these off. They’re perfect for potlucks, parties, or just a special treat for yourself. So go ahead, give them a try. I promise, you won’t be disappointed!
Nutritional Information (Approximate):
Please note that this is an approximate estimate and can vary based on specific ingredients used.
- Calories: 450-550 per bar
- Fat: 25-35g
- Saturated Fat: 15-20g
- Cholesterol: 50-70mg
- Sodium: 200-300mg
- Carbohydrates: 50-60g
- Sugar: 40-50g
- Protein: 5-7g
Enjoy responsibly!
Conclusion:
So there you have it! These Better Than Anything Bars are truly deserving of their name. They’re rich, decadent, and surprisingly easy to make, making them the perfect treat for any occasion, or even just a “treat yourself” kind of day. The combination of textures the soft cake base, the creamy caramel and condensed milk, the crunchy toffee bits, and the smooth chocolate frosting is simply divine. Trust me, once you take a bite, you’ll understand why everyone raves about them. Why are these bars a must-try? Because they deliver maximum flavor with minimal effort. You don’t need to be a master baker to whip up a batch of these beauties. The recipe is straightforward, the ingredients are readily available, and the results are guaranteed to impress. Plus, they’re incredibly versatile! Think of these bars as a blank canvas for your sweet tooth creativity. While the classic recipe is fantastic as is, there are so many ways you can customize them to your liking.Serving Suggestions and Variations:
* Serving Suggestions: Serve these bars chilled for the best texture and flavor. They’re perfect with a scoop of vanilla ice cream, a dollop of whipped cream, or a simple cup of coffee. For a more elegant presentation, dust them with cocoa powder or drizzle them with melted white chocolate. They are also great for potlucks, bake sales, or as a homemade gift. Cut them into smaller squares for bite-sized treats, or larger rectangles for a more substantial dessert. * Chocolate Variations: Experiment with different types of chocolate for the frosting. Dark chocolate will add a richer, more intense flavor, while milk chocolate will create a sweeter, more classic taste. You could even use a combination of both! Consider adding a teaspoon of instant espresso powder to the frosting for a mocha twist. * Nutty Additions: If you’re a fan of nuts, feel free to add chopped pecans, walnuts, or almonds to the toffee layer or sprinkle them on top of the frosting. The added crunch and nutty flavor will complement the other ingredients perfectly. * Caramel Swirls: Before baking the cake layer, drizzle some extra caramel sauce over the top for a gooey, caramel-infused base. * Seasonal Twists: Adapt the recipe to suit the seasons! In the fall, add a pinch of cinnamon and nutmeg to the cake batter and top with chopped apples or pears. In the winter, use peppermint extract in the frosting and sprinkle with crushed candy canes. * Coffee Infusion: Soak the cake layer in a coffee mixture after baking, before adding the caramel and toffee. This will add a subtle coffee flavor that complements the chocolate and caramel beautifully. I truly believe that these Better Than Anything Bars will become a new favorite in your household. They’re the perfect combination of sweet, salty, and crunchy, and they’re guaranteed to satisfy any sweet craving. So, what are you waiting for? Gather your ingredients, preheat your oven, and get ready to bake up a batch of these irresistible bars. I’m confident that you’ll love them as much as I do. And most importantly, I want to hear about your experience! Did you try any of the variations I suggested? Did you add your own special touch? Share your photos and stories in the comments below. I can’t wait to see what you create! Happy baking! Print
Better Than Anything Bars: The Ultimate Dessert Recipe
- Total Time: 160 minutes
- Yield: 24 bars 1x
Description
Decadent chocolate bars with a cake base, sweetened condensed milk, caramel, whipped topping, and crushed Heath bars. Easy and incredibly delicious!
Ingredients
- 1 box (18.25 ounces) chocolate cake mix
- 1 cup (2 sticks) unsalted butter, melted
- 1 (14 ounce) can sweetened condensed milk
- 1 jar (12 ounces) caramel topping
- 1 container (8 ounces) frozen whipped topping, thawed
- 6 Heath candy bars (1.4 ounces each), crushed
Instructions
- Preheat: Preheat oven to 350°F (175°C). Grease a 9×13 inch baking pan.
- Cake Base: In a large bowl, combine chocolate cake mix and melted butter. Mix until the mixture resembles coarse crumbs.
- Press and Bake: Press half of the mixture into the prepared baking pan. Bake for 10-12 minutes, or until lightly golden brown. Remove from oven and let cool slightly.
- Sweet Layers: Pour sweetened condensed milk evenly over the warm cake base. Drizzle caramel topping evenly over the sweetened condensed milk. Sprinkle the remaining cake mixture evenly over the caramel.
- Bake Again: Bake for another 10-15 minutes, or until the topping is golden brown. Remove from oven and let cool completely.
- Finishing Touches: Spread the thawed whipped topping evenly over the cooled bars. Sprinkle the crushed Heath candy bars evenly over the whipped topping.
- Chill and Serve: Refrigerate for at least 2 hours before serving. Cut into squares and serve.
Notes
- Use different cake mix flavors (vanilla, yellow, red velvet).
- Substitute other candy bars (Snickers, Reese’s, M&Ms).
- Add chopped nuts or chocolate chips to the caramel layer.
- Make it gluten-free with a gluten-free cake mix.
- Make it dairy-free with dairy-free alternatives.
- Store in the refrigerator for up to 3-4 days or freeze for 2-3 months.
- Dry cake base: Add milk to the cake mix.
- Hard caramel: Microwave the caramel topping briefly.
- Melting whipped topping: Ensure bars are completely cool.
- Sinking candy bars: Sprinkle candy bars just before serving.
- Prep Time: 15 minutes
- Cook Time: 25 minutes