
Pickled Beets: Prepare to unlock a vibrant explosion of flavor with this surprisingly simple and utterly addictive recipe! Forget those bland, store-bought jars; we’re about to embark on a journey to create homemade pickled beets that will tantalize your taste buds and leave you craving more. Have you ever wondered how to transform humble beets into a culinary masterpiece?
Pickling, a preservation technique dating back centuries, has been used across cultures to extend the shelf life of seasonal produce. Beets, with their earthy sweetness, are particularly well-suited to this process. In many Eastern European countries, pickled beets are a staple, often enjoyed as a side dish, in salads, or even as a key ingredient in the iconic borscht soup. It’s a testament to the versatility and enduring appeal of this humble root vegetable.
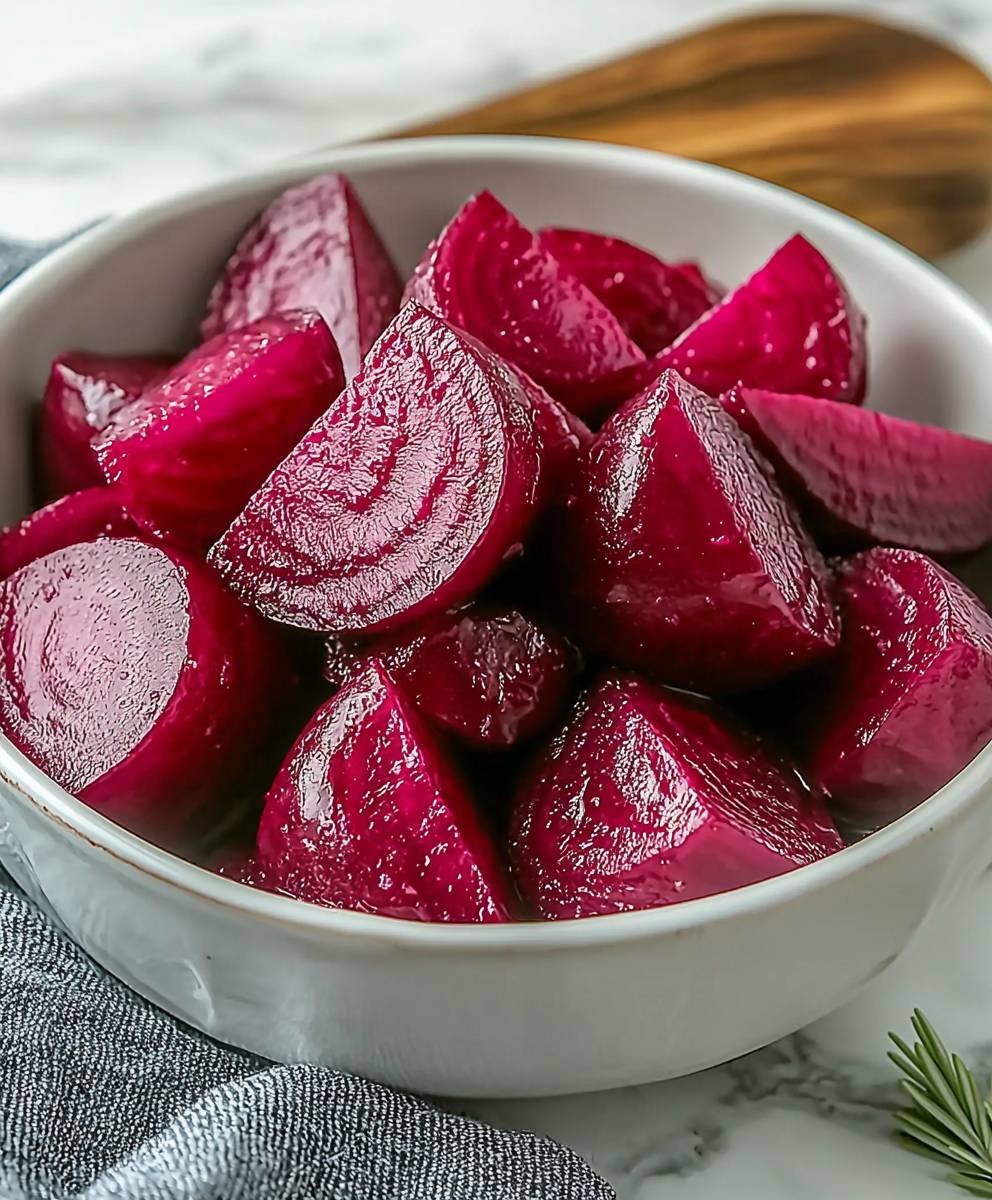
So, why do people adore pickled beets? The answer lies in the delightful contrast of flavors and textures. The tangy vinegar perfectly complements the beets’ natural sweetness, creating a harmonious balance that is both refreshing and satisfying. The pickling process also tenderizes the beets, resulting in a pleasingly soft yet slightly firm texture. Beyond the taste, this recipe is incredibly convenient. It requires minimal effort and uses readily available ingredients. Plus, a batch of homemade pickled beets will keep in the refrigerator for weeks, making it a perfect make-ahead dish for busy weeknights or impromptu gatherings. Get ready to experience the magic of homemade!

Ingredients:
- 5 pounds fresh beets, preferably of similar size
- 10 cups water
- 5 cups white vinegar (5% acidity)
- 2 ½ cups granulated sugar
- 2 tablespoons pickling salt
- 1 tablespoon whole cloves
- 1 tablespoon allspice berries
- 2 cinnamon sticks, broken in half
- 1 large onion, thinly sliced (optional)
- 2-3 bay leaves (optional)
Preparing the Beets:
- Wash the beets thoroughly. Scrub the beets under cold running water to remove any dirt or debris. Pay special attention to the crevices around the root and stem. You can use a vegetable brush to help with this process.
- Trim the beets. Cut off the beet greens, leaving about 1-2 inches of stem attached to the beet. This helps prevent the beets from bleeding too much during cooking. Also, trim the root end, leaving about ½ inch.
- Boil the beets. Place the beets in a large pot and cover them with the 10 cups of water. Bring the water to a boil over high heat. Once boiling, reduce the heat to medium-low, cover the pot, and simmer for 30-60 minutes, or until the beets are tender. The cooking time will depend on the size of the beets. You should be able to easily pierce them with a fork or knife.
- Cool the beets. Once the beets are cooked, drain them and rinse them with cold water. This will stop the cooking process and make them easier to handle. Let them cool slightly until they are cool enough to handle without burning yourself.
- Peel the beets. While the beets are still slightly warm, use your fingers or a small paring knife to peel off the skins. The skins should slip off easily. If they are difficult to peel, you can try rubbing them with a clean kitchen towel. Be careful, as the beet juice can stain your hands and clothing. You might want to wear gloves for this step.
- Slice or dice the beets. Once the beets are peeled, slice them into ¼-inch thick rounds or dice them into ½-inch cubes, depending on your preference. I personally prefer slicing them, as it looks more appealing in the jars.
Preparing the Pickling Brine:
- Combine the ingredients. In a large, non-reactive saucepan (stainless steel or enamel-coated), combine the 5 cups of white vinegar, 2 ½ cups of granulated sugar, and 2 tablespoons of pickling salt.
- Add the spices. Add the 1 tablespoon of whole cloves, 1 tablespoon of allspice berries, and 2 cinnamon sticks (broken in half) to the saucepan. If you are using the optional onion and bay leaves, add them now as well.
- Bring to a boil. Bring the mixture to a boil over medium-high heat, stirring occasionally to dissolve the sugar and salt.
- Simmer the brine. Once the mixture is boiling, reduce the heat to medium-low and simmer for 10 minutes, stirring occasionally. This will allow the flavors of the spices to infuse into the vinegar.
Canning the Pickled Beets:
Important Note: If you are new to canning, it is essential to follow proper canning procedures to ensure the safety of your pickled beets. Improper canning can lead to spoilage and potentially dangerous bacteria growth. Consult a reliable canning guide, such as the USDA Complete Guide to Home Canning, before you begin.
- Prepare your canning equipment. You will need:
- Canning jars (pint or quart size)
- New canning lids
- Canning rings
- A large stockpot or canning pot with a rack
- Jar lifter
- Lid lifter (optional)
- Funnel (optional)
- Sterilize the jars. Wash the canning jars, lids, and rings in hot, soapy water. Rinse them thoroughly. Sterilize the jars by placing them in a boiling water bath for 10 minutes. Keep the jars hot until you are ready to fill them. You can also sterilize them in a dishwasher with a sterilization cycle.
- Heat the lids. Place the canning lids in a small saucepan and cover them with water. Bring the water to a simmer over low heat. Do not boil. Keep the lids hot until you are ready to use them.
- Pack the beets into the jars. Using a jar lifter, carefully remove a hot jar from the boiling water. Place the sliced or diced beets into the jar, leaving ½ inch of headspace (the space between the top of the beets and the top of the jar). Pack the beets tightly, but not too tightly.
- Pour the hot brine over the beets. Using a ladle or a funnel, carefully pour the hot pickling brine over the beets in the jar, leaving ½ inch of headspace. Make sure the beets are completely submerged in the brine.
- Remove air bubbles. Use a non-metallic utensil, such as a plastic spatula or a wooden skewer, to gently run around the inside of the jar to release any trapped air bubbles.
- Wipe the jar rims. Use a clean, damp cloth to wipe the rims of the jars to remove any spills or drips. This will ensure a good seal.
- Place the lids and rings on the jars. Using a lid lifter (or your fingers, if you are careful), carefully place a hot lid on each jar. Screw on the canning rings fingertip-tight. Do not overtighten.
- Process the jars in a boiling water bath. Place the jars in the canning pot, making sure they are completely covered with water. The water should be at least 1 inch above the tops of the jars. Bring the water to a rolling boil.
- Process for the correct time. Process pint jars for 30 minutes and quart jars for 35 minutes. Adjust the processing time according to your altitude. Consult a reliable canning guide for altitude adjustments.
- Turn off the heat and let the jars sit. After processing for the correct time, turn off the heat and let the jars sit in the hot water for 5 minutes. This will help prevent siphoning.
- Remove the jars from the pot. Using a jar lifter, carefully remove the jars from the canning pot and place them on a towel-lined surface to cool. Leave at least 1 inch of space between the jars.
- Let the jars cool completely. Let the jars cool completely, undisturbed, for 12-24 hours. As the jars cool, you should hear a popping sound as the lids seal.
- Check the seals. After the jars have cooled completely, check the seals by pressing down on the center of each lid. If the lid does not flex or move, it is properly sealed. If the lid flexes or moves, it is not properly sealed and should be reprocessed with a new lid or stored in the refrigerator and used within a few weeks.
- Store the pickled beets. Store the sealed jars of pickled beets in a cool, dark, and dry place. Properly canned pickled beets can be stored for at least one year.
Serving and Enjoying Your Pickled Beets:
Once opened, store the pickled beets in the refrigerator. They are delicious served as a side dish, in salads, or as a topping for sandwiches and burgers. I love to add them to a goat cheese salad with walnuts and a balsamic vinaigrette. They also pair well with roasted meats and poultry. Enjoy!
Conclusion:
So, there you have it! My take on pickled beets, a recipe that I genuinely believe deserves a spot in your culinary repertoire. Why? Because it’s more than just a side dish; it’s a vibrant explosion of flavor, a testament to the simple beauty of fresh ingredients, and a surprisingly versatile addition to countless meals. Think about it: the earthy sweetness of the beets, perfectly balanced by the tangy vinegar and subtle spices. It’s a symphony of tastes that dances on your tongue, leaving you wanting more. And the best part? It’s incredibly easy to make! No fancy equipment, no complicated techniques, just straightforward goodness that anyone can achieve. But the real magic of this recipe lies in its adaptability. While I’ve shared my go-to method, feel free to experiment and make it your own. Craving a little heat? Add a pinch of red pepper flakes or a slivered jalapeño to the brine. Want a sweeter profile? A touch more sugar or a drizzle of honey will do the trick. You could even infuse the vinegar with herbs like thyme or rosemary for an extra layer of complexity. The possibilities are truly endless! Beyond the recipe itself, consider the myriad ways you can enjoy these delightful pickled beets. They’re fantastic as a simple side dish alongside grilled meats or roasted vegetables. But don’t stop there! Toss them into salads for a burst of color and flavor. Layer them onto sandwiches or wraps for a tangy twist. Use them as a topping for crostini or bruschetta. Or, get really adventurous and blend them into a vibrant beet hummus. I personally love to serve them with a dollop of creamy goat cheese and a sprinkle of toasted walnuts. The combination of the sweet, tangy beets, the rich goat cheese, and the crunchy walnuts is simply divine. Another favorite is to dice them finely and add them to a quinoa salad with feta cheese and fresh herbs. It’s a healthy and delicious lunch that always hits the spot. And let’s not forget about the health benefits! Beets are packed with nutrients, including fiber, vitamins, and antioxidants. Pickling them not only enhances their flavor but also helps to preserve these valuable nutrients. So, you can indulge in this delicious treat knowing that you’re also doing something good for your body. I truly believe that this pickled beets recipe is a must-try for anyone who appreciates good food. It’s simple, flavorful, versatile, and healthy what more could you ask for? So, what are you waiting for? Gather your ingredients, put on some music, and get pickling! I promise you won’t be disappointed. And once you’ve tried it, I’d love to hear about your experience. Did you make any variations? What did you serve them with? Share your photos and stories in the comments below. I can’t wait to see what you create! Happy pickling! Print
Pickled Beets: The Ultimate Guide to Pickling Beets at Home
- Total Time: 120 minutes
- Yield: 6–8 pint jars or 3–4 quart jars 1x
Description
Tangy and sweet pickled beets, perfect as a side dish or topping. This recipe includes instructions for safe home canning.
Ingredients
- 5 pounds fresh beets, preferably of similar size
- 10 cups water
- 5 cups white vinegar (5% acidity)
- 2 ½ cups granulated sugar
- 2 tablespoons pickling salt
- 1 tablespoon whole cloves
- 1 tablespoon allspice berries
- 2 cinnamon sticks, broken in half
- 1 large onion, thinly sliced (optional)
- 2–3 bay leaves (optional)
Instructions
- Wash the beets thoroughly.
- Trim the beets.
- Boil the beets.
- Cool the beets.
- Peel the beets.
- Slice or dice the beets.
- Combine the ingredients.
- Add the spices.
- Bring to a boil.
- Simmer the brine.
- Prepare your canning equipment.
- Sterilize the jars.
- Heat the lids.
- Pack the beets into the jars.
- Pour the hot brine over the beets.
- Remove air bubbles.
- Wipe the jar rims.
- Place the lids and rings on the jars.
- Process the jars in a boiling water bath.
- Process for the correct time.
- Turn off the heat and let the jars sit.
- Remove the jars from the pot.
- Let the jars cool completely.
- Check the seals.
- Store the pickled beets.
Notes
- Wear gloves when peeling beets to avoid staining your hands.
- Adjust processing time based on your altitude. Consult a reliable canning guide.
- If a jar doesn’t seal, reprocess with a new lid or refrigerate and use within a few weeks.
- Once opened, store pickled beets in the refrigerator.
- Prep Time: 30 minutes
- Cook Time: 90 minutes