
Cacao Fig Bliss Balls: Prepare to embark on a delightful journey of flavor and well-being with these little spheres of pure joy! Imagine sinking your teeth into a naturally sweet treat, bursting with rich chocolate notes and the satisfying chewiness of figs. These aren’t just any energy bites; they’re a guilt-free indulgence that will leave you feeling energized and utterly content.
Figs, a fruit revered since ancient times, have been cherished for their sweetness and nutritional value across various cultures. From the Mediterranean to the Middle East, figs have been a staple, often associated with prosperity and good health. Combining them with cacao, the raw form of chocolate, elevates this simple snack to a powerhouse of antioxidants and essential minerals.
What makes these Cacao Fig Bliss Balls so irresistible? It’s the perfect balance of textures the smooth, melt-in-your-mouth cacao complements the slightly chewy figs, creating a symphony in your mouth. Plus, they are incredibly convenient! Whip up a batch on Sunday, and you’ll have a healthy and delicious snack ready to grab throughout the week. Whether you’re a busy professional, a fitness enthusiast, or simply someone who appreciates a wholesome treat, these bliss balls are guaranteed to become your new favorite go-to snack. Get ready to experience a burst of flavor and energy with every bite!

Ingredients:
- 1 cup dried figs, stems removed and roughly chopped
- 1/2 cup raw cacao powder
- 1/4 cup almond butter (or any nut butter of your choice)
- 1/4 cup unsweetened shredded coconut, plus extra for rolling
- 2 tablespoons chia seeds
- 2 tablespoons maple syrup (or honey, or agave)
- 1 teaspoon vanilla extract
- 1/4 teaspoon sea salt
- 2-3 tablespoons water (optional, for adjusting consistency)
Preparing the Fig Paste:
Okay, let’s get started! The first thing we need to do is create a lovely, sticky fig paste. This will be the base of our bliss balls, providing sweetness and a wonderful chewy texture. Trust me, this step is crucial for achieving that perfect bliss ball consistency.
- Soaking the Figs (Optional but Recommended): While not strictly necessary, soaking the figs in warm water for about 10-15 minutes will make them even softer and easier to blend. This is especially helpful if your figs are on the drier side. Simply place the chopped figs in a bowl and cover them with warm water. Let them sit while you gather the rest of your ingredients. After soaking, drain the figs thoroughly.
- Blending the Figs: Place the chopped (and soaked, if you chose to soak them) figs into a food processor. Pulse the food processor a few times to break the figs down into smaller pieces. Then, process continuously until a thick, sticky paste forms. This might take a few minutes, and you may need to stop and scrape down the sides of the food processor a few times to ensure everything is evenly processed. You’re looking for a smooth, almost jam-like consistency. If the figs are too dry and not blending easily, add a tablespoon of water at a time until the mixture starts to come together. Be careful not to add too much water, as this will make the bliss balls too wet.
- Checking the Consistency: Once you have a fig paste, take a small amount and roll it between your fingers. It should be sticky and hold its shape. If it’s too dry and crumbly, add a tiny bit more water (a teaspoon at a time) and process again. If it’s too wet, add a tablespoon of shredded coconut or almond flour to help absorb the excess moisture.
Combining the Ingredients:
Now that we have our beautiful fig paste, it’s time to bring in the rest of the ingredients and create the bliss ball mixture. This is where the magic really happens, as the cacao, almond butter, and other goodies come together to create a flavor explosion!
- Adding the Dry Ingredients: Add the raw cacao powder, shredded coconut, chia seeds, and sea salt to the food processor with the fig paste. Pulse a few times to combine the dry ingredients with the fig paste. This will prevent the cacao powder from flying everywhere when you start processing.
- Adding the Wet Ingredients: Add the almond butter, maple syrup, and vanilla extract to the food processor. Process continuously until all the ingredients are well combined and a thick, slightly sticky dough forms. Again, you may need to stop and scrape down the sides of the food processor a few times to ensure everything is evenly incorporated.
- Adjusting the Consistency (If Needed): The consistency of the dough should be such that you can easily roll it into balls. If the dough is too dry and crumbly, add a tablespoon of water at a time until it comes together. If it’s too wet, add a tablespoon of shredded coconut or almond flour. Remember, you can always add more, but you can’t take it away!
- Taste Testing (The Best Part!): Once the dough is well combined, give it a taste! This is your chance to adjust the flavors to your liking. If you want a richer chocolate flavor, add a little more cacao powder. If you prefer a sweeter bliss ball, add a touch more maple syrup. Don’t be afraid to experiment!
Rolling and Coating the Bliss Balls:
We’re almost there! Now comes the fun part: rolling the dough into bliss balls and coating them with shredded coconut. This is a great activity to do with kids (or anyone who enjoys getting their hands a little messy!).
- Preparing the Coating: Place the extra shredded coconut in a shallow bowl or plate. This will be used to coat the bliss balls. You can also use other coatings, such as chopped nuts, cacao nibs, or even a dusting of cacao powder. Get creative!
- Rolling the Bliss Balls: Take a tablespoon of the dough and roll it between your palms to form a ball. The size of the bliss balls is entirely up to you, but I find that about a tablespoon is a good size. If the dough is sticking to your hands, you can lightly dampen your hands with water.
- Coating the Bliss Balls: Once you’ve rolled a ball, immediately roll it in the shredded coconut (or your chosen coating) until it’s evenly coated. Gently press the coating into the ball to ensure it adheres well.
- Placing the Bliss Balls: Place the coated bliss ball on a plate or baking sheet lined with parchment paper. This will prevent the bliss balls from sticking to the surface.
- Repeating the Process: Repeat steps 2-4 until all the dough has been used.
Chilling and Storing:
Finally, the last step is to chill the bliss balls. This will help them firm up and develop their flavors even further. Plus, they’re just so much more enjoyable when they’re cold!
- Chilling the Bliss Balls: Place the plate or baking sheet of bliss balls in the refrigerator for at least 30 minutes. This will allow them to firm up and become easier to handle. You can also chill them for longer, even overnight, if you prefer.
- Storing the Bliss Balls: Once the bliss balls are chilled, transfer them to an airtight container. They can be stored in the refrigerator for up to a week, or in the freezer for up to a month. If freezing, let them thaw slightly before enjoying.
Tips and Variations:
Here are a few extra tips and variations to help you customize these bliss balls to your liking:
- Nut Butter Variations: Feel free to experiment with different nut butters, such as peanut butter, cashew butter, or sunflower seed butter. Each nut butter will impart a slightly different flavor to the bliss balls.
- Sweetener Variations: If you don’t have maple syrup, you can use honey, agave nectar, or even date syrup as a sweetener. Adjust the amount to your liking.
- Adding Spices: Add a pinch of cinnamon, nutmeg, or ginger to the dough for a warm and comforting flavor.
- Adding Dried Fruit: In addition to figs, you can add other dried fruits, such as dates, raisins, or cranberries.
- Adding Nuts and Seeds: Add chopped nuts, such as almonds, walnuts, or pecans, or seeds, such as pumpkin seeds or sunflower seeds, for added texture and nutrition.
- Chocolate Chips: For an extra chocolatey treat, add a handful of mini chocolate chips to the dough.
- Lemon or Orange Zest: Add a teaspoon of lemon or orange zest for a bright and citrusy flavor.
- Protein Powder: Add a scoop of your favorite protein powder for an extra boost of protein.
Enjoy!
And there you have it! Delicious, healthy, and easy-to-make Cacao Fig Bliss Balls. I hope you enjoy them as much as I do. They’re the perfect snack for satisfying your sweet cravings without any guilt. Happy bliss ball making!

Conclusion:
And there you have it! These Cacao Fig Bliss Balls are more than just a snack; they’re a little burst of energy and happiness rolled into one delicious bite. I truly believe this recipe is a must-try for anyone looking for a healthy, satisfying, and incredibly easy treat. The combination of rich cacao, sweet figs, and crunchy nuts creates a symphony of flavors and textures that will leave you wanting more. But why is this recipe so special? It’s the perfect balance of indulgence and nourishment. Unlike processed snacks loaded with sugar and artificial ingredients, these bliss balls are packed with wholesome goodness. The figs provide natural sweetness and fiber, the cacao offers antioxidants and a mood boost, and the nuts contribute healthy fats and protein. It’s a guilt-free way to satisfy your sweet cravings and fuel your body. Beyond the health benefits, the simplicity of this recipe is a major win. No baking is required, and the entire process takes less than 30 minutes from start to finish. That’s right, in just half an hour, you can have a batch of these delectable treats ready to enjoy. It’s perfect for busy weeknights, impromptu gatherings, or anytime you need a quick and easy snack.Serving Suggestions and Variations:
The possibilities are endless when it comes to serving and customizing these Cacao Fig Bliss Balls. Here are a few ideas to get you started: * Enjoy them as a pre- or post-workout snack: The combination of carbs, protein, and healthy fats will provide sustained energy for your workouts. * Pack them in your lunchbox: They’re a convenient and healthy alternative to processed snacks. * Serve them as a dessert: These bliss balls are a surprisingly elegant and satisfying dessert option. * Gift them to friends and family: Homemade treats are always appreciated, and these bliss balls are sure to impress. And if you’re feeling adventurous, why not try some variations? * Add a pinch of sea salt: This will enhance the sweetness of the figs and create a more complex flavor profile. * Roll them in shredded coconut: This will add a touch of tropical flavor and a beautiful visual appeal. * Mix in some chia seeds or flax seeds: This will boost the nutritional value and add a slightly nutty flavor. * Substitute the walnuts with almonds, pecans, or cashews: Experiment with different nuts to find your favorite combination. * Add a tablespoon of your favorite nut butter: Peanut butter, almond butter, or cashew butter will add creaminess and richness. * Spice it up with a dash of cinnamon or cardamom: These warm spices will complement the cacao and figs beautifully. I encourage you to get creative and experiment with different ingredients to create your own unique version of these bliss balls. The beauty of this recipe is that it’s incredibly versatile and forgiving. Don’t be afraid to try new things and see what you come up with! Now it’s your turn! I’m so excited for you to try this recipe and experience the joy of these Cacao Fig Bliss Balls for yourself. I know you’ll love them as much as I do. Once you’ve made them, please come back and share your experience in the comments below. I’d love to hear what you think, what variations you tried, and any tips or tricks you discovered along the way. Let’s create a community of bliss ball enthusiasts! Happy snacking! Print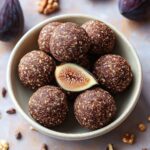
Cacao Fig Bliss Balls: The Ultimate No-Bake Energy Bites Recipe
- Total Time: 40
- Yield: 12–15 bliss balls 1x
Description
Chewy, decadent, and healthy no-bake energy bites made with dried figs, cacao powder, almond butter, and shredded coconut for a naturally sweet and satisfying treat.
Ingredients
- 1 cup dried figs, stems removed and roughly chopped
- 1/2 cup raw cacao powder
- 1/4 cup almond butter (or any nut butter of your choice)
- 1/4 cup unsweetened shredded coconut, plus extra for rolling
- 2 tablespoons chia seeds
- 2 tablespoons maple syrup (or honey, or agave)
- 1 teaspoon vanilla extract
- 1/4 teaspoon sea salt
- 2–3 tablespoons water (optional, for adjusting consistency)
Instructions
- (Optional) Soak Figs: Soak chopped figs in warm water for 10-15 minutes to soften. Drain thoroughly.
- Make Fig Paste: Place figs in a food processor and process until a thick, sticky paste forms. Scrape down sides as needed. If too dry, add water 1 tablespoon at a time.
- Combine Dry Ingredients: Add cacao powder, shredded coconut, chia seeds, and sea salt to the food processor with the fig paste. Pulse to combine.
- Combine Wet Ingredients: Add almond butter, maple syrup, and vanilla extract to the food processor. Process until a thick, slightly sticky dough forms. Scrape down sides as needed.
- Adjust Consistency: If too dry, add water 1 tablespoon at a time. If too wet, add shredded coconut 1 tablespoon at a time.
- Taste Test: Adjust flavors to your liking by adding more cacao powder for a richer chocolate flavor or more maple syrup for a sweeter bliss ball.
- Prepare Coating: Place extra shredded coconut in a shallow bowl.
- Roll Bliss Balls: Take a tablespoon of dough and roll into a ball.
- Coat Bliss Balls: Roll the ball in shredded coconut until evenly coated. Gently press the coating into the ball to ensure it adheres well.
- Place Bliss Balls: Place the coated bliss ball on a plate or baking sheet lined with parchment paper.
- Repeat: Repeat steps 8-10 until all dough is used.
- Chill: Refrigerate for at least 30 minutes to firm up.
- Store: Store in an airtight container in the refrigerator for up to a week or in the freezer for up to a month.
Notes
- Soaking the figs is optional but recommended, especially if your figs are dry.
- Adjust the amount of water or shredded coconut to achieve the desired consistency.
- Feel free to experiment with different nut butters, sweeteners, spices, dried fruits, nuts, seeds, chocolate chips, or zest.
- For freezing, let them thaw slightly before enjoying.
- Prep Time: 10 minutes
- Cook Time: 0 minutes