
Pistachio thumbprint cookies: Just the name conjures up images of delicate, buttery cookies adorned with a vibrant green jewel of pistachio goodness, doesn’t it? I’m thrilled to share this recipe with you, because these aren’t just any cookies; they’re a delightful combination of textures and flavors that will elevate your baking game.
Thumbprint cookies, in general, have a charming history, with variations found across many cultures. Some believe they originated in Sweden or Poland, where similar small, filled cookies have been enjoyed for centuries, often during festive occasions. The simple act of pressing your thumb into the dough to create a well for the filling is a testament to their homespun appeal.
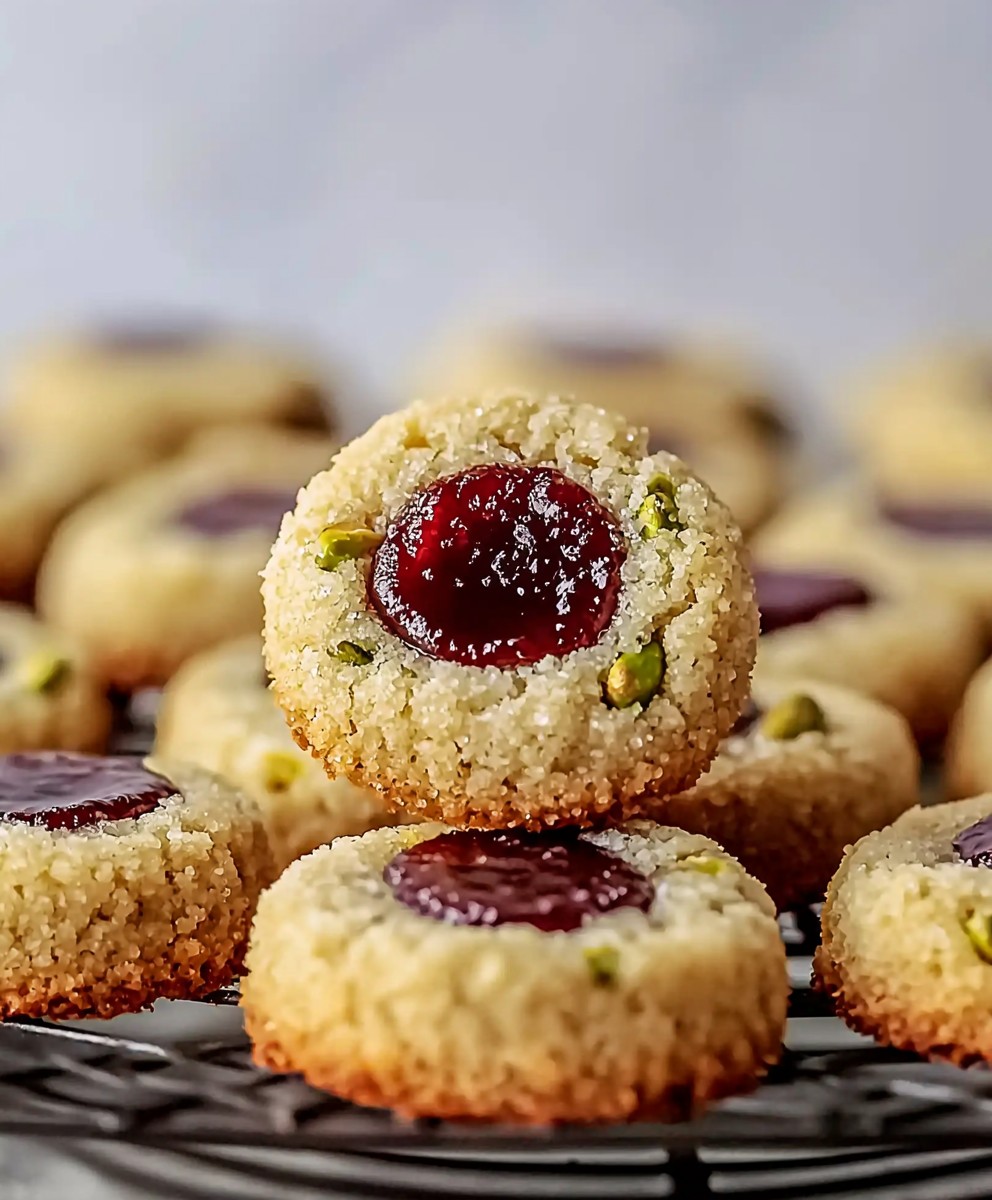
What makes these pistachio thumbprint cookies so irresistible? It’s the perfect balance of a tender, melt-in-your-mouth shortbread-like base and the nutty, slightly sweet, and ever-so-slightly salty pistachio filling. The contrasting textures the crumbly cookie and the smooth, rich filling are a symphony in your mouth. Plus, they’re surprisingly easy to make! Whether you’re a seasoned baker or just starting out, this recipe is foolproof and guaranteed to impress. Get ready to experience a cookie that’s as beautiful as it is delicious!

Ingredients:
- For the Cookies:
- 1 cup (2 sticks) unsalted butter, softened
- ½ cup granulated sugar
- ¼ cup packed light brown sugar
- 1 large egg
- 1 teaspoon vanilla extract
- 2 ¼ cups all-purpose flour
- ½ teaspoon baking powder
- ¼ teaspoon salt
- For the Pistachio Filling:
- 1 cup shelled, unsalted pistachios
- ¼ cup powdered sugar
- 1-2 tablespoons heavy cream, or as needed
- ¼ teaspoon almond extract (optional, but highly recommended!)
- For Rolling (Optional):
- ½ cup finely chopped pistachios
Preparing the Dough:
- Cream the Butter and Sugars: In a large bowl, or the bowl of your stand mixer fitted with the paddle attachment, cream together the softened butter, granulated sugar, and brown sugar until light and fluffy. This usually takes about 3-5 minutes. Don’t rush this step! Properly creaming the butter and sugar incorporates air, which will result in a tender cookie. Scrape down the sides of the bowl occasionally to ensure everything is evenly mixed.
- Add the Egg and Vanilla: Beat in the egg and vanilla extract until well combined. Again, scrape down the sides of the bowl to make sure everything is incorporated. You want a smooth and homogenous mixture at this stage.
- Combine Dry Ingredients: In a separate medium bowl, whisk together the all-purpose flour, baking powder, and salt. Whisking is important to evenly distribute the baking powder and salt throughout the flour, which will ensure a consistent rise and flavor in your cookies.
- Gradually Add Dry Ingredients to Wet Ingredients: Gradually add the dry ingredients to the wet ingredients, mixing on low speed until just combined. Be careful not to overmix! Overmixing develops the gluten in the flour, which can result in tough cookies. Mix until the flour is *almost* completely incorporated, then stop and scrape down the sides of the bowl. Finish mixing by hand with a spatula until just combined. A few streaks of flour are okay at this point.
- Chill the Dough: Wrap the dough tightly in plastic wrap and chill in the refrigerator for at least 30 minutes, or up to 2 hours. Chilling the dough is crucial! It allows the gluten to relax, which prevents the cookies from spreading too much in the oven. It also makes the dough easier to handle.
Making the Pistachio Filling:
- Prepare the Pistachios: Place the pistachios in a food processor and pulse until they are finely ground. Be careful not to over-process them into pistachio butter! You want a crumbly, slightly coarse texture.
- Combine Ingredients: In a medium bowl, combine the ground pistachios, powdered sugar, and almond extract (if using).
- Add Heavy Cream: Add the heavy cream, one tablespoon at a time, until the mixture comes together to form a thick, but spreadable paste. You may need slightly more or less cream depending on the moisture content of your pistachios. The filling should be thick enough to hold its shape when placed in the thumbprint indentation.
Assembling and Baking the Cookies:
- Preheat Oven and Prepare Baking Sheets: Preheat your oven to 350°F (175°C). Line baking sheets with parchment paper or silicone baking mats. This will prevent the cookies from sticking and make cleanup a breeze.
- Shape the Dough: Remove the chilled dough from the refrigerator. Roll the dough into 1-inch balls. If you are using the optional chopped pistachios for rolling, place them in a shallow dish.
- Roll in Pistachios (Optional): If desired, roll each dough ball in the chopped pistachios, pressing gently to help them adhere. This adds a lovely texture and visual appeal to the cookies.
- Place on Baking Sheets: Place the dough balls on the prepared baking sheets, leaving about 2 inches between each cookie to allow for spreading.
- Make the Thumbprints: Use your thumb (or the back of a small spoon) to make an indentation in the center of each cookie. Be careful not to press all the way through the dough. You want a well-defined indentation to hold the pistachio filling.
- Fill the Thumbprints: Spoon or pipe a small amount of the pistachio filling into each thumbprint indentation. Don’t overfill them, as the filling may spread during baking.
- Bake the Cookies: Bake for 10-12 minutes, or until the edges of the cookies are lightly golden brown. The centers should still be slightly soft.
- Cool the Cookies: Remove the baking sheets from the oven and let the cookies cool on the baking sheets for a few minutes before transferring them to a wire rack to cool completely. This prevents them from breaking while they are still warm and delicate.
Tips for Perfect Pistachio Thumbprint Cookies:
- Use High-Quality Pistachios: The flavor of these cookies relies heavily on the pistachios, so use the best quality you can find. Look for pistachios that are bright green and have a fresh, nutty aroma.
- Don’t Overbake: Overbaked cookies will be dry and crumbly. Bake them just until the edges are lightly golden brown. The centers should still be slightly soft.
- Chill the Dough: Chilling the dough is essential for preventing the cookies from spreading too much in the oven. It also makes the dough easier to handle.
- Adjust Sweetness: If you prefer a less sweet cookie, you can reduce the amount of sugar in the dough.
- Storage: Store the cooled cookies in an airtight container at room temperature for up to 3 days. They can also be frozen for longer storage.
- Variations: Feel free to experiment with different extracts in the filling, such as rosewater or orange blossom water. You can also add a pinch of cardamom to the dough for a warm, aromatic flavor.
Troubleshooting:
Why are my cookies spreading too much?
This is usually caused by not chilling the dough long enough, using too much butter, or not measuring the flour correctly. Make sure to chill the dough for at least 30 minutes, use the correct amount of butter, and measure the flour accurately using the spoon and level method (spoon the flour into the measuring cup and level it off with a knife).
Why are my cookies dry and crumbly?
This is usually caused by overbaking the cookies or using too much flour. Make sure to bake the cookies just until the edges are lightly golden brown, and measure the flour accurately.
Why is my pistachio filling too dry?
Add a little more heavy cream, one teaspoon at a time, until the filling reaches the desired consistency.
Why is my pistachio filling too runny?
Add a little more powdered sugar, one tablespoon at a time, until the filling thickens up.
Conclusion:
And there you have it! These pistachio thumbprint cookies are more than just a sweet treat; they’re a little burst of nutty, buttery joy that’s surprisingly easy to create. I truly believe this recipe is a must-try for several reasons. First, the combination of the delicate, crumbly cookie base with the rich, slightly salty pistachio filling is simply divine. It’s a flavor profile that’s both sophisticated and comforting, making it perfect for any occasion, from a casual afternoon tea to a more festive holiday gathering. Second, the recipe itself is incredibly straightforward. Even if you’re not a seasoned baker, you’ll find these cookies surprisingly simple to make. The steps are clear, the ingredients are readily available, and the results are consistently delicious. Plus, the thumbprint design adds a touch of rustic charm that’s hard to resist. But perhaps the best reason to try these cookies is their versatility. While I’ve shared my favorite pistachio filling, the possibilities are truly endless. Feel free to experiment with different nuts, such as almonds, pecans, or walnuts. You could also try adding a touch of citrus zest to the dough for a brighter, more vibrant flavor. Or, for a truly decadent treat, consider drizzling the finished cookies with melted chocolate. Speaking of serving suggestions, these pistachio thumbprint cookies are wonderful on their own, enjoyed with a cup of coffee or tea. They also make a beautiful addition to a dessert platter, adding a pop of color and a unique flavor profile. For a special occasion, you could even package them up in a pretty box and give them as a homemade gift. I’ve found they are always appreciated! Here are a few more ideas to spark your creativity:Serving Suggestions and Variations:
* Glaze it up! A simple powdered sugar glaze, perhaps flavored with almond extract, would add a touch of elegance. * Jam-packed! Swap the pistachio filling for your favorite jam or preserves. Raspberry, apricot, or fig jam would all be delicious choices. * Chocolate chips! Add mini chocolate chips to the dough for an extra touch of sweetness. * Spice it up! A pinch of cinnamon or cardamom in the dough would add warmth and complexity. * Vegan option: Substitute the butter with a vegan butter alternative and use an egg replacer for a plant-based version. I’m so confident that you’ll love these cookies that I urge you to give them a try. Don’t be intimidated by the idea of baking; this recipe is truly foolproof. And once you’ve tasted the first bite, I guarantee you’ll be hooked. So, go ahead, preheat your oven, gather your ingredients, and get ready to bake up a batch of these irresistible pistachio thumbprint cookies. I can’t wait to hear what you think! Please, share your experience in the comments below. Let me know if you made any variations, what your family and friends thought, and any tips or tricks you discovered along the way. Happy baking! I am excited to see your creations. Print
Pistachio Thumbprint Cookies: A Delicious and Easy Recipe
- Total Time: 60 minutes
- Yield: 24–30 cookies 1x
Description
Delicate, buttery thumbprint cookies with a sweet, nutty pistachio filling and a soft texture.
Ingredients
- 1 cup (2 sticks) unsalted butter, softened
- ½ cup granulated sugar
- ¼ cup packed light brown sugar
- 1 large egg
- 1 teaspoon vanilla extract
- 2 ¼ cups all-purpose flour
- ½ teaspoon baking powder
- ¼ teaspoon salt
- 1 cup shelled, unsalted pistachios
- ¼ cup powdered sugar
- 1–2 tablespoons heavy cream, or as needed
- ¼ teaspoon almond extract (optional, but highly recommended!)
- ½ cup finely chopped pistachios
Instructions
- Cream the Butter and Sugars: In a large bowl, or the bowl of your stand mixer fitted with the paddle attachment, cream together the softened butter, granulated sugar, and brown sugar until light and fluffy (3-5 minutes). Scrape down the sides of the bowl occasionally.
- Add the Egg and Vanilla: Beat in the egg and vanilla extract until well combined. Scrape down the sides of the bowl.
- Combine Dry Ingredients: In a separate medium bowl, whisk together the all-purpose flour, baking powder, and salt.
- Gradually Add Dry Ingredients to Wet Ingredients: Gradually add the dry ingredients to the wet ingredients, mixing on low speed until just combined. Be careful not to overmix! Mix until the flour is *almost* completely incorporated, then stop and scrape down the sides of the bowl. Finish mixing by hand with a spatula until just combined. A few streaks of flour are okay at this point.
- Chill the Dough: Wrap the dough tightly in plastic wrap and chill in the refrigerator for at least 30 minutes, or up to 2 hours.
- Prepare the Pistachios (Filling): Place the pistachios in a food processor and pulse until they are finely ground. Be careful not to over-process them into pistachio butter! You want a crumbly, slightly coarse texture.
- Combine Ingredients (Filling): In a medium bowl, combine the ground pistachios, powdered sugar, and almond extract (if using).
- Add Heavy Cream (Filling): Add the heavy cream, one tablespoon at a time, until the mixture comes together to form a thick, but spreadable paste. You may need slightly more or less cream depending on the moisture content of your pistachios. The filling should be thick enough to hold its shape when placed in the thumbprint indentation.
- Preheat Oven and Prepare Baking Sheets: Preheat your oven to 350°F (175°C). Line baking sheets with parchment paper or silicone baking mats.
- Shape the Dough: Remove the chilled dough from the refrigerator. Roll the dough into 1-inch balls. If you are using the optional chopped pistachios for rolling, place them in a shallow dish.
- Roll in Pistachios (Optional): If desired, roll each dough ball in the chopped pistachios, pressing gently to help them adhere.
- Place on Baking Sheets: Place the dough balls on the prepared baking sheets, leaving about 2 inches between each cookie to allow for spreading.
- Make the Thumbprints: Use your thumb (or the back of a small spoon) to make an indentation in the center of each cookie. Be careful not to press all the way through the dough. You want a well-defined indentation to hold the pistachio filling.
- Fill the Thumbprints: Spoon or pipe a small amount of the pistachio filling into each thumbprint indentation. Don’t overfill them, as the filling may spread during baking.
- Bake the Cookies: Bake for 10-12 minutes, or until the edges of the cookies are lightly golden brown. The centers should still be slightly soft.
- Cool the Cookies: Remove the baking sheets from the oven and let the cookies cool on the baking sheets for a few minutes before transferring them to a wire rack to cool completely.
Notes
- Use high-quality pistachios for the best flavor.
- Don’t overbake the cookies; bake until the edges are lightly golden brown.
- Chilling the dough is essential to prevent spreading.
- Adjust the sweetness to your preference by reducing the sugar.
- Store cooled cookies in an airtight container at room temperature for up to 3 days or freeze for longer storage.
- Experiment with different extracts in the filling, such as rosewater or orange blossom water.
- Add a pinch of cardamom to the dough for a warm, aromatic flavor.
- Prep Time: 30 minutes
- Cook Time: 12 minutes