
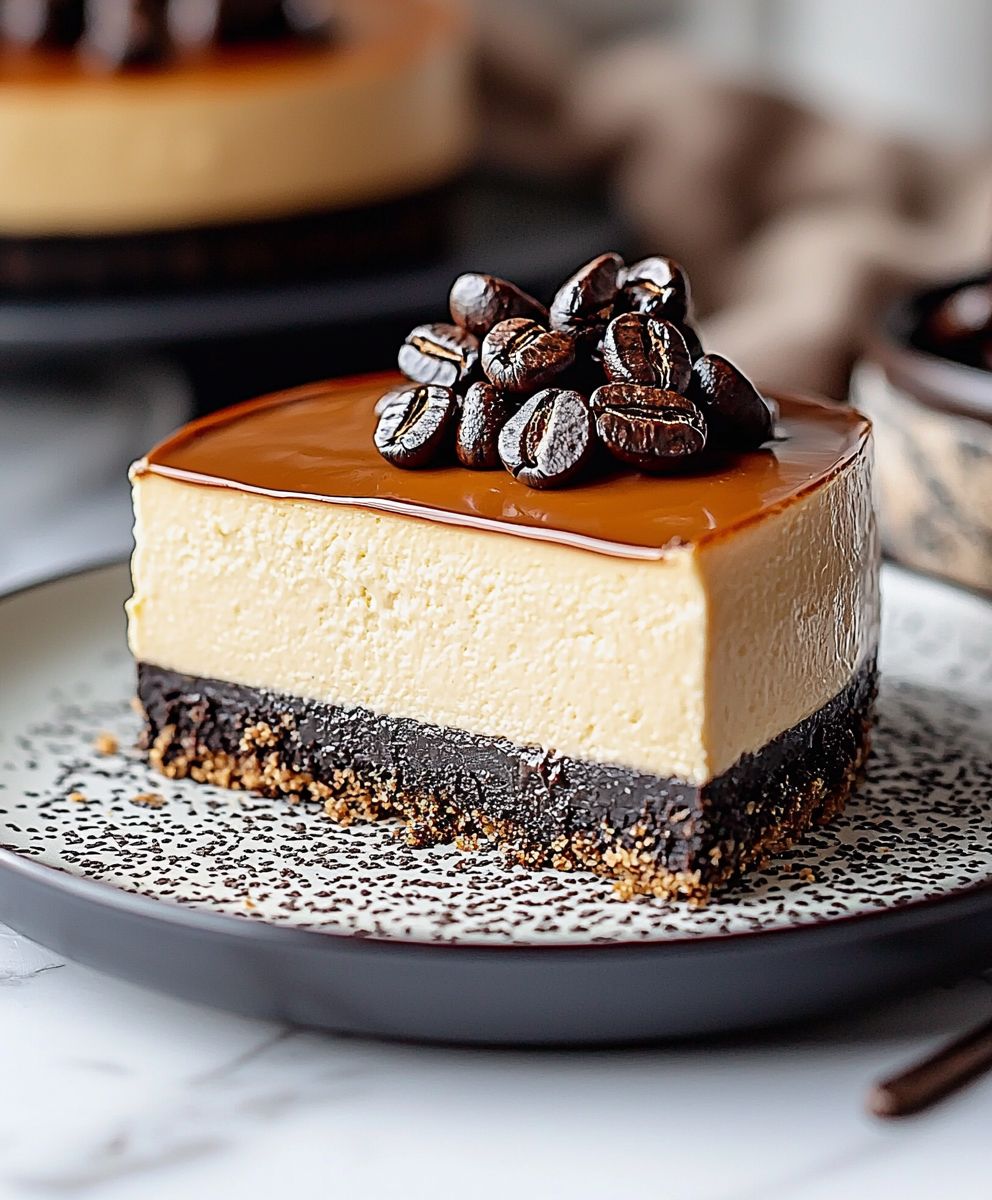
Espresso Cheesecake: Prepare to be captivated by a dessert that marries the rich, intense flavors of coffee with the creamy decadence of cheesecake. This isn’t just a dessert; it’s an experience, a symphony of textures and tastes that will leave you craving more. Imagine the smooth, velvety cheesecake base, infused with the robust aroma of freshly brewed espresso, all resting on a delightful crust.
While cheesecake’s origins can be traced back to ancient Greece, the modern iteration we know and love gained popularity in America in the late 19th century. The addition of espresso is a more recent innovation, a testament to our ever-evolving culinary landscape and our love for bold, exciting flavors. It’s a perfect marriage of two beloved treats, creating something truly special.
People adore espresso cheesecake for its sophisticated flavor profile. The bitterness of the espresso perfectly balances the sweetness of the cheesecake, preventing it from becoming overly rich. The caffeine kick provides a subtle energy boost, making it an ideal dessert for an afternoon treat or an after-dinner indulgence. Plus, it’s surprisingly easy to make at home, allowing you to impress your friends and family with a restaurant-quality dessert without spending hours in the kitchen. Get ready to embark on a baking adventure that will tantalize your taste buds and elevate your dessert game!

Ingredients:
- For the Crust:
- 1 ½ cups (about 150g) graham cracker crumbs
- 5 tablespoons (70g) unsalted butter, melted
- ¼ cup (50g) granulated sugar
- Pinch of salt
- For the Cheesecake Filling:
- 32 ounces (900g) cream cheese, softened to room temperature
- 1 ½ cups (300g) granulated sugar
- ½ cup (120ml) heavy cream
- 4 large eggs, room temperature
- 2 teaspoons vanilla extract
- ¼ cup (60ml) strong brewed espresso, cooled
- 2 tablespoons all-purpose flour
- For the Espresso Ganache Topping:
- 8 ounces (225g) semi-sweet chocolate, finely chopped
- ½ cup (120ml) heavy cream
- 2 tablespoons (30ml) strong brewed espresso
- 1 tablespoon unsalted butter
- Optional Garnish:
- Chocolate-covered espresso beans
- Cocoa powder
Preparing the Graham Cracker Crust
Okay, let’s get started with the foundation of our delicious Espresso Cheesecake the graham cracker crust! This is a super simple step, but it’s crucial for providing that perfect textural contrast to the creamy filling.
- Combine the Dry Ingredients: In a medium-sized bowl, whisk together the graham cracker crumbs, granulated sugar, and a pinch of salt. Make sure everything is evenly distributed. This ensures a consistent flavor throughout the crust.
- Add the Melted Butter: Pour the melted butter into the bowl with the dry ingredients. Use a fork or your fingers to mix everything together until the crumbs are evenly moistened and resemble wet sand. You should be able to press a small amount of the mixture together and have it hold its shape.
- Press into the Pan: Transfer the graham cracker mixture to a 9-inch springform pan. Use the bottom of a measuring cup or your fingers to firmly press the crumbs evenly across the bottom of the pan and slightly up the sides. The firmer you press, the more stable your crust will be.
- Pre-bake the Crust: Bake the crust in a preheated oven at 350°F (175°C) for 8-10 minutes. This helps to set the crust and prevent it from becoming soggy. Keep a close eye on it to prevent burning.
- Cool the Crust: Remove the crust from the oven and let it cool completely while you prepare the cheesecake filling. This is important because adding the filling to a hot crust can affect the texture of the cheesecake.
Making the Espresso Cheesecake Filling
Now for the star of the show the espresso cheesecake filling! This is where the magic happens, and we’ll be infusing that rich coffee flavor into a creamy, decadent base. Room temperature ingredients are key here, so make sure your cream cheese and eggs are ready to go.
- Beat the Cream Cheese: In a large mixing bowl (or the bowl of your stand mixer), beat the softened cream cheese on medium speed until it’s completely smooth and creamy. This usually takes about 2-3 minutes. Scrape down the sides of the bowl as needed to ensure everything is evenly mixed. Lumps in your cream cheese will translate to lumps in your cheesecake, so take your time with this step!
- Add the Sugar: Gradually add the granulated sugar to the cream cheese, beating on medium speed until well combined. Again, scrape down the sides of the bowl to ensure everything is incorporated.
- Incorporate the Heavy Cream: Pour in the heavy cream and beat on low speed until just combined. Be careful not to overmix at this stage, as overmixing can incorporate too much air into the batter, which can cause the cheesecake to crack during baking.
- Add the Eggs: Add the eggs one at a time, beating on low speed after each addition until just combined. It’s crucial to not overmix after adding the eggs. Overmixing will incorporate too much air and lead to a cracked cheesecake.
- Add the Flavorings: Stir in the vanilla extract, cooled espresso, and all-purpose flour. Mix on low speed until just combined. The flour helps to stabilize the cheesecake and prevent it from becoming too soft.
- Pour into the Crust: Pour the cheesecake filling into the cooled graham cracker crust, spreading it evenly.
Baking the Espresso Cheesecake
Baking a cheesecake can seem intimidating, but with a few simple tricks, you can achieve a perfectly creamy and crack-free result. We’ll be using a water bath to ensure even baking and prevent the cheesecake from drying out.
- Prepare the Water Bath: Wrap the bottom of the springform pan tightly with heavy-duty aluminum foil. This will prevent water from seeping into the cheesecake. Place the wrapped springform pan inside a larger roasting pan.
- Pour in Hot Water: Carefully pour hot water into the roasting pan, filling it about halfway up the sides of the springform pan. The water should come about 1-2 inches up the sides of the springform pan.
- Bake the Cheesecake: Bake in a preheated oven at 325°F (160°C) for 65-75 minutes, or until the edges of the cheesecake are set but the center still has a slight jiggle. The jiggle should be a slight wobble, not a liquid slosh.
- Turn Off the Oven and Let Cool: Turn off the oven and crack the oven door slightly. Let the cheesecake cool in the oven for 1 hour. This gradual cooling process helps to prevent cracking.
- Refrigerate: Remove the cheesecake from the water bath and let it cool completely on a wire rack. Then, cover it loosely with plastic wrap and refrigerate for at least 6 hours, or preferably overnight. This allows the cheesecake to fully set and develop its flavor.
Making the Espresso Ganache Topping
The espresso ganache topping is the perfect finishing touch to our Espresso Cheesecake. It adds a layer of rich, chocolatey goodness with a hint of coffee that complements the cheesecake beautifully.
- Chop the Chocolate: Finely chop the semi-sweet chocolate and place it in a heatproof bowl. The finer the chocolate is chopped, the smoother the ganache will be.
- Heat the Heavy Cream and Espresso: In a small saucepan, heat the heavy cream and espresso over medium heat until it just begins to simmer. Do not boil.
- Pour over the Chocolate: Pour the hot cream mixture over the chopped chocolate. Let it sit for 1 minute to allow the heat to melt the chocolate.
- Stir Until Smooth: Gently stir the mixture until the chocolate is completely melted and the ganache is smooth and glossy. Add the butter and stir until melted and incorporated.
- Cool Slightly: Let the ganache cool slightly for about 10-15 minutes, or until it thickens to a pourable consistency.
Assembling and Serving the Espresso Cheesecake
Finally, it’s time to assemble our masterpiece and enjoy the fruits of our labor! This is the easiest part, and you can get creative with your garnishes.
- Remove from Springform Pan: Carefully remove the chilled cheesecake from the springform pan. Run a thin knife around the edges of the cheesecake to loosen it from the pan before releasing the sides.
- Pour on the Ganache: Pour the slightly cooled espresso ganache over the top of the cheesecake, spreading it evenly. You can let the ganache drip down the sides for a more rustic look, or smooth it out for a cleaner finish.
- Garnish (Optional): Garnish the cheesecake with chocolate-covered espresso beans and a dusting of cocoa powder, if desired.
- Chill (Optional): If you prefer a firmer ganache, chill the cheesecake for another 30 minutes to an hour after adding the ganache.
- Slice and Serve: Slice the Espresso Cheesecake with a warm, clean knife and serve. Enjoy!
Conclusion:
This Espresso Cheesecake isn’t just a dessert; it’s an experience. The rich, creamy texture, the intense coffee flavor, and the subtle sweetness all combine to create a symphony of sensations that will leave you wanting more. Trust me, once you take that first bite, you’ll understand why I’m so passionate about this recipe. It’s the perfect ending to any meal, a delightful treat for a special occasion, or simply a way to elevate your everyday. Why is this a must-try? Because it’s surprisingly easy to make, even for novice bakers. The recipe is straightforward, the ingredients are readily available, and the results are consistently impressive. Forget those complicated, multi-step cheesecakes that require hours in the kitchen. This one is streamlined for maximum flavor with minimal effort. Plus, the espresso adds a sophisticated twist that sets it apart from your average cheesecake. It’s a guaranteed crowd-pleaser that will have everyone asking for the recipe. But the best part? It’s incredibly versatile! While I adore it exactly as written, there are so many ways to customize it to your liking. For a truly decadent experience, try drizzling it with melted dark chocolate or a homemade coffee caramel sauce. A sprinkle of cocoa powder or shaved chocolate on top adds a touch of elegance. If you’re feeling adventurous, you could even incorporate a layer of chocolate ganache between the crust and the filling. For those who prefer a lighter flavor, consider using a decaf espresso or adding a hint of vanilla extract to the batter. You can also experiment with different types of crusts. A classic graham cracker crust is always a winner, but a chocolate cookie crust or even a shortbread crust would be equally delicious. And if you’re looking for a gluten-free option, simply substitute the graham crackers with gluten-free alternatives. Serving suggestions? The possibilities are endless! This Espresso Cheesecake is fantastic on its own, but it also pairs beautifully with fresh berries, whipped cream, or a scoop of vanilla ice cream. For a truly indulgent treat, serve it with a warm cup of coffee or a glass of dessert wine. It’s also a great addition to a dessert platter or a potluck gathering. I truly believe that this recipe is a winner, and I can’t wait for you to try it. So, gather your ingredients, preheat your oven, and get ready to create a masterpiece. Don’t be intimidated by the word “cheesecake” this recipe is designed to be foolproof. Follow the instructions carefully, and you’ll be rewarded with a creamy, dreamy, and utterly irresistible dessert. Now, it’s your turn! I’m so excited to hear about your experience making this Espresso Cheesecake. Did you make any variations? What did your friends and family think? Share your photos and comments below! I love seeing your creations and hearing your feedback. Let’s spread the cheesecake love and inspire others to try this amazing recipe. Happy baking! Print
Espresso Cheesecake: The Ultimate Guide to Making the Perfect Dessert
- Total Time: 420 minutes
- Yield: 12 servings 1x
Description
Rich espresso cheesecake with graham cracker crust and espresso ganache. A coffee lover’s dream!
Ingredients
- 1 ½ cups (about 150g) graham cracker crumbs
- 5 tablespoons (70g) unsalted butter, melted
- ¼ cup (50g) granulated sugar
- Pinch of salt
- 32 ounces (900g) cream cheese, softened to room temperature
- 1 ½ cups (300g) granulated sugar
- ½ cup (120ml) heavy cream
- 4 large eggs, room temperature
- 2 teaspoons vanilla extract
- ¼ cup (60ml) strong brewed espresso, cooled
- 2 tablespoons all-purpose flour
- 8 ounces (225g) semi-sweet chocolate, finely chopped
- ½ cup (120ml) heavy cream
- 2 tablespoons (30ml) strong brewed espresso
- 1 tablespoon unsalted butter
- Chocolate-covered espresso beans
- Cocoa powder
Instructions
- Prepare the Graham Cracker Crust:
- In a medium bowl, whisk together graham cracker crumbs, sugar, and salt.
- Add melted butter and mix until the crumbs are moistened and resemble wet sand.
- Press the mixture into a 9-inch springform pan, covering the bottom and slightly up the sides.
- Bake at 350°F (175°C) for 8-10 minutes.
- Cool completely.
- Make the Espresso Cheesecake Filling:
- Beat softened cream cheese until smooth.
- Gradually add sugar and beat until well combined.
- Incorporate heavy cream on low speed until just combined.
- Add eggs one at a time, beating on low speed after each addition until just combined.
- Stir in vanilla extract, cooled espresso, and flour. Mix on low speed until just combined.
- Pour the filling into the cooled crust, spreading evenly.
- Bake the Espresso Cheesecake:
- Wrap the bottom of the springform pan tightly with heavy-duty aluminum foil. Place the wrapped springform pan inside a larger roasting pan.
- Carefully pour hot water into the roasting pan, filling it about halfway up the sides of the springform pan.
- Bake at 325°F (160°C) for 65-75 minutes, or until the edges are set but the center still has a slight jiggle.
- Turn off the oven, crack the door slightly, and let the cheesecake cool in the oven for 1 hour.
- Remove from the water bath and let cool completely on a wire rack.
- Cover loosely with plastic wrap and refrigerate for at least 6 hours, or preferably overnight.
- Make the Espresso Ganache Topping:
- Finely chop the semi-sweet chocolate and place it in a heatproof bowl.
- In a small saucepan, heat the heavy cream and espresso over medium heat until it just begins to simmer. Do not boil.
- Pour the hot cream mixture over the chopped chocolate. Let it sit for 1 minute to allow the heat to melt the chocolate.
- Gently stir the mixture until the chocolate is completely melted and the ganache is smooth and glossy. Add the butter and stir until melted and incorporated.
- Let the ganache cool slightly for about 10-15 minutes, or until it thickens to a pourable consistency.
- Assemble and Serve:
- Carefully remove the chilled cheesecake from the springform pan.
- Pour the slightly cooled espresso ganache over the top of the cheesecake, spreading it evenly.
- Garnish with chocolate-covered espresso beans and cocoa powder, if desired.
- Chill for another 30 minutes to an hour after adding the ganache, if desired.
- Slice and serve.
Notes
- Room temperature ingredients are crucial for a smooth cheesecake filling.
- Do not overmix the batter, especially after adding the eggs, to prevent cracking.
- A water bath ensures even baking and prevents the cheesecake from drying out.
- Cooling the cheesecake gradually in the oven helps to prevent cracking.
- Refrigerate for at least 6 hours, or preferably overnight, to allow the cheesecake to fully set.
- Prep Time: 45 minutes
- Cook Time: 75 minutes