
Strawberry Rhubarb Preserves: the taste of sunshine bottled! Imagine spreading a vibrant, ruby-red spoonful of homemade goodness onto your morning toast, the sweet and tart flavors dancing on your tongue. This isn’t just jam; it’s a jar full of memories, a connection to simpler times, and a celebration of spring’s bounty.
Rhubarb, often called the “pie plant,” has a fascinating history, arriving in North America in the 18th century. It quickly became a staple in gardens and kitchens, perfectly complementing the sweetness of strawberries. Together, they create a flavor profile that’s both comforting and exciting.
What makes Strawberry Rhubarb Preserves so irresistible? It’s the perfect balance of sweet and tart, the delightful texture of the fruit, and the sheer versatility of this delightful spread. Whether you’re slathering it on scones, swirling it into yogurt, or using it as a glaze for grilled meats, this preserve elevates any dish. Plus, making your own preserves is surprisingly easy and rewarding, allowing you to control the ingredients and create a truly homemade treat. Get ready to experience the joy of crafting your own jar of sunshine!

Ingredients:
- 4 cups chopped rhubarb (about 1 pound)
- 4 cups hulled and quartered strawberries (about 1 pound)
- 6 cups granulated sugar
- 1/4 cup bottled lemon juice
- 1 package (1.75 ounces) powdered fruit pectin
- 1/2 teaspoon butter or margarine (to reduce foaming)
Preparing the Fruit:
1. First things first, let’s get our fruit ready. Wash the rhubarb thoroughly and trim off the ends. Chop it into pieces that are roughly 1/2 inch thick. Don’t worry about being too precise; we’re going for a rustic preserve here! 2. Next up are the strawberries. Give them a good rinse and hull them (remove the green tops). Quarter the strawberries so they’re about the same size as the rhubarb pieces. This ensures even cooking and a beautiful texture in the finished preserves. 3. In a large, heavy-bottomed pot (stainless steel or enamel-coated is best avoid aluminum, as it can react with the fruit), combine the chopped rhubarb and strawberries. Gently stir them together to distribute the flavors.Cooking the Preserves:
1. Now, it’s time to add the sugar. Pour the 6 cups of granulated sugar over the fruit mixture. Stir well to coat all the fruit with the sugar. This step is crucial because the sugar not only sweetens the preserves but also helps to draw out the natural juices from the fruit, which is essential for creating that lovely, syrupy consistency. 2. Add the lemon juice. The lemon juice is important for two reasons: it adds a bright, tangy flavor that balances the sweetness of the fruit and sugar, and it also helps to activate the pectin, which is what will thicken the preserves. 3. Stir in the butter or margarine. This might seem like an odd ingredient, but it’s a little trick I learned from my grandmother. A small amount of butter or margarine helps to reduce foaming during the cooking process, resulting in a clearer, more visually appealing preserve. 4. Place the pot over medium-high heat. Bring the mixture to a full rolling boil that you can’t stir down. This means that even when you’re stirring constantly, the mixture continues to bubble vigorously. 5. Once you’ve reached a full rolling boil, quickly stir in the powdered fruit pectin. Make sure to stir it in thoroughly to prevent clumping. 6. Continue to boil hard for exactly 1 minute, stirring constantly. It’s important to maintain that full rolling boil during this minute to ensure the pectin sets properly. Use a timer to be precise! 7. Remove the pot from the heat. Skim off any foam that has formed on the surface using a metal spoon. This step is optional, but it will give your preserves a clearer, more professional look.Testing for Set:
1. Before you start canning, it’s crucial to test the preserves to make sure they’ve reached the proper consistency. There are a couple of ways to do this: * The Cold Plate Test: Place a small plate in the freezer before you start cooking the preserves. Once the preserves have boiled for the specified time, remove the plate from the freezer and drop a spoonful of the hot preserves onto the cold plate. Return the plate to the freezer for about 30 seconds. Then, push the preserves with your finger. If the surface wrinkles, the preserves are set. If the mixture is still runny, continue to cook the preserves for another minute or two, and then test again. * The Candy Thermometer Test: Use a candy thermometer to monitor the temperature of the preserves as they cook. The preserves are ready when they reach a temperature of 220°F (104°C). This method is more precise, but it requires a candy thermometer.Canning the Preserves:
1. While the preserves are cooking, prepare your canning jars. Wash the jars, lids, and bands in hot, soapy water. Rinse them thoroughly. 2. Sterilize the jars. There are several ways to sterilize canning jars: * Boiling Water Bath: Place the jars in a large pot of boiling water, making sure they are completely submerged. Boil for 10 minutes. Remove the jars from the boiling water using a jar lifter and place them on a clean towel-lined surface. * Dishwasher: Run the jars through a hot cycle in your dishwasher. Leave the jars in the dishwasher until you’re ready to fill them. * Oven: Preheat your oven to 200°F (93°C). Place the clean jars on a baking sheet and heat them in the oven for 10 minutes. 3. Heat the lids in a small saucepan of simmering water. Do not boil the lids, as this can damage the sealing compound. Keep the lids hot until you’re ready to use them. 4. Ladle the hot preserves into the hot, sterilized jars, leaving 1/4 inch of headspace (the space between the top of the preserves and the rim of the jar). 5. Wipe the rims of the jars with a clean, damp cloth to remove any spills or drips. This is important for ensuring a good seal. 6. Place a lid on each jar and screw on the band fingertip-tight. Do not overtighten the bands, as this can prevent the jars from sealing properly. 7. Process the jars in a boiling water bath. Place the filled jars in a boiling water bath canner. Make sure the jars are completely covered with water (at least 1 inch above the tops of the jars). Bring the water to a rolling boil and process for 10 minutes for half-pint or pint jars. Adjust processing time for altitude according to the chart below: Altitude (feet) | Increase Processing Time (minutes) —————–|———————————— 1,001 – 3,000 | 5 3,001 – 6,000 | 10 6,001 – 8,000 | 15 8,001 – 10,000 | 20 8. After processing, turn off the heat and remove the canner lid. Let the jars sit in the hot water for 5 minutes before removing them. This helps to prevent siphoning (loss of liquid from the jars). 9. Remove the jars from the canner using a jar lifter and place them on a clean towel-lined surface, leaving at least 1 inch of space between the jars. 10. Let the jars cool completely, undisturbed, for 12-24 hours. As the jars cool, you should hear a popping sound as the lids seal. 11. After the jars have cooled, check the seals. Press down on the center of each lid. If the lid doesn’t flex or pop back up, it’s sealed. If the lid flexes or pops, the jar didn’t seal properly. You can reprocess the jar with a new lid within 24 hours, or you can store the unsealed jar in the refrigerator and use the preserves within a few weeks. 12. Remove the bands from the sealed jars. Wash the jars and bands to remove any sticky residue. Label the jars with the date and contents. 13. Store the sealed jars in a cool, dark place for up to 1 year.Troubleshooting:
* Preserves didn’t set: If your preserves are too runny, it could be due to several factors: not enough pectin, not enough acid (lemon juice), or not boiling the mixture long enough. You can try re-cooking the preserves with additional pectin and lemon juice, or you can simply use them as a syrup. * Mold growth: Mold growth indicates that the jar didn’t seal properly. Discard the contents of the jar. * Crystals in the preserves: Crystals can form if there’s too much sugar in the preserves. This is usually harmless, but it can affect the texture. To prevent crystals, make sure to use the correct ratio of fruit to sugar and to stir the mixture well while it’s cooking. * Jars didn’t seal: Ensure the jar rim is clean before applying the lid, don’t over tighten the bands, and process for the correct time based on your altitude. Enjoy your homemade Strawberry Rhubarb Preserves! They’re delicious on toast, scones, yogurt, or even as a topping for ice cream.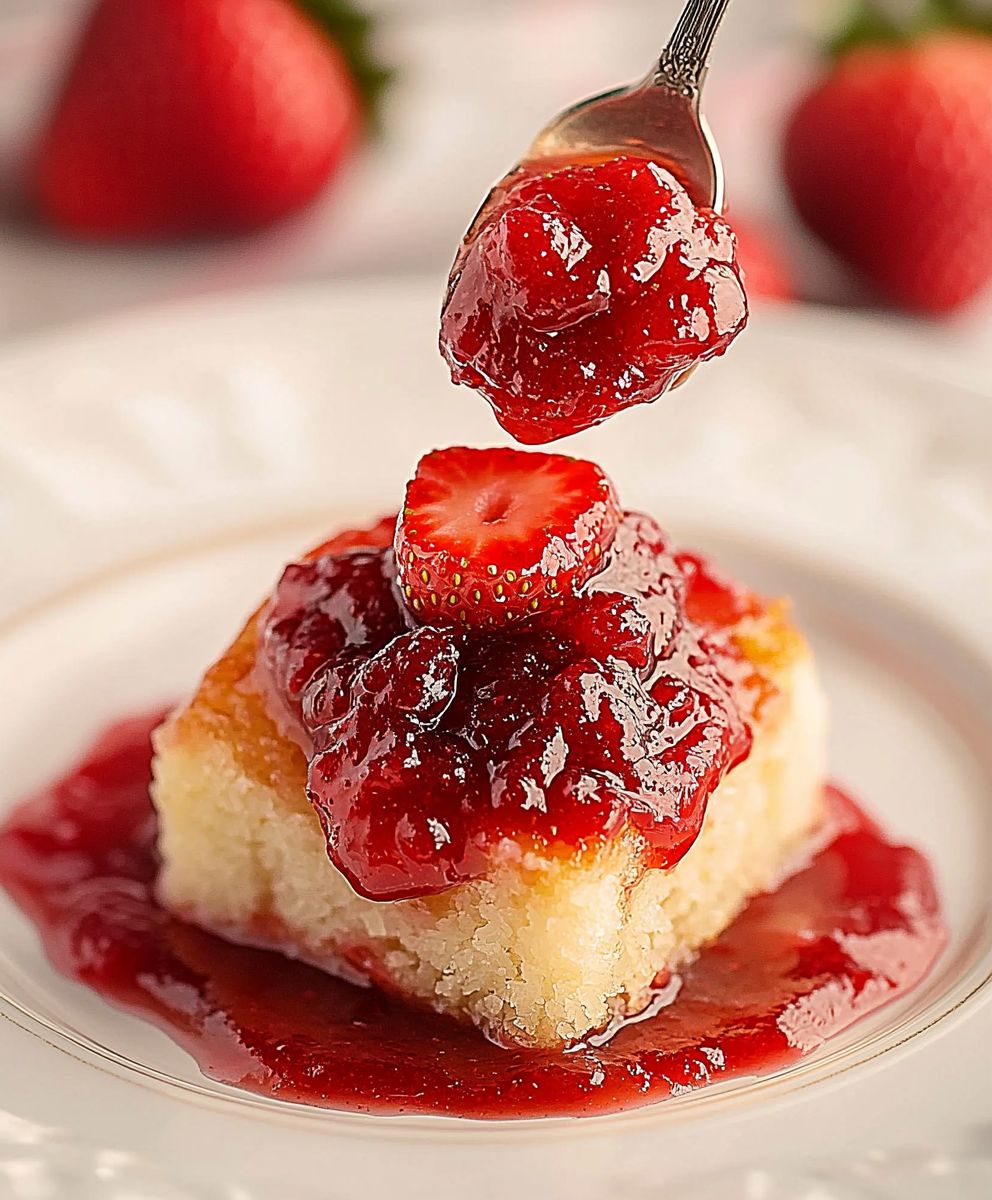
Conclusion:
And there you have it! I truly believe this Strawberry Rhubarb Preserves recipe is a must-try for anyone who loves the taste of summer bottled up. The sweet strawberries perfectly balance the tart rhubarb, creating a flavor explosion that’s both comforting and exciting. It’s a simple recipe, yes, but the results are anything but ordinary. The vibrant color alone is enough to brighten any morning! Why is it a must-try? Because it’s more than just a preserve; it’s a taste of sunshine, a reminder of warm days, and a versatile ingredient that can elevate so many dishes. It’s also incredibly satisfying to make something from scratch, knowing exactly what ingredients went into it. No artificial flavors, no weird preservatives just pure, delicious fruit. Plus, the aroma that fills your kitchen while it’s simmering is simply divine! But the best part? The possibilities are endless! Of course, it’s fantastic spread on toast, scones, or English muffins. Imagine a warm, buttery croissant slathered with this homemade goodness pure bliss! But don’t stop there. Try swirling it into your morning yogurt or oatmeal for a burst of fruity flavor. It’s also incredible as a glaze for grilled chicken or pork, adding a touch of sweetness and tang. Serving Suggestions and Variations: * Cheese Plate Perfection: Pair it with a creamy brie or goat cheese for a sophisticated appetizer. The sweetness of the preserves complements the richness of the cheese beautifully. * Baking Buddy: Use it as a filling for thumbprint cookies, hand pies, or even a layer in a Victoria sponge cake. It adds moisture and a delightful fruity flavor. * Ice Cream Topping: Drizzle it over vanilla ice cream for a simple yet elegant dessert. Add a sprinkle of chopped nuts for extra crunch. * Cocktail Hour: Stir a spoonful into your favorite cocktail for a fruity twist. It’s especially delicious in a gin and tonic or a sparkling wine cocktail. * Spice it Up: For a little extra warmth, add a pinch of ground ginger or cinnamon to the preserves while they’re cooking. * Citrus Zest: A little lemon or orange zest can brighten the flavor even further. * Vanilla Bean: Scrape the seeds of a vanilla bean into the pot for a touch of luxury. I’m confident that once you try this recipe, you’ll be hooked. It’s a wonderful way to preserve the flavors of summer and enjoy them all year round. It also makes a thoughtful and delicious homemade gift for friends and family. Imagine the joy of receiving a jar of this beautiful, handcrafted Strawberry Rhubarb Preserves! So, what are you waiting for? Gather your ingredients, put on some music, and get ready to create something truly special. I can’t wait to hear about your experience! Please, please, please give this recipe a try. And most importantly, don’t forget to share your creations! Post a picture on social media and tag me I’d love to see your beautiful jars of homemade goodness. Let me know what variations you tried and how you enjoyed it. Your feedback is invaluable, and it inspires me to keep creating and sharing delicious recipes. Happy preserving! Print
Strawberry Rhubarb Preserves: The Ultimate Guide to Making Delicious Homemade Jam
- Total Time: 60 minutes
- Yield: 5–6 half-pint jars 1x
Description
Tangy and sweet homemade Strawberry Rhubarb Preserves, perfect for spreading on toast, scones, or topping desserts. This recipe yields a beautiful, flavorful preserve that captures the essence of spring.
Ingredients
- 4 cups chopped rhubarb (about 1 pound)
- 4 cups hulled and quartered strawberries (about 1 pound)
- 6 cups granulated sugar
- 1/4 cup bottled lemon juice
- 1 package (1.75 ounces) powdered fruit pectin
- 1/2 teaspoon butter or margarine (to reduce foaming)
Instructions
- Prepare the Fruit: Wash the rhubarb and trim the ends. Chop into roughly 1/2-inch pieces. Rinse and hull the strawberries, then quarter them.
- Combine Fruit and Sugar: In a large, heavy-bottomed pot (stainless steel or enamel-coated), combine the chopped rhubarb and strawberries. Add the sugar and stir well to coat the fruit.
- Add Lemon Juice and Butter: Add the lemon juice and butter or margarine to the pot. Stir to combine.
- Boil the Mixture: Place the pot over medium-high heat and bring to a full rolling boil that you can’t stir down.
- Add Pectin: Quickly stir in the powdered fruit pectin, ensuring it’s thoroughly mixed to prevent clumping.
- Boil Hard: Continue to boil hard for exactly 1 minute, stirring constantly. Use a timer to be precise.
- Remove from Heat and Skim: Remove the pot from the heat. Skim off any foam that has formed on the surface using a metal spoon (optional).
- Test for Set: Use either the Cold Plate Test or the Candy Thermometer Test (220°F/104°C) to ensure the preserves have reached the proper consistency.
- Prepare Canning Jars: Wash the jars, lids, and bands in hot, soapy water. Rinse thoroughly. Sterilize the jars using your preferred method (boiling water bath, dishwasher, or oven). Heat the lids in simmering water.
- Fill Jars: Ladle the hot preserves into the hot, sterilized jars, leaving 1/4 inch of headspace.
- Wipe Rims and Seal: Wipe the rims of the jars with a clean, damp cloth. Place a lid on each jar and screw on the band fingertip-tight.
- Process in Boiling Water Bath: Place the filled jars in a boiling water bath canner, ensuring they are completely covered with water (at least 1 inch above the tops of the jars). Bring the water to a rolling boil and process for 10 minutes for half-pint or pint jars. Adjust processing time for altitude.
- Cool and Check Seals: After processing, turn off the heat and let the jars sit in the hot water for 5 minutes before removing them. Place the jars on a clean towel-lined surface and let them cool completely, undisturbed, for 12-24 hours. Check the seals by pressing down on the center of each lid.
- Clean and Store: Remove the bands from the sealed jars. Wash the jars and bands to remove any sticky residue. Label the jars with the date and contents. Store the sealed jars in a cool, dark place for up to 1 year.
Notes
- Avoid using aluminum pots, as they can react with the fruit.
- A small amount of butter or margarine helps to reduce foaming during cooking.
- Testing for set is crucial to ensure the preserves have the right consistency.
- Adjust processing time for altitude to ensure proper sealing.
- If a jar doesn’t seal, reprocess it with a new lid within 24 hours or store it in the refrigerator and use the preserves within a few weeks.
- Troubleshooting tips are provided for common issues like preserves not setting, mold growth, crystals, and jars not sealing.
- Prep Time: 30 minutes
- Cook Time: 30 minutes