
Lemon cooler cookies, those delightfully crisp and chewy bites of sunshine, are about to become your new favorite treat! Imagine sinking your teeth into a cookie that practically melts in your mouth, bursting with bright, tangy lemon flavor and a satisfyingly sweet finish. Are you ready to experience pure cookie bliss?
While the exact origins of lemon cooler cookies are shrouded in a bit of mystery, their popularity soared in the mid-20th century, becoming a staple in many American households. They represent a time of simple pleasures and homemade goodness, often associated with warm kitchens and shared family moments. These cookies are more than just a dessert; they’re a nostalgic trip down memory lane for many.
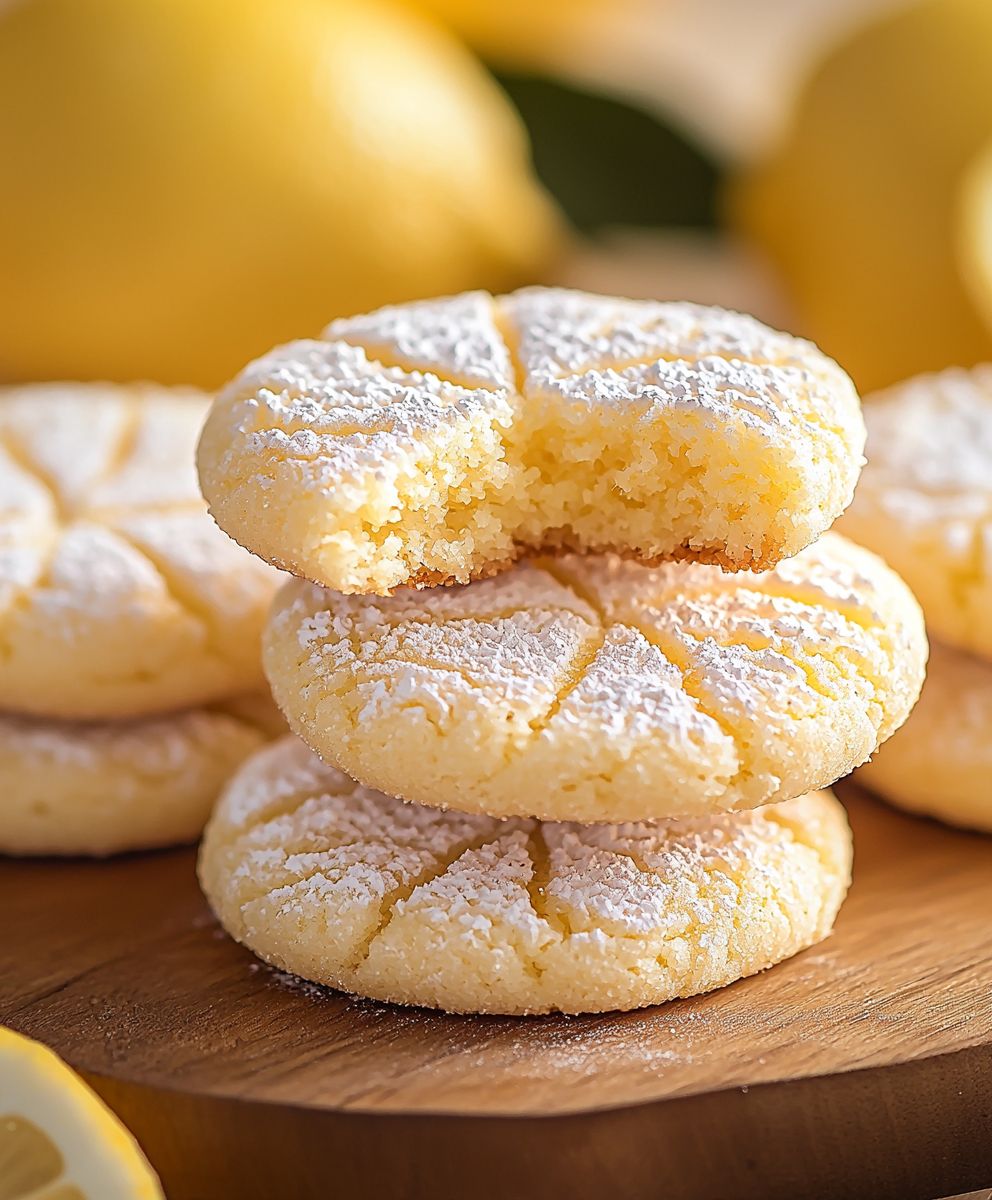
What makes these cookies so irresistible? It’s the perfect balance of textures and flavors. The initial crispness gives way to a soft, chewy interior, creating a truly delightful mouthfeel. The vibrant lemon zest and juice provide a refreshing tang that cuts through the sweetness, preventing the cookies from being overly cloying. Plus, they’re surprisingly easy to make, requiring minimal ingredients and effort. Whether you’re a seasoned baker or a kitchen novice, you can whip up a batch of these sunshine-filled cookies in no time. Get ready to brighten your day with these amazing cookies!

Ingredients:
- 1 cup (2 sticks) unsalted butter, softened
- 1 ½ cups granulated sugar
- 2 large eggs
- ¼ cup lemon juice, freshly squeezed
- 2 tablespoons lemon zest, finely grated
- 1 teaspoon vanilla extract
- 3 cups all-purpose flour
- 1 teaspoon baking soda
- ½ teaspoon salt
Lemon Glaze:
- 2 cups powdered sugar
- ¼ cup lemon juice, freshly squeezed (more if needed)
- 1 tablespoon lemon zest, finely grated
- 1 tablespoon unsalted butter, melted
Instructions:
Preparing the Cookie Dough:
- Cream the Butter and Sugar: In a large bowl, or in the bowl of your stand mixer, cream together the softened butter and granulated sugar until light and fluffy. This usually takes about 3-5 minutes on medium speed. Make sure to scrape down the sides of the bowl occasionally to ensure everything is evenly mixed. This step is crucial for creating a tender cookie.
- Add the Eggs: Beat in the eggs one at a time, mixing well after each addition. Again, scrape down the sides of the bowl to incorporate any stray ingredients.
- Incorporate the Lemon Flavor: Stir in the lemon juice, lemon zest, and vanilla extract. The mixture might look slightly curdled at this point, but don’t worry, it will come together in the next steps. The lemon zest is key to getting that bright, fresh lemon flavor, so don’t skimp on it!
- Combine Dry Ingredients: In a separate medium bowl, whisk together the all-purpose flour, baking soda, and salt. Whisking ensures that the baking soda and salt are evenly distributed throughout the flour, which is important for proper leavening and flavor.
- Gradually Add Dry Ingredients to Wet Ingredients: Gradually add the dry ingredients to the wet ingredients, mixing on low speed until just combined. Be careful not to overmix the dough, as this can lead to tough cookies. Mix until the flour is just incorporated, and then stop. A few streaks of flour are okay at this point.
- Chill the Dough: Wrap the dough in plastic wrap and chill in the refrigerator for at least 1 hour, or preferably 2 hours. Chilling the dough is essential because it allows the gluten to relax, which prevents the cookies from spreading too much during baking. It also makes the dough easier to handle. You can even chill it overnight if that’s more convenient.
Baking the Cookies:
- Preheat the Oven: Preheat your oven to 350°F (175°C). Line baking sheets with parchment paper. Parchment paper prevents the cookies from sticking to the baking sheets and makes cleanup a breeze.
- Shape the Cookies: Remove the chilled dough from the refrigerator. Using a cookie scoop or a spoon, drop rounded tablespoons of dough onto the prepared baking sheets, leaving about 2 inches between each cookie.
- Bake the Cookies: Bake for 10-12 minutes, or until the edges are lightly golden brown. The centers of the cookies should still be slightly soft. Keep a close eye on them, as baking times can vary depending on your oven.
- Cool the Cookies: Remove the baking sheets from the oven and let the cookies cool on the baking sheets for a few minutes before transferring them to a wire rack to cool completely. This prevents them from breaking while they are still warm and soft.
Preparing the Lemon Glaze:
- Combine Glaze Ingredients: In a medium bowl, whisk together the powdered sugar, lemon juice, lemon zest, and melted butter until smooth. Add more lemon juice, one teaspoon at a time, if needed to reach your desired consistency. The glaze should be thick enough to coat the cookies but thin enough to spread easily.
Glazing the Cookies:
- Glaze the Cookies: Once the cookies are completely cool, dip the tops of the cookies into the lemon glaze. Alternatively, you can drizzle the glaze over the cookies using a spoon or a fork.
- Let the Glaze Set: Place the glazed cookies back on the wire rack and let the glaze set completely before serving or storing. This usually takes about 30 minutes to an hour.
Tips and Variations:
For Extra Lemon Flavor:
- Add a few drops of lemon extract to the cookie dough for an even more intense lemon flavor.
- Roll the cookie dough in granulated sugar before baking for a slightly crunchy texture and added sweetness.
For a Tangier Glaze:
- Add a pinch of citric acid to the glaze for an extra tangy kick.
Storage Instructions:
- Store the cookies in an airtight container at room temperature for up to 3 days.
- For longer storage, you can freeze the cookies for up to 2 months. Thaw them completely before serving.
Troubleshooting:
- Cookies Spreading Too Much: If your cookies are spreading too much, it could be because the dough wasn’t chilled long enough, or your oven temperature is too low. Make sure to chill the dough for at least an hour and double-check your oven temperature.
- Cookies Too Dry: If your cookies are too dry, it could be because you overbaked them. Reduce the baking time by a minute or two next time.
- Glaze Too Thick: If your glaze is too thick, add a little more lemon juice, one teaspoon at a time, until it reaches the desired consistency.
- Glaze Too Thin: If your glaze is too thin, add a little more powdered sugar, one tablespoon at a time, until it reaches the desired consistency.
Serving Suggestions:
- Serve these lemon cooler cookies with a glass of cold milk or a cup of hot tea.
- They are also a perfect addition to a cookie platter or a dessert buffet.
- These cookies make a great gift for friends and family.
Why This Recipe Works:
This recipe is designed to deliver perfectly soft and chewy lemon cooler cookies every time. The combination of butter and sugar creates a tender crumb, while the lemon juice and zest provide a bright and refreshing flavor. Chilling the dough is crucial for preventing the cookies from spreading too much, and the lemon glaze adds a touch of sweetness and a beautiful finish.
Nutritional Information (Approximate, per cookie):
- Calories: 150
- Fat: 8g
- Saturated Fat: 5g
- Cholesterol: 30mg
- Sodium: 50mg
- Carbohydrates: 20g
- Sugar: 12g
- Protein: 1g
Equipment Needed:
- Large mixing bowl or stand mixer
- Medium mixing bowl
- Whisk
- Measuring cups and spoons
- Baking sheets
- Parchment paper
- Wire rack
Variations on the Glaze:
- Lavender Lemon Glaze: Infuse the lemon juice with dried lavender for a floral twist.
- Rosemary Lemon Glaze: Infuse the lemon juice with fresh rosemary for an herbaceous flavor.
- Pink Lemonade Glaze: Add a few drops of red food coloring to the glaze for a festive pink color.
Making the Dough Ahead of Time:
The cookie dough can be made ahead of time and stored in the refrigerator for up to 3 days. Just make sure to wrap it tightly in plastic wrap to prevent it from drying out. You can also freeze the dough for up to 2 months. Thaw it completely in the refrigerator before baking.
Tips for Perfect Lemon Zest:
When zesting lemons, be sure to only zest the yellow part of the peel, as the white pith underneath is bitter. Use a microplane or a fine grater to get the zest as fine as possible. You can also use a vegetable peeler to remove strips of the peel and then chop them finely.
Adjusting for Altitude:
If you live at a high altitude, you may need to adjust the recipe slightly. Try reducing the amount of baking soda by 1/4 teaspoon and adding an extra tablespoon of flour. You may also need to reduce the baking time by a minute or two.
Why Softened Butter is Important:
Using softened butter is crucial for creating a light and fluffy cookie dough. The softened butter traps air when creamed with the
Conclusion:
This isn’t just another cookie recipe; it’s a ticket to sunshine in every bite! These lemon cooler cookies are truly irresistible, and I wholeheartedly believe they deserve a permanent spot in your baking repertoire. The bright, zesty flavor, the melt-in-your-mouth texture, and the simple elegance of the powdered sugar coating combine to create a cookie experience that’s both comforting and utterly delightful. If you’re looking for a cookie that’s guaranteed to impress, whether you’re serving it at a party or simply enjoying it with a cup of tea, look no further.
But the best part? These cookies are incredibly versatile! While they’re perfect as is, there are so many ways to customize them to your liking. For a more intense lemon flavor, try adding a teaspoon of lemon extract to the dough. Or, if you’re feeling adventurous, you could experiment with other citrus flavors like lime or orange. Imagine a batch of lime cooler cookies with a hint of coconut pure tropical bliss!
Serving suggestions are endless. These cookies are fantastic on their own, but they also pair beautifully with a variety of beverages. A glass of cold milk is a classic choice, of course, but they’re equally delicious with a cup of hot coffee or tea. For a more sophisticated pairing, try serving them with a glass of chilled Moscato or a crisp Sauvignon Blanc. They also make a wonderful addition to a dessert platter, alongside other treats like brownies, cupcakes, and fruit tarts.
And don’t forget about gifting! These lemon cooler cookies are the perfect homemade present for friends, family, and neighbors. Package them in a pretty tin or a cellophane bag tied with a ribbon, and you’re sure to brighten someone’s day. They’re also a great option for bake sales and potlucks, where their unique flavor and charming appearance will definitely make them stand out from the crowd.
I’ve poured my heart into perfecting this recipe, and I’m confident that you’ll love it as much as I do. The process is straightforward, the ingredients are readily available, and the results are simply divine. So, what are you waiting for? Preheat your oven, gather your ingredients, and get ready to bake a batch of these incredible cookies.
I truly encourage you to give this recipe a try. It’s more than just a recipe; it’s an experience. It’s the joy of creating something delicious from scratch, the satisfaction of sharing it with loved ones, and the simple pleasure of savoring a truly exceptional cookie.
Once you’ve made them, I’d absolutely love to hear about your experience! Did you make any variations? What did you think of the flavor and texture? What did your friends and family say? Share your photos and comments I can’t wait to see your creations and hear your feedback. Happy baking, and enjoy every single bite of these delightful lemon cooler cookies! Let me know if you have any questions, and I’m always happy to help. I hope this recipe brings as much joy to your kitchen as it has to mine.
Lemon Cooler Cookies: The Ultimate Guide to Baking Perfection
Soft and chewy lemon cooler cookies with a bright, refreshing lemon glaze. Perfect for a sweet treat any time of day!
Ingredients
- 1 cup (2 sticks) unsalted butter, softened
- 1 ½ cups granulated sugar
- 2 large eggs
- ¼ cup lemon juice, freshly squeezed
- 2 tablespoons lemon zest, finely grated
- 1 teaspoon vanilla extract
- 3 cups all-purpose flour
- 1 teaspoon baking soda
- ½ teaspoon salt
- 2 cups powdered sugar
- ¼ cup lemon juice, freshly squeezed (more if needed)
- 1 tablespoon lemon zest, finely grated
- 1 tablespoon unsalted butter, melted
Instructions
- Cream the Butter and Sugar: In a large bowl, or in the bowl of your stand mixer, cream together the softened butter and granulated sugar until light and fluffy. This usually takes about 3-5 minutes on medium speed. Make sure to scrape down the sides of the bowl occasionally to ensure everything is evenly mixed. This step is crucial for creating a tender cookie.
- Add the Eggs: Beat in the eggs one at a time, mixing well after each addition. Again, scrape down the sides of the bowl to incorporate any stray ingredients.
- Incorporate the Lemon Flavor: Stir in the lemon juice, lemon zest, and vanilla extract. The mixture might look slightly curdled at this point, but don’t worry, it will come together in the next steps. The lemon zest is key to getting that bright, fresh lemon flavor, so don’t skimp on it!
- Combine Dry Ingredients: In a separate medium bowl, whisk together the all-purpose flour, baking soda, and salt. Whisking ensures that the baking soda and salt are evenly distributed throughout the flour, which is important for proper leavening and flavor.
- Gradually Add Dry Ingredients to Wet Ingredients: Gradually add the dry ingredients to the wet ingredients, mixing on low speed until just combined. Be careful not to overmix the dough, as this can lead to tough cookies. Mix until the flour is just incorporated, and then stop. A few streaks of flour are okay at this point.
- Chill the Dough: Wrap the dough in plastic wrap and chill in the refrigerator for at least 1 hour, or preferably 2 hours. Chilling the dough is essential because it allows the gluten to relax, which prevents the cookies from spreading too much during baking. It also makes the dough easier to handle. You can even chill it overnight if that’s more convenient.
- Preheat the Oven: Preheat your oven to 350°F (175°C). Line baking sheets with parchment paper. Parchment paper prevents the cookies from sticking to the baking sheets and makes cleanup a breeze.
- Shape the Cookies: Remove the chilled dough from the refrigerator. Using a cookie scoop or a spoon, drop rounded tablespoons of dough onto the prepared baking sheets, leaving about 2 inches between each cookie.
- Bake the Cookies: Bake for 10-12 minutes, or until the edges are lightly golden brown. The centers of the cookies should still be slightly soft. Keep a close eye on them, as baking times can vary depending on your oven.
- Cool the Cookies: Remove the baking sheets from the oven and let the cookies cool on the baking sheets for a few minutes before transferring them to a wire rack to cool completely. This prevents them from breaking while they are still warm and soft.
- Combine Glaze Ingredients: In a medium bowl, whisk together the powdered sugar, lemon juice, lemon zest, and melted butter until smooth. Add more lemon juice, one teaspoon at a time, if needed to reach your desired consistency. The glaze should be thick enough to coat the cookies but thin enough to spread easily.
- Glaze the Cookies: Once the cookies are completely cool, dip the tops of the cookies into the lemon glaze. Alternatively, you can drizzle the glaze over the cookies using a spoon or a fork.
- Let the Glaze Set: Place the glazed cookies back on the wire rack and let the glaze set completely before serving or storing. This usually takes about 30 minutes to an hour.
Notes
- For Extra Lemon Flavor: Add a few drops of lemon extract to the cookie dough for an even more intense lemon flavor. Roll the cookie dough in granulated sugar before baking for a slightly crunchy texture and added sweetness.
- For a Tangier Glaze: Add a pinch of citric acid to the glaze for an extra tangy kick.
- Storage Instructions: Store the cookies in an airtight container at room temperature for up to 3 days. For longer storage, you can freeze the cookies for up to 2 months. Thaw them completely before serving.
- Cookies Spreading Too Much: If your cookies are spreading too much, it could be because the dough wasn’t chilled long enough, or your oven temperature is too low. Make sure to chill the dough for at least an hour and double-check your oven temperature.
- Cookies Too Dry: If your cookies are too dry, it could be because you overbaked them. Reduce the baking time by a minute or two next time.
- Glaze Too Thick: If your glaze is too thick, add a little more lemon juice, one teaspoon at a time, until it reaches the desired consistency.
- Glaze Too Thin: If your glaze is too thin, add a little more powdered sugar, one tablespoon at a time, until it reaches the desired consistency.
- Serving Suggestions: Serve these lemon cooler cookies with a glass of cold milk or a cup of hot tea. They are also a perfect addition to a cookie platter or a dessert buffet. These cookies make a great gift for friends and family.