
Dumpster Fire Nachos: Prepare yourself for an explosion of flavor! Forget everything you thought you knew about nachos, because this recipe is about to set your taste buds ablaze (in the best way possible, of course!). We’re talking layers upon layers of cheesy, spicy, smoky goodness, piled high on a bed of crispy tortilla chips. This isn’t your average appetizer; it’s a culinary adventure.
While the name might conjure images of chaos, the beauty of Dumpster Fire Nachos lies in their customizable nature and the sheer joy of throwing together all your favorite ingredients. Think of it as a celebration of excess, a testament to the fact that sometimes, more is definitely more. While there’s no specific historical origin for this particular concoction, it embodies the spirit of resourceful cooking using what you have on hand to create something truly spectacular. It’s a dish born from late-night cravings and the desire for maximum flavor with minimal effort.
Why do people love them? Well, beyond the obvious deliciousness, these nachos are incredibly versatile. You can tailor the toppings to your liking, making them perfect for picky eaters or those with dietary restrictions. Plus, they’re incredibly easy to make, making them ideal for game day gatherings, casual get-togethers, or even a satisfying solo meal. The combination of textures the crunch of the chips, the gooey cheese, the tender meat, and the fresh toppings is simply irresistible. So, gather your ingredients, fire up your oven (or grill!), and get ready to experience the ultimate nacho indulgence. You won’t regret it!

Ingredients:
- For the Nachos:
- 1 large bag (12-16 oz) of your favorite tortilla chips (sturdy ones are best!)
- 2 cups shredded cheddar cheese
- 2 cups shredded Monterey Jack cheese
- 1 cup queso dip (store-bought or homemade)
- 1/2 cup pickled jalapeños, sliced
- 1/4 cup chopped fresh cilantro
- For the “Dumpster Fire” Chili:
- 1 tablespoon olive oil
- 1 large onion, chopped
- 2 cloves garlic, minced
- 1 red bell pepper, chopped
- 1 green bell pepper, chopped
- 1 pound ground beef (80/20 blend is great for flavor)
- 1 pound ground Italian sausage (sweet or hot, your preference!)
- 1 (15 ounce) can black beans, rinsed and drained
- 1 (15 ounce) can kidney beans, rinsed and drained
- 1 (15 ounce) can pinto beans, rinsed and drained
- 1 (28 ounce) can crushed tomatoes
- 1 (15 ounce) can tomato sauce
- 1 (4 ounce) can diced green chilies
- 2 tablespoons chili powder
- 1 tablespoon cumin
- 1 teaspoon smoked paprika
- 1/2 teaspoon cayenne pepper (optional, for extra heat)
- 1 teaspoon dried oregano
- 1/2 teaspoon salt (or to taste)
- 1/4 teaspoon black pepper (or to taste)
- 1 cup beef broth
- For the “Toxic Waste” Toppings:
- 1 cup sour cream
- 1/2 cup guacamole (store-bought or homemade)
- 1/4 cup chopped green onions
- Hot sauce, to taste (choose a variety for different heat levels!)
- Pickled onions (optional)
- Crumbled bacon (optional)
Preparing the “Dumpster Fire” Chili:
- Sauté the Aromatics: In a large, heavy-bottomed pot or Dutch oven, heat the olive oil over medium heat. Add the chopped onion and cook until softened and translucent, about 5-7 minutes. Add the minced garlic, chopped red bell pepper, and chopped green bell pepper and cook for another 3-5 minutes, until the peppers are slightly tender. Make sure to stir frequently to prevent burning. The goal here is to build a flavorful base for our chili.
- Brown the Meats: Add the ground beef and ground Italian sausage to the pot. Break up the meat with a spoon and cook until browned, draining off any excess grease. Browning the meat is crucial for developing a rich, deep flavor. Don’t be afraid to let it get a little crispy!
- Add the Beans and Tomatoes: Stir in the rinsed and drained black beans, kidney beans, and pinto beans. Then, add the crushed tomatoes, tomato sauce, and diced green chilies. Give everything a good stir to combine.
- Spice it Up: Add the chili powder, cumin, smoked paprika, cayenne pepper (if using), dried oregano, salt, and pepper. Stir well to ensure the spices are evenly distributed. The spices are what really give this chili its “Dumpster Fire” kick! Adjust the amount of cayenne pepper to your desired level of heat.
- Simmer and Thicken: Pour in the beef broth. Bring the chili to a simmer, then reduce the heat to low, cover, and cook for at least 1 hour, or up to 2-3 hours, stirring occasionally. The longer it simmers, the more the flavors will meld together and the chili will thicken. If the chili becomes too thick, add a little more beef broth. If it’s too thin, simmer uncovered for a bit longer.
- Taste and Adjust: After simmering, taste the chili and adjust the seasonings as needed. You might want to add more salt, pepper, chili powder, or cayenne pepper to achieve your perfect flavor profile. Remember, you can always add more, but you can’t take it away!
Assembling the Dumpster Fire Nachos:
- Preheat the Oven (Optional): If you want to melt the cheese evenly, preheat your oven to 350°F (175°C). Alternatively, you can use a broiler for a quicker melt, but watch carefully to prevent burning. If you don’t want to use the oven, you can skip this step and just rely on the heat of the chili to melt the cheese slightly.
- Layer the Chips: Spread a generous layer of tortilla chips on a large baking sheet or oven-safe platter. Make sure the chips are arranged in a single layer as much as possible to ensure even coverage.
- Cheese, Please!: Sprinkle half of the shredded cheddar cheese and half of the shredded Monterey Jack cheese evenly over the chips.
- Chili Time: Spoon a generous amount of the “Dumpster Fire” chili over the cheese-covered chips. Try to distribute the chili evenly so that every chip gets a taste.
- More Cheese!: Sprinkle the remaining cheddar and Monterey Jack cheese over the chili. We’re going for maximum cheesy goodness here!
- Melt the Cheese (Optional): If using the oven, bake the nachos for 5-10 minutes, or until the cheese is melted and bubbly. If using the broiler, broil for 1-2 minutes, watching very closely to prevent burning. If not using the oven, the heat from the chili will melt the cheese slightly.
- Add the Queso: Drizzle the queso dip over the melted cheese. You can warm the queso slightly in the microwave for easier drizzling.
- Top it Off: Sprinkle the pickled jalapeños and chopped fresh cilantro over the nachos.
- Toxic Waste Time!: Dollop sour cream and guacamole over the nachos. Sprinkle with chopped green onions.
- Heat it Up!: Serve immediately with a variety of hot sauces on the side, pickled onions, and crumbled bacon (if desired). Let everyone customize their nachos with their favorite toppings!
Tips and Variations:
- Meat Variations: Feel free to experiment with different types of meat in the chili. Ground turkey, shredded chicken, or even chorizo would be delicious additions. You could also make a vegetarian version by omitting the meat and adding more beans or vegetables.
- Bean Variations: Don’t be afraid to swap out the beans for your favorites. Great Northern beans, cannellini beans, or even lentils would work well.
- Vegetable Variations: Add other vegetables to the chili, such as corn, zucchini, or diced tomatoes.
- Cheese Variations: Use different types of cheese, such as pepper jack, Colby jack, or even crumbled queso fresco.
- Spice Level: Adjust the amount of cayenne pepper and hot sauce to your desired level of heat. If you’re sensitive to spice, start with a small amount and add more to taste.
- Chip Choice: Choose sturdy tortilla chips that can hold up to the weight of the chili and toppings. Restaurant-style chips or thicker-cut chips are good options.
- Make Ahead: The chili can be made ahead of time and stored in the refrigerator for up to 3 days. Reheat the chili before assembling the nachos.
- Individual Nachos: For individual servings, assemble the nachos on smaller plates or baking sheets.
- Slow Cooker Option: You can also make the chili in a slow cooker. Brown the meat and sauté the vegetables as directed, then transfer everything to the slow cooker. Cook on low for 6-8 hours or on high for 3-4 hours.
- Grilling Option: For a smoky flavor, grill the bell peppers and onions before adding them to the chili.
- Leftovers: Leftover chili can be used in other dishes, such as chili dogs, chili mac, or chili cheese fries.
Serving Suggestions:
- Serve the Dumpster Fire Nachos immediately while the cheese is melted and the chili is hot.
- Offer a variety of toppings and hot sauces so that everyone can customize their nachos to their liking.
- These nachos are perfect for game day, parties, or any casual gathering.
- Pair them with your favorite beer or soft drink.
Enjoy your delicious and slightly chaotic Dumpster Fire Nachos! They’re sure to be a crowd-pleaser.
Conclusion:
Well, there you have it! My take on Dumpster Fire Nachos a flavor explosion that’s surprisingly delightful and guaranteed to be the talk of your next gathering. I know, the name might raise an eyebrow (or two!), but trust me, once you taste the symphony of spicy, savory, and cheesy goodness, you’ll understand why this unconventional creation is an absolute must-try.
Why should you make these nachos? Because they’re ridiculously easy to assemble, incredibly customizable, and deliver a taste experience that’s far more sophisticated than the name implies. Forget boring, predictable nachos; these are a conversation starter, a crowd-pleaser, and a testament to the fact that sometimes, the most unexpected combinations yield the most delicious results. They are also perfect for using up leftover ingredients, reducing food waste and saving you money. Who doesn’t love that?
But the fun doesn’t stop there! Feel free to experiment with different toppings and variations to create your own signature version of these fiery delights.
Serving Suggestions and Variations:
* Spice it up (or down): Adjust the amount of hot sauce and jalapeños to suit your personal preference. If you’re feeling brave, add a dash of ghost pepper sauce for an extra kick! For a milder version, use a sweeter barbecue sauce and omit the jalapeños altogether.
* Protein Power: While I used shredded chicken, you could easily substitute ground beef, pulled pork, chorizo, or even black beans for a vegetarian option. Tofu crumbles, seasoned with taco seasoning, would also be a fantastic addition.
* Cheese, Please!: I’m a big fan of the cheddar-jack blend, but feel free to experiment with other cheeses like Monterey Jack, pepper jack, or even a smoky Gouda. A drizzle of queso fresco after baking adds a lovely creamy touch.
* Veggie Variety: Add some extra veggies to the mix! Diced bell peppers, onions, corn, black beans, or even roasted sweet potatoes would all be delicious additions.
* Dip It Good: Serve with a side of guacamole, sour cream, or a cool ranch dressing to balance out the heat. A mango salsa would also be a refreshing complement.
* Dessert Nachos: For a sweet twist, try making dessert nachos with cinnamon sugar tortilla chips, melted chocolate, marshmallows, and your favorite candy toppings.
These Dumpster Fire Nachos are more than just a recipe; they’re an invitation to get creative in the kitchen and have some fun. Don’t be afraid to experiment, adapt, and make them your own. I truly believe that everyone should experience the unique flavor profile of these nachos at least once.
So, what are you waiting for? Gather your ingredients, preheat your oven, and get ready to embark on a culinary adventure. I’m confident that you’ll be pleasantly surprised by the deliciousness that awaits.
I’m so excited for you to try this recipe! Once you’ve made your own version of these Dumpster Fire Nachos, I’d love to hear about it. Share your photos and experiences in the comments below. Tell me what variations you tried, what toppings you loved, and what your friends and family thought. Let’s create a community of nacho enthusiasts and inspire each other with our culinary creations! Happy nacho-ing!
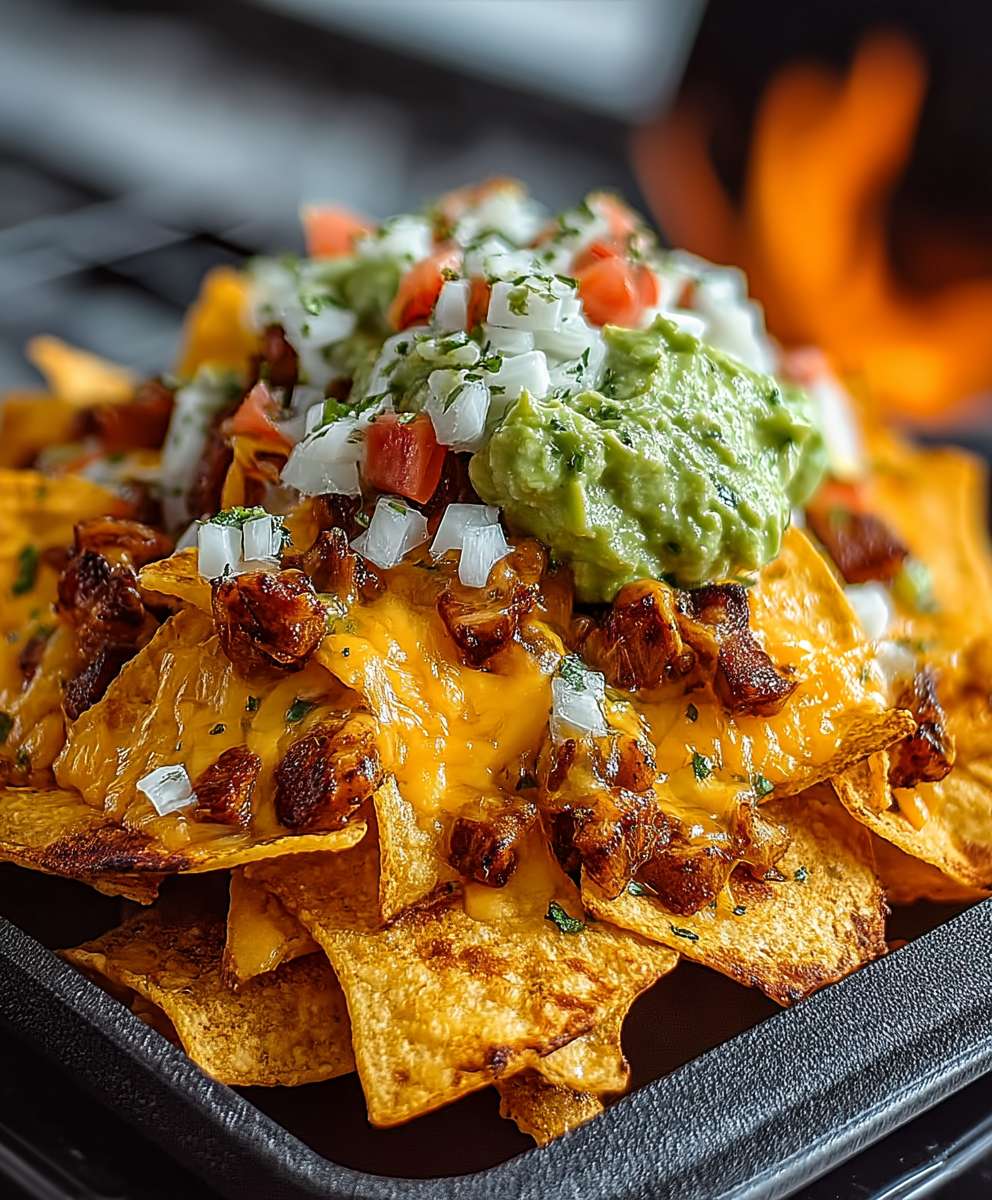
Dumpster Fire Nachos: The Ultimate Guide to Spicy, Cheesy Goodness
Loaded nachos piled high with a flavorful "Dumpster Fire" chili, melted cheese, and all the best toppings! A guaranteed crowd-pleaser.
Ingredients
- 1 large bag (12-16 oz) tortilla chips (sturdy)
- 2 cups shredded cheddar cheese
- 2 cups shredded Monterey Jack cheese
- 1 cup queso dip (store-bought or homemade)
- 1/2 cup pickled jalapeños, sliced
- 1/4 cup chopped fresh cilantro
- 1 tablespoon olive oil
- 1 large onion, chopped
- 2 cloves garlic, minced
- 1 red bell pepper, chopped
- 1 green bell pepper, chopped
- 1 pound ground beef (80/20 blend)
- 1 pound ground Italian sausage (sweet or hot)
- 1 (15 ounce) can black beans, rinsed and drained
- 1 (15 ounce) can kidney beans, rinsed and drained
- 1 (15 ounce) can pinto beans, rinsed and drained
- 1 (28 ounce) can crushed tomatoes
- 1 (15 ounce) can tomato sauce
- 1 (4 ounce) can diced green chilies
- 2 tablespoons chili powder
- 1 tablespoon cumin
- 1 teaspoon smoked paprika
- 1/2 teaspoon cayenne pepper (optional)
- 1 teaspoon dried oregano
- 1/2 teaspoon salt (or to taste)
- 1/4 teaspoon black pepper (or to taste)
- 1 cup beef broth
- 1 cup sour cream
- 1/2 cup guacamole (store-bought or homemade)
- 1/4 cup chopped green onions
- Hot sauce, to taste
- Pickled onions (optional)
- Crumbled bacon (optional)
Instructions
- In a large, heavy-bottomed pot or Dutch oven, heat the olive oil over medium heat. Add the chopped onion and cook until softened and translucent, about 5-7 minutes. Add the minced garlic, chopped red bell pepper, and chopped green bell pepper and cook for another 3-5 minutes, until the peppers are slightly tender. Stir frequently to prevent burning.
- Add the ground beef and ground Italian sausage to the pot. Break up the meat with a spoon and cook until browned, draining off any excess grease.
- Stir in the rinsed and drained black beans, kidney beans, and pinto beans. Then, add the crushed tomatoes, tomato sauce, and diced green chilies. Give everything a good stir to combine.
- Add the chili powder, cumin, smoked paprika, cayenne pepper (if using), dried oregano, salt, and pepper. Stir well to ensure the spices are evenly distributed.
- Pour in the beef broth. Bring the chili to a simmer, then reduce the heat to low, cover, and cook for at least 1 hour, or up to 2-3 hours, stirring occasionally. If the chili becomes too thick, add a little more beef broth. If it’s too thin, simmer uncovered for a bit longer.
- After simmering, taste the chili and adjust the seasonings as needed.
- If you want to melt the cheese evenly, preheat your oven to 350°F (175°C). Alternatively, you can use a broiler for a quicker melt, but watch carefully to prevent burning.
- Spread a generous layer of tortilla chips on a large baking sheet or oven-safe platter. Make sure the chips are arranged in a single layer as much as possible to ensure even coverage.
- Sprinkle half of the shredded cheddar cheese and half of the shredded Monterey Jack cheese evenly over the chips.
- Spoon a generous amount of the “Dumpster Fire” chili over the cheese-covered chips. Try to distribute the chili evenly so that every chip gets a taste.
- Sprinkle the remaining cheddar and Monterey Jack cheese over the chili.
- If using the oven, bake the nachos for 5-10 minutes, or until the cheese is melted and bubbly. If using the broiler, broil for 1-2 minutes, watching very closely to prevent burning.
- Drizzle the queso dip over the melted cheese. You can warm the queso slightly in the microwave for easier drizzling.
- Sprinkle the pickled jalapeños and chopped fresh cilantro over the nachos.
- Dollop sour cream and guacamole over the nachos. Sprinkle with chopped green onions.
- Serve immediately with a variety of hot sauces on the side, pickled onions, and crumbled bacon (if desired).
Notes
- Meat Variations: Ground turkey, shredded chicken, or chorizo can be used in the chili.
- Bean Variations: Great Northern beans, cannellini beans, or lentils can be used.
- Vegetable Variations: Corn, zucchini, or diced tomatoes can be added to the chili.
- Cheese Variations: Pepper jack, Colby jack, or queso fresco can be used.
- Spice Level: Adjust the amount of cayenne pepper and hot sauce to your desired level of heat.
- Chip Choice: Choose sturdy tortilla chips.
- Make Ahead: The chili can be made ahead of time and stored in the refrigerator for up to 3 days.
- Individual Nachos: Assemble the nachos on smaller plates or baking sheets for individual servings.
- Slow Cooker Option: The chili can be made in a slow cooker. Brown the meat and sauté the vegetables as directed, then transfer everything to the slow cooker. Cook on low for 6-8 hours or on high for 3-4 hours.
- Grilling Option: Grill the bell peppers and onions before adding them to the chili for a smoky flavor.
- Leftovers: Leftover chili can be used in other dishes, such as chili dogs, chili mac, or chili cheese fries.
- Serving Suggestions: Serve the Dumpster Fire Nachos immediately while the cheese is melted and the chili is hot. Offer a variety of toppings and hot sauces. Perfect for game day, parties, or any casual gathering. Pair them with your favorite beer or soft drink.