
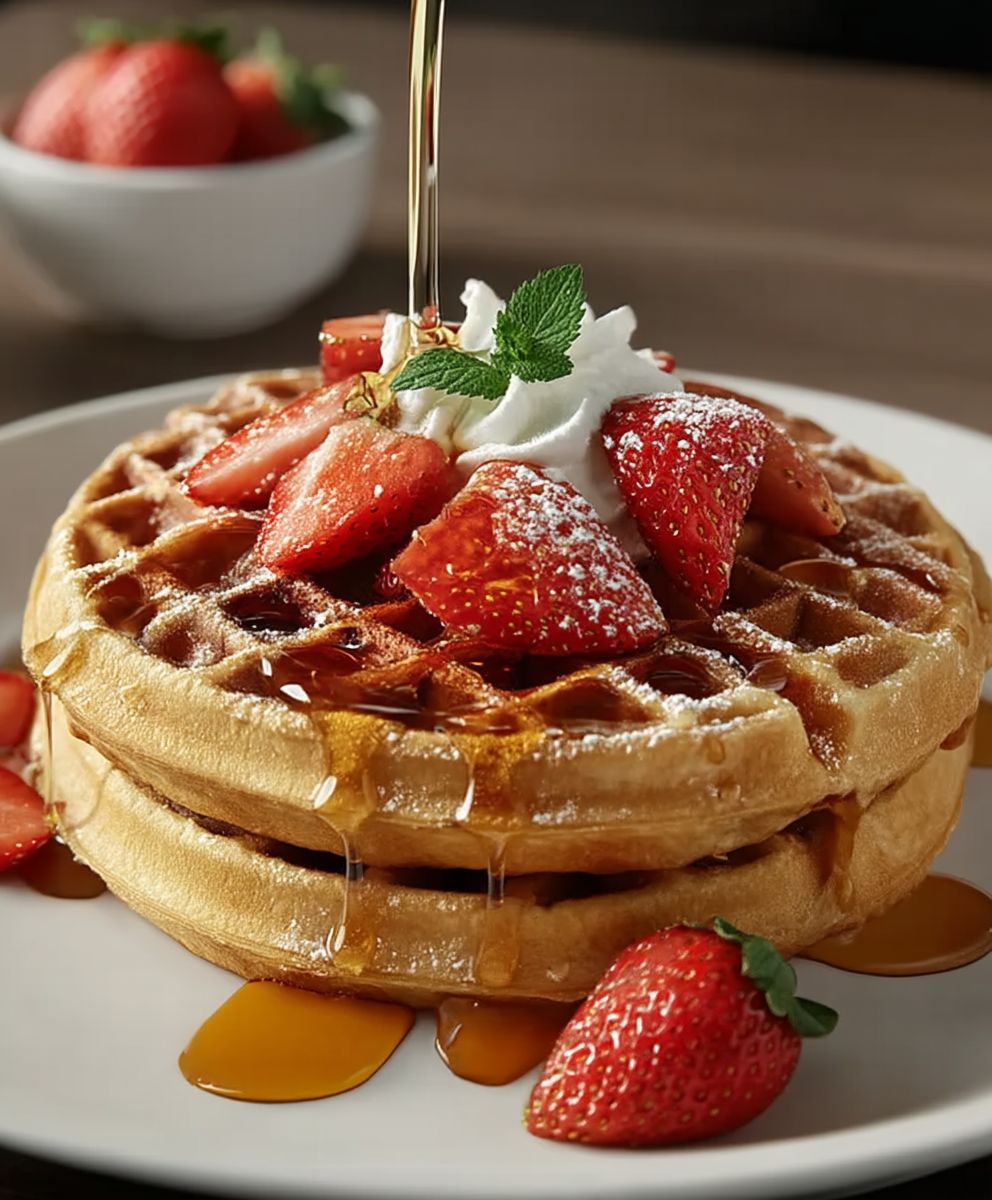
Buttermilk waffles strawberries: Is there a more iconic breakfast combination? I think not! Imagine waking up to the tantalizing aroma of freshly baked waffles, their golden-brown surfaces begging to be drenched in sweet, ruby-red strawberries and a generous dollop of whipped cream. Its a symphony of flavors and textures that simply screams “weekend indulgence.”
Waffles, in their various forms, have been gracing breakfast tables for centuries. Their origins can be traced back to medieval Europe, where early versions were cooked over open fires using patterned irons. Over time, they evolved into the light and airy delights we know and love today. The addition of buttermilk adds a subtle tang and incredible tenderness, elevating the waffle experience to a whole new level. And strawberries? Well, they’re the perfect complement, offering a burst of freshness and natural sweetness that balances the richness of the waffle.
People adore buttermilk waffles strawberries for so many reasons. The combination is visually appealing, incredibly delicious, and surprisingly easy to make. The slight tang of the buttermilk, the crispy edges and soft interior of the waffle, and the juicy sweetness of the strawberries create a truly unforgettable culinary experience. Whether you’re looking for a special breakfast treat or a delightful brunch option, this recipe is guaranteed to impress. So, grab your waffle iron and let’s get started!

Ingredients:
- 2 cups all-purpose flour
- 2 tablespoons granulated sugar
- 4 teaspoons baking powder
- 1/2 teaspoon baking soda
- 1/2 teaspoon salt
- 2 large eggs
- 2 cups buttermilk
- 1/4 cup (1/2 stick) unsalted butter, melted
- 1 teaspoon vanilla extract
- Fresh strawberries, sliced, for serving
- Maple syrup, for serving
- Whipped cream, for serving (optional)
- Powdered sugar, for dusting (optional)
Preparing the Waffle Batter
Alright, let’s get started on these amazing buttermilk waffles! The key to fluffy waffles is not overmixing the batter, so we’ll be gentle with it.
- Combine the dry ingredients: In a large bowl, whisk together the flour, sugar, baking powder, baking soda, and salt. Make sure everything is evenly distributed. This helps the baking powder and soda work their magic and gives us that light and airy texture we’re after.
- Whisk the wet ingredients: In a separate bowl, whisk together the eggs, buttermilk, melted butter, and vanilla extract. The melted butter should be cooled slightly before adding it to the eggs, so you don’t accidentally cook them.
- Combine wet and dry ingredients: Pour the wet ingredients into the dry ingredients. Using a rubber spatula or a whisk, gently fold the wet ingredients into the dry ingredients until just combined. Do not overmix! A few lumps are perfectly fine. Overmixing develops the gluten in the flour, which can result in tough waffles. We want tender, fluffy waffles, not hockey pucks!
- Let the batter rest (optional but recommended): Cover the bowl with plastic wrap and let the batter rest for 5-10 minutes. This allows the gluten to relax and the baking powder to activate, resulting in even lighter and fluffier waffles. While the batter rests, you can preheat your waffle iron and prepare your toppings.
Cooking the Waffles
Now for the fun part cooking those waffles! Every waffle iron is a little different, so you might need to adjust the cooking time slightly to get your waffles perfectly golden brown.
- Preheat your waffle iron: Preheat your waffle iron according to the manufacturer’s instructions. Most waffle irons have an indicator light that will tell you when it’s ready.
- Grease the waffle iron: Lightly grease the waffle iron with cooking spray or melted butter. This will prevent the waffles from sticking and make them easier to remove.
- Pour the batter onto the waffle iron: Pour the batter onto the hot waffle iron, using the amount recommended by the manufacturer. Usually, it’s about 1/2 to 3/4 cup of batter per waffle, but check your waffle iron’s instructions. Be careful not to overfill the waffle iron, as the batter will expand as it cooks.
- Cook the waffles: Close the waffle iron and cook the waffles according to the manufacturer’s instructions, usually for 3-5 minutes, or until they are golden brown and crisp. The indicator light on your waffle iron should tell you when the waffles are done. If your waffle iron doesn’t have an indicator light, you can carefully lift the lid to check the waffles.
- Remove the waffles: Carefully remove the waffles from the waffle iron using a fork or tongs. Be careful not to scratch the non-stick surface of the waffle iron.
- Keep the waffles warm (optional): If you’re making a large batch of waffles, you can keep them warm in a preheated oven (200°F) until you’re ready to serve them. Place the waffles on a wire rack in a single layer to prevent them from getting soggy.
Serving and Enjoying Your Buttermilk Waffles
This is the best part! Time to load up those waffles with all your favorite toppings and dig in!
- Prepare the strawberries: Wash and hull the fresh strawberries. Slice them into thin slices.
- Assemble the waffles: Place the warm waffles on plates. Top with sliced strawberries, a generous drizzle of maple syrup, and a dollop of whipped cream, if desired.
- Dust with powdered sugar (optional): For an extra touch of sweetness and elegance, dust the waffles with powdered sugar.
- Serve immediately: Serve the waffles immediately and enjoy! These waffles are best enjoyed fresh, while they are still warm and crispy.
Tips and Variations
Want to customize your waffles? Here are a few ideas:
- Add blueberries: Fold 1 cup of fresh or frozen blueberries into the batter before cooking.
- Add chocolate chips: Fold 1/2 cup of chocolate chips into the batter before cooking.
- Make them whole wheat: Substitute 1 cup of all-purpose flour with 1 cup of whole wheat flour.
- Add lemon zest: Add 1 tablespoon of lemon zest to the batter for a bright, citrusy flavor.
- Spice it up: Add 1/2 teaspoon of cinnamon or nutmeg to the batter for a warm, comforting flavor.
- Different toppings: Get creative with your toppings! Try fresh berries, bananas, peaches, chocolate sauce, caramel sauce, nuts, or even a scoop of ice cream.
Troubleshooting
Sometimes things don’t go exactly as planned. Here are a few common waffle problems and how to fix them:
- Waffles are sticking to the waffle iron: Make sure you’re greasing the waffle iron properly. You may also need to adjust the cooking time.
- Waffles are not cooking evenly: Make sure your waffle iron is preheated properly. You may also need to adjust the amount of batter you’re using.
- Waffles are too dense: You may have overmixed the batter. Be careful not to overmix the batter next time.
- Waffles are not crispy: You may need to cook the waffles for a longer time. You can also try adding a tablespoon of cornstarch to the batter.
Storage
If you have leftover waffles, you can store them in an airtight container in the refrigerator for up to 3 days. To reheat, toast them in a toaster or oven until warm and crispy.
You can also freeze waffles for longer storage. Place the waffles in a single layer on a baking sheet and freeze for 1-2 hours, or until solid. Then, transfer the waffles to a freezer bag or airtight container and store in the freezer for up to 2 months. To reheat, toast them in a toaster or oven until warm and crispy.
Enjoy your homemade buttermilk waffles!
Conclusion:
So, there you have it! This buttermilk waffle recipe, bursting with that subtle tang and yielding the most incredibly light and fluffy texture, is truly a must-try. I know, I know, everyone claims their waffle recipe is the best, but trust me on this one. The combination of simple ingredients, the easy-to-follow steps, and the sheer deliciousness of the final product make it a winner every single time. It’s the kind of breakfast that transforms an ordinary morning into something special, something worth savoring.
But why is it a must-try? Because it’s more than just a waffle; it’s an experience. It’s the satisfying sizzle as the batter hits the hot iron, the intoxicating aroma that fills your kitchen, and the pure joy of that first bite. It’s the perfect canvas for your favorite toppings, allowing you to create a personalized breakfast masterpiece. And let’s be honest, who doesn’t love a good waffle?
Now, let’s talk serving suggestions and variations because the possibilities are truly endless! Of course, you can’t go wrong with the classic combination of fresh strawberries and a dollop of whipped cream. The sweetness of the berries perfectly complements the slight tang of the buttermilk, creating a symphony of flavors in your mouth. But don’t stop there!
Consider drizzling your waffles with maple syrup, honey, or even a homemade berry compote. Add a sprinkle of powdered sugar for an extra touch of elegance. For a more decadent treat, try topping them with chocolate sauce and a scoop of vanilla ice cream.
If you’re feeling adventurous, why not experiment with different flavor combinations? Add a handful of blueberries or raspberries to the batter for a burst of fruity goodness. Sprinkle in some chocolate chips for a chocolate lover’s dream. Or, for a savory twist, try adding some shredded cheese and herbs to the batter.
For a brunch gathering, consider setting up a waffle bar with a variety of toppings and sauces, allowing your guests to create their own personalized waffle creations. It’s a fun and interactive way to elevate your brunch game and impress your friends and family.
And speaking of family, these waffles are a guaranteed hit with kids! They’ll love helping you mix the batter and choosing their favorite toppings. It’s a great way to get them involved in the kitchen and create lasting memories together.
I truly believe that this buttermilk waffle recipe will become a staple in your household. It’s simple enough for a weekday breakfast but special enough for a weekend brunch. It’s versatile, adaptable, and, most importantly, incredibly delicious.
So, what are you waiting for? Grab your ingredients, dust off your waffle iron, and get ready to experience waffle perfection. I’m confident that you’ll love this recipe as much as I do.
And once you’ve tried it, I’d love to hear about your experience! Share your photos and comments on social media using [Your Hashtag Here]. Let me know what toppings you used, what variations you tried, and what your family thought. I can’t wait to see your waffle creations! Happy waffle-making!
Buttermilk Waffles Strawberries: The Perfect Breakfast Recipe
Fluffy and delicious homemade buttermilk waffles, perfect for a weekend brunch! Top with fresh strawberries, maple syrup, and whipped cream for a delightful treat.
Ingredients
- 2 cups all-purpose flour
- 2 tablespoons granulated sugar
- 4 teaspoons baking powder
- 1/2 teaspoon baking soda
- 1/2 teaspoon salt
- 2 large eggs
- 2 cups buttermilk
- 1/4 cup (1/2 stick) unsalted butter, melted
- 1 teaspoon vanilla extract
- Fresh strawberries, sliced, for serving
- Maple syrup, for serving
- Whipped cream, for serving (optional)
- Powdered sugar, for dusting (optional)
Instructions
- Combine Dry Ingredients: In a large bowl, whisk together the flour, sugar, baking powder, baking soda, and salt.
- Whisk Wet Ingredients: In a separate bowl, whisk together the eggs, buttermilk, melted butter (cooled slightly), and vanilla extract.
- Combine Wet and Dry: Pour the wet ingredients into the dry ingredients. Gently fold until just combined. Do not overmix; a few lumps are okay.
- Rest (Optional): Cover and let the batter rest for 5-10 minutes.
- Preheat Waffle Iron: Preheat your waffle iron according to the manufacturer’s instructions.
- Grease Waffle Iron: Lightly grease the waffle iron with cooking spray or melted butter.
- Pour Batter: Pour the batter onto the hot waffle iron, using the amount recommended by the manufacturer (usually 1/2 to 3/4 cup per waffle).
- Cook Waffles: Close the waffle iron and cook for 3-5 minutes, or until golden brown and crisp, according to the manufacturer’s instructions.
- Remove Waffles: Carefully remove the waffles from the waffle iron.
- Keep Warm (Optional): Keep waffles warm in a preheated oven (200°F) on a wire rack.
- Prepare Strawberries: Wash, hull, and slice the strawberries.
- Assemble Waffles: Place warm waffles on plates. Top with sliced strawberries, maple syrup, and whipped cream (if using).
- Dust with Powdered Sugar (Optional): Dust with powdered sugar.
- Serve: Serve immediately and enjoy!
Notes
- Don’t Overmix: Overmixing the batter will result in tough waffles.
- Resting the Batter: Resting the batter allows the gluten to relax and the baking powder to activate, resulting in lighter and fluffier waffles.
- Waffle Iron Variations: Cooking times may vary depending on your waffle iron.
- Add-ins: Fold in blueberries, chocolate chips, lemon zest, or spices for variations.
- Topping Ideas: Get creative with your toppings! Try fresh berries, bananas, peaches, chocolate sauce, caramel sauce, nuts, or even a scoop of ice cream.
- Storage: Store leftover waffles in an airtight container in the refrigerator for up to 3 days. Reheat in a toaster or oven.
- Freezing: Freeze waffles in a single layer on a baking sheet, then transfer to a freezer bag for up to 2 months. Reheat in a toaster or oven.