
Cheesy Garlic Breadsticks: Is there anything more comforting and universally loved? I think not! Imagine sinking your teeth into a warm, golden-brown breadstick, its surface glistening with melted cheese and fragrant garlic butter. The aroma alone is enough to make your mouth water, promising a delightful combination of savory, cheesy, and garlicky goodness.
While the exact origins of breadsticks are debated, their history stretches back centuries, with variations found in numerous cultures. The addition of garlic and cheese, however, is a more modern and distinctly crowd-pleasing twist. Think of them as a delicious evolution of classic Italian bread, reimagined for ultimate snacking satisfaction.
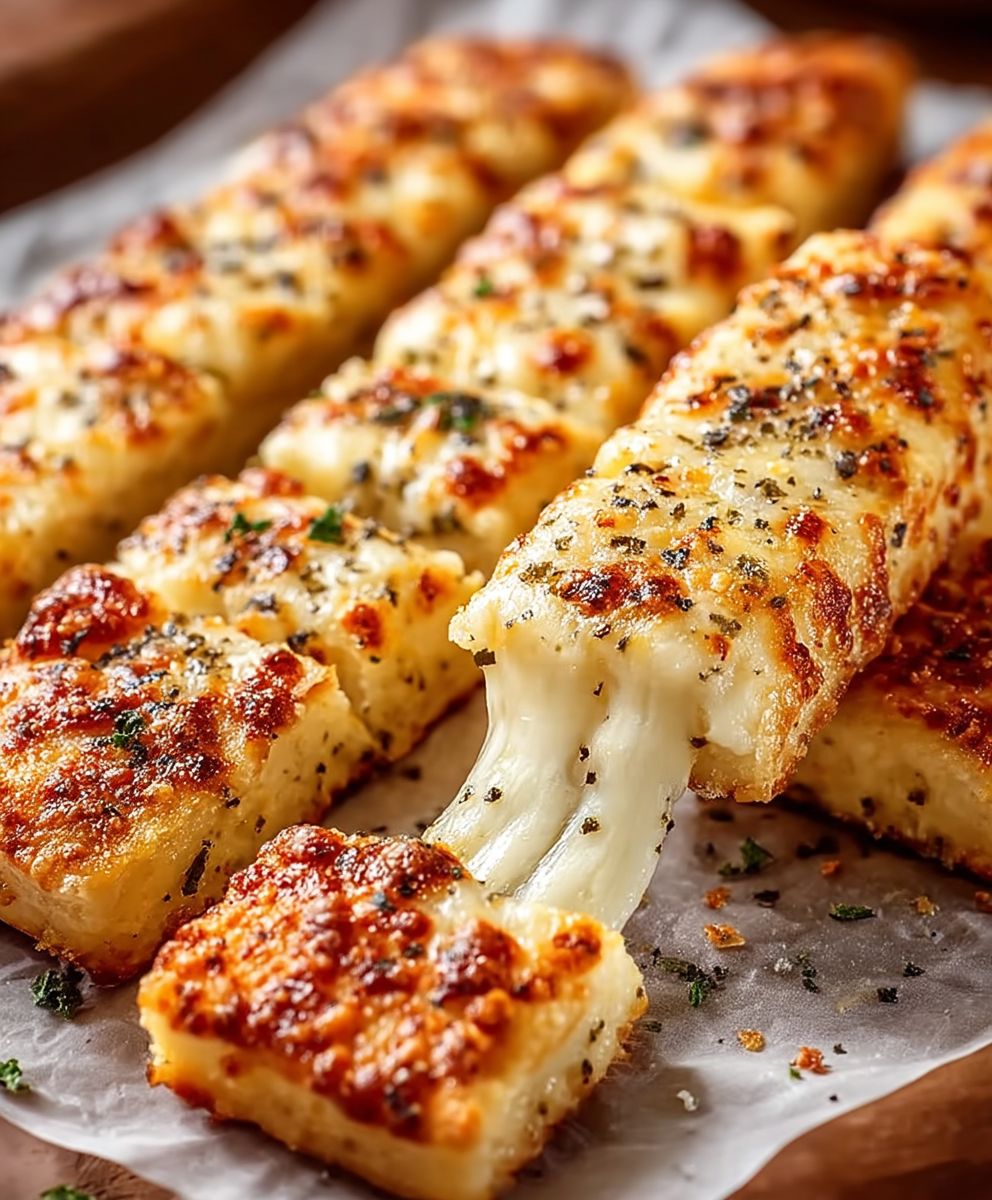
What makes cheesy garlic breadsticks so irresistible? It’s the perfect marriage of textures and flavors. The soft, chewy interior of the breadstick contrasts beautifully with the crispy, golden exterior. The garlic butter infuses every bite with a savory depth, while the melted cheese adds a creamy, rich indulgence. They’re incredibly easy to make, perfect as an appetizer, a side dish with pasta, or even a satisfying snack on their own. Plus, who can resist the allure of warm, cheesy, garlicky bread? I know I can’t!

Ingredients:
- 1 pound pizza dough (store-bought or homemade)
- 1/2 cup (1 stick) unsalted butter, melted
- 4 cloves garlic, minced
- 1 teaspoon dried Italian seasoning
- 1/2 teaspoon garlic powder
- 1/4 teaspoon salt
- 1/4 teaspoon black pepper
- 1 1/2 cups shredded mozzarella cheese
- 1/2 cup grated Parmesan cheese
- Optional: Fresh parsley, chopped, for garnish
- Optional: Marinara sauce, for dipping
Preparing the Garlic Butter:
Okay, let’s get started! The first thing we need to do is create that amazing garlic butter that will make these breadsticks irresistible. This is super easy, I promise!
-
Melt the butter: In a small, microwave-safe bowl, melt the butter. You can do this in the microwave in 30-second intervals, stirring in between, until it’s completely melted. Alternatively, you can melt it in a small saucepan over low heat on the stovetop. Just keep an eye on it so it doesn’t burn!
-
Add the garlic and seasonings: Once the butter is melted, add the minced garlic, Italian seasoning, garlic powder, salt, and pepper. Stir everything together really well to combine all those delicious flavors. The warmth of the butter will help the garlic release its aroma, making it even more potent and flavorful. I like to let this mixture sit for a few minutes to really let the flavors meld together. The longer it sits, the more garlicky it will be!
Preparing the Dough:
Now that our garlic butter is ready, let’s move on to the dough. Whether you’re using store-bought or homemade, the key is to handle it gently to keep it nice and airy.
-
Preheat the oven: Preheat your oven to 400°F (200°C). This is crucial for getting that golden-brown, crispy crust we all crave. Make sure your oven is fully preheated before you put the breadsticks in.
-
Prepare the baking sheet: Line a large baking sheet with parchment paper. This will prevent the breadsticks from sticking and make cleanup a breeze. If you don’t have parchment paper, you can lightly grease the baking sheet with cooking spray.
-
Stretch or roll out the dough: On a lightly floured surface, gently stretch or roll out the pizza dough into a large rectangle, about 12×16 inches. Try to keep it relatively even in thickness. If you’re using store-bought dough, it might already be in a round shape, so just stretch it out to a similar size.
-
Cut the dough into strips: Using a pizza cutter or a sharp knife, cut the dough into strips that are about 1 inch wide and 6-8 inches long. These will be our breadsticks! Don’t worry if they’re not perfectly uniform; a little variation adds character.
-
Arrange the breadsticks on the baking sheet: Place the breadsticks on the prepared baking sheet, leaving a little space between each one. This will allow them to bake evenly and get crispy on all sides.
Assembling and Baking:
Alright, we’re almost there! Now comes the fun part: slathering on that garlic butter and cheese!
-
Brush with garlic butter: Using a pastry brush, generously brush the garlic butter mixture over the breadsticks. Make sure to get every nook and cranny! Don’t be shy; the more garlic butter, the better. You might have a little bit left over, and that’s okay. You can save it for dipping later!
-
Sprinkle with cheese: Sprinkle the mozzarella and Parmesan cheese evenly over the breadsticks. I like to use a combination of both cheeses for the best flavor and texture. The mozzarella will melt beautifully and create that gooey, cheesy goodness, while the Parmesan will add a salty, nutty flavor.
-
Bake: Bake in the preheated oven for 12-15 minutes, or until the breadsticks are golden brown and the cheese is melted and bubbly. Keep a close eye on them, as baking times can vary depending on your oven. You want them to be perfectly golden brown, not burnt!
-
Garnish (optional): Once the breadsticks are out of the oven, sprinkle them with fresh parsley, if desired. This adds a pop of color and a fresh, herbaceous flavor that complements the garlic and cheese perfectly.
-
Serve: Let the breadsticks cool slightly before serving. They’re best served warm, with marinara sauce for dipping. But honestly, they’re so good, you can eat them plain! These are perfect as an appetizer, a side dish, or even a snack. Enjoy!
Tips and Variations:
Want to customize your cheesy garlic breadsticks? Here are a few ideas to get you started:
-
Add some heat: Sprinkle a pinch of red pepper flakes over the breadsticks before baking for a little kick.
-
Use different cheeses: Experiment with different cheeses, such as provolone, cheddar, or asiago.
-
Add herbs: In addition to Italian seasoning, try adding other herbs like oregano, basil, or thyme.
-
Make them stuffed: Before baking, cut a slit down the center of each breadstick and stuff it with your favorite fillings, such as pepperoni, ham, or spinach.
-
Garlic Herb Butter: Instead of just garlic, add other fresh herbs like rosemary, thyme, or oregano to the melted butter for an even more complex flavor profile.
-
Everything Bagel Seasoning: Sprinkle everything bagel seasoning on top of the cheese before baking for a savory and crunchy topping.
-
Pesto Breadsticks: Instead of garlic butter, spread a thin layer of pesto over the dough before adding the cheese.
Serving Suggestions:
These cheesy garlic breadsticks are incredibly versatile and can be served in a variety of ways:
-
Appetizer: Serve them as an appetizer at your next party or gathering. They’re always a crowd-pleaser!
-
Side Dish: Serve them as a side dish with pasta, soup, or salad.
-
Snack: Enjoy them as a snack anytime you’re craving something cheesy and garlicky.
-
Pizza Night: Serve them alongside homemade pizza for the ultimate pizza night experience.
-
Dipping Sauces: Offer a variety of dipping sauces, such as marinara, ranch, garlic aioli, or pesto, to cater to different tastes.
Storage Instructions:
If you happen to have any leftover breadsticks (which is unlikely!), here’s how to store them:
-
Room Temperature: Store leftover breadsticks in an airtight container at room temperature for up to 2 days. They may lose some of their crispness, but they’ll still be delicious.
-
Refrigerator: For longer storage, store them in an airtight container in the refrigerator for up to 5 days. Reheat them in the oven or microwave before serving.
-
Freezer: To freeze, wrap the breadsticks individually in plastic wrap and then place them in a freezer-safe bag or container. They can be frozen for up to 2 months. Thaw them in the refrigerator overnight or reheat them directly from frozen in the oven.
Reheating Instructions:
Here’s how to reheat your cheesy garlic breadsticks to bring them back to their former glory:
Conclusion:
And there you have it! These Cheesy Garlic Breadsticks are truly a must-try recipe, and I’m confident they’ll become a family favorite in your home, just as they have in mine. The combination of the warm, soft bread, the pungent garlic, and the gooey, melted cheese is simply irresistible. It’s the kind of comfort food that makes you feel good from the inside out, perfect for a cozy night in or a crowd-pleasing appetizer at your next gathering.
But what makes these breadsticks truly special is their versatility. They’re not just a side dish; they’re a blank canvas for your culinary creativity!
Serving Suggestions and Variations:
* Pizza Night Perfection: Serve these alongside your favorite homemade or takeout pizza for an extra cheesy, garlicky experience. They’re perfect for dipping in marinara sauce or even ranch dressing.
* Soup’s Best Friend: A bowl of hearty tomato soup, creamy potato soup, or even a simple chicken noodle soup is instantly elevated with a side of these warm, cheesy breadsticks. They’re perfect for soaking up all that delicious broth.
* Pasta Power-Up: Forget plain garlic bread! These cheesy breadsticks are the ultimate accompaniment to any pasta dish, from spaghetti and meatballs to creamy Alfredo.
* Spice It Up: Add a pinch of red pepper flakes to the garlic butter mixture for a little kick. You could also sprinkle some dried oregano or Italian seasoning on top before baking for an extra layer of flavor.
* Cheese, Please!: Experiment with different cheeses! Mozzarella is classic, but you could also try provolone, cheddar, parmesan, or even a blend of your favorites. A sprinkle of freshly grated parmesan after baking adds a touch of elegance.
* Herb Heaven: Fresh herbs take these breadsticks to the next level. Try adding chopped parsley, basil, or chives to the garlic butter mixture.
* Dipping Delights: While they’re delicious on their own, these breadsticks are even better with a dipping sauce. Marinara sauce is a classic choice, but you could also try pesto, garlic aioli, or even a simple olive oil and balsamic vinegar dip.
* Breakfast Breadsticks: Believe it or not, these can even be enjoyed for breakfast! Serve them alongside scrambled eggs or a breakfast casserole for a savory and satisfying start to your day.
I truly believe that anyone can make these Cheesy Garlic Breadsticks successfully. The recipe is straightforward, the ingredients are readily available, and the results are simply divine. Don’t be intimidated by the yeast; just follow the instructions carefully, and you’ll be rewarded with warm, fluffy, cheesy goodness.
So, what are you waiting for? Head to your kitchen, gather your ingredients, and get ready to bake up a batch of these irresistible breadsticks. I promise you won’t regret it!
And most importantly, I want to hear about your experience! Did you try any of the variations I suggested? Did you come up with your own creative twist? Share your photos and stories in the comments below. I can’t wait to see what you create! Happy baking! Let me know if you have any questions, and I’ll do my best to help. Enjoy your homemade Cheesy Garlic Breadsticks!
Cheesy Garlic Breadsticks: The Ultimate Guide to Baking Perfection
Easy, cheesy garlic breadsticks ready in under 30 minutes. Perfect as an appetizer, side, or snack!
Ingredients
- 1 pound pizza dough (store-bought or homemade)
- 1/2 cup (1 stick) unsalted butter, melted
- 4 cloves garlic, minced
- 1 teaspoon dried Italian seasoning
- 1/2 teaspoon garlic powder
- 1/4 teaspoon salt
- 1/4 teaspoon black pepper
- 1 1/2 cups shredded mozzarella cheese
- 1/2 cup grated Parmesan cheese
- Optional: Fresh parsley, chopped, for garnish
- Optional: Marinara sauce, for dipping
Instructions
- Prepare Garlic Butter: In a small, microwave-safe bowl, melt the butter in 30-second intervals, stirring in between, until completely melted. Alternatively, melt in a small saucepan over low heat.
- Add the minced garlic, Italian seasoning, garlic powder, salt, and pepper to the melted butter. Stir well to combine. Let sit for a few minutes to allow flavors to meld.
- Preheat Oven: Preheat your oven to 400°F (200°C). Line a large baking sheet with parchment paper.
- Prepare Dough: On a lightly floured surface, gently stretch or roll out the pizza dough into a large rectangle, about 12×16 inches.
- Cut the dough into strips that are about 1 inch wide and 6-8 inches long.
- Arrange the breadsticks on the prepared baking sheet, leaving a little space between each one.
- Assemble and Bake: Using a pastry brush, generously brush the garlic butter mixture over the breadsticks.
- Sprinkle the mozzarella and Parmesan cheese evenly over the breadsticks.
- Bake in the preheated oven for 12-15 minutes, or until the breadsticks are golden brown and the cheese is melted and bubbly.
- Garnish (optional): Once the breadsticks are out of the oven, sprinkle them with fresh parsley, if desired.
- Serve: Let the breadsticks cool slightly before serving. Serve warm, with marinara sauce for dipping, if desired.
Notes
- Add some heat: Sprinkle a pinch of red pepper flakes over the breadsticks before baking for a little kick.
- Use different cheeses: Experiment with different cheeses, such as provolone, cheddar, or asiago.
- Add herbs: In addition to Italian seasoning, try adding other herbs like oregano, basil, or thyme.
- Make them stuffed: Before baking, cut a slit down the center of each breadstick and stuff it with your favorite fillings, such as pepperoni, ham, or spinach.
- Garlic Herb Butter: Instead of just garlic, add other fresh herbs like rosemary, thyme, or oregano to the melted butter for an even more complex flavor profile.
- Everything Bagel Seasoning: Sprinkle everything bagel seasoning on top of the cheese before baking for a savory and crunchy topping.
- Pesto Breadsticks: Instead of garlic butter, spread a thin layer of pesto over the dough before adding the cheese.