
Nutella ice cream, a symphony of hazelnut and chocolate, is about to become your new obsession. Imagine a dessert so decadent, so creamy, and so intensely flavored that every spoonful transports you to a blissful state of pure indulgence. Forget everything you thought you knew about homemade ice cream because this recipe is a game-changer!
While the exact origins of combining Nutella with frozen desserts are somewhat shrouded in delicious mystery, the love affair is undeniable. Nutella itself, born from the resourceful use of hazelnuts in post-World War II Italy, quickly became a global phenomenon. Its rich, nutty flavor profile lends itself perfectly to the creamy canvas of ice cream, creating a harmonious blend that’s both comforting and exciting.
People adore Nutella ice cream for its unparalleled taste and texture. The smooth, velvety ice cream, infused with the unmistakable hazelnut-chocolate notes of Nutella, offers a delightful melt-in-your-mouth experience. It’s incredibly easy to make at home, requiring minimal ingredients and effort, making it the perfect treat for a hot summer day or a cozy night in. Plus, who can resist the allure of Nutella? It’s a universally loved ingredient that elevates any dessert to a whole new level of deliciousness. Get ready to experience ice cream nirvana!

Ingredients:
- 1 ½ cups (360ml) heavy cream
- ¾ cup (180ml) whole milk
- ¾ cup (150g) granulated sugar
- Pinch of salt
- 6 large egg yolks
- 1 cup (280g) Nutella, softened
- ½ teaspoon vanilla extract (optional, but recommended)
- ¼ cup chopped hazelnuts, toasted (optional, for garnish)
Preparing the Custard Base:
This is the most important part! Don’t skip any steps, and pay close attention to the temperature. A good custard base is the key to creamy, delicious ice cream.
- Combine Cream, Milk, Sugar, and Salt: In a medium saucepan, whisk together the heavy cream, whole milk, granulated sugar, and salt. Place the saucepan over medium heat and stir constantly until the sugar is completely dissolved and the mixture is steaming gently. Do not let it boil! We’re just warming it up to help the sugar dissolve and infuse the flavors.
- Temper the Egg Yolks: While the cream mixture is heating, prepare the egg yolks. In a separate medium bowl, whisk the egg yolks until they are slightly pale and frothy. This helps to prevent them from scrambling when you add the hot cream mixture.
- Slowly Add Hot Cream to Egg Yolks: This is where the tempering process comes in. Slowly drizzle a small amount (about ¼ cup) of the hot cream mixture into the egg yolks while whisking constantly and vigorously. This gradually raises the temperature of the egg yolks, preventing them from cooking too quickly and curdling. Continue adding the hot cream mixture in small increments, whisking constantly, until about half of the cream mixture has been incorporated.
- Return Mixture to Saucepan: Pour the tempered egg yolk mixture back into the saucepan with the remaining cream mixture. Place the saucepan back over medium-low heat.
- Cook the Custard Base: This is the crucial step! Cook the custard base, stirring constantly with a heat-resistant spatula or wooden spoon, until it thickens enough to coat the back of the spoon. To test for doneness, dip the spoon into the custard and then run your finger across the back of the spoon. If the line remains distinct and doesn’t run back together, the custard is ready. This usually takes about 5-8 minutes. Be very careful not to let the custard boil, or the eggs will scramble! The ideal temperature is around 170-175°F (77-79°C). If you have a thermometer, use it!
- Strain the Custard: Immediately remove the saucepan from the heat and pour the custard through a fine-mesh sieve into a clean bowl. This will remove any cooked egg bits and ensure a smooth, creamy texture.
Incorporating the Nutella and Chilling:
Now for the fun part! Adding the Nutella transforms this custard into a decadent Nutella ice cream base.
- Add Nutella and Vanilla: While the custard is still warm, add the softened Nutella and vanilla extract (if using) to the strained custard. Whisk vigorously until the Nutella is completely melted and evenly incorporated into the custard. Make sure there are no lumps of Nutella remaining.
- Chill the Custard Base: Cover the bowl tightly with plastic wrap, pressing the plastic wrap directly onto the surface of the custard to prevent a skin from forming. Refrigerate the custard base for at least 4 hours, or preferably overnight. This allows the flavors to meld together and the custard to chill completely, which is essential for proper freezing. The colder the base, the smoother the ice cream.
Churning and Freezing:
This is where the magic happens! The churning process incorporates air into the custard, creating the light and airy texture of ice cream.
- Prepare Your Ice Cream Maker: Follow the manufacturer’s instructions for your ice cream maker. If you have a freezer bowl ice cream maker, make sure the bowl has been frozen solid for at least 24 hours.
- Churn the Ice Cream: Pour the chilled custard base into the prepared ice cream maker. Churn according to the manufacturer’s instructions, usually for about 20-25 minutes, or until the ice cream has reached a soft-serve consistency.
- Transfer to Freezer-Safe Container: Once the ice cream has reached the desired consistency, transfer it to a freezer-safe container. A loaf pan or a plastic container with a tight-fitting lid works well.
- Harden the Ice Cream: Cover the container tightly and freeze the ice cream for at least 2-3 hours, or until it has hardened to a scoopable consistency. This final freezing period allows the ice cream to firm up and develop its final texture.
Serving and Storage:
Finally, the moment you’ve been waiting for! Enjoy your homemade Nutella ice cream.
- Scoop and Serve: Let the ice cream sit at room temperature for a few minutes before scooping to soften it slightly. This will make it easier to scoop and will also enhance the flavor.
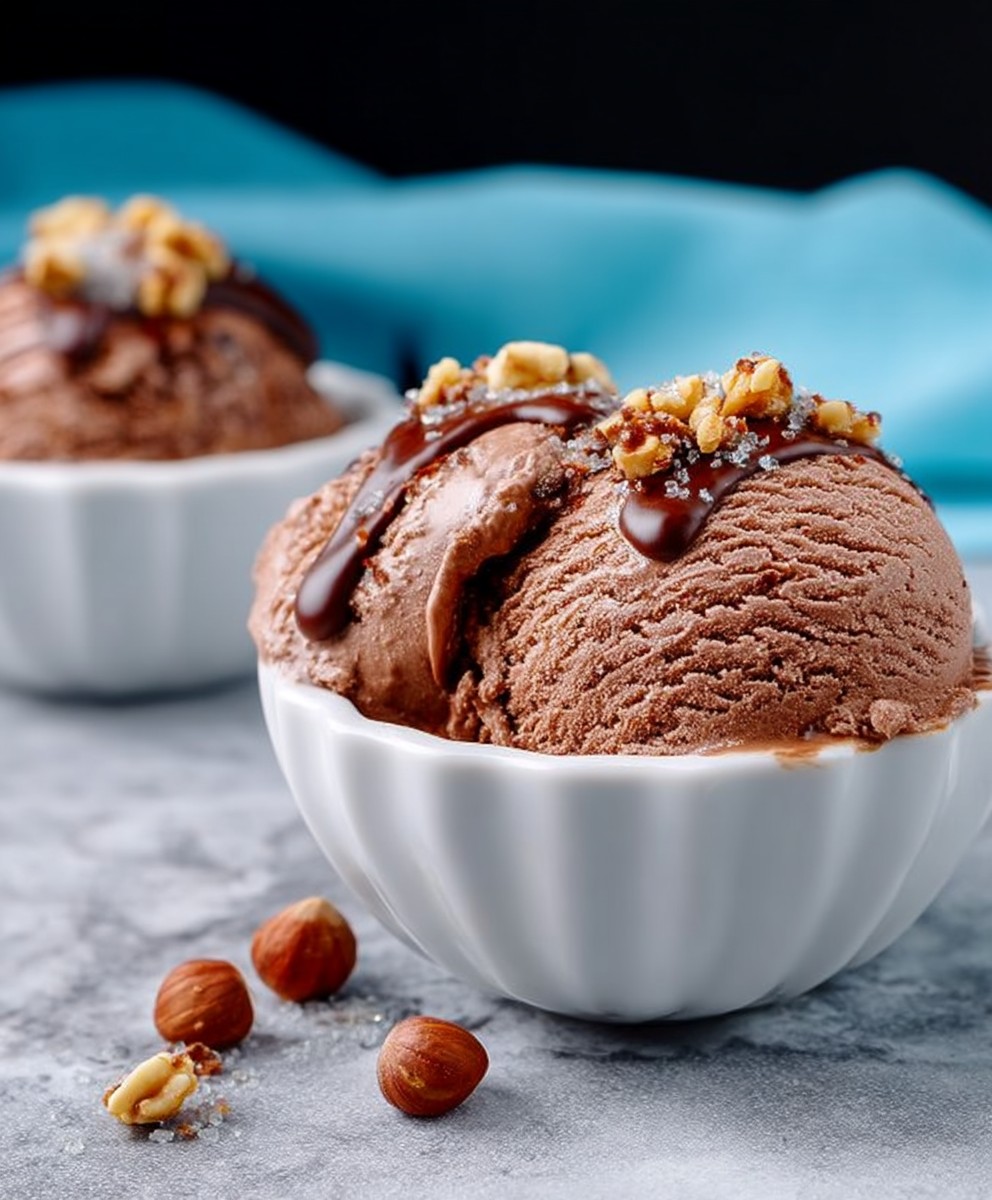
- Garnish (Optional): If desired, garnish the ice cream with chopped toasted hazelnuts for added flavor and texture. You can also add a drizzle of melted Nutella or a sprinkle of chocolate shavings.
- Storage: Store the leftover ice cream in the freezer in a tightly sealed container. Homemade ice cream is best consumed within 1-2 weeks for optimal flavor and texture. After that, it may develop ice crystals. To minimize ice crystal formation, press a piece of plastic wrap directly onto the surface of the ice cream before sealing the container.
Tips for Success:
- Use High-Quality Ingredients: The better the ingredients, the better the ice cream. Use fresh, high-quality heavy cream, whole milk, and Nutella.
- Don’t Overcook the Custard: Overcooked custard will result in scrambled eggs. Use a thermometer to ensure the custard reaches the correct temperature (170-175°F or 77-79°C).
- Chill the Custard Thoroughly: Chilling the custard base completely is essential for smooth, creamy ice cream. Don’t skip this step!
- Follow Ice Cream Maker Instructions: Each ice cream maker is different, so be sure to follow the manufacturer’s instructions for best results.
- Don’t Overchurn: Overchurning can result in grainy ice cream. Churn until the ice cream reaches a soft-serve consistency.
- Harden Properly: Allowing the ice cream to harden in the freezer for at least 2-3 hours is crucial for developing its final texture.
Variations:
- Nutella Swirl: For an extra Nutella kick, swirl in some melted Nutella into the ice cream after it has been churned but before freezing.
- Chocolate Chips: Add chocolate chips or chunks to the ice cream after it has been churned.
- Espresso: Add a shot of espresso to the custard base for a Nutella espresso ice cream.
- Salted Caramel: Drizzle salted caramel sauce into the ice cream after it has been churned.
- Brownie Bites: Fold in small brownie bites into the ice cream after it has been churned.
Enjoy your delicious homemade Nutella ice cream! I hope you love it as much as I do!
Conclusion:
So, there you have it! This Nutella ice cream recipe is truly a game-changer, and I genuinely believe it’s a must-try for any ice cream lover, especially those with a soft spot for that hazelnut-chocolate goodness. The creamy texture, the intense Nutella flavor, and the sheer simplicity of the process make it a winner in my book. Forget store-bought versions loaded with artificial ingredients; this homemade delight is in a league of its own.
Why is it a must-try? Well, beyond the obvious deliciousness, it’s incredibly versatile. Imagine serving it in a waffle cone on a hot summer day, or scooping it into a sundae with whipped cream, chopped nuts, and a drizzle of chocolate sauce. The possibilities are endless! And let’s not forget how easy it is to customize.
Speaking of variations, feel free to get creative! For a richer, more decadent experience, try adding a tablespoon or two of Frangelico liqueur. The hazelnut notes in the liqueur will complement the Nutella beautifully. Or, if you’re feeling adventurous, stir in some chopped toasted hazelnuts or dark chocolate chunks for added texture and flavor. A swirl of salted caramel would also be divine! For a vegan version, experiment with coconut cream as a substitute for the heavy cream and a plant-based chocolate hazelnut spread. The key is to have fun and experiment until you find your perfect Nutella ice cream creation.
Serving suggestions? Oh, where do I even begin? This ice cream is fantastic on its own, but it also pairs perfectly with warm brownies, chocolate chip cookies, or even a slice of apple pie. You could also use it to make an incredible ice cream sandwich. Just imagine: two freshly baked cookies with a generous scoop of this creamy Nutella ice cream in between. Pure bliss! For a more sophisticated presentation, try serving it in a martini glass with a sprinkle of cocoa powder and a few fresh raspberries.
But honestly, the best way to enjoy this ice cream is however *you* like it best. Whether you’re eating it straight from the container (no judgment here!), sharing it with friends and family, or using it to create elaborate desserts, I’m confident that this recipe will become a new favorite.
I poured my heart into perfecting this recipe, and I’m so excited for you to try it. I truly believe that this homemade Nutella ice cream will blow your mind. It’s so much better than anything you can buy in the store.
So, what are you waiting for? Gather your ingredients, dust off your ice cream maker (or use the no-churn method!), and get ready to experience ice cream nirvana. And most importantly, don’t forget to share your creations with me! I’d love to see your photos and hear about your variations. Tag me on social media and let me know what you think. Happy ice cream making! I can’t wait to hear about your experience with this recipe. Let me know what you think!
Nutella Ice Cream: The Ultimate Homemade Recipe
Rich, creamy homemade Nutella ice cream with a smooth custard base infused with irresistible Nutella flavor. A decadent and unforgettable treat.
Ingredients
- 1 ½ cups (360ml) heavy cream
- ¾ cup (180ml) whole milk
- ¾ cup (150g) granulated sugar
- Pinch of salt
- 6 large egg yolks
- 1 cup (280g) Nutella, softened
- ½ teaspoon vanilla extract (optional, but recommended)
- ¼ cup chopped hazelnuts, toasted (optional, for garnish)
Instructions
- In a medium saucepan, whisk together the heavy cream, whole milk, granulated sugar, and salt. Place the saucepan over medium heat and stir constantly until the sugar is completely dissolved and the mixture is steaming gently. Do not let it boil!
- In a separate medium bowl, whisk the egg yolks until they are slightly pale and frothy.
- Slowly drizzle a small amount (about ¼ cup) of the hot cream mixture into the egg yolks while whisking constantly and vigorously. Continue adding the hot cream mixture in small increments, whisking constantly, until about half of the cream mixture has been incorporated.
- Pour the tempered egg yolk mixture back into the saucepan with the remaining cream mixture. Place the saucepan back over medium-low heat.
- Cook the custard base, stirring constantly with a heat-resistant spatula or wooden spoon, until it thickens enough to coat the back of the spoon. To test for doneness, dip the spoon into the custard and then run your finger across the back of the spoon. If the line remains distinct and doesn’t run back together, the custard is ready. This usually takes about 5-8 minutes. Be very careful not to let the custard boil, or the eggs will scramble! The ideal temperature is around 170-175°F (77-79°C).
- Immediately remove the saucepan from the heat and pour the custard through a fine-mesh sieve into a clean bowl.
- While the custard is still warm, add the softened Nutella and vanilla extract (if using) to the strained custard. Whisk vigorously until the Nutella is completely melted and evenly incorporated into the custard.
- Cover the bowl tightly with plastic wrap, pressing the plastic wrap directly onto the surface of the custard to prevent a skin from forming. Refrigerate the custard base for at least 4 hours, or preferably overnight.
- Follow the manufacturer’s instructions for your ice cream maker. If you have a freezer bowl ice cream maker, make sure the bowl has been frozen solid for at least 24 hours.
- Pour the chilled custard base into the prepared ice cream maker. Churn according to the manufacturer’s instructions, usually for about 20-25 minutes, or until the ice cream has reached a soft-serve consistency.
- Once the ice cream has reached the desired consistency, transfer it to a freezer-safe container. A loaf pan or a plastic container with a tight-fitting lid works well.
- Cover the container tightly and freeze the ice cream for at least 2-3 hours, or until it has hardened to a scoopable consistency.
- Let the ice cream sit at room temperature for a few minutes before scooping to soften it slightly.
- If desired, garnish the ice cream with chopped toasted hazelnuts for added flavor and texture. You can also add a drizzle of melted Nutella or a sprinkle of chocolate shavings.
- Store the leftover ice cream in the freezer in a tightly sealed container. Homemade ice cream is best consumed within 1-2 weeks for optimal flavor and texture. To minimize ice crystal formation, press a piece of plastic wrap directly onto the surface of the ice cream before sealing the container.
Notes
- Use high-quality ingredients for the best flavor.
- Be careful not to overcook the custard, as this will result in scrambled eggs. Use a thermometer to ensure the custard reaches the correct temperature (170-175°F or 77-79°C).
- Chilling the custard base completely is essential for smooth, creamy ice cream.
- Follow your ice cream maker’s instructions for best results.
- Don’t overchurn the ice cream, as this can result in a grainy texture.
- Allow the ice cream to harden properly in the freezer for at least 2-3 hours.