
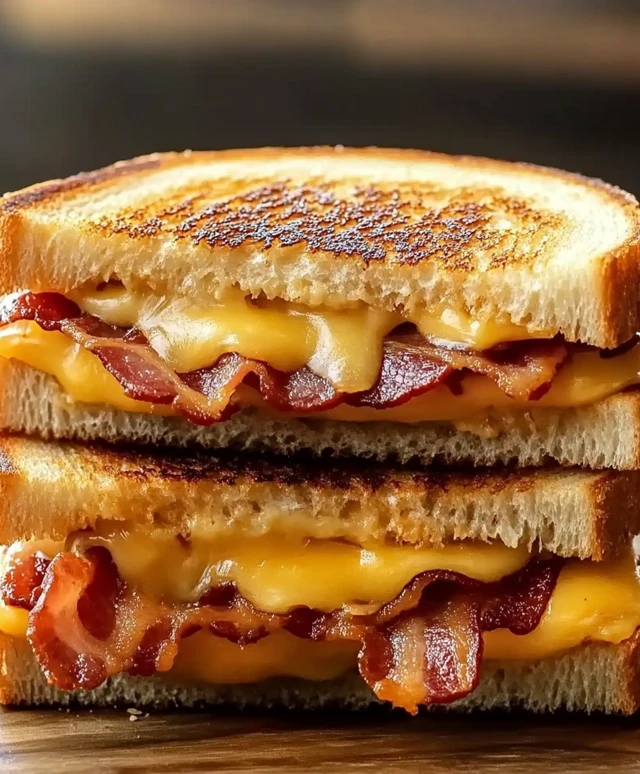
Bacon Grilled Cheese Sandwich is not just a meal; its a comforting embrace on a plate. This delightful combination of crispy bacon and gooey melted cheese nestled between two slices of perfectly toasted bread has captured the hearts and taste buds of food lovers around the world. The origins of the grilled cheese sandwich date back to the 1920s, but when you add bacon into the mix, you elevate this classic dish to new heights of flavor and satisfaction.
People adore the Bacon Grilled Cheese Sandwich for its irresistible taste and texture. The salty crunch of the bacon complements the creamy richness of the cheese, creating a symphony of flavors that dance on your palate. Plus, its a quick and convenient meal that can be whipped up in no time, making it a favorite for busy weeknights or lazy weekends. Whether youre enjoying it with a bowl of tomato soup or on its own, this sandwich is sure to become a staple in your culinary repertoire.

Ingredients:
- 4 slices of bread (your choice: sourdough, whole wheat, or white)
- 4 slices of cheddar cheese (or your preferred cheese)
- 4 slices of cooked bacon
- 2 tablespoons of unsalted butter
- 1 tablespoon of mayonnaise (optional)
- Salt and pepper to taste
- Optional add-ins: sliced tomatoes, avocado, or jalapeños
Preparing the Ingredients
- Start by cooking the bacon. In a skillet over medium heat, lay the bacon strips flat. Cook for about 4-5 minutes on each side or until crispy. Once cooked, transfer the bacon to a paper towel-lined plate to drain excess grease.
- While the bacon is cooking, prepare your bread. If you prefer a toasted flavor, you can lightly toast the bread slices in a toaster or on a skillet for a minute on each side. This step is optional but can add a nice crunch to your sandwich.
- Gather your cheese slices. If youre using a block of cheese, slice it into even pieces to ensure even melting. Aim for about 1/4 inch thickness for optimal meltiness.
- If youre adding any optional ingredients like tomatoes or avocado, slice them now. For tomatoes, aim for thin slices, and for avocado, slice it into thin wedges.
Assembling the Sandwich
- Take two slices of bread and spread a thin layer of mayonnaise on one side of each slice. This step is optional but adds a creamy texture and flavor.
- On the non-mayo side of one slice, layer two slices of cheese evenly. Make sure to cover the entire surface of the bread.
- Next, add two slices of crispy bacon on top of the cheese. If youre using any optional ingredients like tomatoes or avocado, layer them on top of the bacon.
- Finish the layering by placing another two slices of cheese on top of the bacon (or optional ingredients). This will help hold everything together when the sandwich is grilled.
- Top the sandwich with the second slice of bread, mayo side facing down. Press down gently to help the layers stick together.
Cooking the Sandwich
- In a large skillet or frying pan, heat 1 tablespoon of unsalted butter over medium heat. Allow the butter to melt and coat the bottom of the pan.
- Once the butter is melted and bubbling, carefully place the assembled sandwich in the skillet. Cook for about 3-4 minutes, or until the bottom is golden brown and crispy.
- While the first side is cooking, use a spatula to gently press down on the sandwich. This helps the cheese melt evenly and creates a nice crust.
- After 3-4 minutes, carefully flip the sandwich over using the spatula. Add the remaining tablespoon of butter to the pan, allowing it to melt and coat the bottom of the skillet again.
- Cook the second side for another 3-4 minutes, or until it is golden brown and the cheese is melted. You can cover the skillet with a lid for the last minute of cooking to help the cheese melt faster.
Serving the Sandwich
- Once both sides of the sandwich are golden brown and the cheese is melted, remove the sandwich from the skillet and place it on a cutting board.
- Allow the sandwich to cool for a minute before slicing. This will help prevent the cheese from oozing out too much when you cut it.
- Using a sharp knife, slice the sandwich diagonally into two halves. This not only makes it easier to eat but also showcases the delicious layers inside.
- Serve the sandwich warm, with your choice of sides such as pickles, chips, or a simple salad. You can also serve it with a bowl of tomato soup for a classic pairing.
Tips for the Perfect Bacon Grilled Cheese
- Experiment with different types of cheese. While cheddar is a classic choice, you can also try gouda, mozzarella, or pepper jack for a twist.
- For added flavor, consider seasoning the butter with garlic powder
Conclusion:
In summary, the Bacon Grilled Cheese Sandwich is a must-try for anyone who appreciates the perfect blend of crispy, savory bacon and gooey, melted cheese nestled between two slices of golden, buttery bread. This recipe elevates the classic grilled cheese to new heights, making it an irresistible comfort food that can be enjoyed at any time of the day. Whether you’re looking for a quick lunch, a satisfying snack, or a delightful dinner option, this sandwich delivers on all fronts. For serving suggestions, consider pairing your Bacon Grilled Cheese Sandwich with a warm bowl of tomato soup for a nostalgic combination that never fails to please. Alternatively, you can add a twist by incorporating different types of cheese, such as sharp cheddar, creamy mozzarella, or even a tangy blue cheese for a gourmet touch. You might also experiment with additional ingredients like avocado slices, sautéed onions, or fresh herbs to customize your sandwich to your liking. We encourage you to try this Bacon Grilled Cheese Sandwich recipe and share your experience with friends and family. Whether you stick to the classic version or make your own variations, we would love to hear how it turns out for you. Dont forget to snap a picture and share it on social media, tagging us so we can see your delicious creations! Dive into this mouthwatering recipe and discover why the Bacon Grilled Cheese Sandwich is a timeless favorite that deserves a spot in your culinary repertoire. Print
Bacon Grilled Cheese Sandwich: The Ultimate Comfort Food Recipe
- Total Time: 20 minutes
- Yield: 2 sandwiches 1x
Description
Enjoy a delicious Bacon Grilled Cheese Sandwich featuring crispy bacon and melty cheese between your choice of bread. Perfect for a comforting lunch or dinner, this easy recipe can be customized with optional add-ins like tomatoes or avocado for extra flavor.
Ingredients
- 4 slices of bread (your choice: sourdough, whole wheat, or white)
- 4 slices of cheddar cheese (or your preferred cheese)
- 4 slices of cooked bacon
- 2 tablespoons of unsalted butter
- 1 tablespoon of mayonnaise (optional)
- Salt and pepper to taste
- Optional add-ins: sliced tomatoes, avocado, or jalapeños
Instructions
- Start by cooking the bacon. In a skillet over medium heat, lay the bacon strips flat. Cook for about 4-5 minutes on each side or until crispy. Once cooked, transfer the bacon to a paper towel-lined plate to drain excess grease.
- While the bacon is cooking, prepare your bread. If you prefer a toasted flavor, you can lightly toast the bread slices in a toaster or on a skillet for a minute on each side. This step is optional but can add a nice crunch to your sandwich.
- Gather your cheese slices. If youre using a block of cheese, slice it into even pieces to ensure even melting. Aim for about 1/4 inch thickness for optimal meltiness.
- If youre adding any optional ingredients like tomatoes or avocado, slice them now. For tomatoes, aim for thin slices, and for avocado, slice it into thin wedges.
- Take two slices of bread and spread a thin layer of mayonnaise on one side of each slice. This step is optional but adds a creamy texture and flavor.
- On the non-mayo side of one slice, layer two slices of cheese evenly. Make sure to cover the entire surface of the bread.
- Next, add two slices of crispy bacon on top of the cheese. If youre using any optional ingredients like tomatoes or avocado, layer them on top of the bacon.
- Finish the layering by placing another two slices of cheese on top of the bacon (or optional ingredients). This will help hold everything together when the sandwich is grilled.
- Top the sandwich with the second slice of bread, mayo side facing down. Press down gently to help the layers stick together.
- In a large skillet or frying pan, heat 1 tablespoon of unsalted butter over medium heat. Allow the butter to melt and coat the bottom of the pan.
- Once the butter is melted and bubbling, carefully place the assembled sandwich in the skillet. Cook for about 3-4 minutes, or until the bottom is golden brown and crispy.
- While the first side is cooking, use a spatula to gently press down on the sandwich. This helps the cheese melt evenly and creates a nice crust.
- After 3-4 minutes, carefully flip the sandwich over using the spatula. Add the remaining tablespoon of butter to the pan, allowing it to melt and coat the bottom of the skillet again.
- Cook the second side for another 3-4 minutes, or until it is golden brown and the cheese is melted. You can cover the skillet with a lid for the last minute of cooking to help the cheese melt faster.
- Once both sides of the sandwich are golden brown and the cheese is melted, remove the sandwich from the skillet and place it on a cutting board.
- Allow the sandwich to cool for a minute before slicing. This will help prevent the cheese from oozing out too much when you cut it.
- Using a sharp knife, slice the sandwich diagonally into two halves. This not only makes it easier to eat but also showcases the delicious layers inside.
- Serve the sandwich warm, with your choice of sides such as pickles, chips, or a simple salad. You can also serve it with a bowl of tomato soup for a classic pairing.
Notes
- Experiment with different types of cheese. While cheddar is a classic choice, you can also try gouda, mozzarella, or pepper jack for a twist.
- For added flavor, consider seasoning the butter with garlic powder or herbs before spreading it on the bread.
- Prep Time: 10 minutes
- Cook Time: 10 minutes