
Banana Pudding Cheesecake Cones are a delightful twist on two beloved desserts, combining the creamy richness of cheesecake with the nostalgic flavors of banana pudding. As a fan of both treats, I was thrilled to discover this innovative recipe that not only satisfies my sweet tooth but also brings a sense of joy and comfort. The origins of banana pudding can be traced back to the Southern United States, where it has been a cherished dessert for generations, often served at family gatherings and celebrations.
What makes Banana Pudding Cheesecake Cones so irresistible is their perfect balance of flavors and textures. The smooth, velvety cheesecake filling pairs beautifully with the soft, sweet bananas, all nestled in a crunchy cone that adds a delightful crunch. This dessert is not only delicious but also incredibly convenient, making it an ideal choice for parties, picnics, or simply a sweet treat at home. I love how these cones allow for easy serving and enjoyment, making them a hit with both kids and adults alike. Join me as we dive into this scrumptious recipe that is sure to become a favorite in your household!

Ingredients:
- For the Cheesecake Filling:
- 16 oz cream cheese, softened
- 1 cup powdered sugar
- 1 teaspoon vanilla extract
- 1 cup heavy whipping cream
- 2 ripe bananas, mashed
- 1 tablespoon lemon juice
- For the Banana Pudding:
- 2 cups whole milk
- 1/2 cup granulated sugar
- 1/3 cup cornstarch
- 1/4 teaspoon salt
- 3 large egg yolks
- 2 tablespoons unsalted butter
- 1 teaspoon vanilla extract
- For Assembly:
- 12 sugar cones
- 1 cup whipped cream (for topping)
- 1 banana, sliced (for garnish)
- 1/4 cup crushed vanilla wafers (for garnish)
Preparing the Cheesecake Filling
- In a large mixing bowl, beat the softened cream cheese with an electric mixer on medium speed until smooth and creamy, about 2-3 minutes.
- Add the powdered sugar and vanilla extract to the cream cheese. Continue to mix until well combined and fluffy, about another 2 minutes.
- In a separate bowl, whip the heavy cream until stiff peaks form. This usually takes about 3-5 minutes with a hand mixer or stand mixer.
- Gently fold the whipped cream into the cream cheese mixture using a spatula. Be careful not to deflate the whipped cream; you want to keep it light and airy.
- In another bowl, mash the ripe bananas with a fork until smooth. Stir in the lemon juice to prevent browning.
- Fold the mashed bananas into the cheesecake mixture until evenly distributed. Set aside while you prepare the banana pudding.
Making the Banana Pudding
- In a medium saucepan, whisk together the whole milk, granulated sugar, cornstarch, and salt until well combined.
- Place the saucepan over medium heat and cook the mixture, stirring constantly, until it begins to thicken and bubble. This should take about 5-7 minutes.
- In a small bowl, whisk the egg yolks until they are well beaten. Once the milk mixture is thickened, slowly pour about a cup of the hot mixture into the egg yolks while whisking constantly. This will temper the eggs and prevent them from scrambling.
- Pour the tempered egg mixture back into the saucepan with the remaining milk mixture. Continue to cook for another 2-3 minutes, stirring constantly, until the pudding is thick and creamy.
- Remove the saucepan from the heat and stir in the butter and vanilla extract until fully melted and incorporated.
- Transfer the banana pudding to a bowl and cover it with plastic wrap, pressing it directly onto the surface to prevent a skin from forming. Let it cool to room temperature, then refrigerate until chilled, about 1 hour.
Assembling the Banana Pudding Cheesecake Cones
- Once the cheesecake filling and banana pudding are both chilled, its time to assemble the cones!
- Take a sugar cone and fill it about one-third of the way with the cheesecake filling. I like to use a piping bag for this step, but you can also use a spoon if you prefer.
- Next, add a layer of banana pudding on top of the cheesecake filling, filling the cone about two-thirds of the way full.
- Repeat the process by adding another layer of cheesecake filling on top of the banana pudding, filling the cone to the top.
- Once all the cones are filled, top each one with a generous dollop of whipped cream. You can use a piping bag for a decorative touch or simply spoon it on.
- Garnish each cone with a few banana slices and a sprinkle of crushed vanilla wafers for that classic banana pudding crunch.
Conclusion:
In wrapping up this delightful journey into the world of Banana Pudding Cheesecake Cones, I can confidently say that this recipe is a must-try for anyone looking to impress friends and family with a unique and delicious dessert. The combination of creamy cheesecake filling, the nostalgic flavor of banana pudding, and the fun, portable cone presentation makes these treats not only a feast for the taste buds but also a visual delight. For serving suggestions, consider topping your cones with a dollop of whipped cream and a sprinkle of crushed vanilla wafers for that classic banana pudding touch. You can also experiment with variations by adding layers of fresh fruit, such as strawberries or blueberries, or even a drizzle of chocolate sauce for an extra indulgent twist. I encourage you to give this Banana Pudding Cheesecake Cones recipe a try and share your experience with me! Whether youre making them for a special occasion or just a sweet treat for yourself, Id love to hear how they turn out. Dont forget to snap a picture and tag me on social media so we can celebrate your delicious creation together! Happy baking! Print
Banana Pudding Cheesecake Cones: A Delicious Twist on a Classic Dessert
- Total Time: 105 minutes
- Yield: 12 cones 1x
Description
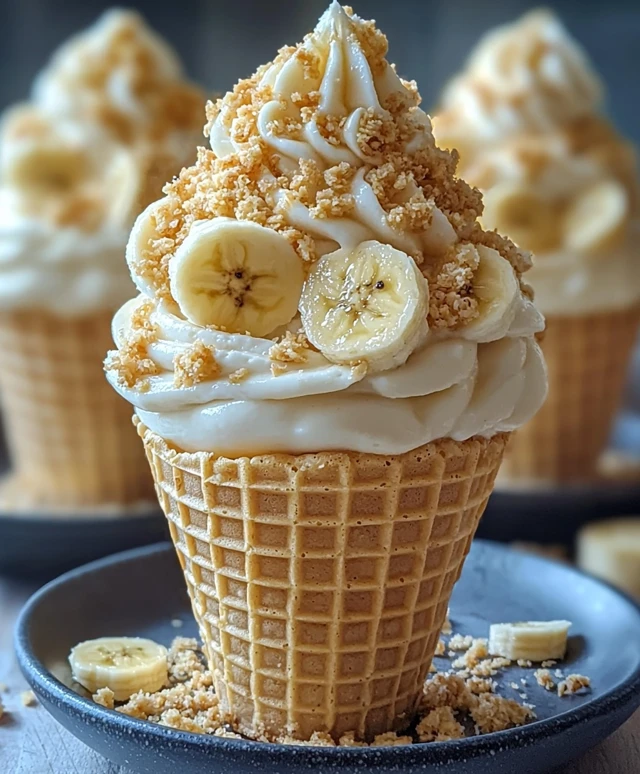
Enjoy a fun and delicious treat with these Banana Pudding Cheesecake Cones, featuring a creamy cheesecake filling layered with rich banana pudding, all nestled in a crunchy sugar cone. Perfect for parties or a sweet snack!
Ingredients
- 16 oz cream cheese, softened
- 1 cup powdered sugar
- 1 teaspoon vanilla extract
- 1 cup heavy whipping cream
- 2 ripe bananas, mashed
- 1 tablespoon lemon juice
- 2 cups whole milk
- 1/2 cup granulated sugar
- 1/3 cup cornstarch
- 1/4 teaspoon salt
- 3 large egg yolks
- 2 tablespoons unsalted butter
- 1 teaspoon vanilla extract
- 12 sugar cones
- 1 cup whipped cream (for topping)
- 1 banana, sliced (for garnish)
- 1/4 cup crushed vanilla wafers (for garnish)
Instructions
- In a large mixing bowl, beat the softened cream cheese with an electric mixer on medium speed until smooth and creamy, about 2-3 minutes.
- Add the powdered sugar and vanilla extract to the cream cheese. Continue to mix until well combined and fluffy, about another 2 minutes.
- In a separate bowl, whip the heavy cream until stiff peaks form, about 3-5 minutes.
- Gently fold the whipped cream into the cream cheese mixture using a spatula, being careful not to deflate the whipped cream.
- In another bowl, mash the ripe bananas with a fork until smooth. Stir in the lemon juice to prevent browning.
- Fold the mashed bananas into the cheesecake mixture until evenly distributed. Set aside.
- In a medium saucepan, whisk together the whole milk, granulated sugar, cornstarch, and salt until well combined.
- Place the saucepan over medium heat and cook the mixture, stirring constantly, until it thickens and bubbles, about 5-7 minutes.
- In a small bowl, whisk the egg yolks. Slowly pour about a cup of the hot mixture into the egg yolks while whisking constantly to temper the eggs.
- Pour the tempered egg mixture back into the saucepan with the remaining milk mixture. Continue to cook for another 2-3 minutes, stirring constantly, until thick and creamy.
- Remove from heat and stir in the butter and vanilla extract until fully melted and incorporated.
- Transfer the pudding to a bowl, cover with plastic wrap pressed onto the surface, and let cool to room temperature. Refrigerate until chilled, about 1 hour.
- Once the cheesecake filling and banana pudding are chilled, take a sugar cone and fill it about one-third of the way with the cheesecake filling.
- Add a layer of banana pudding on top, filling the cone about two-thirds of the way full.
- Repeat by adding another layer of cheesecake filling on top, filling the cone to the top.
- Top each cone with a generous dollop of whipped cream.
- Garnish with banana slices and a sprinkle of crushed vanilla wafers.
Notes
- For a more decorative presentation, use a piping bag to fill the cones and top with whipped cream.
- Ensure the banana pudding is completely chilled before assembly to maintain the structure of the cones.
- Prep Time: 30 minutes
- Cook Time: 15 minutes