
Brick Street Chocolate Cake: just the name conjures images of cozy cafes and decadent desserts, doesn’t it? Imagine sinking your fork into a slice of intensely chocolatey, moist cake, its rich flavor lingering on your palate long after the last bite. This isn’t just any chocolate cake; it’s an experience, a journey into chocolate heaven that will leave you craving more.
While the exact origins of the name “Brick Street Chocolate Cake” are shrouded in a bit of mystery (perhaps inspired by a charming bakery on a brick-paved street?), the essence of this cake lies in its simplicity and the quality of its ingredients. It’s a testament to the idea that sometimes, the most satisfying pleasures are found in the classics. Chocolate cake, in general, has a long and storied history, evolving from early chocolate drinks enjoyed by the Mayans and Aztecs to the sophisticated desserts we know and love today. This particular version, however, feels like a warm hug from a cherished family recipe.
People adore Brick Street Chocolate Cake for its unparalleled moistness and deeply satisfying chocolate flavor. It’s the kind of cake that’s perfect for celebrations, comforting on a rainy day, or simply a delightful treat to brighten your week. The texture is divine a tender crumb that practically melts in your mouth. Plus, it’s surprisingly easy to make, making it a winner for both seasoned bakers and those just starting their culinary adventures. Get ready to impress your friends and family with this unforgettable chocolate masterpiece!

Ingredients:
- For the Cake:
- 2 cups all-purpose flour
- 2 cups granulated sugar
- ¾ cup unsweetened cocoa powder
- 1 ½ teaspoons baking powder
- 1 ½ teaspoons baking soda
- 1 teaspoon salt
- 1 cup buttermilk
- ½ cup vegetable oil
- 2 large eggs
- 2 teaspoons vanilla extract
- 1 cup boiling water
- For the Chocolate Cream Cheese Frosting:
- 8 ounces cream cheese, softened
- ½ cup (1 stick) unsalted butter, softened
- 3 cups powdered sugar
- ¾ cup unsweetened cocoa powder
- 1 teaspoon vanilla extract
- ¼ cup milk, or more as needed
Preparing the Cake Batter:
Okay, let’s get started! This cake is seriously decadent, and the first step is creating the perfect batter. Don’t be intimidated by the number of ingredients; it’s all pretty straightforward.
- Preheat and Prep: First things first, preheat your oven to 350°F (175°C). Grease and flour two 9-inch round cake pans. I like to use baking spray with flour already in it it’s a lifesaver! You can also line the bottoms with parchment paper rounds for extra insurance against sticking. This makes removing the cakes later so much easier.
- Combine Dry Ingredients: In a large bowl, whisk together the flour, sugar, cocoa powder, baking powder, baking soda, and salt. Make sure everything is well combined. This ensures that the baking powder and soda are evenly distributed, which is crucial for a good rise.
- Add Wet Ingredients (Except Boiling Water): In a separate bowl, whisk together the buttermilk, oil, eggs, and vanilla extract. Pour this wet mixture into the dry ingredients and beat with an electric mixer on medium speed for about 2 minutes, or until well combined. The batter will be relatively thin at this point, and that’s perfectly normal.
- Incorporate Boiling Water: Now, here’s the magic ingredient: boiling water! Gradually pour the boiling water into the batter while mixing on low speed. Be careful not to splash! The batter will become even thinner, almost like a soup. Don’t worry; this is what it’s supposed to look like. The hot water helps to bloom the cocoa powder, intensifying the chocolate flavor and creating a super moist cake.
- Divide and Bake: Divide the batter evenly between the prepared cake pans. Bake for 30-35 minutes, or until a wooden skewer inserted into the center comes out clean. Keep a close eye on them, as baking times can vary depending on your oven.
- Cool Completely: Once the cakes are done, let them cool in the pans for about 10 minutes before inverting them onto a wire rack to cool completely. This prevents them from sticking and allows them to cool evenly. Make sure they are completely cool before frosting, or the frosting will melt! I usually let them cool for at least an hour, sometimes even longer.
Making the Chocolate Cream Cheese Frosting:
Now for the best part the frosting! This chocolate cream cheese frosting is the perfect complement to the rich chocolate cake. It’s creamy, tangy, and oh-so-chocolatey.
- Cream Butter and Cream Cheese: In a large bowl, beat the softened cream cheese and butter with an electric mixer on medium speed until smooth and creamy. Make sure your cream cheese and butter are truly softened; otherwise, you’ll end up with lumps in your frosting.
- Add Powdered Sugar and Cocoa Powder: Gradually add the powdered sugar and cocoa powder to the cream cheese mixture, beating on low speed until combined. Start with a low speed to prevent a powdered sugar explosion!
- Incorporate Vanilla and Milk: Add the vanilla extract and milk. Beat on medium speed until the frosting is smooth and fluffy. If the frosting is too thick, add a little more milk, one tablespoon at a time, until you reach your desired consistency. You want it to be spreadable but not too runny.
- Taste and Adjust: Give the frosting a taste and adjust the sweetness or chocolate intensity as needed. If you want it sweeter, add a little more powdered sugar. If you want it more chocolatey, add a little more cocoa powder.
Assembling the Cake:
Alright, the cakes are cool, the frosting is ready it’s time to put it all together! This is where the magic really happens.
- Level the Cakes (Optional): If your cakes have a slight dome on top, you can use a serrated knife to carefully level them. This will make stacking and frosting much easier. I usually just trim off the very top to create a flat surface.
- Place First Layer: Place one cake layer on a serving plate or cake stand. If you’ve used parchment paper rounds, carefully peel them off.
- Add Frosting Layer: Spread a generous layer of frosting evenly over the first cake layer. Don’t be shy! This is where you get that delicious frosting-to-cake ratio.
- Place Second Layer: Carefully place the second cake layer on top of the frosting.
- Frost the Entire Cake: Frost the top and sides of the cake with the remaining frosting. You can go for a smooth, even finish or a more rustic, swirled look. I personally love a slightly rustic look it’s more forgiving!
- Decorate (Optional): If you want to get fancy, you can decorate the cake with chocolate shavings, sprinkles, fresh berries, or anything else your heart desires. I sometimes drizzle melted chocolate over the top for an extra touch of decadence.
- Chill (Optional): For best results, chill the cake in the refrigerator for at least 30 minutes before serving. This will help the frosting set and make the cake easier to slice. However, if you’re impatient (like me!), you can definitely dig in right away.
Tips for Success:
- Room Temperature Ingredients: Using room temperature ingredients, especially the cream cheese and butter for the frosting, is crucial for a smooth and creamy texture.
- Don’t Overbake: Overbaking the cake will result in a dry cake. Check for doneness with a wooden skewer.
- Cool Completely: Make sure the cakes are completely cool before frosting to prevent the frosting from melting.
- Adjust Sweetness: Adjust the amount of powdered sugar in the frosting to your liking.
- Storage: Store leftover cake in an airtight container in the refrigerator for up to 3 days.
Variations:
- Add Coffee: For a mocha flavor, add 1-2 teaspoons of instant coffee granules to the boiling water.
- Chocolate Chips: Fold chocolate chips into the batter for extra chocolatey goodness.
- Different Frosting: If you’re not a fan of cream cheese frosting, you can use a chocolate buttercream frosting instead.
Conclusion:
Well, there you have it! I truly believe this Brick Street Chocolate Cake recipe is a must-try for any chocolate lover. It’s not just a cake; it’s an experience. The deep, rich chocolate flavor, combined with the incredibly moist and tender crumb, makes it utterly irresistible. It’s the kind of cake that will have everyone asking for seconds (and the recipe!).
Why is it a must-try? Because it’s simple enough for a weeknight bake, yet impressive enough for a special occasion. It’s the perfect balance of ease and elegance, delivering a decadent dessert without requiring hours in the kitchen. Plus, the ingredients are readily available, meaning you can whip this up whenever that chocolate craving hits!
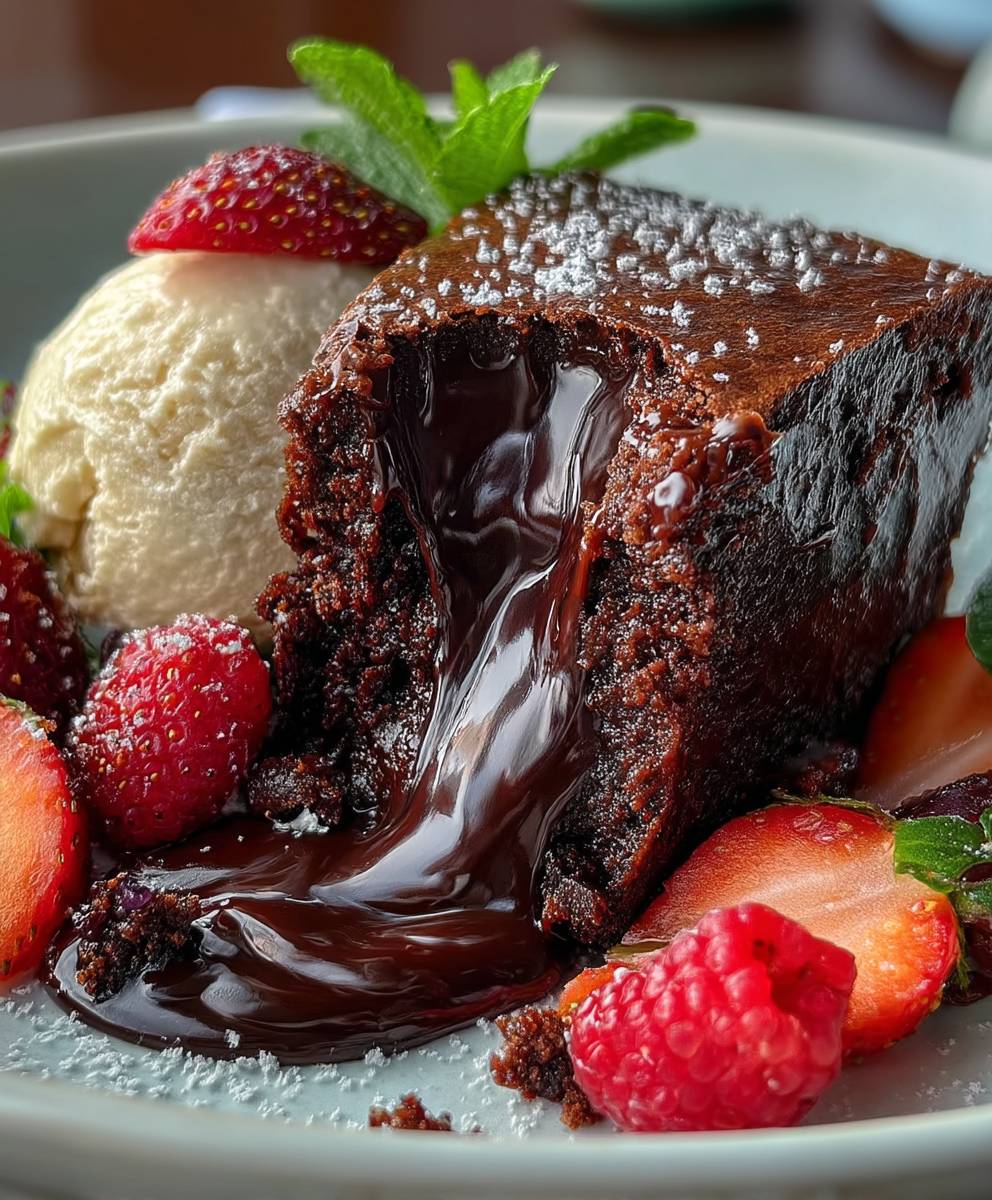
But the best part? It’s incredibly versatile! While I personally love it served simply with a dusting of powdered sugar, the possibilities are endless. For a truly decadent experience, try serving it warm with a scoop of vanilla bean ice cream and a drizzle of hot fudge sauce. Or, if you’re feeling adventurous, top it with a homemade chocolate ganache or a light and fluffy whipped cream.
Serving Suggestions and Variations:
* Classic: Dust with powdered sugar and serve with fresh berries.
* Decadent: Warm slice with vanilla ice cream and hot fudge.
* Elegant: Top with chocolate ganache and chocolate shavings.
* Festive: Add a layer of raspberry jam between the cake and frosting.
* Coffee Lover’s Dream: Add a tablespoon of instant espresso powder to the batter for an intensified chocolate-coffee flavor.
* Nutty Delight: Sprinkle chopped walnuts or pecans on top of the frosting.
* Boozy Boost: Brush the cooled cake layers with a simple syrup infused with rum or bourbon before frosting.
Don’t be afraid to experiment and make it your own! That’s the beauty of baking it’s all about creating something delicious and personal. I encourage you to get creative with your toppings and fillings. Maybe you’ll discover a new favorite combination!
I’ve poured my heart into perfecting this recipe, and I’m confident that you’ll love it as much as I do. It’s a guaranteed crowd-pleaser, perfect for birthdays, holidays, or simply a sweet treat on a rainy day. This Brick Street Chocolate Cake is more than just a recipe; it’s a memory waiting to be made.
So, what are you waiting for? Preheat your oven, gather your ingredients, and get ready to bake the most delicious chocolate cake you’ve ever tasted! I can’t wait to hear about your baking adventures. Please, try this recipe and share your experience in the comments below. Let me know what variations you tried, what toppings you loved, and how much your family and friends enjoyed it. Happy baking! I hope you enjoy this recipe as much as I do.
Brick Street Chocolate Cake: A Decadent Recipe & Baking Guide
Decadent and moist chocolate cake with a tangy and creamy chocolate cream cheese frosting. Rich, flavorful, and perfect for any celebration.
Ingredients
- 2 cups all-purpose flour
- 2 cups granulated sugar
- ¾ cup unsweetened cocoa powder
- 1 ½ teaspoons baking powder
- 1 ½ teaspoons baking soda
- 1 teaspoon salt
- 1 cup buttermilk
- ½ cup vegetable oil
- 2 large eggs
- 2 teaspoons vanilla extract
- 1 cup boiling water
- 8 ounces cream cheese, softened
- ½ cup (1 stick) unsalted butter, softened
- 3 cups powdered sugar
- ¾ cup unsweetened cocoa powder
- 1 teaspoon vanilla extract
- ¼ cup milk, or more as needed
Instructions
- Preheat oven to 350°F (175°C). Grease and flour two 9-inch round cake pans. Line the bottoms with parchment paper rounds.
- In a large bowl, whisk together the flour, sugar, cocoa powder, baking powder, baking soda, and salt.
- In a separate bowl, whisk together the buttermilk, oil, eggs, and vanilla extract. Pour this wet mixture into the dry ingredients and beat with an electric mixer on medium speed for about 2 minutes, or until well combined.
- Gradually pour the boiling water into the batter while mixing on low speed. Be careful not to splash!
- Divide the batter evenly between the prepared cake pans. Bake for 30-35 minutes, or until a wooden skewer inserted into the center comes out clean.
- Let the cakes cool in the pans for about 10 minutes before inverting them onto a wire rack to cool completely.
- In a large bowl, beat the softened cream cheese and butter with an electric mixer on medium speed until smooth and creamy.
- Gradually add the powdered sugar and cocoa powder to the cream cheese mixture, beating on low speed until combined.
- Add the vanilla extract and milk. Beat on medium speed until the frosting is smooth and fluffy. If the frosting is too thick, add a little more milk, one tablespoon at a time, until you reach your desired consistency.
- Give the frosting a taste and adjust the sweetness or chocolate intensity as needed.
- If your cakes have a slight dome on top, you can use a serrated knife to carefully level them.
- Place one cake layer on a serving plate or cake stand. If you’ve used parchment paper rounds, carefully peel them off.
- Spread a generous layer of frosting evenly over the first cake layer.
- Carefully place the second cake layer on top of the frosting.
- Frost the top and sides of the cake with the remaining frosting.
- If you want to get fancy, you can decorate the cake with chocolate shavings, sprinkles, fresh berries, or anything else your heart desires.
- For best results, chill the cake in the refrigerator for at least 30 minutes before serving.
Notes
- Using room temperature ingredients, especially the cream cheese and butter for the frosting, is crucial for a smooth and creamy texture.
- Overbaking the cake will result in a dry cake. Check for doneness with a wooden skewer.
- Make sure the cakes are completely cool before frosting to prevent the frosting from melting.
- Adjust the amount of powdered sugar in the frosting to your liking.
- Store leftover cake in an airtight container in the refrigerator for up to 3 days.