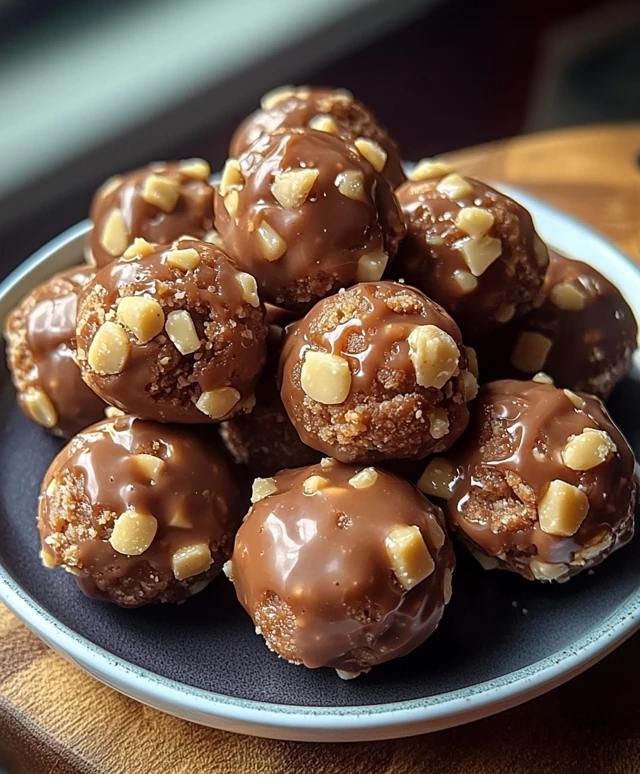
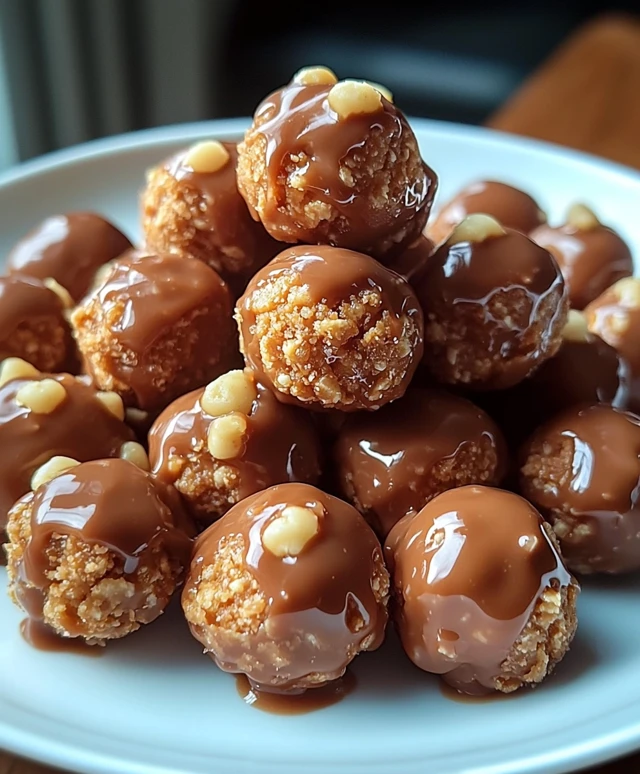
Butterfinger Balls Treats are a delightful indulgence that combines the rich, crunchy goodness of Butterfinger candy bars with the simplicity of no-bake desserts. These treats have become a favorite among dessert lovers, not just for their irresistible taste but also for their nostalgic connection to childhood. The combination of creamy peanut butter, crushed Butterfinger bars, and a chocolate coating creates a texture that is both satisfying and decadent.
Originating from the classic American candy bar, Butterfinger Balls Treats have evolved into a popular homemade dessert that is perfect for any occasion. Whether youre hosting a party, celebrating a holiday, or simply craving something sweet, these treats are incredibly convenient to make and require minimal ingredients. People love this dish for its perfect balance of sweet and salty flavors, making it a crowd-pleaser that appeals to all ages. With just a few simple steps, you can whip up a batch of Butterfinger Balls Treats that will leave everyone asking for seconds!
Ingredients:
- 1 cup Butterfinger candy bars, crushed (about 4-5 bars)
- 1 cup creamy peanut butter
- 1 cup powdered sugar
- 2 cups semi-sweet chocolate chips
- 1 tablespoon coconut oil (optional, for smoother chocolate)
- 1/2 cup crushed Butterfinger bars (for topping)
Preparing the Mixture
- Start by preparing your workspace. Gather all the ingredients and tools you will need, including a mixing bowl, a spatula, a baking sheet, and parchment paper.
- In a large mixing bowl, combine the crushed Butterfinger candy bars and creamy peanut butter. Use a spatula to mix them together until they are well combined. The mixture should be thick and sticky.
- Next, gradually add the powdered sugar to the mixture. Its best to add it in increments to avoid a cloud of sugar. Mix thoroughly after each addition until the mixture is fully combined and forms a dough-like consistency.
- Once the mixture is well combined, use your hands to knead it slightly in the bowl. This will help ensure that all ingredients are evenly distributed. The mixture should be moldable and hold its shape when formed into balls.
Forming the Balls
- Line a baking sheet with parchment paper. This will prevent the Butterfinger balls from sticking and make for easy cleanup.
- Using a tablespoon or a small cookie scoop, take a portion of the mixture and roll it into a ball about 1 inch in diameter. Place the formed ball onto the prepared baking sheet. Repeat this process until all the mixture is used up. You should have approximately 20-25 balls.
- Once all the balls are formed, place the baking sheet in the refrigerator for about 30 minutes. This will help the balls firm up and make them easier to coat in chocolate.
Melting the Chocolate
- While the Butterfinger balls are chilling, prepare the chocolate coating. In a microwave-safe bowl, combine the semi-sweet chocolate chips and coconut oil (if using). The coconut oil will help the chocolate melt smoothly and give it a nice sheen.
- Microwave the chocolate mixture in 30-second intervals, stirring in between each interval. This will help prevent the chocolate from burning. Continue until the chocolate is completely melted and smooth.
- If you prefer, you can also melt the chocolate using a double boiler. Fill a pot with a few inches of water and bring it to a simmer. Place a heatproof bowl on top of the pot, ensuring it doesnt touch the water. Add the chocolate chips and coconut oil to the bowl, stirring until melted.
Coating the Balls
- Once the Butterfinger balls have chilled and the chocolate is melted, its time to coat the balls. Using a fork or a toothpick, dip each ball into the melted chocolate, ensuring it is fully coated.
- Allow any excess chocolate to drip off before placing the coated ball back onto the parchment-lined baking sheet. This will help prevent the chocolate from pooling underneath the balls.
- After all the balls are coated in chocolate, sprinkle the remaining crushed Butterfinger bars on top of each ball while the chocolate is still wet. This will create a delicious topping and add extra crunch.
Chilling and Serving
- Once all the Butterfinger balls are coated and topped, place the baking sheet back in the refrigerator for about 30 minutes to allow the chocolate to set completely.
- After the chocolate has hardened, you can transfer the Butterfinger balls to an airtight container for storage. They can be kept in the refrigerator for up to two weeks, or you can freeze them for longer storage.
- When ready to serve, simply take them out of the refrigerator or freezer and enjoy! These treats are perfect for parties, holidays, or just a sweet snack at home.
Tips and Variations
- If you want to add a little extra flavor, consider mixing in a teaspoon of vanilla extract into the peanut butter mixture.
- For a different chocolate

Conclusion:
In summary, these Butterfinger Balls Treats are an absolute must-try for anyone looking to indulge in a sweet, crunchy, and utterly delightful dessert. The combination of creamy peanut butter, crushed Butterfinger bars, and a smooth chocolate coating creates a flavor explosion that is sure to satisfy your sweet tooth. Not only are they incredibly easy to make, but they also require minimal ingredients, making them a perfect choice for both novice and experienced bakers alike. For serving suggestions, consider presenting these treats on a decorative platter at your next gathering or party. They make for a fantastic dessert table addition, and their bite-sized nature makes them easy to enjoy while mingling. You can also experiment with variations by using different types of chocolate for coating, such as white chocolate or dark chocolate, or even adding a sprinkle of sea salt on top for an extra flavor kick. For a fun twist, try incorporating crushed pretzels or nuts into the mixture for added texture. We encourage you to try this Butterfinger Balls Treats recipe and share your experience with friends and family. Whether youre making them for a special occasion or just as a sweet treat for yourself, wed love to hear how they turn out! Dont forget to snap a picture and tag us on social media to show off your delicious creations. Happy baking! Print
Butterfinger Balls Treats: Easy Recipe for a Delicious No-Bake Dessert
- Total Time: 60 minutes
- Yield: 20–25 balls 1x
Description
These Butterfinger Peanut Butter Balls are a delicious no-bake treat combining creamy peanut butter and crunchy Butterfinger candy, all coated in rich chocolate. Easy to make and perfect for satisfying your sweet cravings!
Ingredients
Scale- 1 cup Butterfinger candy bars, crushed (about 4–5 bars)
- 1 cup creamy peanut butter
- 1 cup powdered sugar
- 2 cups semi-sweet chocolate chips
- 1 tablespoon coconut oil (optional, for smoother chocolate)
- 1/2 cup crushed Butterfinger bars (for topping)
Instructions
- Start by preparing your workspace. Gather all the ingredients and tools you will need, including a mixing bowl, a spatula, a baking sheet, and parchment paper.
- In a large mixing bowl, combine the crushed Butterfinger candy bars and creamy peanut butter. Use a spatula to mix them together until they are well combined. The mixture should be thick and sticky.
- Gradually add the powdered sugar to the mixture, mixing thoroughly after each addition until the mixture is fully combined and forms a dough-like consistency.
- Use your hands to knead the mixture slightly in the bowl to ensure all ingredients are evenly distributed. The mixture should be moldable and hold its shape when formed into balls.
- Line a baking sheet with parchment paper to prevent sticking.
- Using a tablespoon or a small cookie scoop, take a portion of the mixture and roll it into a ball about 1 inch in diameter. Place the formed ball onto the prepared baking sheet. Repeat until all the mixture is used up, yielding approximately 20-25 balls.
- Place the baking sheet in the refrigerator for about 30 minutes to firm up the balls.
- In a microwave-safe bowl, combine the semi-sweet chocolate chips and coconut oil (if using).
- Microwave the chocolate mixture in 30-second intervals, stirring in between, until completely melted and smooth. Alternatively, melt using a double boiler.
- Once the Butterfinger balls have chilled and the chocolate is melted, dip each ball into the melted chocolate using a fork or toothpick, ensuring it is fully coated.
- Allow excess chocolate to drip off before placing the coated ball back onto the parchment-lined baking sheet.
- While the chocolate is still wet, sprinkle the remaining crushed Butterfinger bars on top of each ball.
- Place the baking sheet back in the refrigerator for about 30 minutes to allow the chocolate to set completely.
- Transfer the Butterfinger balls to an airtight container for storage. They can be kept in the refrigerator for up to two weeks or frozen for longer storage.
- When ready to serve, take them out of the refrigerator or freezer and enjoy!
Notes
- For added flavor, consider mixing in a teaspoon of vanilla extract into the peanut butter mixture.
- You can use milk chocolate or dark chocolate instead of semi-sweet chocolate for a different taste.
- Prep Time: 20 minutes
- Cook Time: 10 minutes

