
Butterscotch Squares: Prepare to be transported back to childhood with every bite of these chewy, melt-in-your-mouth treats! Is there anything more comforting than the rich, buttery sweetness of butterscotch? This recipe isn’t just about baking; it’s about creating a nostalgic experience that will have everyone reaching for seconds (and thirds!).
While the exact origins of butterscotch are debated, most believe it emerged in Doncaster, England, sometime in the early 19th century. Legend has it that a confectioner’s apprentice accidentally created the delightful candy, and its popularity quickly spread. The simple combination of butter, brown sugar, and vanilla creates a flavor profile that’s both comforting and sophisticated.
What makes butterscotch squares so irresistible? It’s the perfect balance of textures a slightly crisp top giving way to a soft, chewy interior. The deep, caramel-like flavor is undeniably addictive, and the squares are incredibly easy to make, making them ideal for bake sales, potlucks, or simply a sweet treat on a cozy afternoon. Plus, they are incredibly convenient to pack and travel with. So, gather your ingredients, and let’s bake up a batch of these delightful squares that are guaranteed to bring smiles to faces of all ages!

Ingredients:
- 1 cup (2 sticks) unsalted butter, softened
- 1 cup packed light brown sugar
- 1 large egg
- 1 teaspoon vanilla extract
- 2 cups all-purpose flour
- 1/2 teaspoon baking soda
- 1/4 teaspoon salt
- 1 cup butterscotch chips
Preparing the Dough:
Okay, let’s get started! First things first, we need to cream together the butter and brown sugar. This is a crucial step, so don’t rush it. You want the mixture to be light and fluffy. I usually use an electric mixer for this, but you can definitely do it by hand if you’re feeling ambitious. Just make sure your butter is nice and soft not melted, but soft enough that you can easily press your finger into it.
- In a large bowl, cream together the softened butter and packed light brown sugar until light and fluffy. This usually takes about 3-5 minutes with an electric mixer on medium speed. You’ll notice the color lighten and the texture become much smoother. Don’t skip this step it’s what gives the butterscotch squares their tender crumb.
- Beat in the egg and vanilla extract until well combined. Make sure to scrape down the sides of the bowl to ensure everything is evenly mixed. We don’t want any pockets of unmixed butter or sugar!
- In a separate bowl, whisk together the all-purpose flour, baking soda, and salt. Whisking is important here because it helps to evenly distribute the baking soda and salt throughout the flour. This will ensure that your butterscotch squares rise properly and have a consistent flavor.
- Gradually add the dry ingredients to the wet ingredients, mixing on low speed until just combined. Be careful not to overmix! Overmixing can develop the gluten in the flour, which will result in tough butterscotch squares. We want them to be tender and melt-in-your-mouth.
- Stir in the butterscotch chips. I like to use a spatula for this step to avoid overmixing. Just gently fold in the butterscotch chips until they are evenly distributed throughout the dough.
Pressing and Baking:
Now comes the fun part pressing the dough into the pan and baking it! This is where the magic happens, and you’ll start to see those delicious butterscotch squares come to life.
- Preheat your oven to 350°F (175°C). Make sure your oven is properly preheated before you put the dough in. This will ensure that the butterscotch squares bake evenly.
- Grease and flour a 9×13 inch baking pan. You can also line the pan with parchment paper, leaving an overhang on the sides. This will make it easier to lift the butterscotch squares out of the pan after they’ve baked.
- Press the dough evenly into the prepared pan. The dough will be a bit crumbly, but just keep pressing it down until it forms a smooth, even layer. I sometimes use the bottom of a measuring cup to help me press the dough evenly.
- Bake for 20-25 minutes, or until the edges are golden brown and the center is set. The baking time may vary depending on your oven, so keep an eye on them. You want them to be golden brown around the edges and slightly soft in the center. They will continue to set up as they cool.
- Let the butterscotch squares cool completely in the pan before cutting into squares. This is important! If you try to cut them while they’re still warm, they will crumble and fall apart. Be patient it’s worth the wait!
Cutting and Serving:
Almost there! Once the butterscotch squares are completely cool, it’s time to cut them and enjoy. This is the best part, right?
- Once completely cooled, cut into squares. I usually cut them into 2-inch squares, but you can make them any size you like.
- Lift the butterscotch squares out of the pan using the parchment paper overhang (if you used it). If you didn’t use parchment paper, you can carefully loosen the edges with a knife and then lift them out.
- Serve and enjoy! These butterscotch squares are delicious on their own, but they’re also great with a scoop of vanilla ice cream or a glass of cold milk.
Tips and Variations:
Want to take your butterscotch squares to the next level? Here are a few tips and variations to try:
- Add nuts: Stir in 1/2 cup of chopped walnuts or pecans for added crunch and flavor.
- Use different chips: Experiment with different types of chips, such as chocolate chips, peanut butter chips, or white chocolate chips.
- Drizzle with chocolate: Drizzle melted chocolate over the cooled butterscotch squares for a decadent treat.
- Add a glaze: Make a simple glaze by whisking together powdered sugar and milk, and then drizzle it over the cooled butterscotch squares.
- Make them gluten-free: Substitute the all-purpose flour with a gluten-free all-purpose flour blend.
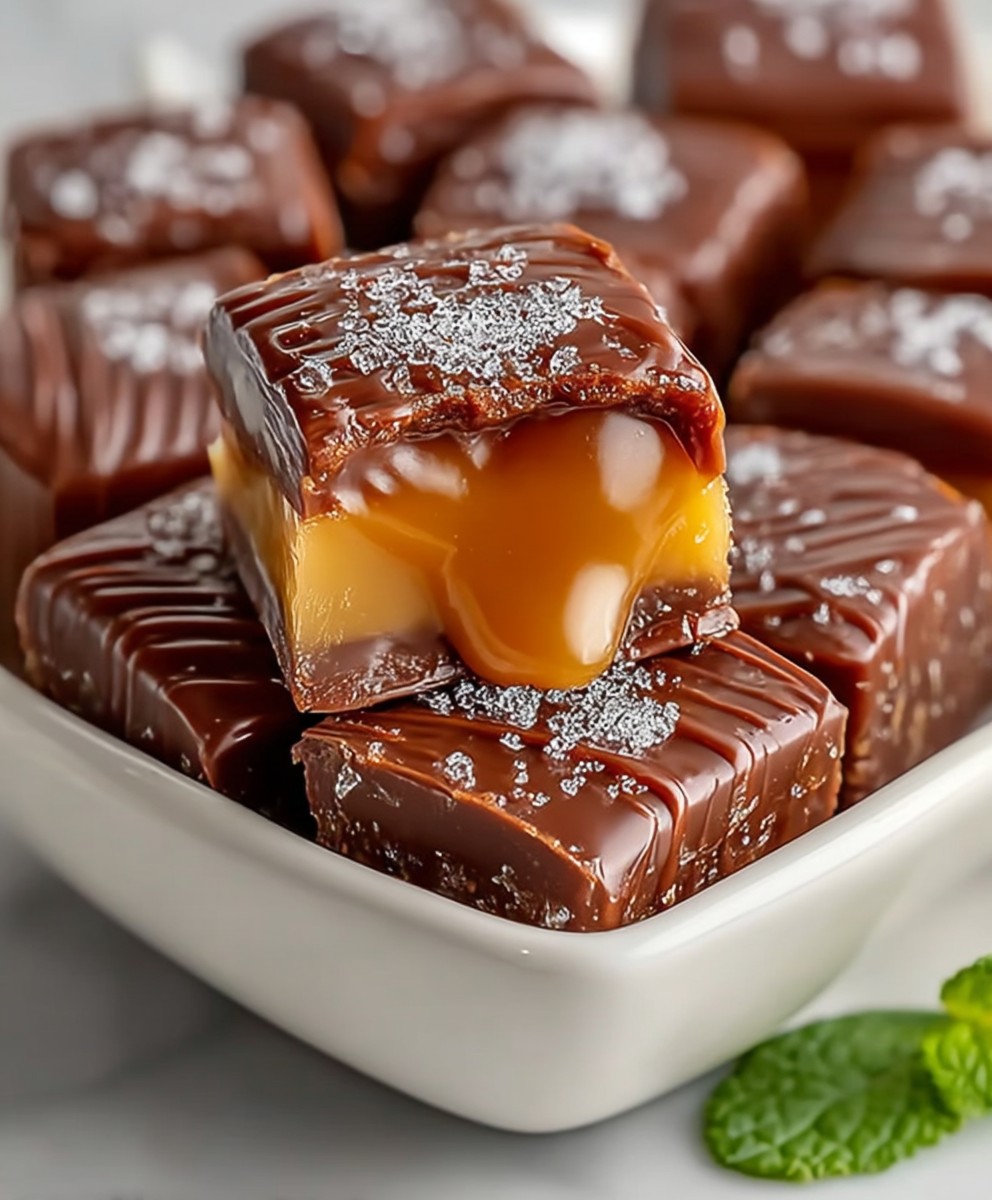
- Salted Butterscotch: Sprinkle a little sea salt on top of the squares immediately after they come out of the oven. The salt enhances the butterscotch flavor beautifully.
Storing Butterscotch Squares:
These butterscotch squares are best stored in an airtight container at room temperature. They will stay fresh for up to 3-4 days. You can also freeze them for longer storage. Just wrap them tightly in plastic wrap and then place them in a freezer-safe bag or container. They will keep in the freezer for up to 2 months. When you’re ready to eat them, simply thaw them at room temperature.
Troubleshooting:
Sometimes things don’t go exactly as planned in the kitchen. Here are a few common problems you might encounter when making butterscotch squares, and how to fix them:
- Butterscotch squares are too dry: This could be due to overbaking or using too much flour. Make sure to measure your flour accurately and don’t overbake the squares.
- Butterscotch squares are too crumbly: This could be due to not creaming the butter and sugar together properly, or overmixing the dough. Make sure to cream the butter and sugar until light and fluffy, and don’t overmix the dough.
- Butterscotch squares are too soft: This could be due to underbaking or using too much butter. Make sure to bake the squares until they are golden brown around the edges and slightly soft in the center.
- Butterscotch chips are melting too much: This can happen if your oven is too hot. Make sure your oven is properly calibrated and that you’re baking the squares at the correct temperature. You can also try chilling the dough for 30 minutes before baking to help prevent the chips from melting too much.
Why This Recipe Works:
This recipe is a classic for a reason! The combination of butter, brown sugar, and butterscotch chips creates a rich, chewy, and utterly irresistible treat. The baking soda helps to give the squares a light and airy texture, while the salt balances out the sweetness. The key to success is to use high-quality ingredients and to follow the instructions carefully. Don’t be afraid to experiment with different variations to find your perfect butterscotch square!
Nutritional Information (Approximate):
Please note that the following nutritional information is an estimate and may vary depending on the specific ingredients you use and the size of the squares you cut.
- Calories: Approximately 200-250 per square
- Fat: 10-15 grams
- Saturated Fat: 6-9 grams
- Cholesterol: 30-40 mg
- Sodium: 100-150 mg
- Carbohydrates: 25-35 grams
- Sugar: 15-20 grams
- Protein: 2-3 grams
Enjoy your homemade Butterscotch Squares! I hope you love them as much as I do.
Conclusion:
And there you have it! These Butterscotch Squares are truly something special, and I genuinely believe they deserve a spot in your regular baking rotation. Why? Because they’re ridiculously easy to make, require minimal ingredients you probably already have on hand, and deliver an explosion of rich, buttery, caramel-like flavor that’s simply irresistible. Forget complicated desserts that take hours; these squares are your ticket to instant gratification.
But beyond the simplicity and the incredible taste, these Butterscotch Squares offer a comforting nostalgia. They remind me of simpler times, of grandma’s kitchen filled with the aroma of baking, and of sharing sweet treats with loved ones. That’s a feeling you can’t put a price on, and it’s a big part of what makes this recipe a must-try.
Serving Suggestions and Variations:
Now, let’s talk about how to enjoy these delectable squares. They’re fantastic on their own, of course, perfect with a cup of coffee or tea. But don’t be afraid to get creative!
* Warm with Ice Cream: Gently warm a square in the microwave for a few seconds and top it with a scoop of vanilla ice cream. The contrast of warm and cold, soft and slightly chewy, is heavenly. A drizzle of caramel sauce wouldn’t hurt either!
* Butterscotch Crumble Topping: Crumble a square over your favorite apple crisp or peach cobbler for an extra layer of butterscotch goodness.
* Butterscotch Parfaits: Layer crumbled squares with whipped cream and fresh berries in a glass for a simple yet elegant dessert.
* Butterscotch Bark: Melt some chocolate (milk, dark, or white your choice!), spread it on parchment paper, and sprinkle with crumbled Butterscotch Squares. Let it set, then break it into pieces for a delightful treat.
* Nutty Butterscotch: Add a handful of chopped pecans or walnuts to the batter for a nutty twist.
* Salted Butterscotch: Sprinkle a pinch of sea salt on top of the squares after baking for a delightful salty-sweet combination. This really enhances the butterscotch flavor!
* Espresso Butterscotch: Add a teaspoon of instant espresso powder to the batter for a mocha-butterscotch flavor.
The possibilities are endless! Feel free to experiment and find your own favorite way to enjoy these versatile squares.
Time to Bake!
I truly hope you’ll give this recipe for Butterscotch Squares a try. I’m confident that you’ll love them as much as I do. They’re perfect for a quick weeknight dessert, a potluck contribution, or a special treat for someone you care about.
Once you’ve made them, I’d absolutely love to hear about your experience! Did you try any of the variations? Did you make any adjustments to the recipe? What did your family and friends think? Share your thoughts and photos in the comments below. Your feedback is invaluable, and it helps me to continue creating and sharing recipes that you’ll love. Happy baking, and enjoy every delicious bite of these amazing Butterscotch Squares! I can’t wait to hear all about your baking adventures!
Butterscotch Squares: The Ultimate Guide to Baking Perfect Squares
Chewy and delicious butterscotch squares packed with butterscotch chips. A classic treat that's easy to make and perfect for any occasion.
Ingredients
- 1 cup (2 sticks) unsalted butter, softened
- 1 cup packed light brown sugar
- 1 large egg
- 1 teaspoon vanilla extract
- 2 cups all-purpose flour
- 1/2 teaspoon baking soda
- 1/4 teaspoon salt
- 1 cup butterscotch chips
Instructions
- Prepare: Preheat oven to 350°F (175°C). Grease and flour a 9×13 inch baking pan (or line with parchment paper).
- Cream Butter and Sugar: In a large bowl, cream together the softened butter and packed light brown sugar until light and fluffy (3-5 minutes with an electric mixer on medium speed).
- Add Egg and Vanilla: Beat in the egg and vanilla extract until well combined. Scrape down the sides of the bowl.
- Combine Dry Ingredients: In a separate bowl, whisk together the all-purpose flour, baking soda, and salt.
- Combine Wet and Dry: Gradually add the dry ingredients to the wet ingredients, mixing on low speed until just combined. Do not overmix.
- Add Butterscotch Chips: Stir in the butterscotch chips until evenly distributed.
- Press into Pan: Press the dough evenly into the prepared pan.
- Bake: Bake for 20-25 minutes, or until the edges are golden brown and the center is set.
- Cool: Let the butterscotch squares cool completely in the pan before cutting into squares.
- Cut and Serve: Once completely cooled, cut into squares and serve.
Notes
- Creaming is Key: Don’t rush the creaming of the butter and sugar. This is what gives the squares their tender crumb.
- Don’t Overmix: Overmixing the dough will result in tough squares.
- Cool Completely: Let the squares cool completely before cutting to prevent crumbling.
- Variations:
- Add 1/2 cup of chopped walnuts or pecans.
- Use different types of chips (chocolate, peanut butter, white chocolate).
- Drizzle with melted chocolate or a powdered sugar glaze.
- Use gluten-free all-purpose flour for a gluten-free version.
- Sprinkle with sea salt immediately after baking for salted butterscotch squares.
- Storage: Store in an airtight container at room temperature for up to 3-4 days, or freeze for up to 2 months.