
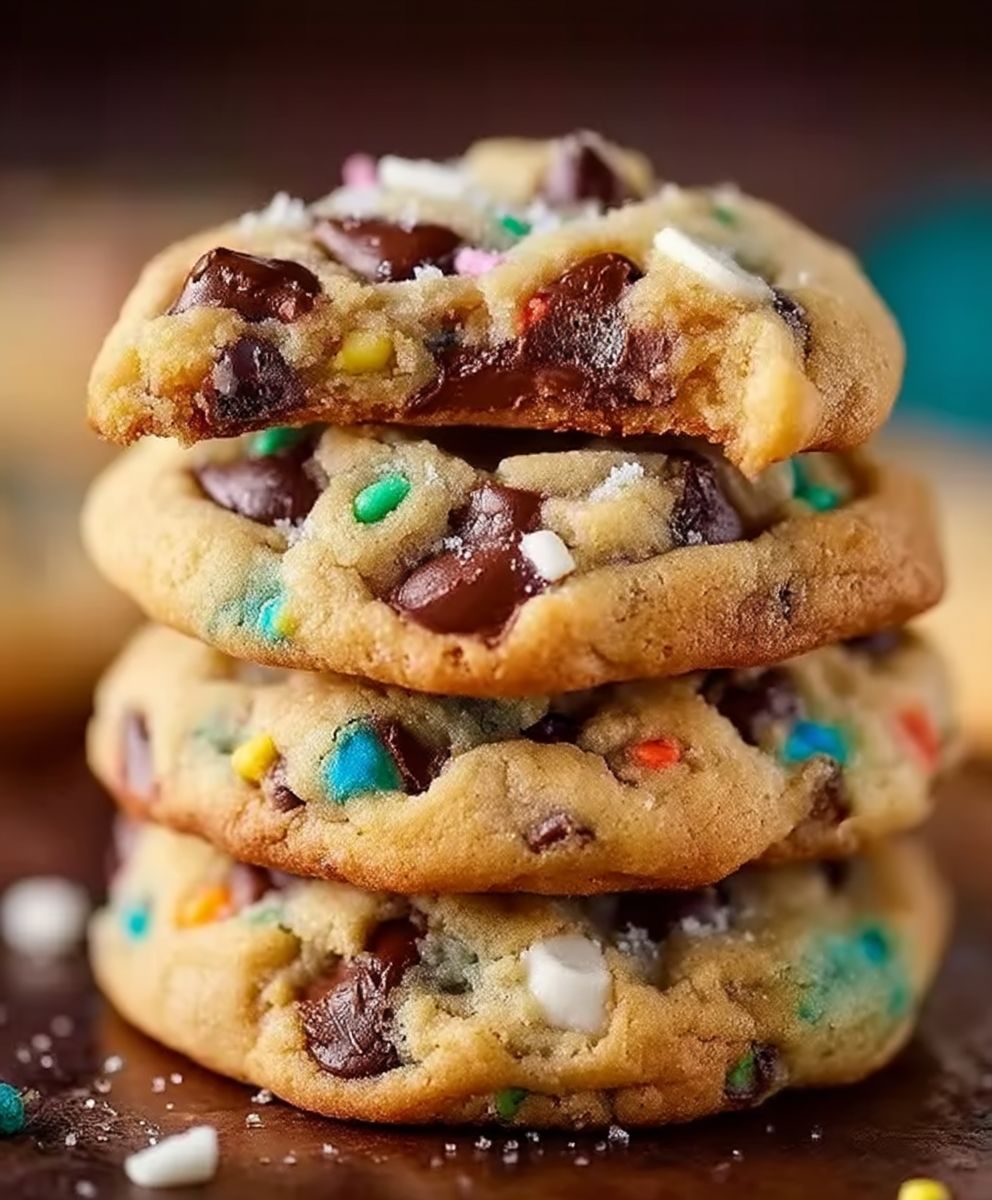
Cake Batter Chocolate Chip cookies: just the name alone conjures up images of fun, sprinkles, and pure, unadulterated joy! Have you ever snuck a spoonful (or two…or three!) of cake batter while baking? That irresistible, sweet, vanilla-infused flavor is what we’ve captured in these incredibly soft and chewy cookies.
While the exact origins of adding cake mix to cookies are a bit hazy, the concept likely emerged from home bakers looking for a shortcut to achieve a moist and flavorful cookie. It’s a brilliant hack that transforms a simple chocolate chip cookie into something truly special. These aren’t your grandma’s chocolate chip cookies (unless your grandma is a culinary genius, of course!).
What makes these Cake Batter Chocolate Chip cookies so beloved? It’s the perfect combination of textures: a slightly crisp edge giving way to a melt-in-your-mouth center. The cake mix adds a unique tenderness and a subtle vanilla flavor that complements the rich chocolate chips beautifully. Plus, they’re incredibly easy to make, requiring minimal ingredients and effort. Whether you’re baking for a party, a holiday, or simply a sweet treat for yourself, these cookies are guaranteed to be a crowd-pleaser. Get ready to experience a burst of childhood nostalgia with every bite!

Ingredients:
- 2 1/4 cups all-purpose flour
- 1 teaspoon baking soda
- 1 teaspoon salt
- 1 cup (2 sticks) unsalted butter, softened
- 3/4 cup granulated sugar
- 3/4 cup packed brown sugar
- 1 teaspoon vanilla extract
- 2 large eggs
- 12 ounces semi-sweet chocolate chips
- 1/2 cup chopped walnuts or pecans (optional)
- 1/4 cup milk (optional, for adjusting batter consistency)
Preparing the Dough:
- Combine Dry Ingredients: In a medium bowl, whisk together the flour, baking soda, and salt. This ensures that the baking soda is evenly distributed throughout the flour, which is crucial for a consistent rise. Set this bowl aside for later.
- Cream Butter and Sugars: In a large bowl (or the bowl of a stand mixer), cream together the softened butter, granulated sugar, and brown sugar until light and fluffy. This process incorporates air into the butter, which contributes to the cake-like texture of the cookies. I usually cream them for about 3-5 minutes on medium speed. You’ll know it’s ready when the mixture is noticeably lighter in color and has a smooth, almost whipped consistency. Don’t rush this step!
- Add Vanilla and Eggs: Beat in the vanilla extract until combined. Then, add the eggs one at a time, beating well after each addition. Make sure each egg is fully incorporated before adding the next. This prevents the batter from curdling and ensures a smooth, homogenous mixture. Scrape down the sides of the bowl as needed to ensure everything is evenly mixed.
- Gradually Add Dry Ingredients: Gradually add the dry ingredients to the wet ingredients, mixing on low speed until just combined. Be careful not to overmix! Overmixing develops the gluten in the flour, which can result in tough cookies. I usually add the dry ingredients in three additions, mixing until just a few streaks of flour remain after each addition.
- Incorporate Chocolate Chips and Nuts (Optional): Fold in the chocolate chips and nuts (if using) until evenly distributed throughout the dough. Folding gently prevents the chocolate chips from breaking and ensures they are evenly dispersed.
- Adjust Consistency (Optional): If the dough seems too dry or stiff, add milk, one tablespoon at a time, until the desired consistency is reached. The dough should be soft and slightly sticky, but not too wet. This step is especially helpful if you live in a dry climate or if your flour is particularly absorbent.
- Chill the Dough (Important!): Cover the bowl with plastic wrap and refrigerate the dough for at least 30 minutes, or up to 24 hours. Chilling the dough allows the gluten to relax, which results in softer, chewier cookies. It also prevents the cookies from spreading too much during baking. If you’re short on time, 30 minutes will do, but I find that chilling for a few hours or overnight yields the best results.
Baking the Cookies:
- Preheat Oven: Preheat your oven to 375°F (190°C). Make sure your oven rack is positioned in the center of the oven for even baking.
- Prepare Baking Sheets: Line baking sheets with parchment paper or silicone baking mats. This prevents the cookies from sticking and makes cleanup a breeze. I prefer parchment paper because it’s disposable, but silicone mats are a great reusable option.
- Scoop Dough: Drop rounded tablespoons of dough onto the prepared baking sheets, leaving about 2 inches between each cookie. I like to use a cookie scoop to ensure that all the cookies are the same size, which helps them bake evenly. If you don’t have a cookie scoop, you can use two spoons to portion out the dough.
- Bake: Bake for 9-11 minutes, or until the edges are golden brown and the centers are still slightly soft. The baking time will vary depending on your oven and the size of your cookies. Keep a close eye on them, especially during the last few minutes of baking, to prevent them from burning.
- Cool: Remove the baking sheets from the oven and let the cookies cool on the baking sheets for a few minutes before transferring them to a wire rack to cool completely. This allows the cookies to firm up slightly and prevents them from breaking when you move them.
Tips and Tricks for Perfect Cake Batter Chocolate Chip Cookies:
- Use Room Temperature Butter: Softened butter is crucial for creaming properly with the sugars. If your butter is too cold, it won’t cream well, and if it’s too melted, the cookies will spread too much. The ideal consistency is soft enough to press your finger into easily, but not greasy.
- Don’t Overmix: Overmixing the dough develops the gluten in the flour, which can result in tough cookies. Mix until just combined, and then stop.
- Chill the Dough: Chilling the dough is essential for preventing the cookies from spreading too much and for developing a richer flavor. Don’t skip this step!
- Use High-Quality Chocolate Chips: The quality of the chocolate chips will significantly impact the flavor of the cookies. I recommend using semi-sweet chocolate chips for a classic chocolate chip cookie flavor, but you can also experiment with other types of chocolate, such as dark chocolate or milk chocolate.
- Adjust Baking Time: The baking time will vary depending on your oven and the size of your cookies. Keep a close eye on them and adjust the baking time as needed. The cookies are done when the edges are golden brown and the centers are still slightly soft.
- For Extra Chewy Cookies: Slightly underbake the cookies. They will continue to cook on the baking sheet as they cool.
- For Extra Crispy Cookies: Bake the cookies for a minute or two longer.
- Add a Sprinkle of Sea Salt: A sprinkle of sea salt on top of the cookies before baking enhances the sweetness and adds a delicious salty-sweet contrast.
- Store Properly: Store the cookies in an airtight container at room temperature for up to 3 days.
- Freeze for Later: You can freeze the cookie dough for up to 3 months. Simply scoop the dough onto a baking sheet, freeze until solid, and then transfer to a freezer bag. When you’re ready to bake, bake from frozen, adding a few extra minutes to the baking time. You can also freeze baked cookies. Let them cool completely, then place them in a freezer-safe bag or container. They can be thawed at room temperature.
Variations:
- Double Chocolate Chip: Use both semi-sweet and milk chocolate chips.
- Peanut Butter Chocolate Chip: Add 1/2 cup of peanut butter to the wet ingredients.
- Oatmeal Chocolate Chip: Add 1 cup of rolled oats to the dry ingredients.
- White Chocolate Macadamia Nut: Substitute white chocolate chips for the semi-sweet chocolate chips and add 1/2 cup of chopped macadamia nuts.
- Spice it Up: Add 1/2 teaspoon of cinnamon or nutmeg to the dry ingredients for a warm, spiced flavor.
Enjoy your delicious homemade Cake Batter Chocolate Chip Cookies!
Conclusion:
And there you have it! This Cake Batter Chocolate Chip recipe is truly a game-changer, and I genuinely believe it deserves a spot in your regular baking rotation. Why? Because it delivers that nostalgic, funfetti-filled flavor we all secretly crave, but in a sophisticated, chewy, and utterly irresistible chocolate chip cookie. It’s the perfect balance of playful and delicious, making it a guaranteed crowd-pleaser, whether you’re baking for kids, adults, or, let’s be honest, just yourself!
Think about it: the soft, almost melt-in-your-mouth texture, the bursts of sweet cake batter flavor mingling with rich chocolate chips… it’s a symphony of deliciousness in every single bite. Plus, the recipe is incredibly easy to follow, even for novice bakers. You don’t need any fancy equipment or hard-to-find ingredients. Just a few simple steps, and you’ll be rewarded with a batch of cookies that are far superior to anything you can buy in a store.
But the best part? The possibilities are endless! While these cookies are amazing as is, feel free to get creative with your serving suggestions and variations. For a truly decadent treat, try sandwiching a scoop of vanilla ice cream between two cookies. Or, crumble them over a bowl of yogurt or oatmeal for a delightful breakfast boost.
Serving Suggestions and Variations:
* Ice Cream Sandwiches: As mentioned, vanilla ice cream is a classic pairing, but don’t be afraid to experiment with other flavors like strawberry, chocolate, or even birthday cake ice cream to really amplify that cake batter flavor.
* Cookie Crumble Topping: Crush the cookies and sprinkle them over ice cream, yogurt, parfaits, or even pancakes for an extra touch of sweetness and texture.
* Cake Batter Milkshake: Blend a few cookies with milk and ice cream for a fun and festive milkshake. Add a swirl of whipped cream and some sprinkles for extra flair.
* Different Chocolate Chips: While semi-sweet chocolate chips are a classic choice, you can easily swap them out for milk chocolate, dark chocolate, white chocolate, or even a combination of all three.
* Add Sprinkles: For an extra pop of color and fun, add some sprinkles to the dough before baking. Rainbow sprinkles are always a good choice, but you can also use themed sprinkles for holidays or special occasions.
* Nuts: If you’re a fan of nuts, try adding some chopped walnuts, pecans, or macadamia nuts to the dough.
* Frosting: Once the cookies have cooled, you can frost them with a simple buttercream frosting or a cream cheese frosting. Add some sprinkles for an extra touch of fun.
I truly believe that this Cake Batter Chocolate Chip recipe will become a new favorite in your household. It’s the perfect treat for any occasion, from birthday parties to casual weeknight desserts. So, what are you waiting for? Gather your ingredients, preheat your oven, and get ready to experience cookie perfection!
I’m so excited for you to try this recipe and would absolutely love to hear about your experience. Did you make any variations? What did your family and friends think? Share your photos and stories in the comments below! Happy baking! I can’t wait to see what you create. Don’t forget to rate the recipe once you’ve tried it! Your feedback helps others discover this amazing treat.
Cake Batter Chocolate Chip: The Ultimate Guide to Baking Perfection
Soft, chewy chocolate chip cookies with a hint of vanilla. A classic, sweet treat.
Ingredients
- 2 1/4 cups all-purpose flour
- 1 teaspoon baking soda
- 1 teaspoon salt
- 1 cup (2 sticks) unsalted butter, softened
- 3/4 cup granulated sugar
- 3/4 cup packed brown sugar
- 1 teaspoon vanilla extract
- 2 large eggs
- 12 ounces semi-sweet chocolate chips
- 1/2 cup chopped walnuts or pecans (optional)
- 1/4 cup milk (optional, for adjusting batter consistency)
Instructions
- Combine Dry Ingredients: In a medium bowl, whisk together the flour, baking soda, and salt. Set aside.
- Cream Butter and Sugars: In a large bowl (or stand mixer), cream together the softened butter, granulated sugar, and brown sugar until light and fluffy (3-5 minutes on medium speed).
- Add Vanilla and Eggs: Beat in the vanilla extract until combined. Add the eggs one at a time, beating well after each addition. Scrape down the sides of the bowl as needed.
- Gradually Add Dry Ingredients: Gradually add the dry ingredients to the wet ingredients, mixing on low speed until just combined. Be careful not to overmix.
- Incorporate Chocolate Chips and Nuts (Optional): Fold in the chocolate chips and nuts (if using) until evenly distributed.
- Adjust Consistency (Optional): If the dough seems too dry, add milk, one tablespoon at a time, until the desired consistency is reached.
- Chill the Dough (Important!): Cover the bowl with plastic wrap and refrigerate the dough for at least 30 minutes, or up to 24 hours.
- Preheat Oven: Preheat your oven to 375°F (190°C).
- Prepare Baking Sheets: Line baking sheets with parchment paper or silicone baking mats.
- Scoop Dough: Drop rounded tablespoons of dough onto the prepared baking sheets, leaving about 2 inches between each cookie.
- Bake: Bake for 9-11 minutes, or until the edges are golden brown and the centers are still slightly soft.
- Cool: Remove the baking sheets from the oven and let the cookies cool on the baking sheets for a few minutes before transferring them to a wire rack to cool completely.
Notes
- Use room temperature butter for best results.
- Don’t overmix the dough.
- Chilling the dough is essential for preventing spreading.
- Use high-quality chocolate chips for better flavor.
- Adjust baking time based on your oven.
- For extra chewy cookies, slightly underbake them.
- For extra crispy cookies, bake them for a minute or two longer.
- A sprinkle of sea salt enhances the sweetness.
- Store in an airtight container at room temperature for up to 3 days.
- Freeze cookie dough or baked cookies for longer storage.