
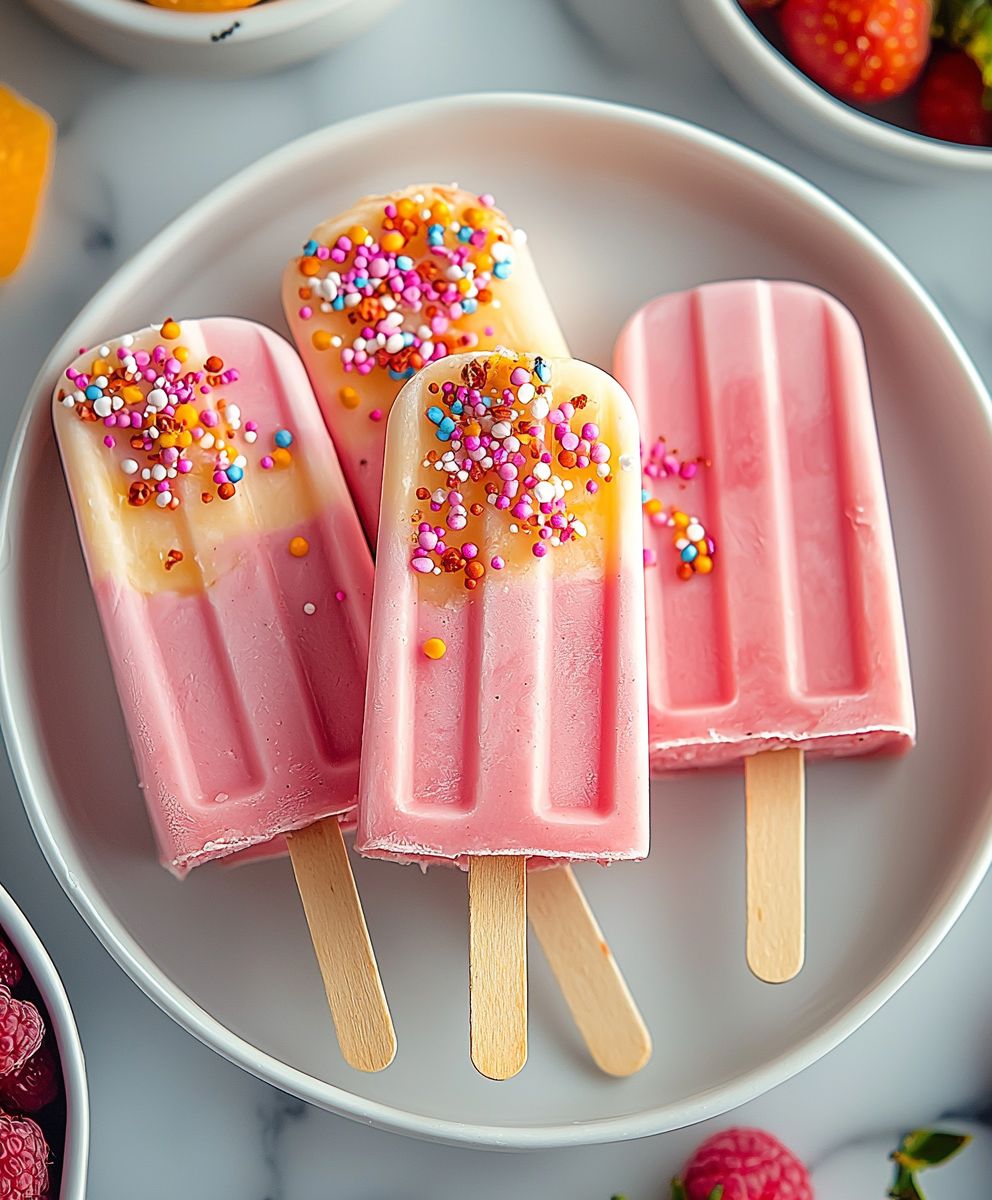
Cakesicles: Prepare to be amazed by the cutest, most delicious dessert trend taking the internet by storm! Forget everything you thought you knew about cake pops because these adorable treats are about to redefine your dessert game. Imagine a perfectly moist cake, enrobed in a crisp, vibrant chocolate shell, all presented in a delightful popsicle shape. Sounds tempting, right?
While the exact origins of cakesicles are debated, their popularity is undeniably linked to the rise of creative baking and the desire for visually stunning desserts. They’re a modern twist on classic cake pops, offering a more substantial and impressive presentation. Think of them as miniature works of art you can eat!
What makes cakesicles so irresistible? It’s a combination of factors. First, there’s the satisfying crunch of the chocolate shell giving way to the soft, flavorful cake inside. Then, there’s the sheer fun of eating a cake on a stick! They’re incredibly versatile, too. You can customize the cake flavor, chocolate color, and decorations to match any theme or occasion. Whether you’re planning a birthday party, a baby shower, or simply want to treat yourself, cakesicles are guaranteed to bring a smile to everyone’s face. Get ready to learn how to make these delightful treats it’s easier than you think!

Ingredients:
- For the Cake:
- 1 box (15.25 oz) cake mix (any flavor you like!)
- Eggs (as called for on the cake mix box)
- Oil (as called for on the cake mix box)
- Water (as called for on the cake mix box)
- For the Frosting:
- 1 cup (2 sticks) unsalted butter, softened
- 3 cups powdered sugar
- 2-3 tablespoons milk or cream
- 1 teaspoon vanilla extract
- Pinch of salt
- For the Chocolate Coating:
- 24 oz melting chocolate (milk, dark, or white your choice!)
- 1 tablespoon vegetable shortening (optional, for smoother melting)
- For Decoration (Optional):
- Sprinkles
- Edible glitter
- Candy melts (for drizzling)
- Mini chocolate chips
- Nuts, chopped
- Equipment:
- Cakesicle molds
- Lollipop sticks
- Baking pan (size depends on cake mix instructions)
- Mixing bowls
- Electric mixer (handheld or stand mixer)
- Spatula
- Microwave-safe bowl or double boiler
- Piping bags (optional, for decorating)
- Parchment paper or silicone mat
Baking the Cake:
- Prepare the Cake Batter: Preheat your oven according to the instructions on the cake mix box. Grease and flour your baking pan to prevent the cake from sticking. In a large mixing bowl, combine the cake mix, eggs, oil, and water as directed on the box. Use an electric mixer to beat the ingredients together until well combined and smooth. Be careful not to overmix, as this can result in a tough cake.
- Bake the Cake: Pour the cake batter into the prepared baking pan and spread it evenly. Bake according to the cake mix instructions, or until a toothpick inserted into the center comes out clean. The baking time will vary depending on the size of your pan and your oven. Start checking for doneness a few minutes before the recommended time.
- Cool the Cake: Once the cake is baked, remove it from the oven and let it cool in the pan for about 10-15 minutes. Then, invert the cake onto a wire rack to cool completely. Make sure the cake is completely cool before you start crumbling it, otherwise, it will be too sticky.
Making the Frosting:
- Cream the Butter: In a large mixing bowl, beat the softened butter with an electric mixer until it is light and fluffy. This usually takes about 2-3 minutes. Make sure your butter is truly softened, but not melted, for the best results.
- Add Powdered Sugar: Gradually add the powdered sugar to the butter, one cup at a time, beating well after each addition. Start on low speed to prevent the powdered sugar from flying everywhere!
- Add Liquid and Vanilla: Add the milk or cream, vanilla extract, and salt to the bowl. Beat until the frosting is smooth and creamy. If the frosting is too thick, add a little more milk or cream, one tablespoon at a time, until you reach the desired consistency. If it’s too thin, add a bit more powdered sugar.
Combining Cake and Frosting:
- Crumble the Cake: Once the cake is completely cool, crumble it into a large mixing bowl. You can use your hands or a fork to do this. Make sure there are no large chunks of cake remaining.
- Add Frosting: Add the frosting to the crumbled cake, a little at a time, and mix well with your hands or a spatula. You want the cake and frosting to be evenly combined and moist enough to hold its shape, but not too wet. Start with about half of the frosting and add more as needed. You might not need all of the frosting, depending on the moisture content of your cake.
- Test the Consistency: To test the consistency, squeeze a handful of the cake mixture in your hand. It should hold its shape without crumbling. If it’s too dry, add a little more frosting. If it’s too wet, add a little more crumbled cake.
Preparing the Cakesicles:
- Fill the Molds: Press the cake mixture firmly into the cakesicle molds, filling them completely. Use your fingers or the back of a spoon to pack the mixture tightly and evenly. Make sure to get into all the corners and crevices of the mold.
- Insert the Sticks: Insert a lollipop stick into each cakesicle, pushing it about halfway through the cake mixture. Make sure the sticks are centered and secure.
- Chill the Cakesicles: Place the filled cakesicle molds in the freezer for at least 2-3 hours, or until they are firm and frozen solid. This will make them easier to remove from the molds and dip in chocolate.
Melting the Chocolate:
- Prepare the Chocolate: Chop the melting chocolate into small pieces and place it in a microwave-safe bowl. Add the vegetable shortening (if using). The shortening helps to create a smoother, more fluid chocolate coating.
- Melt the Chocolate: Microwave the chocolate in 30-second intervals, stirring well after each interval, until it is completely melted and smooth. Be careful not to overheat the chocolate, as it can burn. Alternatively, you can melt the chocolate in a double boiler over simmering water. Make sure the bottom of the bowl doesn’t touch the water.
- Check the Consistency: The melted chocolate should be smooth and easily pourable. If it’s too thick, add a little more vegetable shortening or a tiny bit of coconut oil.
Dipping and Decorating:
- Remove Cakesicles from Molds: Once the cakesicles are frozen solid, carefully remove them from the molds. You may need to gently wiggle the sticks to loosen them. If they are difficult to remove, let them sit at room temperature for a few minutes.
- Dip the Cakesicles: Dip each cakesicle into the melted chocolate, making sure it is completely coated. You can use a spoon to help spread the chocolate evenly.
- Remove Excess Chocolate: Gently tap the cakesicle against the side of the bowl to remove any excess chocolate. You can also use a fork to scrape off the excess.
- Decorate Immediately: While the chocolate is still wet, decorate the cakesicles with sprinkles, edible glitter, candy melts, mini chocolate chips, or chopped nuts. The decorations will adhere better to the wet chocolate.
- Set the Chocolate: Place the decorated cakesicles on a parchment paper-lined baking sheet or silicone mat. Let them sit at room temperature or in the refrigerator until the chocolate is completely set. This usually takes about 15-30 minutes.
- Drizzle (Optional): If you want to add a drizzle of candy melts, melt the candy melts according to the package instructions. Transfer the melted candy melts to a piping bag or a zip-top bag with a small corner snipped off. Drizzle the melted candy melts over the set chocolate.
- Final Touches: Add any final decorations, such as edible pearls or small candies. Let the drizzle set completely before serving or storing the cakesicles.
Storage:
Store the finished cakesicles in an airtight container in the refrigerator for up to a week. You can also freeze them for longer storage. Wrap each cakesicle individually in plastic wrap before freezing to prevent freezer burn. Let them thaw in the refrigerator before serving.
Tips and Tricks:
- Cake Flavor Variations: Feel free to experiment with different cake flavors and frosting combinations. Chocolate cake with peanut butter frosting, vanilla cake with strawberry frosting, or red velvet cake with cream cheese frosting are all delicious options.
- Chocolate Coating Options: You can use different types of melting chocolate, such as milk chocolate, dark chocolate, white chocolate, or even flavored melting wafers.
- Coloring the Chocolate: If you want to add color to your chocolate coating, use oil-based food coloring. Water-based food coloring can cause the chocolate to seize.
- Adding Extracts: Enhance the flavor of your frosting by adding different extracts, such as almond extract, peppermint extract, or lemon extract.
- Making Mini Cakesicles: Use smaller cakesicle molds to make mini cakesicles. These are perfect for parties or as
Conclusion:
So there you have it! I truly believe this Cakesicles recipe is a must-try for anyone looking to add a touch of whimsy and deliciousness to their dessert repertoire. They’re surprisingly easy to make, endlessly customizable, and guaranteed to be a hit with both kids and adults. Forget boring cupcakes or predictable cookies; these little pops of cakey goodness are where it’s at!
Why are these Cakesicles so special? Well, first and foremost, they’re incredibly fun to eat. The combination of moist cake, creamy coating, and that satisfying “pop” off the stick is just pure joy. Secondly, they’re a fantastic way to use up leftover cake no more throwing away those extra slices! And finally, the decorating possibilities are truly limitless. You can go simple with sprinkles, get fancy with edible glitter, or even create intricate designs with melted chocolate.
But the fun doesn’t stop there! Let’s talk serving suggestions and variations. Imagine serving these at your next birthday party they’d be the star of the dessert table! Or how about packaging them individually as adorable party favors? For a more sophisticated touch, try dipping them in dark chocolate and sprinkling them with sea salt. The salty-sweet combination is divine!
If you’re feeling adventurous, you can experiment with different cake flavors. Chocolate cake with a peanut butter coating? Yes, please! Vanilla cake with a raspberry swirl? Absolutely! The possibilities are endless. You could even try using different types of coatings, like white chocolate, candy melts, or even a homemade glaze.
And don’t forget about the decorations! Get creative with sprinkles, edible glitter, chocolate shavings, chopped nuts, or even small candies. You can also use food coloring to tint your coating and create a rainbow of Cakesicles. For a truly personalized touch, try using stencils to create designs on the coating.
I’m so excited for you to try this recipe and experience the magic of Cakesicles for yourself. I promise you won’t be disappointed! They’re the perfect treat for any occasion, and they’re sure to bring a smile to everyone’s face.
Ready to get started? Gather your ingredients, preheat your oven (if you’re baking a fresh cake), and let your creativity flow. Don’t be afraid to experiment and put your own spin on the recipe. After all, that’s what baking is all about!
Once you’ve made your Cakesicles, I’d love to hear about your experience. Share your photos and stories on social media using the hashtag #MyCakesicles. I can’t wait to see what you create! And if you have any questions or comments, feel free to leave them in the comments section below. I’m always happy to help.
So go ahead, give this Cakesicles recipe a try. You might just discover your new favorite dessert! Happy baking! I’m confident that once you master this recipe, you’ll be making these delightful treats for every celebration and special occasion. Remember, the key is to have fun and let your imagination run wild. And most importantly, enjoy the deliciousness of your homemade Cakesicles!
Cakesicles: The Ultimate Guide to Making and Decorating Them
Fun and easy cakesicles made from cake mix, frosting, and a chocolate coating. Perfect for parties or a sweet treat!
Ingredients
- 1 box (15.25 oz) cake mix (any flavor you like!)
- Eggs (as called for on the cake mix box)
- Oil (as called for on the cake mix box)
- Water (as called for on the cake mix box)
- 1 cup (2 sticks) unsalted butter, softened
- 3 cups powdered sugar
- 2-3 tablespoons milk or cream
- 1 teaspoon vanilla extract
- Pinch of salt
- 24 oz melting chocolate (milk, dark, or white your choice!)
- 1 tablespoon vegetable shortening (optional, for smoother melting)
- Sprinkles
- Edible glitter
- Candy melts (for drizzling)
- Mini chocolate chips
- Nuts, chopped
Instructions
- Prepare the Cake Batter: Preheat your oven according to the instructions on the cake mix box. Grease and flour your baking pan to prevent the cake from sticking. In a large mixing bowl, combine the cake mix, eggs, oil, and water as directed on the box. Use an electric mixer to beat the ingredients together until well combined and smooth. Be careful not to overmix, as this can result in a tough cake.
- Bake the Cake: Pour the cake batter into the prepared baking pan and spread it evenly. Bake according to the cake mix instructions, or until a toothpick inserted into the center comes out clean. The baking time will vary depending on the size of your pan and your oven. Start checking for doneness a few minutes before the recommended time.
- Cool the Cake: Once the cake is baked, remove it from the oven and let it cool in the pan for about 10-15 minutes. Then, invert the cake onto a wire rack to cool completely. Make sure the cake is completely cool before you start crumbling it, otherwise, it will be too sticky.
- Cream the Butter: In a large mixing bowl, beat the softened butter with an electric mixer until it is light and fluffy. This usually takes about 2-3 minutes. Make sure your butter is truly softened, but not melted, for the best results.
- Add Powdered Sugar: Gradually add the powdered sugar to the butter, one cup at a time, beating well after each addition. Start on low speed to prevent the powdered sugar from flying everywhere!
- Add Liquid and Vanilla: Add the milk or cream, vanilla extract, and salt to the bowl. Beat until the frosting is smooth and creamy. If the frosting is too thick, add a little more milk or cream, one tablespoon at a time, until you reach the desired consistency. If it’s too thin, add a bit more powdered sugar.
- Crumble the Cake: Once the cake is completely cool, crumble it into a large mixing bowl. You can use your hands or a fork to do this. Make sure there are no large chunks of cake remaining.
- Add Frosting: Add the frosting to the crumbled cake, a little at a time, and mix well with your hands or a spatula. You want the cake and frosting to be evenly combined and moist enough to hold its shape, but not too wet. Start with about half of the frosting and add more as needed. You might not need all of the frosting, depending on the moisture content of your cake.
- Test the Consistency: To test the consistency, squeeze a handful of the cake mixture in your hand. It should hold its shape without crumbling. If it’s too dry, add a little more frosting. If it’s too wet, add a little more crumbled cake.
- Fill the Molds: Press the cake mixture firmly into the cakesicle molds, filling them completely. Use your fingers or the back of a spoon to pack the mixture tightly and evenly. Make sure to get into all the corners and crevices of the mold.
- Insert the Sticks: Insert a lollipop stick into each cakesicle, pushing it about halfway through the cake mixture. Make sure the sticks are centered and secure.
- Chill the Cakesicles: Place the filled cakesicle molds in the freezer for at least 2-3 hours, or until they are firm and frozen solid. This will make them easier to remove from the molds and dip in chocolate.
- Prepare the Chocolate: Chop the melting chocolate into small pieces and place it in a microwave-safe bowl. Add the vegetable shortening (if using). The shortening helps to create a smoother, more fluid chocolate coating.
- Melt the Chocolate: Microwave the chocolate in 30-second intervals, stirring well after each interval, until it is completely melted and smooth. Be careful not to overheat the chocolate, as it can burn. Alternatively, you can melt the chocolate in a double boiler over simmering water. Make sure the bottom of the bowl doesn’t touch the water.
- Check the Consistency: The melted chocolate should be smooth and easily pourable. If it’s too thick, add a little more vegetable shortening or a tiny bit of coconut oil.
- Remove Cakesicles from Molds: Once the cakesicles are frozen solid, carefully remove them from the molds. You may need to gently wiggle the sticks to loosen them. If they are difficult to remove, let them sit at room temperature for a few minutes.
- Dip the Cakesicles: Dip each cakesicle into the melted chocolate, making sure it is completely coated. You can use a spoon to help spread the chocolate evenly.
- Remove Excess Chocolate: Gently tap the cakesicle against the side of the bowl to remove any excess chocolate. You can also use a fork to scrape off the excess.
- Decorate Immediately: While the chocolate is still wet, decorate the cakesicles with sprinkles, edible glitter, candy melts, mini chocolate chips, or chopped nuts. The decorations will adhere better to the wet chocolate.
- Set the Chocolate: Place the decorated cakesicles on a parchment paper-lined baking sheet or silicone mat. Let them sit at room temperature or in the refrigerator until the chocolate is completely set. This usually takes about 15-30 minutes.
- Drizzle (Optional): If you want to add a drizzle of candy melts, melt the candy melts according to the package instructions. Transfer the melted candy melts to a piping bag or a zip-top bag with a small corner snipped off. Drizzle the melted candy melts over the set chocolate.
- Final Touches: Add any final decorations, such as edible pearls or small candies. Let the drizzle set completely before serving or storing the cakesicles.
Notes
- Cake Flavor Variations: Feel free to experiment with different cake flavors and frosting combinations. Chocolate cake with peanut butter frosting, vanilla cake with strawberry frosting, or red velvet cake with cream cheese frosting are all delicious options.
- Chocolate Coating Options: You can use different types of melting chocolate, such as milk chocolate, dark chocolate, white chocolate, or even flavored melting wafers.
- Coloring the Chocolate: If you want to add color to your chocolate coating, use oil-based food coloring. Water-based food coloring can cause the chocolate to seize.
- Adding Extracts: Enhance the flavor of your frosting by adding different extracts, such as almond extract, peppermint extract, or lemon extract.
- Making Mini Cakesicles: Use smaller cakesicle molds to make mini cakesicles. These are perfect for parties or as individual treats.
- Storage: Store the finished cakesicles in an airtight container in the refrigerator for up to a week. You can also freeze them for longer storage. Wrap each cakesicle individually in plastic wrap before freezing to prevent freezer burn. Let them thaw in the refrigerator before serving.