
Caramel Candy: that’s right, we’re diving headfirst into a world of buttery, melt-in-your-mouth goodness! Forget store-bought sweets; we’re about to embark on a journey to create homemade caramel perfection. Imagine the look on your loved ones’ faces when you present them with a batch of these golden delights, each one a testament to your culinary prowess.
The history of caramel is as rich and complex as its flavor. While the exact origins are debated, it’s believed that early forms of caramel were created by Arabs who slowly evaporated water from sugar solutions. Over time, the process evolved, and caramel found its way into countless desserts and candies around the globe. Its a treat that transcends cultures and generations, evoking feelings of nostalgia and pure, unadulterated joy.
But what is it about Caramel Candy that makes it so irresistible? Is it the smooth, creamy texture that dances on your tongue? Or perhaps the deep, complex flavor that balances sweetness with a hint of salt? Maybe it’s the sheer versatility perfect on its own, drizzled over ice cream, or incorporated into decadent desserts. Whatever the reason, one thing is certain: homemade caramel candy is a guaranteed crowd-pleaser. So, grab your saucepan, gather your ingredients, and let’s get started on this sweet adventure!

Ingredients:
- 1 cup (2 sticks) unsalted butter, cut into cubes
- 2 cups granulated sugar
- 1 cup light corn syrup
- 1 cup heavy cream
- 1 teaspoon vanilla extract
- 1/2 teaspoon sea salt, plus more for sprinkling (optional)
Preparing the Caramel Mixture:
- In a heavy-bottomed 3-quart saucepan, combine the butter, sugar, and corn syrup. Using a heavy-bottomed pan is crucial to prevent scorching. I learned this the hard way after several batches that tasted burnt!
- Place the saucepan over medium heat and stir constantly with a heat-resistant spatula or wooden spoon until the butter is melted and the sugar is dissolved. It’s important to stir constantly to ensure even heating and prevent the sugar from crystallizing.
- Once the mixture is smooth and the sugar is dissolved, stop stirring and insert a candy thermometer into the saucepan, making sure it doesn’t touch the bottom.
- Continue to cook the mixture, without stirring, until the candy thermometer reaches 245°F (118°C), which is the firm-ball stage. This process can take anywhere from 15 to 25 minutes, so be patient! The color of the mixture will gradually deepen to a beautiful amber hue.
- Keep a close eye on the temperature! If it rises too quickly, reduce the heat slightly to prevent burning. If it rises too slowly, you can increase the heat a little, but be careful not to burn the sugar.
- While the mixture is cooking, prepare an 8×8 inch baking pan by lining it with parchment paper, leaving an overhang on two sides for easy removal. Lightly grease the parchment paper with butter or cooking spray. This will prevent the caramel from sticking and make it much easier to cut later.
Adding the Cream and Vanilla:
- Once the caramel mixture reaches 245°F (118°C), remove the saucepan from the heat.
- Carefully pour in the heavy cream. Be very careful, as the mixture will bubble up vigorously when the cream is added. I usually tilt the pan away from me and pour the cream in slowly to minimize splattering.
- Stir the cream into the caramel mixture until it is completely combined and smooth. The mixture will cool down slightly, so the temperature will drop.
- Return the saucepan to medium heat and continue to cook, stirring constantly, until the candy thermometer reaches 245°F (118°C) again. This will ensure that the caramel is cooked to the correct consistency.
- Remove the saucepan from the heat and stir in the vanilla extract and sea salt. The vanilla extract adds a lovely flavor, and the sea salt enhances the sweetness of the caramel.
Cooling and Cutting the Caramel:
- Pour the caramel mixture into the prepared baking pan, spreading it evenly with a spatula.
- If desired, sprinkle the top of the caramel with additional sea salt. This is optional, but I think it adds a nice touch of flavor and visual appeal.
- Let the caramel cool completely at room temperature for at least 4 hours, or preferably overnight. Do not refrigerate the caramel, as this can make it too hard and difficult to cut.
- Once the caramel is completely cool and firm, lift it out of the pan using the parchment paper overhang.
- Place the caramel on a cutting board and use a large, sharp knife to cut it into squares. I find that a chef’s knife works best for this.
- To prevent the caramel from sticking to the knife, you can lightly grease the blade with butter or cooking spray. You can also run the knife under hot water and dry it before each cut.
- Cut the caramel into your desired size and shape. I usually cut it into 1-inch squares, but you can make them larger or smaller depending on your preference.
Wrapping and Storing the Caramel:
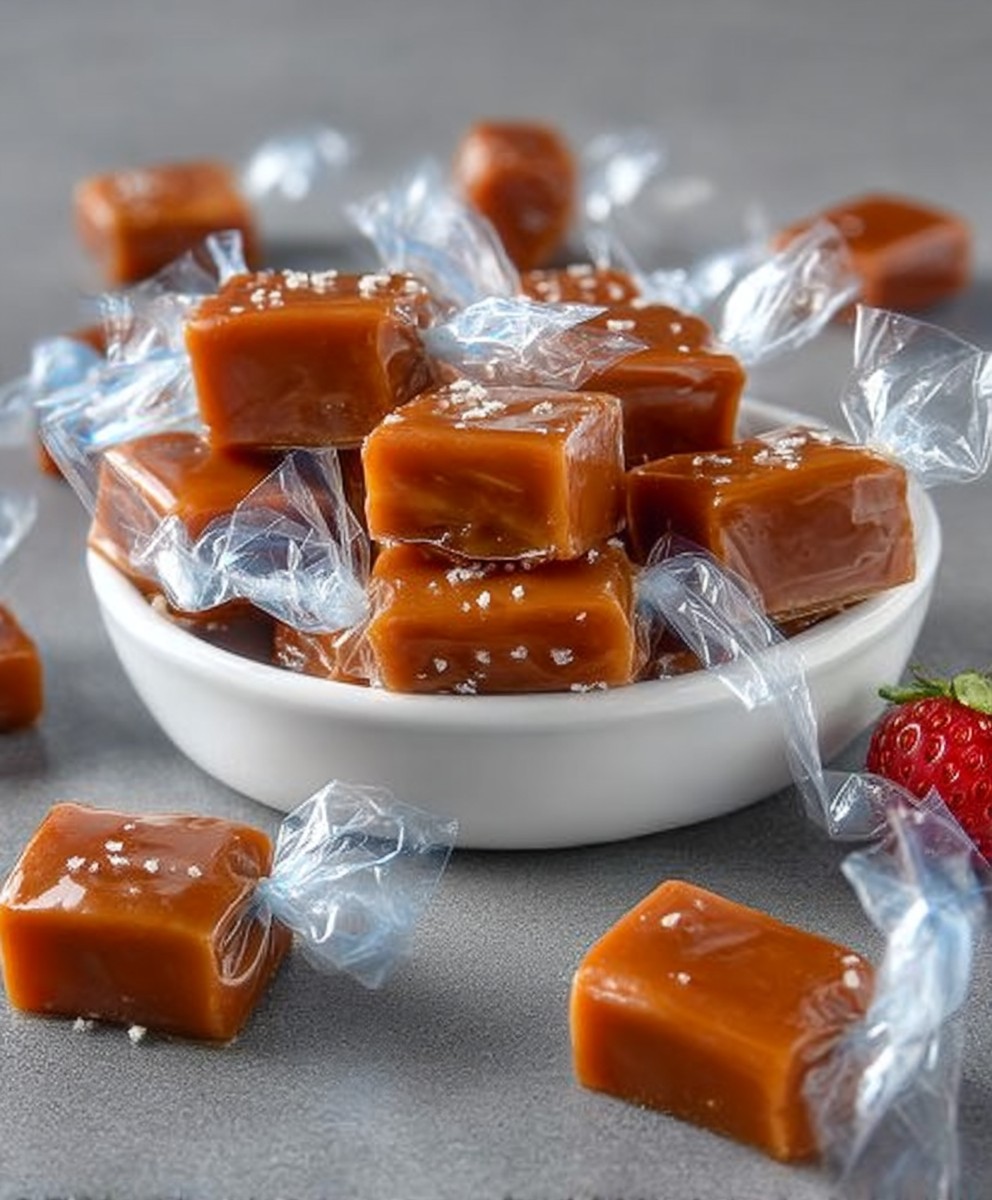
- Wrap each caramel square individually in wax paper or cellophane wrappers. This will prevent them from sticking together and keep them fresh.
- To wrap the caramels, place a caramel square in the center of a wax paper square.
- Fold the wax paper over the caramel and twist the ends to secure it.
- Repeat this process for all of the caramel squares.
- Store the wrapped caramels in an airtight container at room temperature for up to 2 weeks. Do not store them in the refrigerator, as this can make them too hard.
Troubleshooting Tips:
- Caramel is too hard: This usually means that the caramel was cooked to too high of a temperature. Next time, be sure to remove the saucepan from the heat as soon as the candy thermometer reaches 245°F (118°C).
- Caramel is too soft: This usually means that the caramel was not cooked to a high enough temperature. Next time, be sure to cook the caramel until the candy thermometer reaches 245°F (118°C).
- Caramel is grainy: This can happen if the sugar crystallizes during cooking. To prevent this, be sure to stir the mixture constantly until the sugar is dissolved. You can also add a tablespoon of lemon juice or vinegar to the mixture, which will help to prevent crystallization.
- Caramel is burnt: This usually happens if the caramel is cooked over too high of heat or if it is not stirred constantly. To prevent this, be sure to cook the caramel over medium heat and stir it constantly.
- Caramel sticks to the pan: This can happen if the pan is not heavy-bottomed or if it is not greased properly. To prevent this, be sure to use a heavy-bottomed pan and grease it well with butter or cooking spray. Lining the pan with parchment paper is also a good idea.
Variations:
- Salted Caramel: Add more sea salt to the caramel mixture or sprinkle the finished caramels with a generous amount of sea salt.
- Chocolate Caramel: Add 1/2 cup of unsweetened cocoa powder to the caramel mixture along with the heavy cream.
- Coffee Caramel: Add 1 tablespoon of instant coffee granules to the caramel mixture along with the heavy cream.
- Nut Caramel: Stir in 1 cup of chopped nuts (such as pecans, walnuts, or almonds) into the caramel mixture after it has been removed from the heat.
- Spiced Caramel: Add 1/2 teaspoon of ground cinnamon, nutmeg, or ginger to the caramel mixture along with the heavy cream.
Tips for Success:
- Use a heavy-bottomed saucepan: This will help to prevent the caramel from scorching.
- Use a candy thermometer: This is the best way to ensure that the caramel is cooked to the correct temperature.
- Stir constantly: This will help to prevent the sugar from crystallizing and the caramel from burning.
- Be patient: Making caramel takes time, so don’t rush the process.
- Let the caramel cool completely: This will make it easier to cut and wrap.
- Wrap the caramels individually: This will prevent them from sticking together and keep them fresh.
Why This Recipe Works:
This recipe is a classic for a reason! The combination of butter, sugar, corn syrup, and heavy cream creates a rich, smooth, and chewy caramel that is simply irresistible. The addition of vanilla extract and sea salt enhances the flavor and adds a touch of sophistication. The step-by-step instructions and troubleshooting tips ensure that even novice candy makers can achieve success. I’ve made this recipe countless times, and it always turns out perfectly. The key is to use high-quality ingredients, follow the instructions carefully, and be patient. The result is a homemade caramel that is far superior to anything you can buy in the store. Plus, making your own caramel is a fun and rewarding experience that you can share with friends and family
Conclusion:
So there you have it! This caramel candy recipe isn’t just another sweet treat; it’s a journey back to simpler times, a burst of comforting flavor, and a guaranteed crowd-pleaser. I truly believe that once you taste the rich, buttery goodness of homemade caramel, you’ll never go back to store-bought again. The depth of flavor and the satisfying chewiness are simply unmatched.
But why is this recipe a must-try? Beyond the incredible taste, it’s about the experience. It’s about the joy of creating something special from scratch, the anticipation as the sugar transforms into a golden elixir, and the pride you’ll feel when you share these delectable candies with your loved ones. It’s a recipe that’s perfect for holiday gifting, a sweet addition to any dessert table, or simply a delightful indulgence for yourself.
And the best part? It’s incredibly versatile! While the classic recipe is divine on its own, feel free to experiment with different flavors and textures. For a salty-sweet twist, sprinkle a generous amount of flaky sea salt on top of the caramels as they cool. Or, if you’re a chocolate lover, dip the cooled caramels in melted dark chocolate for an extra layer of decadence. You could even add a handful of chopped nuts, like pecans or walnuts, to the caramel mixture for a delightful crunch. Imagine the possibilities!
Serving suggestions are endless. These caramels are perfect on their own, enjoyed slowly to savor every morsel. But they also shine as part of a larger dessert spread. Chop them up and sprinkle them over ice cream, use them as a filling for homemade chocolates, or even melt them down to create a luscious caramel sauce for apple slices or pancakes. For a truly special treat, try wrapping individual caramels in parchment paper and tying them with a ribbon for a charming homemade gift.
I’ve poured my heart and soul into perfecting this recipe, and I’m confident that you’ll love it as much as I do. But don’t just take my word for it! I wholeheartedly encourage you to give this caramel candy recipe a try. Gather your ingredients, put on some music, and get ready to embark on a sweet adventure.
And once you’ve made your own batch of homemade caramels, I’d absolutely love to hear about your experience! Did you try any variations? Did you encounter any challenges? What did your friends and family think? Share your photos, tips, and stories in the comments below. Your feedback is invaluable, and it helps me to continue creating and sharing recipes that you’ll love.
So go ahead, unleash your inner candy maker and create some magic in your kitchen. I promise, the sweet reward is well worth the effort. Happy caramel making! I can’t wait to hear all about your delicious creations. Remember to tag me in your photos so I can see your amazing caramel candy masterpieces!
Caramel Candy: The Ultimate Guide to Making and Enjoying It
Rich, chewy homemade caramels with a perfect balance of sweet and salty. This classic recipe is easy to follow and yields a delicious treat that's far better than store-bought.
Ingredients
- 1 cup (2 sticks) unsalted butter, cut into cubes
- 2 cups granulated sugar
- 1 cup light corn syrup
- 1 cup heavy cream
- 1 teaspoon vanilla extract
- 1/2 teaspoon sea salt, plus more for sprinkling (optional)
Instructions
- Prepare the Pan: Line an 8×8 inch baking pan with parchment paper, leaving an overhang on two sides. Lightly grease the parchment paper with butter or cooking spray.
- Combine Ingredients: In a heavy-bottomed 3-quart saucepan, combine the butter, sugar, and corn syrup.
- Melt and Dissolve: Place the saucepan over medium heat and stir constantly with a heat-resistant spatula or wooden spoon until the butter is melted and the sugar is dissolved.
- Cook to Firm-Ball Stage: Once the mixture is smooth, stop stirring and insert a candy thermometer into the saucepan (making sure it doesn’t touch the bottom). Cook, without stirring, until the candy thermometer reaches 245°F (118°C), about 15-25 minutes. The color will deepen to amber.
- Add Cream (Carefully!): Remove the saucepan from the heat. Carefully pour in the heavy cream (it will bubble up vigorously).
- Stir and Reheat: Stir the cream into the caramel mixture until completely combined and smooth. Return the saucepan to medium heat and continue to cook, stirring constantly, until the candy thermometer reaches 245°F (118°C) again.
- Add Vanilla and Salt: Remove the saucepan from the heat and stir in the vanilla extract and sea salt.
- Pour and Cool: Pour the caramel mixture into the prepared baking pan, spreading it evenly with a spatula. Sprinkle the top with additional sea salt, if desired.
- Cool Completely: Let the caramel cool completely at room temperature for at least 4 hours, or preferably overnight. Do not refrigerate.
- Cut: Once cool and firm, lift the caramel out of the pan using the parchment paper overhang. Place on a cutting board and use a large, sharp knife (greased if needed) to cut into squares.
- Wrap: Wrap each caramel square individually in wax paper or cellophane wrappers.
- Store: Store the wrapped caramels in an airtight container at room temperature for up to 2 weeks. Do not store in the refrigerator.
Notes
- Using a heavy-bottomed pan is crucial to prevent scorching.
- Stir constantly until the sugar is dissolved to prevent crystallization.
- Keep a close eye on the temperature. Reduce heat if it rises too quickly.
- Be very careful when adding the cream, as the mixture will bubble up vigorously.
- Do not refrigerate the caramel, as this can make it too hard and difficult to cut.
- To prevent the caramel from sticking to the knife, you can lightly grease the blade with butter or cooking spray. You can also run the knife under hot water and dry it before each cut.
- Too Hard: Cooked to too high a temperature.
- Too Soft: Not cooked to a high enough temperature.
- Grainy: Sugar crystallized. Stir constantly until dissolved.
- Burnt: Cooked over too high heat or not stirred constantly.
- Sticks to Pan: Pan not heavy-bottomed or not greased properly.