
Cheesy Taco Cauliflower Rice: Prepare to ditch the tortillas and dive headfirst into a flavor fiesta! This isn’t just another cauliflower rice recipe; it’s a vibrant, cheesy, and utterly irresistible dish that will have you questioning why you ever bothered with regular tacos in the first place. Imagine the zesty, savory goodness of your favorite taco filling, but served over a bed of fluffy, perfectly seasoned cauliflower rice, all smothered in a blanket of melted cheese. Sounds amazing, right?
While the exact origins of combining taco flavors with cauliflower rice are relatively modern (thank you, low-carb revolution!), the essence of tacos themselves is deeply rooted in Mexican culinary history. Tacos, in their various forms, have been a staple for centuries, reflecting the diverse ingredients and traditions of different regions. This Cheesy Taco Cauliflower Rice recipe takes that beloved taco experience and reimagines it for a healthier, quicker, and equally satisfying meal.
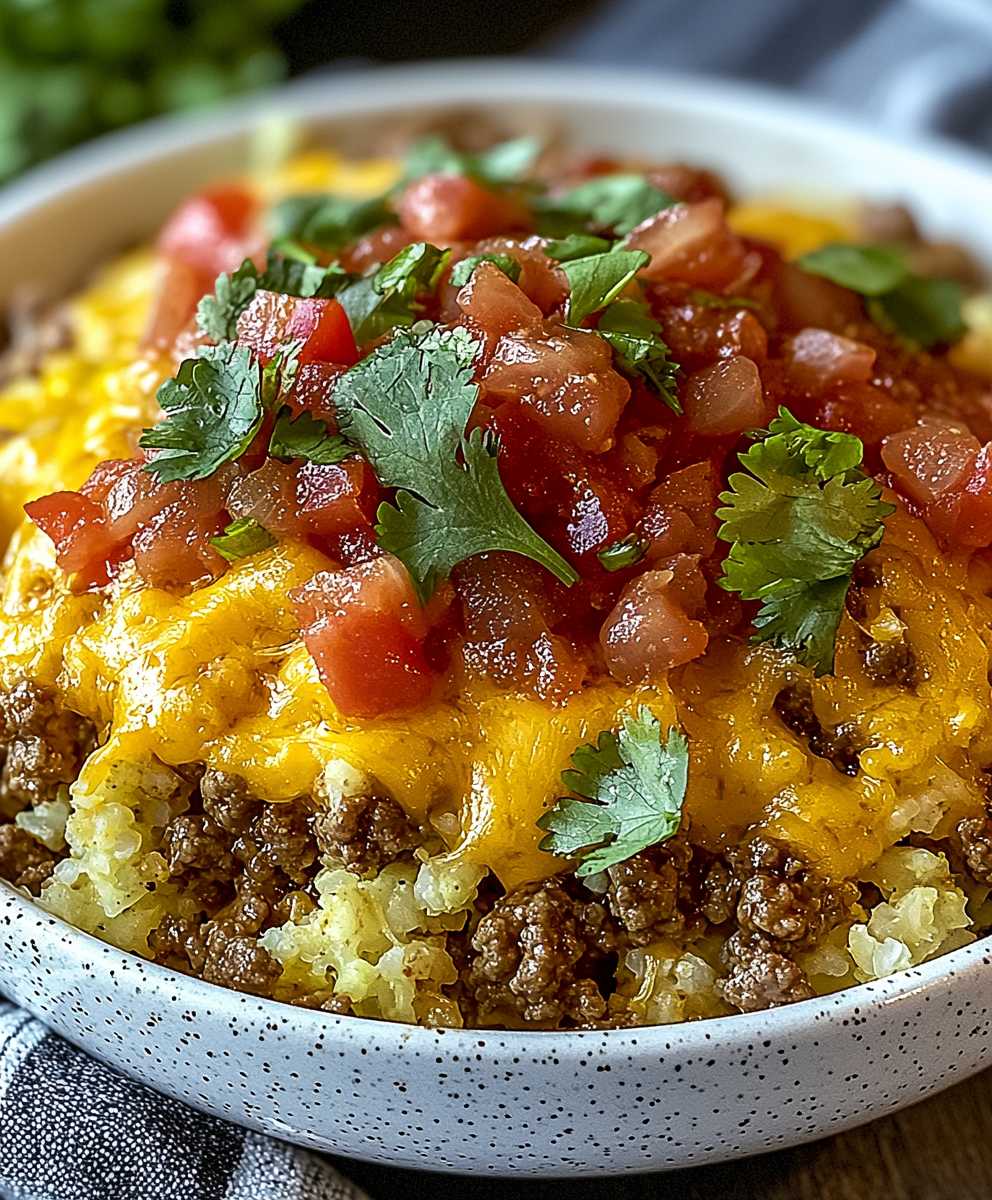
So, why do people adore this dish? It’s simple: it’s the perfect marriage of convenience, health, and incredible taste. The cauliflower rice provides a light and fluffy base, soaking up all the delicious taco seasonings and juicy ground beef (or your protein of choice!). The melted cheese adds a creamy, comforting element that elevates the entire dish. Plus, it’s incredibly versatile customize it with your favorite taco toppings like salsa, sour cream, avocado, and cilantro. Whether you’re looking for a quick weeknight dinner, a low-carb alternative to traditional tacos, or simply a flavorful and satisfying meal, this recipe is guaranteed to become a new favorite.

Ingredients:
- 1 large head of cauliflower, riced (about 4 cups)
- 1 pound ground beef
- 1 packet taco seasoning (low sodium preferred)
- 1/2 cup water
- 1/2 cup chopped onion
- 1 clove garlic, minced
- 1 (15 ounce) can black beans, rinsed and drained
- 1 (15 ounce) can corn, drained
- 1 (10 ounce) can diced tomatoes and green chilies (like Rotel), undrained
- 1 cup shredded cheddar cheese
- 1/2 cup shredded Monterey Jack cheese
- 2 tablespoons olive oil
- Optional toppings: sour cream, salsa, avocado, cilantro, green onions
Preparing the Ground Beef and Vegetables:
- Heat the olive oil in a large skillet over medium-high heat. Add the chopped onion and cook until softened, about 5 minutes. Add the minced garlic and cook for another minute until fragrant. Be careful not to burn the garlic!
- Add the ground beef to the skillet and cook, breaking it up with a spoon, until browned. Drain off any excess grease. This is a crucial step to avoid a greasy final product.
- Stir in the taco seasoning and water. Bring to a simmer and cook for 5 minutes, allowing the flavors to meld together. Make sure the taco seasoning is evenly distributed.
- Add the black beans, corn, and diced tomatoes and green chilies to the skillet. Stir well to combine. Reduce the heat to medium-low and simmer for another 5 minutes, stirring occasionally. This allows the flavors to really come together.
Ricing the Cauliflower (if needed):
- If you haven’t already, prepare the cauliflower rice. You can use a food processor or a box grater.
- Using a Food Processor: Cut the cauliflower head into florets. Place the florets in the food processor and pulse until the cauliflower is finely chopped and resembles rice. Be careful not to over-process, or it will become mushy.
- Using a Box Grater: Cut the cauliflower head into florets. Grate the florets using the large holes of a box grater. This method takes a little more time, but it’s a good option if you don’t have a food processor.
- Buying Pre-Riced Cauliflower: You can also buy pre-riced cauliflower at most grocery stores. This is a convenient option if you’re short on time.
Cooking the Cauliflower Rice:
- Add the riced cauliflower to the skillet with the ground beef mixture. Stir well to combine.
- Cover the skillet and cook for 5-7 minutes, or until the cauliflower rice is tender-crisp. Stir occasionally to prevent sticking. The cooking time will depend on the size of the cauliflower rice and your desired level of tenderness.
- Remove the skillet from the heat.
Adding the Cheese and Finishing Touches:
- Sprinkle the cheddar cheese and Monterey Jack cheese evenly over the cauliflower rice mixture.
- Cover the skillet again and let it sit for a few minutes, or until the cheese is melted and gooey. You can also place the skillet under the broiler for a minute or two to melt the cheese, but watch it carefully to prevent burning.
- Remove from heat and let cool slightly.
Serving and Enjoying:
- Serve the cheesy taco cauliflower rice hot.
- Top with your favorite taco toppings, such as sour cream, salsa, avocado, cilantro, and green onions. Get creative and customize it to your liking!
- Enjoy! This dish is perfect for a quick and easy weeknight meal.
Tips and Variations:
- Spice it up: Add a pinch of cayenne pepper or a dash of hot sauce to the ground beef mixture for extra heat.
- Add more vegetables: Feel free to add other vegetables to the skillet, such as bell peppers, zucchini, or mushrooms.
- Use different protein: You can substitute ground beef with ground turkey, ground chicken, or even shredded chicken.
- Make it vegetarian: Omit the ground beef and add an extra can of black beans or lentils for a vegetarian option.
- Make it dairy-free: Use dairy-free cheese alternatives or omit the cheese altogether.
- Meal Prep: This dish is great for meal prepping! Store leftovers in an airtight container in the refrigerator for up to 3 days.
- Freezing: You can also freeze this dish for longer storage. Let it cool completely before transferring it to a freezer-safe container. It can be stored in the freezer for up to 2 months. Thaw overnight in the refrigerator before reheating.
- Reheating: Reheat the cheesy taco cauliflower rice in the microwave or in a skillet over medium heat. Add a splash of water if needed to prevent it from drying out.
- Serving Suggestions: Serve this dish as a main course, a side dish, or even as a filling for tacos or burritos.
- Cheese Options: Feel free to experiment with different types of cheese. Pepper jack, Colby jack, or even a Mexican cheese blend would be delicious.
- Low-Carb Option: This recipe is naturally low-carb, making it a great option for those following a ketogenic or low-carb diet.
- Cauliflower Rice Texture: If you prefer a softer cauliflower rice, you can steam or microwave the riced cauliflower for a few minutes before adding it to the skillet. This will help to soften it up.
- Taco Seasoning: If you don’t have taco seasoning on hand, you can make your own using a combination of chili powder, cumin, paprika, garlic powder, onion powder, oregano, and salt.
- Tomato Options: Instead of diced tomatoes and green chilies, you can use regular diced tomatoes or even tomato sauce.
- Bean Options: You can substitute black beans with pinto beans or kidney beans.
- Corn Options: You can use fresh, frozen, or canned corn. If using frozen corn, thaw it before adding it to the skillet.
Detailed Cauliflower Ricing Instructions:
Let’s delve deeper into the cauliflower ricing process, as this is a key step for achieving the right texture and consistency in your Cheesy Taco Cauliflower Rice.
Using a Food Processor:
- Prepare the Cauliflower: Start by washing the cauliflower head thoroughly under cold water. Remove the outer leaves and trim the stem.
- Cut into Florets: Cut the cauliflower head into smaller florets. This will make it easier for the food processor to handle.
- Pulse, Don’t Process Continuously: Place the cauliflower florets in the food processor bowl. It’s crucial to pulse the food processor in short bursts rather than running it continuously. This prevents the cauliflower from turning into a puree.
- Check the Texture: After a few pulses, check the texture of the cauliflower. You’re aiming for a rice-like consistency, with small, evenly sized pieces. If it’s still too coarse, pulse a few more times. If it’s starting to look mushy, stop immediately.
- Batch Processing: Depending on the size of your food processor, you may need to process the cauliflower in batches. This will ensure that all the florets are evenly riced.
Using a Box Grater:
- Prepare the Cauliflower: Wash the cauliflower head thoroughly under cold water. Remove the outer leaves and trim the stem.
- Cut into Florets: Cut the cauliflower head into smaller florets. This will make it easier to handle and grate.
- Grate with the Large Holes: Hold a floret firmly and grate it using the large holes of a box grater. Be careful not to grate your fingers!
- Consistent Pressure: Apply consistent pressure as you grate to ensure that the cauliflower is evenly riced.
- Rotate the Floret: Rotate the floret as you grate to ensure that all sides are processed.
- Discard the Core: Once you reach the core of the floret, discard it. The core is too tough to grate.
Tips for Perfect Cauliflower Rice:
- Don’t Over-Process: Whether you’re using a food processor or a box grater, avoid over-processing the cauliflower. Over-processing will result in a mushy texture.
-
Conclusion:
And there you have it! This Cheesy Taco Cauliflower Rice is truly a game-changer. It’s quick, it’s easy, it’s packed with flavor, and it’s a fantastic way to sneak in some extra veggies without sacrificing any of the deliciousness you crave. I honestly believe this recipe is a must-try for anyone looking for a healthy, satisfying, and incredibly versatile meal.
Why is it a must-try? Because it solves so many problems! Are you trying to cut back on carbs? This is your answer. Are you short on time during the week? This comes together in under 30 minutes. Are you looking for a way to get your kids (or even yourself!) to eat more vegetables? The cheesy, taco-seasoned goodness will have everyone asking for seconds. It’s a win-win-win!
But the best part? The possibilities are endless! Serve this Cheesy Taco Cauliflower Rice as a side dish to your favorite grilled chicken or steak. Use it as a filling for tacos or burritos. Top it with a dollop of sour cream, a sprinkle of fresh cilantro, and a squeeze of lime for an extra burst of flavor.
Serving Suggestions and Variations:
* For a spicier kick: Add a pinch of cayenne pepper or a dash of your favorite hot sauce to the cauliflower rice mixture. You could even use a spicier taco seasoning blend.
* For a vegetarian option: Simply omit the ground beef and add a can of black beans or pinto beans for extra protein and fiber. You could also add some crumbled tofu or tempeh.
* For a vegan option: Use a plant-based ground beef substitute and a vegan cheese alternative. There are so many great options available these days!
* Make it a bowl: Layer the Cheesy Taco Cauliflower Rice with your favorite toppings, such as shredded lettuce, diced tomatoes, avocado, salsa, and a drizzle of your favorite dressing.
* Add some crunch: Top with crushed tortilla chips or a sprinkle of crispy fried onions for added texture.
* Make it ahead: This recipe is perfect for meal prepping! Simply prepare the cauliflower rice ahead of time and store it in the refrigerator. When you’re ready to eat, just reheat it and add your favorite toppings.
* Spice it up with different cheeses: Instead of cheddar, try Monterey Jack, pepper jack, or even a Mexican cheese blend. The possibilities are truly endless!I’m so excited for you to try this recipe and discover just how amazing Cheesy Taco Cauliflower Rice can be. It’s become a staple in my kitchen, and I know it will become one in yours too.
So, go ahead, grab your ingredients, and get cooking! I promise you won’t be disappointed. And when you do, please, please, please share your experience with me! I’d love to hear what you think, what variations you tried, and how much you enjoyed it. Leave a comment below, tag me on social media I want to see your creations! Let’s spread the word about this delicious and healthy recipe and make the world a slightly cheesier, taco-flavored place, one cauliflower rice bowl at a time. Happy cooking!
Cheesy Taco Cauliflower Rice: A Delicious and Healthy Recipe
A quick and easy, low-carb weeknight meal featuring ground beef, taco seasoning, and plenty of cheese, all served over tender-crisp cauliflower rice.
Ingredients
- 1 large head of cauliflower, riced (about 4 cups)
- 1 pound ground beef
- 1 packet taco seasoning (low sodium preferred)
- 1/2 cup water
- 1/2 cup chopped onion
- 1 clove garlic, minced
- 1 (15 ounce) can black beans, rinsed and drained
- 1 (15 ounce) can corn, drained
- 1 (10 ounce) can diced tomatoes and green chilies (like Rotel), undrained
- 1 cup shredded cheddar cheese
- 1/2 cup shredded Monterey Jack cheese
- 2 tablespoons olive oil
- Optional toppings: sour cream, salsa, avocado, cilantro, green onions
Instructions
- Prepare the Ground Beef and Vegetables: Heat the olive oil in a large skillet over medium-high heat. Add the chopped onion and cook until softened, about 5 minutes. Add the minced garlic and cook for another minute until fragrant.
- Add the ground beef to the skillet and cook, breaking it up with a spoon, until browned. Drain off any excess grease.
- Stir in the taco seasoning and water. Bring to a simmer and cook for 5 minutes, allowing the flavors to meld together.
- Add the black beans, corn, and diced tomatoes and green chilies to the skillet. Stir well to combine. Reduce the heat to medium-low and simmer for another 5 minutes, stirring occasionally.
- Rice the Cauliflower (if needed): If you haven’t already, prepare the cauliflower rice using a food processor or a box grater. Alternatively, use pre-riced cauliflower.
- Cook the Cauliflower Rice: Add the riced cauliflower to the skillet with the ground beef mixture. Stir well to combine.
- Cover the skillet and cook for 5-7 minutes, or until the cauliflower rice is tender-crisp. Stir occasionally to prevent sticking.
- Remove the skillet from the heat.
- Add the Cheese and Finishing Touches: Sprinkle the cheddar cheese and Monterey Jack cheese evenly over the cauliflower rice mixture.
- Cover the skillet again and let it sit for a few minutes, or until the cheese is melted and gooey. You can also place the skillet under the broiler for a minute or two to melt the cheese, but watch it carefully to prevent burning.
- Remove from heat and let cool slightly.
- Serve and Enjoy: Serve the cheesy taco cauliflower rice hot. Top with your favorite taco toppings, such as sour cream, salsa, avocado, cilantro, and green onions.
Notes
- Spice it up: Add cayenne pepper or hot sauce for extra heat.
- Add more vegetables: Bell peppers, zucchini, or mushrooms work well.
- Use different protein: Ground turkey, ground chicken, or shredded chicken are good substitutes.
- Make it vegetarian: Omit the ground beef and add an extra can of black beans or lentils.
- Make it dairy-free: Use dairy-free cheese alternatives or omit the cheese altogether.
- Meal Prep: Store leftovers in an airtight container in the refrigerator for up to 3 days.
- Freezing: Freeze for up to 2 months. Thaw overnight in the refrigerator before reheating.
- Reheating: Reheat in the microwave or in a skillet over medium heat. Add a splash of water if needed.
- Serving Suggestions: Serve as a main course, side dish, or filling for tacos or burritos.
- Cheese Options: Experiment with different cheeses like pepper jack or a Mexican blend.
- Low-Carb Option: Naturally low-carb.
- Cauliflower Rice Texture: Steam or microwave the riced cauliflower for a softer texture.
- Taco Seasoning: Make your own using chili powder, cumin, paprika, garlic powder, onion powder, oregano, and salt.
- Tomato Options: Use regular diced tomatoes or tomato sauce.
- Bean Options: Substitute black beans with pinto beans or kidney beans.
- Corn Options: Use fresh, frozen, or canned corn.