
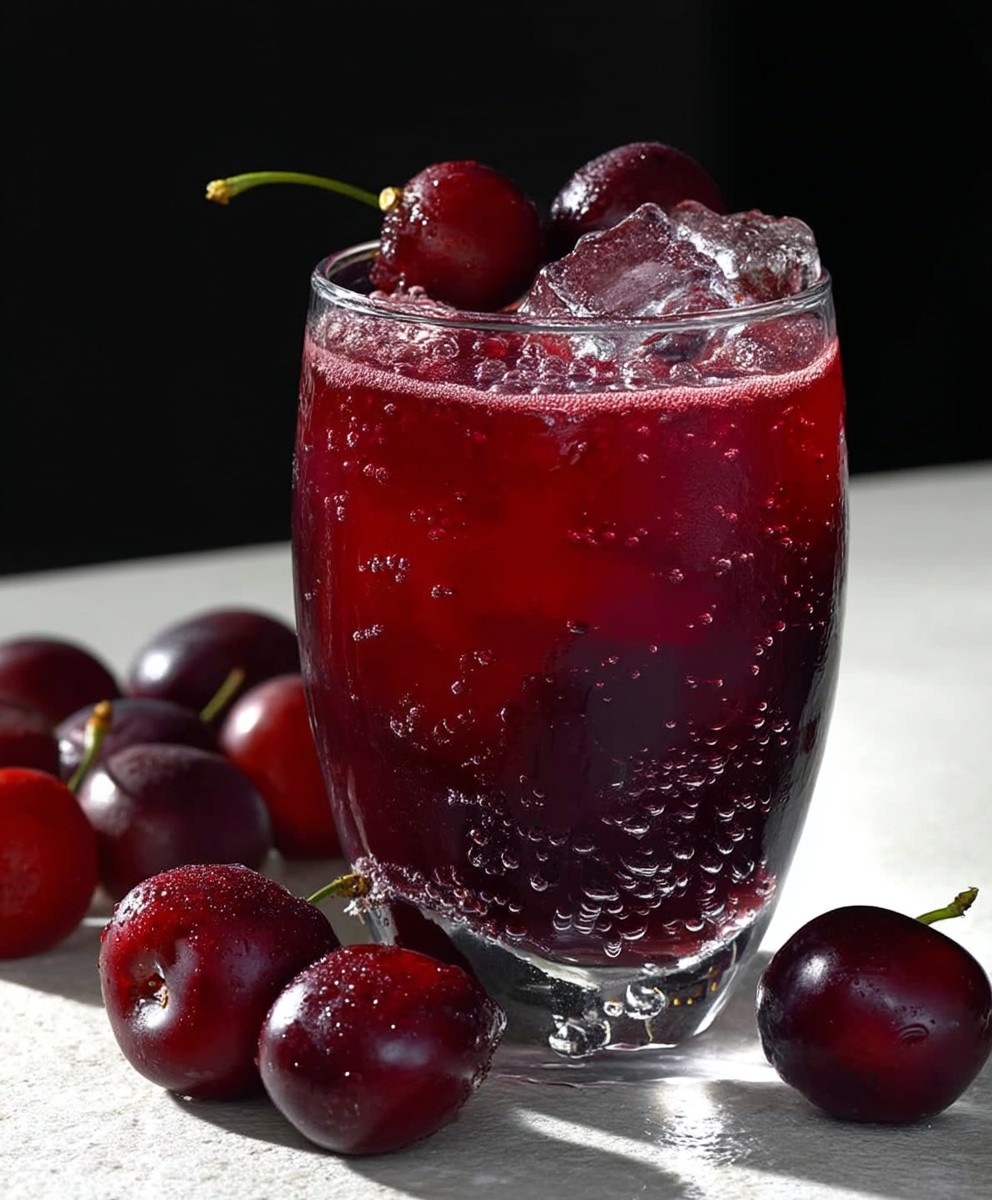
Cherry juice benefits extend far beyond just a refreshing taste! Have you ever wondered if that vibrant, ruby-red glass could be more than just a delicious treat? For centuries, cherries have been celebrated not only for their sweet and tart flavor but also for their potential health-boosting properties. From ancient Roman feasts to modern-day athletic recovery routines, the humble cherry has a rich and fascinating history.
But what makes cherry juice benefits so appealing? Well, it’s a delightful combination of factors. The unique flavor profile, a perfect balance of sweetness and tartness, is undeniably satisfying. Beyond the taste, people are drawn to cherry juice for its potential to aid in sleep, reduce muscle soreness after exercise, and even offer anti-inflammatory effects. Whether you’re a seasoned athlete looking for a natural recovery aid or simply seeking a delicious and potentially beneficial addition to your diet, cherry juice might just be the perfect choice. Let’s dive into the amazing world of cherry juice and explore all the ways it can contribute to your well-being!

Ingredients:
- For the Cherry Clafoutis:
- 1 pound fresh sweet cherries, pitted (or 1 pound frozen, thawed and drained)
- 1/2 cup granulated sugar, plus extra for dusting
- 1/4 cup all-purpose flour
- 1/4 teaspoon salt
- 3 large eggs
- 1 cup whole milk
- 1/4 cup heavy cream
- 1 teaspoon vanilla extract
- 2 tablespoons Kirsch (cherry liqueur), optional but recommended
- 2 tablespoons unsalted butter, melted
- Powdered sugar, for dusting (optional)
- For the Cherry Juice Reduction (Optional):
- 2 cups tart cherry juice (unsweetened)
- 1 tablespoon lemon juice
- 1 tablespoon honey (optional, adjust to taste)
Preparing the Cherry Clafoutis
Okay, let’s get started! First things first, we need to prepare our cherries. If you’re using fresh cherries, give them a good wash and then pit them. Pitting cherries can be a bit tedious, but trust me, it’s worth it! A cherry pitter makes the job much easier. If you’re using frozen cherries, make sure they’re completely thawed and drained of any excess liquid. This will prevent your clafoutis from becoming soggy.
- Preheat your oven to 375°F (190°C). While the oven is heating up, grease a 9-inch pie dish or baking dish with some of the melted butter. Make sure you get all the nooks and crannies! Then, lightly dust the dish with granulated sugar. This will help prevent the clafoutis from sticking and give it a nice, caramelized edge.
- Arrange the cherries in the prepared dish. Spread them evenly across the bottom. Don’t worry if they’re a little crowded; they’ll shrink slightly as they bake.
- In a large bowl, whisk together the sugar, flour, and salt. Make sure there are no lumps of flour. This dry mixture will form the base of our batter.
- In a separate bowl, whisk together the eggs, milk, heavy cream, vanilla extract, and Kirsch (if using). The Kirsch adds a lovely cherry flavor that complements the fresh cherries perfectly, but it’s totally optional if you don’t have any on hand or prefer not to use alcohol.
- Gradually add the wet ingredients to the dry ingredients, whisking constantly until smooth. Be careful not to overmix, as this can develop the gluten in the flour and make the clafoutis tough. Just whisk until everything is combined and the batter is smooth and lump-free.
- Pour the batter over the cherries in the prepared dish. Make sure the cherries are evenly distributed in the batter.
- Drizzle the remaining melted butter over the top of the batter. This will help the clafoutis brown beautifully in the oven.
Baking the Cherry Clafoutis
Now comes the fun part baking! The aroma that fills your kitchen while this bakes is simply divine.
- Bake in the preheated oven for 45-55 minutes, or until the clafoutis is puffed up and golden brown. The center should be set but still slightly jiggly. A toothpick inserted into the center should come out clean, or with just a few moist crumbs attached.
- Let the clafoutis cool slightly before serving. It will deflate a bit as it cools, which is perfectly normal.
- Dust with powdered sugar (optional) and serve warm. I love to serve it with a dollop of whipped cream or a scoop of vanilla ice cream.
Making the Cherry Juice Reduction (Optional)
This step is completely optional, but it adds a beautiful depth of flavor and a touch of elegance to the clafoutis. The cherry juice reduction concentrates the cherry flavor and creates a luscious sauce that complements the clafoutis perfectly.
- In a small saucepan, combine the tart cherry juice, lemon juice, and honey (if using). The lemon juice adds a touch of brightness to balance the sweetness of the cherry juice, and the honey adds a little extra sweetness if needed.
- Bring the mixture to a simmer over medium heat.
- Reduce the heat to low and simmer for 20-30 minutes, or until the juice has reduced by about half and has thickened slightly. Stir occasionally to prevent it from sticking to the bottom of the pan. The reduction should be syrupy and coat the back of a spoon.
- Remove from heat and let cool slightly. The reduction will thicken further as it cools.
- Drizzle the cherry juice reduction over the warm clafoutis before serving. You can also serve it on the side for dipping.
Tips and Variations
Here are a few tips and variations to help you customize this recipe to your liking:
- Use different fruits: While this recipe is specifically for cherry clafoutis, you can easily adapt it to use other fruits, such as blueberries, raspberries, peaches, or plums. Just make sure to adjust the baking time accordingly.
- Add nuts: A sprinkle of toasted almonds or pecans adds a nice crunch and nutty flavor to the clafoutis.
- Use different extracts: Instead of vanilla extract, try using almond extract or lemon extract for a different flavor profile.
- Make it gluten-free: Simply substitute the all-purpose flour with a gluten-free all-purpose flour blend.
- Make it dairy-free: Substitute the whole milk and heavy cream with plant-based alternatives, such as almond milk or coconut cream.
- Don’t overbake: Overbaking the clafoutis will result in a dry and rubbery texture. Keep a close eye on it while it’s baking and remove it from the oven as soon as it’s set but still slightly jiggly in the center.
- Serve it warm: Clafoutis is best served warm, but it’s also delicious at room temperature.
- Storage: Leftover clafoutis can be stored in the refrigerator for up to 3 days. Reheat it gently in the oven or microwave before serving.
Enjoy your delicious Cherry Clafoutis!
Conclusion:
So, there you have it! This recipe isn’t just another drink; it’s a vibrant, flavorful, and incredibly beneficial way to harness the power of cherries. I truly believe this is a must-try recipe because it’s so much more than just a tasty treat. It’s a simple, delicious path to potentially improving your sleep, reducing inflammation, and boosting your overall well-being. Who wouldn’t want that?
Why is this recipe a must-try? Because it’s easy! Seriously, it takes minimal effort and ingredients. Plus, the taste is incredible a perfect balance of sweet and tart that’s incredibly refreshing. And let’s not forget the potential health benefits. We’re talking about a natural way to support your body, and that’s something I’m always on board with. I’ve personally felt a difference in my sleep quality since incorporating this into my routine, and I’m confident you’ll love it too.
But the best part? It’s incredibly versatile!
Serving Suggestions and Variations:
* Sparkling Cherry Delight: For a fizzy twist, top it off with sparkling water or club soda. It’s perfect for a summer afternoon or a festive occasion.
* Cherry Smoothie Booster: Add a splash to your morning smoothie for an extra boost of flavor and nutrients. It pairs wonderfully with berries, bananas, and spinach.
* Warm Cherry Elixir: On a chilly evening, gently warm the juice and add a cinnamon stick or a slice of ginger for a comforting and soothing drink.
* Cherry Ice Pops: Pour the juice into ice pop molds for a healthy and refreshing treat for kids and adults alike.
* Cherry Chia Seed Pudding: Mix the juice with chia seeds and let it sit overnight for a delicious and nutritious breakfast or snack.
* Cherry Vinaigrette: Whisk the juice with olive oil, balsamic vinegar, and a touch of honey for a vibrant and flavorful salad dressing.
* Cherry Mocktail Magic: Combine the juice with lime juice, mint leaves, and a splash of agave nectar for a sophisticated and refreshing mocktail.
Don’t be afraid to experiment and find your own favorite way to enjoy this recipe. The possibilities are endless! You can even try using different types of cherries to see how it affects the flavor profile. Tart cherries will give you a more intense, tangy taste, while sweet cherries will result in a sweeter, more mellow juice.
I’m so excited for you to try this recipe and experience the potential cherry juice benefits for yourself. I truly believe you’ll be amazed at how easy it is to make and how delicious it tastes.
So, what are you waiting for? Head to the store, grab some cherries, and get juicing! I can’t wait to hear about your experience. Did you try any of the variations? Did you notice any positive changes in your health? Share your thoughts and photos in the comments below! Let’s create a community of cherry juice enthusiasts! I’m confident that once you try this, it will become a staple in your routine, just like it has for me. Happy juicing!
Cherry Juice Benefits: Everything You Need to Know
Classic French baked dessert with sweet cherries in a creamy, custard-like batter. Best served warm, dusted with powdered sugar.
Ingredients
- 1 pound fresh sweet cherries, pitted (or 1 pound frozen, thawed and drained)
- 1/2 cup granulated sugar, plus extra for dusting
- 1/4 cup all-purpose flour
- 1/4 teaspoon salt
- 3 large eggs
- 1 cup whole milk
- 1/4 cup heavy cream
- 1 teaspoon vanilla extract
- 2 tablespoons Kirsch (cherry liqueur), optional but recommended
- 2 tablespoons unsalted butter, melted
- Powdered sugar, for dusting (optional)
- 2 cups tart cherry juice (unsweetened)
- 1 tablespoon lemon juice
- 1 tablespoon honey (optional, adjust to taste)
Instructions
- Preheat your oven to 375°F (190°C). Grease a 9-inch pie dish or baking dish with some of the melted butter. Dust the dish with granulated sugar.
- Arrange the cherries in the prepared dish, spreading them evenly across the bottom.
- In a large bowl, whisk together the sugar, flour, and salt.
- In a separate bowl, whisk together the eggs, milk, heavy cream, vanilla extract, and Kirsch (if using).
- Gradually add the wet ingredients to the dry ingredients, whisking constantly until smooth.
- Pour the batter over the cherries in the prepared dish.
- Drizzle the remaining melted butter over the top of the batter.
- Bake in the preheated oven for 45-55 minutes, or until the clafoutis is puffed up and golden brown. The center should be set but still slightly jiggly. A toothpick inserted into the center should come out clean, or with just a few moist crumbs attached.
- Let the clafoutis cool slightly before serving. It will deflate a bit as it cools, which is perfectly normal.
- Dust with powdered sugar (optional) and serve warm. Serve with a dollop of whipped cream or a scoop of vanilla ice cream.
- In a small saucepan, combine the tart cherry juice, lemon juice, and honey (if using).
- Bring the mixture to a simmer over medium heat.
- Reduce the heat to low and simmer for 20-30 minutes, or until the juice has reduced by about half and has thickened slightly. Stir occasionally to prevent it from sticking to the bottom of the pan. The reduction should be syrupy and coat the back of a spoon.
- Remove from heat and let cool slightly. The reduction will thicken further as it cools.
- Drizzle the cherry juice reduction over the warm clafoutis before serving. You can also serve it on the side for dipping.
Notes
- Fruit Variations: Use blueberries, raspberries, peaches, or plums instead of cherries.
- Add Nuts: Sprinkle toasted almonds or pecans for added crunch.
- Extracts: Try almond or lemon extract instead of vanilla.
- Gluten-Free: Substitute all-purpose flour with a gluten-free blend.
- Dairy-Free: Use plant-based milk and cream alternatives.
- Don’t Overbake: Overbaking results in a dry texture.
- Serving: Best served warm, but also delicious at room temperature.
- Storage: Store leftovers in the refrigerator for up to 3 days. Reheat gently before serving.