
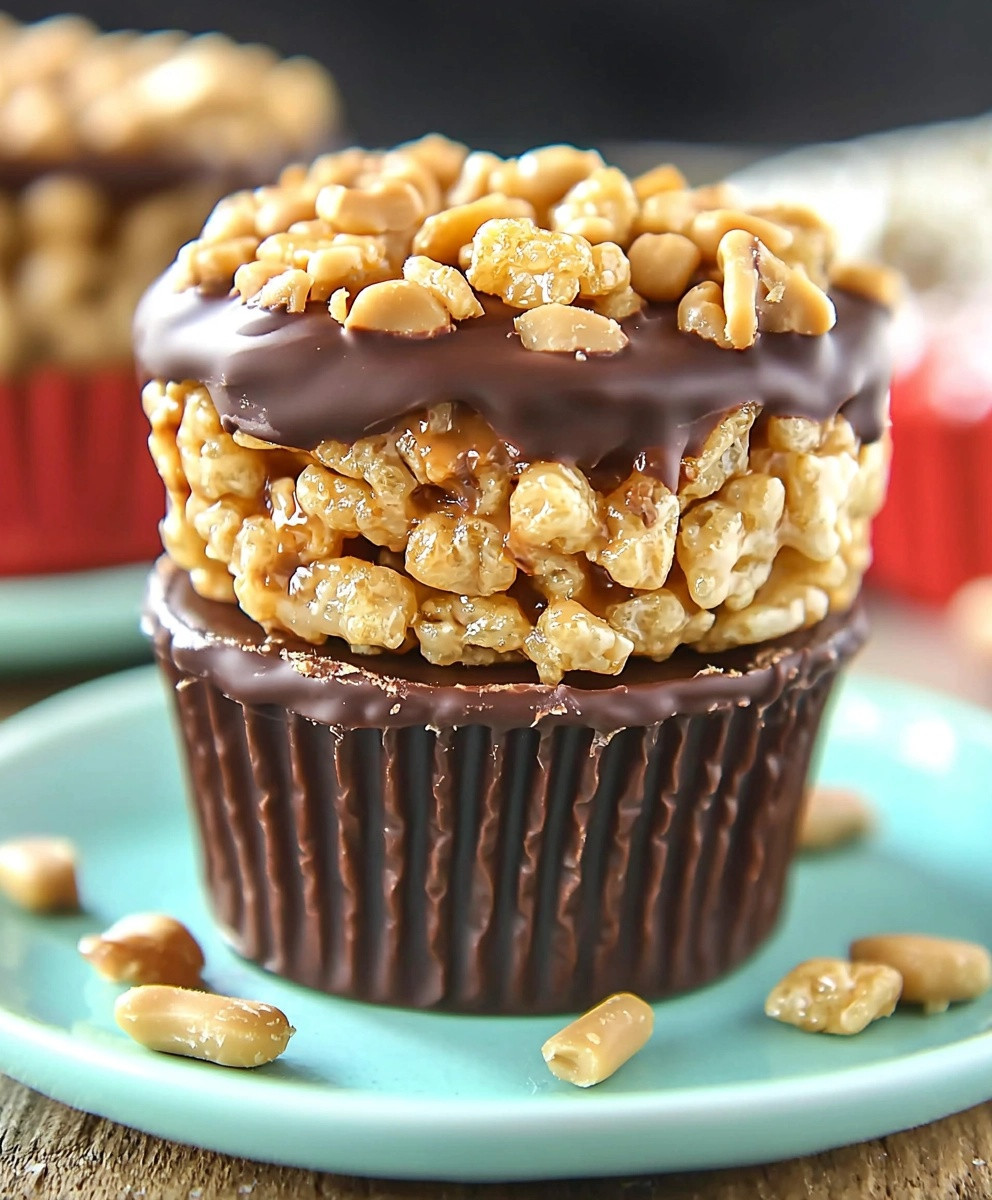
Chocolate Peanut Butter Cups are a delightful treat that brings together the rich, creamy goodness of peanut butter and the indulgent sweetness of chocolate. As a fan of this classic confection, I cant help but reminisce about the first time I tasted these heavenly bites. Originating in the United States, these treats have become a beloved staple in many households, often associated with childhood memories and special occasions. The combination of smooth peanut butter encased in a luscious chocolate shell creates a perfect balance of flavors and textures that keeps people coming back for more.
What I love most about Chocolate Peanut Butter Cups is their versatility; they can be enjoyed as a quick snack, a dessert, or even a homemade gift for friends and family. The convenience of making them at home allows for customization, whether you prefer dark chocolate, milk chocolate, or even adding a sprinkle of sea salt on top. Its no wonder that Chocolate Peanut Butter Cups have captured the hearts (and taste buds) of so many. Join me as we dive into this simple yet satisfying recipe that is sure to become a favorite in your kitchen!

Ingredients:
- 1 cup creamy peanut butter
- 1/2 cup powdered sugar
- 1 teaspoon vanilla extract
- 1 1/2 cups semi-sweet chocolate chips
- 1 tablespoon coconut oil (optional, for smoother chocolate)
- 1/4 teaspoon sea salt (optional, for garnish)
- Mini cupcake liners (for serving)
Preparing the Peanut Butter Filling
First things first, lets whip up that delicious peanut butter filling. Its the heart of our chocolate peanut butter cups!
- In a medium mixing bowl, combine 1 cup of creamy peanut butter, 1/2 cup of powdered sugar, and 1 teaspoon of vanilla extract. I love using a spatula for this, as it helps to scrape down the sides and ensures everything is well mixed.
- Mix the ingredients together until they form a smooth, thick paste. You can use a hand mixer or just a good old-fashioned wooden spoon. I usually opt for the spoon because it gives me a good workout!
- Once the mixture is smooth, set it aside. You want it to be ready when we start assembling our cups.
Melting the Chocolate
Now, lets get to the chocolate! This part is super fun and a little messy, but totally worth it.
- In a microwave-safe bowl, add 1 1/2 cups of semi-sweet chocolate chips. If you want your chocolate to be extra smooth, you can add 1 tablespoon of coconut oil. This will help the chocolate melt evenly and give it a nice sheen.
- Microwave the chocolate chips in 30-second intervals, stirring in between each interval. This is crucial to avoid burning the chocolate. I usually do this for about 1.5 to 2 minutes total, but it can vary depending on your microwave.
- Once the chocolate is completely melted and smooth, remove it from the microwave and let it cool for a minute. You dont want to pour hot chocolate over the peanut butter filling!
Assembling the Chocolate Peanut Butter Cups
Now comes the exciting partputting everything together! This is where the magic happens.
- Line a muffin tin with mini cupcake liners. This recipe makes about 12 cups, so make sure you have enough liners ready to go.
- Using a spoon or a small cookie scoop, add about 1 tablespoon of melted chocolate to the bottom of each cupcake liner. Use the back of the spoon to spread it evenly across the bottom. This layer is going to be the base of your cups.
- Next, take your peanut butter mixture and scoop about 1 tablespoon on top of the chocolate layer in each liner. Gently press it down to create an even layer. Dont worry if its not perfect; its all going to be covered in chocolate anyway!
- Now, pour another tablespoon of melted chocolate over the peanut butter layer in each cup. Use the spoon to spread it out and cover the peanut butter completely. This is where you can get creativeif you want a thicker chocolate layer, feel free to add more chocolate!
- If youre feeling fancy, sprinkle a tiny pinch of sea salt on top of each cup before the chocolate sets. This adds a delightful contrast to the sweetness of the chocolate and peanut butter.
Chilling and Setting
Were almost there! Now we just need to let our cups set so they can hold their shape.
- Place the muffin tin in the refrigerator and let the chocolate peanut butter cups chill for at least 1 hour. This will allow the chocolate to harden completely.
- Once theyre set, carefully peel the cups away from the liners. I find that gently pulling the sides of the liner away from the chocolate helps to release them without breaking.
- Transfer the cups to a serving plate or an airtight container. If youre not eating them right away, store them in the refrigerator to keep them fresh.
Enjoying Your Chocolate Peanut Butter Cups
Now that youve made these delightful treats, its time to enjoy them! Here are a few ideas on how to
Conclusion:
In summary, these Chocolate Peanut Butter Cups are an absolute must-try for anyone who loves the delightful combination of rich chocolate and creamy peanut butter. Not only are they incredibly easy to make, but they also offer a satisfying treat that can be enjoyed at any time of the day. Whether youre looking for a quick dessert to impress your friends or a sweet snack to indulge in during a movie night, these cups are sure to hit the spot. For serving suggestions, consider pairing these delectable treats with a glass of cold milk or a warm cup of coffee to enhance the flavors. You can also get creative with variations by adding a sprinkle of sea salt on top for a sweet and salty twist, or even incorporating crushed nuts or a drizzle of caramel for an extra layer of flavor. The possibilities are endless! I encourage you to give this recipe a try and experience the joy of making your own Chocolate Peanut Butter Cups. Once youve made them, Id love to hear about your experience! Share your thoughts, any variations you tried, or even a photo of your delicious creations. Lets spread the love for these delightful treats together! Print
Chocolate Peanut Butter Cups: The Ultimate Homemade Recipe for a Delicious Treat
- Total Time: 75 minutes
- Yield: 12 cups 1x
Description
Indulge in these homemade chocolate peanut butter cups that are creamy, sweet, and utterly delicious! Perfect for satisfying your sweet tooth or sharing with friends, these treats are easy to make and even easier to enjoy.
Ingredients
- 1 cup creamy peanut butter
- 1/2 cup powdered sugar
- 1 teaspoon vanilla extract
- 1 1/2 cups semi-sweet chocolate chips
- 1 tablespoon coconut oil (optional, for smoother chocolate)
- 1/4 teaspoon sea salt (optional, for garnish)
- Mini cupcake liners (for serving)
Instructions
- In a medium mixing bowl, combine 1 cup of creamy peanut butter, 1/2 cup of powdered sugar, and 1 teaspoon of vanilla extract. Use a spatula to mix well.
- Mix until smooth and thick, using a hand mixer or a wooden spoon.
- Set the mixture aside for assembly.
- In a microwave-safe bowl, add 1 1/2 cups of semi-sweet chocolate chips and 1 tablespoon of coconut oil (if using).
- Microwave in 30-second intervals, stirring in between, until melted and smooth (about 1.5 to 2 minutes total).
- Let the melted chocolate cool for a minute before using.
- Line a muffin tin with mini cupcake liners.
- Add about 1 tablespoon of melted chocolate to the bottom of each liner and spread it evenly.
- Scoop about 1 tablespoon of peanut butter mixture on top of the chocolate layer and gently press down.
- Pour another tablespoon of melted chocolate over the peanut butter layer and spread to cover completely.
- Optionally, sprinkle a tiny pinch of sea salt on top before the chocolate sets.
- Refrigerate the muffin tin for at least 1 hour to allow the chocolate to harden.
- Carefully peel the cups away from the liners.
- Transfer to a serving plate or airtight container and store in the refrigerator.
Notes
- Serve them as a sweet treat at parties or gatherings.
- Pair them with a glass of cold milk for a classic combination.
- Use them as a topping for ice cream or yogurt.
- Wrap them up as gifts for friends and family.
- Feel free to customize the chocolate layer thickness to your liking.
- You can also experiment with different types of chocolate or add toppings like crushed nuts or sprinkles for extra flair!
- Prep Time: 15 minutes
- Cook Time: 2 minutes