
Chocolate Protein Ice Cream: the words alone conjure up images of guilt-free indulgence, don’t they? Imagine sinking your spoon into a creamy, decadent dessert that not only satisfies your sweet tooth but also fuels your body with protein. It sounds too good to be true, right? Well, prepare to be amazed because this recipe delivers on that promise and more!
While the concept of adding protein to desserts might seem like a modern health trend, the idea of fortifying food for added benefits has roots that stretch back centuries. Think of ancient cultures adding herbs and spices not just for flavor, but for their medicinal properties. Today, we’re simply applying that same principle to our sweet treats, creating a delicious and nutritious balance.
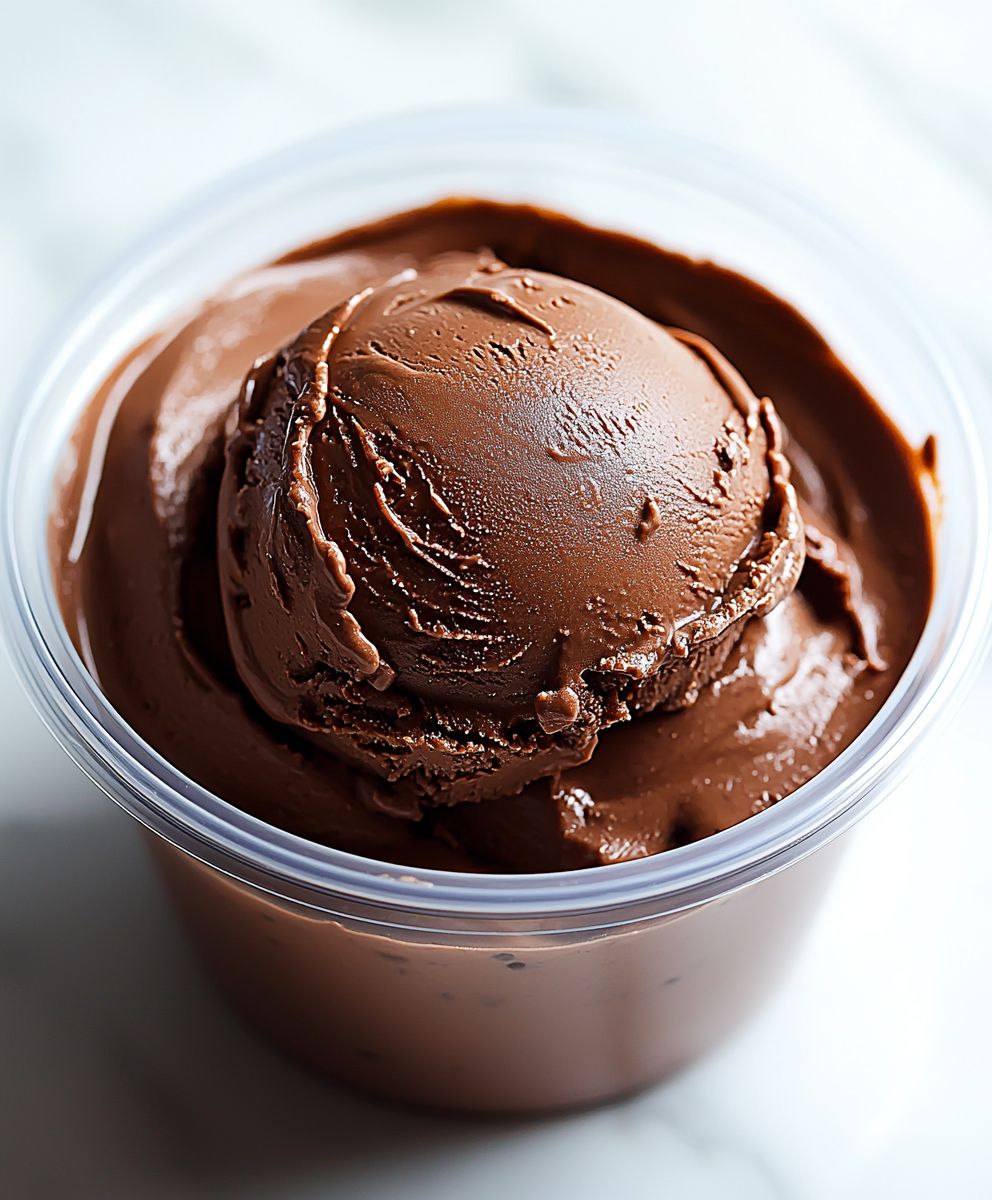
What makes chocolate protein ice cream so irresistible? It’s the perfect marriage of flavor and function. The rich, satisfying taste of chocolate combined with the smooth, creamy texture of ice cream is a classic combination that never fails to please. But beyond the taste, people love that this version allows them to enjoy a treat without derailing their health goals. It’s a convenient and delicious way to sneak in extra protein, whether you’re a fitness enthusiast, looking for a healthy snack, or simply want to enjoy a guilt-free dessert. Get ready to discover how easy it is to make this incredible treat at home!

Ingredients:
- 1 cup unsweetened almond milk (or any milk of your choice)
- 1 scoop (approximately 30g) chocolate protein powder (whey, casein, or plant-based)
- 1/4 cup unsweetened cocoa powder
- 1/4 teaspoon xanthan gum (optional, but highly recommended for a smoother texture)
- 1/4 teaspoon sea salt
- 1/2 teaspoon vanilla extract
- 1-2 tablespoons sweetener of choice (erythritol, stevia, monk fruit, honey, or maple syrup adjust to taste)
- 1/4 cup Greek yogurt (optional, for added creaminess and protein)
- 2 tablespoons sugar-free chocolate syrup (optional, for extra chocolate flavor)
- Ice cubes (approximately 2-3 cups, depending on your blender)
- Optional toppings: sugar-free chocolate chips, chopped nuts, berries, whipped cream (sugar-free)
Preparing the Base:
- First, let’s gather all our ingredients. It’s always a good idea to have everything measured out and ready to go before you start blending. This will make the process much smoother and prevent any last-minute scrambling.
- In a high-powered blender (I recommend a Vitamix or Blendtec, but any decent blender should work), pour in the almond milk. This will provide the liquid base for our ice cream.
- Next, add the chocolate protein powder. Make sure to use a protein powder that you enjoy the taste of, as it will significantly impact the final flavor of the ice cream. I personally prefer whey protein isolate for its smooth texture and minimal aftertaste, but feel free to experiment with casein or plant-based options.
- Now, it’s time for the cocoa powder. This will deepen the chocolate flavor and give our ice cream that rich, dark color we all love. Use unsweetened cocoa powder to control the sweetness level.
- This is where the magic happens! Add the xanthan gum. This ingredient is optional, but I highly recommend it for achieving a smooth, creamy, and scoopable texture. Xanthan gum acts as a stabilizer and thickener, preventing ice crystals from forming and resulting in a much more enjoyable ice cream experience. Just a tiny amount is all you need!
- Don’t forget the sea salt! A pinch of salt enhances the sweetness and chocolate flavor, creating a more balanced and delicious treat.
- Add the vanilla extract. Vanilla extract complements the chocolate beautifully and adds a touch of warmth and complexity to the flavor profile.
- Now, it’s time to sweeten things up. Add your sweetener of choice. I usually use erythritol or stevia to keep the sugar content low, but you can use honey, maple syrup, or any other sweetener you prefer. Start with 1 tablespoon and adjust to taste. Remember, you can always add more, but you can’t take it away!
- If you’re using Greek yogurt, add it now. Greek yogurt adds creaminess and a boost of protein, making this ice cream even more satisfying.
- For an extra dose of chocolatey goodness, add the sugar-free chocolate syrup. This is totally optional, but it definitely elevates the flavor.
Blending Process:
- Now comes the fun part! Close the lid of your blender tightly and start blending on low speed. Gradually increase the speed to high, blending until all the ingredients are well combined and smooth. This should take about 30-60 seconds.
- Stop the blender and scrape down the sides with a spatula to ensure that all the ingredients are fully incorporated.
- Now, with the blender running on low speed, slowly add the ice cubes, one at a time. This is crucial for achieving the right consistency. Adding too much ice at once can strain your blender and result in a chunky, icy texture.
- As you add the ice, the mixture will start to thicken and resemble ice cream. Continue adding ice until you reach your desired consistency. Be patient and don’t over-blend, as this can cause the ice cream to become too watery.
- If the mixture becomes too thick, add a splash of almond milk to thin it out. If it’s too thin, add a few more ice cubes.
- Once you’ve reached the perfect consistency, stop the blender and give the ice cream a taste. Adjust the sweetness or flavor as needed.
Serving and Storage:
- Your chocolate protein ice cream is now ready to be enjoyed! Scoop it into a bowl or cone and add your favorite toppings. I love topping mine with sugar-free chocolate chips, chopped nuts, and fresh berries. A dollop of sugar-free whipped cream is also a delicious addition.
- If you’re not planning on eating all the ice cream right away, you can store it in an airtight container in the freezer. However, keep in mind that homemade ice cream tends to harden more than store-bought ice cream, so you may need to let it thaw for a few minutes before scooping.
- For best results, consume the ice cream within a few days. After that, it may start to develop ice crystals and lose its creamy texture.
Tips and Variations:
- Protein Powder Choice: Experiment with different flavors of protein powder to create unique variations. Vanilla protein powder with a touch of peanut butter is a fantastic combination.
- Adding Fruit: Blend in frozen berries, such as raspberries or strawberries, for a fruity twist.
- Coffee Flavor: Add a teaspoon of instant coffee granules for a mocha-flavored ice cream.
- Nut Butter: Add a tablespoon of your favorite nut butter (peanut, almond, cashew) for added flavor and creaminess.
- Spice it Up: Add a pinch of cinnamon or cayenne pepper for a warm and spicy kick.
- Chocolate Chunks: Fold in sugar-free chocolate chunks or cacao nibs for added texture and chocolate intensity.
- Vegan Option: Ensure your protein powder and milk are plant-based for a vegan-friendly version.
- Adjusting Sweetness: Taste as you go and adjust the sweetener to your preference. Some protein powders are already quite sweet, so you may need less added sweetener.
- Blender Power: If your blender isn’t very powerful, you may need to add the ice in smaller increments and blend for a longer time. You might also need to add a bit more liquid to help the blending process.
- Preventing Icy Texture: The key to preventing an icy texture is to use xanthan gum and to blend the ice cream quickly. Over-blending can melt the ice and result in a watery texture that will freeze into ice crystals.
Troubleshooting:
- Ice Cream is Too Icy: This usually means there wasn’t enough fat or stabilizer in the recipe. Next time, try adding more Greek yogurt or xanthan gum.
- Ice Cream is Too Hard: Homemade ice cream tends to harden more than store-bought ice cream because it doesn’t contain the same stabilizers and emulsifiers. Let it thaw for a few minutes before scooping.
- Ice Cream is Too Soft: You may have added too much liquid or not enough ice. Try adding more ice and blending until it reaches the desired consistency.
- Blender is Struggling: If your blender is struggling to blend the ice, try adding a bit more liquid or using smaller ice cubes. You may also need to stop and scrape down the sides more frequently.
- Taste is Off: Adjust the sweetener and flavorings to your liking. Don’t be afraid to experiment with different ingredients and combinations.
Enjoy your delicious and healthy chocolate protein ice cream! I hope you found this recipe helpful and that you enjoy making and eating this guilt-free treat. Remember to have fun and experiment with different flavors and toppings to create your own unique variations. Happy blending!
Conclusion:
This isn’t just another recipe; it’s your new go-to for guilt-free indulgence! I truly believe this Chocolate Protein Ice Cream is a must-try for anyone looking to satisfy their sweet cravings while staying on track with their health goals. The rich, decadent chocolate flavor combined with the creamy texture will have you forgetting it’s packed with protein and good-for-you ingredients. It’s the perfect way to end a workout, cool down on a hot day, or simply treat yourself without derailing your diet.
But what truly sets this recipe apart is its versatility. While I’ve presented a classic chocolate version, the possibilities are endless! Feel free to experiment with different protein powders to alter the flavor profile. Vanilla protein powder with a dash of espresso powder creates a delightful mocha ice cream. Or, try adding a scoop of peanut butter protein for a Reese’s-inspired treat.
Serving Suggestions and Variations:
Don’t limit yourself to just eating it straight from the bowl (though I won’t judge if you do!). This Chocolate Protein Ice Cream is fantastic in so many different ways.
* As a smoothie booster: Add a scoop or two to your morning smoothie for extra protein and a creamy texture. It blends beautifully with fruits like bananas, berries, and even spinach (you won’t even taste it!).
* In a protein shake: Blend it with milk (dairy or non-dairy), a banana, and some ice for a super thick and satisfying protein shake.
* As a topping: Use it to top your favorite healthy desserts, like protein pancakes, waffles, or even a warm brownie (for a truly decadent experience!).
* Make ice cream sandwiches: Sandwich it between two protein cookies or graham crackers for a fun and portable treat.
* Add mix-ins: Get creative with your mix-ins! Try adding chopped nuts, sugar-free chocolate chips, shredded coconut, or even a swirl of peanut butter.
* For a lighter version: Use unsweetened almond milk or water instead of regular milk. You can also reduce the amount of sweetener if you prefer a less sweet ice cream.
* For a richer version: Use full-fat coconut milk for an extra creamy and decadent treat.
I’ve personally tried all of these variations, and each one is delicious in its own way. The key is to have fun and experiment until you find your perfect combination.
I’m so excited for you to try this recipe and discover just how delicious and satisfying healthy eating can be. It’s a game-changer, I promise! Once you’ve made your own batch of this amazing Chocolate Protein Ice Cream, I’d absolutely love to hear about your experience. Did you try any variations? What were your favorite mix-ins? Share your photos and stories in the comments below! Let’s inspire each other to create healthy and delicious treats that we can all enjoy. Don’t forget to rate the recipe too! Your feedback helps me create even better recipes for you in the future. Happy scooping!
Chocolate Protein Ice Cream: The Ultimate Healthy Dessert Recipe
A healthy and delicious chocolate protein ice cream that's easy to make in your blender! Guilt-free and customizable with your favorite toppings.
Ingredients
- 1 cup unsweetened almond milk (or any milk of your choice)
- 1 scoop (approximately 30g) chocolate protein powder (whey, casein, or plant-based)
- 1/4 cup unsweetened cocoa powder
- 1/4 teaspoon xanthan gum (optional, but highly recommended for a smoother texture)
- 1/4 teaspoon sea salt
- 1/2 teaspoon vanilla extract
- 1-2 tablespoons sweetener of choice (erythritol, stevia, monk fruit, honey, or maple syrup adjust to taste)
- 1/4 cup Greek yogurt (optional, for added creaminess and protein)
- 2 tablespoons sugar-free chocolate syrup (optional, for extra chocolate flavor)
- Ice cubes (approximately 2-3 cups, depending on your blender)
- Optional toppings: sugar-free chocolate chips, chopped nuts, berries, whipped cream (sugar-free)
Instructions
- Prepare Ingredients: Gather and measure all ingredients.
- Blend Base: In a high-powered blender, combine almond milk, protein powder, cocoa powder, xanthan gum (if using), sea salt, vanilla extract, sweetener, Greek yogurt (if using), and sugar-free chocolate syrup (if using).
- Blend Until Smooth: Blend on low speed, gradually increasing to high, until well combined and smooth (about 30-60 seconds). Scrape down the sides as needed.
- Add Ice: With the blender running on low, slowly add ice cubes one at a time until the mixture thickens to ice cream consistency.
- Adjust Consistency: If too thick, add a splash of almond milk. If too thin, add more ice.
- Taste and Adjust: Taste and adjust sweetness or flavor as needed.
- Serve: Scoop into a bowl or cone and add your favorite toppings.
- Store: Store leftovers in an airtight container in the freezer. Thaw for a few minutes before scooping. Consume within a few days for best results.
Notes
- Protein Powder Choice: Experiment with different flavors of protein powder.
- Adding Fruit: Blend in frozen berries.
- Coffee Flavor: Add a teaspoon of instant coffee granules.
- Nut Butter: Add a tablespoon of your favorite nut butter.
- Spice it Up: Add a pinch of cinnamon or cayenne pepper.
- Chocolate Chunks: Fold in sugar-free chocolate chunks or cacao nibs.
- Vegan Option: Ensure your protein powder and milk are plant-based.
- Adjusting Sweetness: Taste as you go and adjust the sweetener to your preference.
- Blender Power: If your blender isn’t very powerful, you may need to add the ice in smaller increments and blend for a longer time. You might also need to add a bit more liquid to help the blending process.
- Preventing Icy Texture: The key to preventing an icy texture is to use xanthan gum and to blend the ice cream quickly. Over-blending can melt the ice and result in a watery texture that will freeze into ice crystals.
- Ice Cream is Too Icy: This usually means there wasn’t enough fat or stabilizer in the recipe. Next time, try adding more Greek yogurt or xanthan gum.
- Ice Cream is Too Hard: Homemade ice cream tends to harden more than store-bought ice cream because it doesn’t contain the same stabilizers and emulsifiers. Let it thaw for a few minutes before scooping.
- Ice Cream is Too Soft: You may have added too much liquid or not enough ice. Try adding more ice and blending until it reaches the desired consistency.
- Blender is Struggling: If your blender is struggling to blend the ice, try adding a bit more liquid or using smaller ice cubes. You may also need to stop and scrape down the sides more frequently.
- Taste is Off: Adjust the sweetener and flavorings to your liking. Don’t be afraid to experiment with different ingredients and combinations.