
3-Ingredient Cereal Bars are a popular snack option for people of all ages, offering a quick, convenient, and satisfying bite. These bars are especially loved for their portability, making them an ideal solution for busy mornings, mid-day cravings, or even as a light snack for children. What makes this recipe stand out is its simplicity—using only three core ingredients that you likely already have in your pantry. With no need for special equipment or advanced baking skills, these bars are perfect for beginners and experienced cooks alike. Whether you’re looking to create a healthy snack or just want to try something new, this easy recipe is a fantastic place to start.
The beauty of this recipe lies in its versatility. While it only requires three main ingredients—cereal, nut butter, and a sweetener—it can be easily adapted to suit your dietary preferences. This makes it perfect for anyone looking to cut down on sugar, follow a gluten-free diet, or even make vegan-friendly snacks. Plus, the combination of crunchiness from the cereal and the rich texture from the nut butter makes every bite delightful. Let’s explore how easy it is to make these delicious bars that will soon become a household favorite.

Ingredients You’ll Need for Cereal Bars
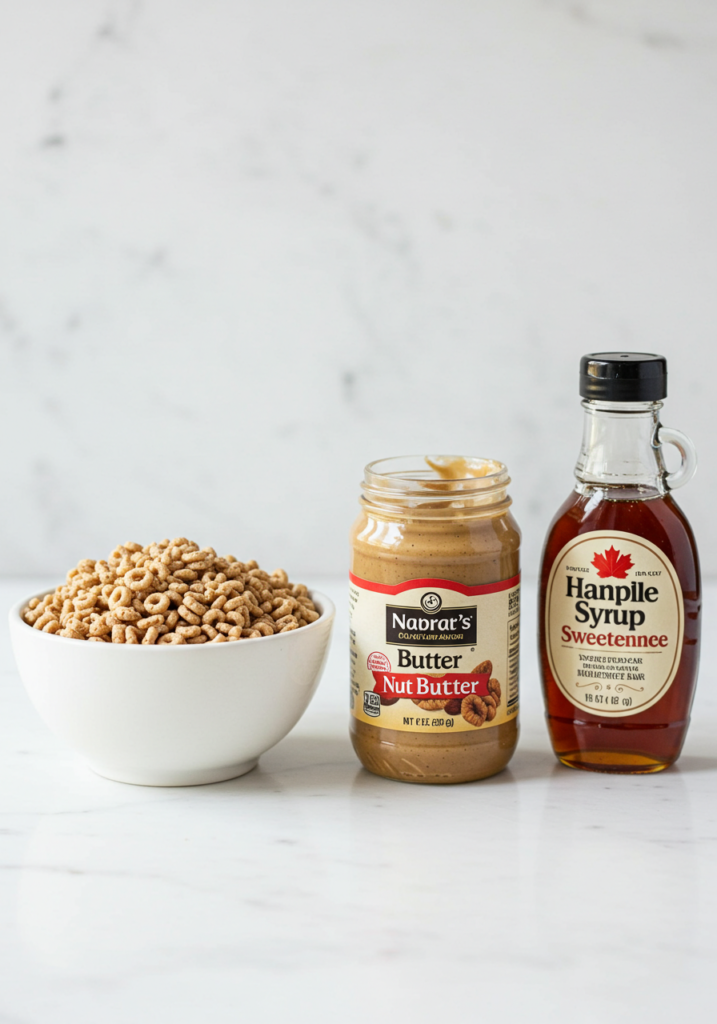
The beauty of these 3-ingredient cereal bars is how simple the ingredients are, but they come together to form a treat that’s both tasty and satisfying. Here’s a breakdown of each essential ingredient and some tips for making the recipe as delicious as possible.
Cereal: The Base of Your Bars
The first ingredient you’ll need is cereal, which provides the crunchy base of these bars. The type of cereal you choose can significantly influence the final texture and flavor of the bars. Popular choices include rice cereal, like Rice Krispies, or oat-based cereals, which provide a heartier, chewier bite. For a more flavorful and slightly denser texture, you can choose whole-grain cereals, or even cornflakes, which create a delicate crunch. The key is selecting a cereal that is light and airy, so it blends well with the nut butter and sweetener. The quantity of cereal will also affect how thick or thin your bars turn out, so adjusting the amount based on your preference is recommended.
Nut Butter: For Binding and Flavor
Nut butter serves a dual purpose in this recipe—it acts as both a binding agent and a source of rich flavor. Peanut butter is the most common choice, giving the bars a classic flavor, but almond butter, cashew butter, or even sunflower seed butter can be used for a different twist. The natural oils in the nut butter help to hold the cereal pieces together, making the bars solid and easy to cut into shapes. You can choose between creamy or chunky nut butters depending on whether you want a smooth texture or a bit of crunch in your bars. If you’re aiming for a healthier option, be sure to choose natural nut butter with minimal added sugars and preservatives.
Sweetener: To Add Just the Right Amount of Sweetness
The third ingredient is the sweetener, which balances the slight saltiness of the nut butter and gives the cereal bars a pleasant sweetness. Honey is the most commonly used sweetener, adding a natural sweetness and a subtle floral flavor. However, if you’re vegan or prefer an alternative, maple syrup, agave nectar, or brown rice syrup can be substituted. The sweetness level can be adjusted to suit your taste, so if you prefer a less sweet bar, feel free to reduce the amount of sweetener. Keep in mind that the liquid consistency of the sweetener also helps in binding the mixture, so it’s important to use the right amount to maintain the texture of the bars.
Preparation: How to Make Easy 3-Ingredient Cereal Bars
Making these 3-ingredient cereal bars is a breeze and can be done in just a few simple steps. Whether you’re preparing them for yourself, your kids, or guests, this recipe doesn’t require any special equipment or extensive time in the kitchen. Here’s how to make these delicious cereal bars from start to finish.
Step 1: Prepare Your Ingredients
Before you start mixing, it’s important to gather all your ingredients. Measure out your cereal, nut butter, and sweetener in the proper quantities to ensure the recipe turns out perfectly. This step helps streamline the process and ensures you don’t forget any crucial ingredients. If you’re using a large quantity, consider doubling or halving the recipe, depending on the number of bars you need. Additionally, make sure your cereal is fresh and free from any moisture to avoid a soggy texture.
If you’re planning to add extra ingredients such as dried fruit, chocolate chips, or seeds, it’s a good idea to have those ready as well. Having everything prepared will allow you to quickly move through the steps without interruptions. If you plan to store the bars in a specific shape or size, use a pan or tray that suits your preference. A square baking pan or an 8×8-inch dish works well for medium-sized bars.
Step 2: Melt the Nut Butter and Sweetener
Start by melting your nut butter and sweetener together. You can do this in a microwave-safe bowl, heating it for 20-30 seconds at a time, stirring in between to ensure it melts evenly. Alternatively, you can melt them in a saucepan on the stove over low heat. The goal is to soften and combine the two ingredients until they become a smooth, slightly runny mixture. This step is essential because it helps the nut butter and sweetener bind together, allowing them to coat the cereal evenly and hold everything together when cooled.
Once melted, stir the mixture thoroughly to ensure that the sweetener is fully incorporated into the nut butter. You want a smooth, creamy consistency without any lumps. This mixture will act as the glue that keeps the bars intact, so making sure it’s well-blended is crucial to achieving a firm yet tender bar.
Mistakes to Avoid When Making 3-Ingredient Cereal Bars
While this recipe is straightforward, there are a few common mistakes that can affect the final texture or flavor of your bars. By avoiding these pitfalls, you can ensure that your cereal bars come out just the way you want them every time.
Mistake 1: Overheating the Nut Butter and Sweetener
One of the most frequent mistakes when making cereal bars is overheating the nut butter and sweetener mixture. It’s easy to think that melting them for too long will help create a smoother texture, but if the mixture gets too hot, it can affect the consistency. The nut butter might separate, and the sweetener may become too runny, causing the bars to be overly sticky or too liquid. Always heat gently and keep an eye on the mixture, stirring frequently. If you overheat it, the texture of the final bars can become oily or mushy.
Mistake 2: Not Pressing the Mixture Firmly
Another mistake people often make is not pressing the cereal mixture into the pan firmly enough. When the ingredients are mixed and poured into the pan, they may look like they’re packed tightly, but without applying enough pressure, the bars won’t hold together properly once they set. This can result in crumbly bars that fall apart easily. Use the back of a spoon or a piece of parchment paper to press down the mixture evenly into the pan. Press firmly but gently to avoid creating air pockets, and make sure the edges are compacted too.
By ensuring the mixture is well-pressed and evenly distributed, your bars will maintain their shape and be much easier to cut.
Alternative Ingredients for Your Cereal Bars
One of the best things about this 3-ingredient cereal bars recipe is how easily it can be adapted to suit various dietary preferences or flavor profiles. By swapping out a few ingredients, you can create a completely different taste or meet specific nutritional needs. Let’s take a look at some alternative ingredients that you can experiment with.
Gluten-Free Options
If you’re following a gluten-free diet, it’s simple to adjust the recipe. The primary ingredient to watch out for is the cereal, as many commercial cereals contain gluten. Look for gluten-free cereal brands, such as Rice Chex or Gluten-Free Rice Krispies, which are perfect for this recipe. Additionally, ensure that the nut butter you choose doesn’t contain any gluten-containing additives or cross-contamination. Most natural nut butters are inherently gluten-free, but it’s always a good idea to double-check the label.
Vegan-Friendly Modifications
For those on a vegan diet, replacing the honey with maple syrup or agave nectar will make the recipe completely plant-based. These sweeteners provide a similar consistency and sweetness to honey without the use of animal products. When selecting nut butter, be sure to choose one without added dairy or other animal-derived ingredients. Most pure peanut butter, almond butter, and sunflower butter options are vegan-friendly, but check the labels just to be sure.
Sugar-Free and Low-Carb Alternatives
If you’re looking for a lower sugar or low-carb version of the cereal bars, you can replace the sweetener with alternatives like Stevia, Erythritol, or Monk Fruit Sweetener. These options will allow you to reduce the sugar content while still achieving a satisfying sweetness. You can also opt for unsweetened nut butters and choose a low-sugar cereal (such as unsweetened bran flakes) to make a healthier, sugar-conscious version of these bars.
Flavor Variations
If you’re looking to switch things up and add some flavor complexity, try experimenting with different nut butters. Cashew butter or hazelnut butter, for example, can add a distinct taste to your bars. You could also stir in a pinch of cinnamon, vanilla extract, or a dash of cocoa powder for a warm or chocolatey twist. The possibilities are endless when it comes to customizing the flavor to your liking!
Tips & Tricks for Perfect Cereal Bars
To ensure your cereal bars turn out perfectly every time, there are a few tips and tricks that can help you get the texture and flavor just right. With these simple suggestions, you’ll avoid common mistakes and make your bars even more delicious.
Tip 1: Use the Right Cereal for Texture
The type of cereal you use will impact both the texture and the overall crunchiness of the bars. If you want a lighter, crispier bar, stick to cereals like Rice Krispies or Cornflakes. These cereals are airy and create a delicate crunch that blends well with the nut butter and sweetener. For a chewier, denser texture, try using oat-based cereals like Cheerios or Oatmeal Squares. You can also mix different types of cereal together to get a variety of textures in each bite. Just make sure the cereal is crisp and not overly sugary or sticky.
Tip 2: Don’t Skip the Refrigeration Step
After you’ve mixed your ingredients and pressed them into the pan, it’s important to refrigerate the bars for at least 1-2 hours before cutting them into squares. This allows the nut butter and sweetener mixture to firm up and bind the cereal together, making the bars solid enough to hold their shape. If you try to cut them too soon, they may fall apart or be too soft. This step is essential for creating bars that have the right texture—not too crumbly, not too gooey.
Tip 3: Experiment with Add-ins
While the basic recipe is delicious on its own, you can take your cereal bars to the next level by adding extra ingredients. Some popular add-ins include chocolate chips, dried fruit (like cranberries or raisins), nuts (such as almonds or walnuts), and seeds (like chia or flax seeds). These additions can provide extra texture and flavor while still keeping the bars simple and wholesome. Just be sure to adjust the quantity of nut butter and sweetener to ensure the mixture binds well, especially if you’re adding more dry ingredients.
Suggestions for Customizing Your Cereal Bars
One of the best things about this 3-ingredient cereal bar recipe is how customizable it is. Whether you’re making them for a special occasion, a kid’s lunchbox, or just for yourself, there are endless possibilities for tailoring these bars to your taste preferences. Here are a few fun suggestions to try:
Sweet & Salty Flavor Combinations
For those who enjoy the combination of sweet and salty flavors, consider adding a pinch of sea salt or flavored pretzels into the mix. The saltiness complements the sweetness of the nut butter and sweetener, balancing out the flavors perfectly. You can also incorporate caramel chips or butterscotch chips if you want to up the sweet side. Adding small amounts of roasted nuts like salted peanuts, cashews, or almonds can bring in that salty, crunchy contrast that makes for an irresistible treat.
Chocolate Lovers’ Bars
If you’re a fan of chocolate, this recipe is easily transformed into a chocolatey delight. You can fold in chocolate chips (milk, dark, or white chocolate) or even drizzle melted chocolate over the top of the bars once they’ve set. For a rich, decadent twist, try adding cocoa powder to the nut butter mixture or use a chocolate-flavored cereal. The possibilities are endless when it comes to creating a chocolatey version that satisfies your cravings!
Healthy Add-ins
If you’re looking to boost the nutritional value of your bars, consider adding superfoods such as chia seeds, hemp seeds, or flaxseeds. These seeds are high in omega-3 fatty acids and fiber, making them a great addition to any healthy snack. You can also throw in some dried fruits like cranberries, apricots, or raisins for added vitamins and sweetness. Additionally, coconut flakes can add a tropical flavor while increasing the texture of your bars.
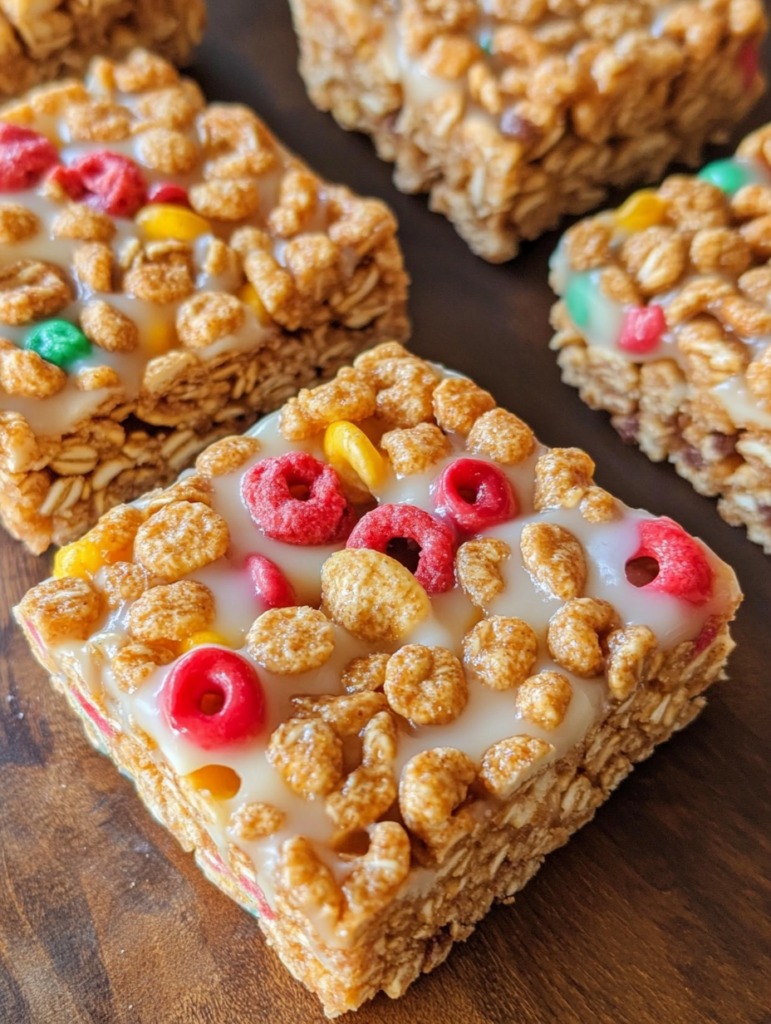
Kid-Friendly Options
When making cereal bars for kids, it’s fun to get creative with the mix-ins! Try using colorful cereals (like Fruity Pebbles or Trix) to create a visually appealing snack that kids will love. You can also add small candies like mini marshmallows, M&Ms, or even a swirl of peanut butter for extra flavor. Just be mindful of the added sugar when using certain cereals or candy, especially if you’re looking for a healthier snack option.
Frequently Asked Questions (FAQs)
If you’ve never made cereal bars before or you’re unsure about certain aspects of the recipe, you’re not alone! Below are some frequently asked questions to help you troubleshoot and perfect your cereal bars.
Can I use any type of cereal for these bars?
Yes, you can use most cereals for this recipe. However, be mindful of the texture and sweetness of the cereal. Cereal like Rice Krispies or Cheerios works well due to their light, crispy texture. Avoid using overly sugary cereals as they may make the bars too sticky or affect the texture negatively. If you want a more filling bar, go for a hearty, whole-grain cereal.
What can I substitute for honey in this recipe?
If you’re looking for a vegan or sugar-free option, maple syrup, agave nectar, or brown rice syrup work as great alternatives to honey. These sweeteners provide the same sticky consistency as honey while offering different flavor profiles. If you prefer a sugar-free bar, you can also use stevia or monk fruit sweetener.
How long can I store these cereal bars?
Once made, your cereal bars can be stored at room temperature for up to 4-5 days in an airtight container. If you want them to last longer, refrigerate them for up to 7-10 days. For longer storage, you can freeze the bars for up to 3 months. Just wrap them individually or place them in a freezer-safe container for easy access.
Why are my cereal bars too soft or crumbly?
If your bars are too soft, it could be because the nut butter and sweetener mixture wasn’t heated enough, or the bars didn’t cool long enough to firm up. Be sure to refrigerate the bars for at least 1-2 hours. If they are crumbly, you may not have pressed the mixture firmly enough into the pan. Make sure to press down on the mixture to compact it well before refrigerating.
Conclusion: Why These 3-Ingredient Cereal Bars Are a Must-Try
In conclusion, this easy 3-ingredient cereal bar recipe is not only a time-saver but also a versatile and customizable snack that can fit into any lifestyle. With just three basic ingredients—cereal, nut butter, and a sweetener—you can create a delicious snack that’s perfect for breakfast, a midday boost, or a post-workout treat. The best part is that it’s an incredibly simple recipe to make, which requires no special skills or equipment.
By following this straightforward recipe, you can create a healthy snack that’s packed with protein and fiber, while also controlling the amount of sugar and fat that goes into it. Whether you’re looking to enjoy a gluten-free, vegan, or low-sugar version, this recipe can be adapted to suit your dietary preferences. Additionally, the options for flavor variations are endless, allowing you to experiment with different cereals, add-ins, and even toppings to make each batch unique.
So, next time you’re looking for a snack that’s both easy to make and delicious, give these 3-ingredient cereal bars a try. With minimal effort and maximum flavor, they’re sure to become a regular feature in your snack rotation!
Print
3-Ingredient Cereal Bars Recipe – Simple, Quick & Delicious
- Total Time: 1 hour 10 minutes
- Yield: 12–16 bars (depending on the size you cut them into) 1x
Description
These 3-Ingredient Cereal Bars are a quick, no-bake snack made with cereal, nut butter, and sweetener. Perfect for breakfast, a midday boost, or a kid-friendly treat, these bars are easy to make and fully customizable!
Ingredients
- 3 cups cereal (Rice Krispies, Cornflakes, Cheerios, or your preferred choice)
- 1 cup nut butter (peanut butter, almond butter, or sunflower seed butter)
- 1/3 cup sweetener (honey, maple syrup, or agave syrup)
Instructions
- Prepare the Ingredients: Measure out 3 cups of your chosen cereal, 1 cup of nut butter, and 1/3 cup of your preferred sweetener (honey, maple syrup, or agave syrup).
- Melt the Nut Butter and Sweetener: In a microwave-safe bowl, melt the nut butter and sweetener together for about 20-30 seconds at a time, stirring in between until smooth and well combined. You can also do this step in a saucepan on the stove over low heat.
- Mix the Cereal: Add your cereal into the bowl with the melted nut butter and sweetener mixture. Stir gently to coat the cereal evenly, ensuring no pieces are left dry.
- Press the Mixture into a Pan: Line an 8×8-inch square pan (or any small baking dish) with parchment paper. Transfer the cereal mixture into the pan, using the back of a spoon or a piece of parchment paper to press it down firmly and evenly.
- Refrigerate: Place the pan in the fridge for 1-2 hours to allow the bars to set and firm up.
- Cut and Serve: Once set, remove the mixture from the fridge and cut into squares or rectangles. Enjoy your easy homemade cereal bars!
Notes
- Storage: Store the bars in an airtight container at room temperature for 4-5 days or in the fridge for up to 7-10 days. You can also freeze them for up to 3 months.
- Substitutions: For a gluten-free version, use gluten-free cereal. For a vegan version, replace honey with maple syrup or agave nectar. You can also experiment with different nut butters like almond butter or cashew butter.
- Prep Time: 10 minutes
- Resting Time:: 1-2 hours (for setting in the fridge)
- Cook Time: 0 minutes (since it’s no-bake)
- Category: Breakfast
- Method: No-Bake
- Cuisine: American
Nutrition
- Serving Size: per serving
- Calories: 150