
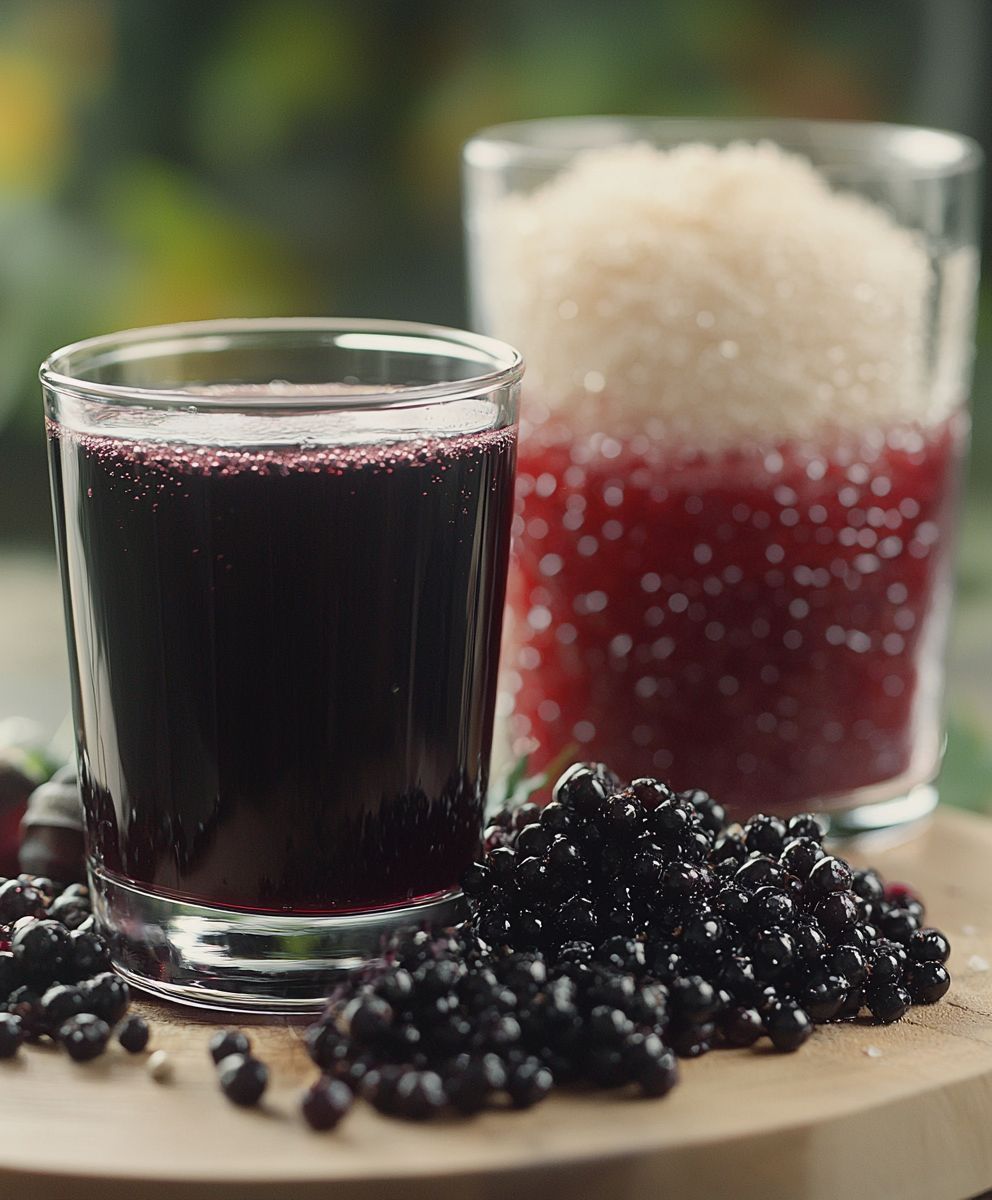
Elderberry syrup benefits extend far beyond just soothing a sore throat. Imagine a delicious, dark berry elixir that not only tastes amazing but also packs a powerful punch against seasonal sniffles. For centuries, elderberries have been revered for their medicinal properties, with evidence suggesting their use dates back to ancient Egypt! This potent berry, bursting with antioxidants and vitamins, has been a staple in traditional medicine across Europe and North America.
What makes elderberry syrup benefits so appealing? Well, beyond its historical significance, it’s the delightful combination of sweet and tart that makes it a family favorite. Its rich, fruity flavor makes it easy to incorporate into your daily routine. Whether you drizzle it over pancakes, stir it into yogurt, or simply take a spoonful straight, it’s a tasty way to boost your immune system. People love it for its convenience, too. It’s a simple, natural remedy that can be easily made at home, offering a proactive approach to wellness. So, are you ready to unlock the secrets of this incredible berry and discover all the ways it can benefit your health?

Ingredients:
- 4 cups fresh elderberries, stemmed (or 2 cups dried elderberries)
- 4 cups water
- 1 cup raw honey (or maple syrup for a vegan option)
- 1 cinnamon stick
- 1 tablespoon fresh ginger, sliced
- ½ teaspoon cloves (whole or ground)
- Optional: ¼ cup brandy or vodka (as a preservative)
Preparing the Elderberry Base:
- Rinse the Elderberries: Carefully rinse the elderberries under cool running water. Remove any remaining stems or unripe berries. It’s important to only use ripe, dark purple elderberries, as unripe berries can cause nausea.
- Combine Ingredients in a Pot: In a large saucepan or pot, combine the rinsed elderberries, water, cinnamon stick, ginger slices, and cloves.
- Bring to a Boil: Place the pot over medium-high heat and bring the mixture to a rolling boil.
- Simmer: Once boiling, reduce the heat to low, cover the pot, and let the mixture simmer for at least 45 minutes to 1 hour. The longer it simmers, the more potent the syrup will be. Stir occasionally to prevent sticking. The berries should become very soft and release their juices.
- Mash the Berries: After simmering, use a potato masher or the back of a spoon to gently mash the elderberries. This will help to extract even more of their beneficial compounds.
Straining and Sweetening:
- Strain the Mixture: Place a fine-mesh sieve or cheesecloth-lined colander over a large bowl. Carefully pour the elderberry mixture into the sieve, allowing the liquid to drain through. Use a spoon to gently press on the solids to extract as much juice as possible. Discard the solids (berries, cinnamon stick, ginger, and cloves). You can also use a jelly bag for this step, which will result in a clearer syrup.
- Measure the Liquid: Measure the amount of elderberry juice you have. This will help you determine the amount of honey or maple syrup to add.
- Add Sweetener: Return the strained elderberry juice to the saucepan. For every 4 cups of juice, add 1 cup of raw honey (or maple syrup). Adjust the amount of sweetener to your taste preference. Remember that honey also has its own beneficial properties.
- Heat Gently: Place the saucepan over low heat and gently warm the mixture, stirring constantly until the honey or maple syrup is completely dissolved. Do not boil the mixture at this stage, as boiling can destroy some of the beneficial properties of the honey.
- Optional: Add Preservative: If you want to extend the shelf life of your elderberry syrup, you can add ¼ cup of brandy or vodka. Stir it in well. The alcohol acts as a preservative and will help prevent spoilage. This step is optional, especially if you plan to store the syrup in the refrigerator and use it within a few weeks.
Bottling and Storing:
- Sterilize Bottles: While the syrup is simmering, sterilize your bottles. You can do this by boiling them in water for 10 minutes, or by running them through a hot cycle in your dishwasher. Make sure the bottles are completely dry before filling them.
- Fill the Bottles: Carefully pour the hot elderberry syrup into the sterilized bottles, leaving about ½ inch of headspace at the top. Use a funnel to prevent spills.
- Seal the Bottles: If you are using canning jars, wipe the rims clean with a damp cloth and place the lids and rings on the jars. Tighten the rings finger-tight. If you are using other types of bottles, make sure they are properly sealed.
- Process for Shelf Stability (Optional): If you want to make the syrup shelf-stable, you can process the filled jars in a boiling water bath for 10 minutes. This will create a vacuum seal and help prevent spoilage. However, this step is not necessary if you plan to store the syrup in the refrigerator.
- Cool and Store: Let the bottles cool completely. If you processed them in a boiling water bath, you should hear a “pop” as the lids seal. Store the sealed bottles in a cool, dark place. Unopened bottles of elderberry syrup can last for up to a year. Once opened, store the syrup in the refrigerator, where it will last for several weeks. If you did not add alcohol, it is especially important to refrigerate the syrup.
Dosage and Usage:
- Adults: The typical adult dose of elderberry syrup is 1 tablespoon, taken 2-3 times per day when experiencing cold or flu symptoms.
- Children: For children (over 1 year old), the typical dose is 1 teaspoon, taken 2-3 times per day when experiencing cold or flu symptoms. Consult with a pediatrician before giving elderberry syrup to infants under 1 year old.
- Preventative Use: Some people take elderberry syrup preventatively during cold and flu season. In this case, the dosage can be reduced to 1 teaspoon per day for adults and ½ teaspoon per day for children.
- How to Take It: You can take elderberry syrup straight from the spoon, or you can mix it with water, juice, or tea. It has a pleasant, slightly tart flavor.
- Listen to Your Body: If you experience any adverse reactions, such as nausea or stomach upset, discontinue use.
Important Considerations:
- Raw Elderberries are Toxic: It is crucial to only use ripe, cooked elderberries. Raw elderberries contain compounds that can cause nausea, vomiting, and diarrhea. Cooking the berries neutralizes these compounds.
- Consult Your Doctor: If you are pregnant, breastfeeding, have an autoimmune disorder, or are taking any medications, consult with your doctor before using elderberry syrup. Elderberry may interact with certain medications.
- Allergies: If you are allergic to elderberries or other members of the honeysuckle family, do not use elderberry syrup.
- Quality of Ingredients: Use high-quality ingredients, especially raw honey. Raw honey has its own beneficial properties and is a healthier alternative to refined sugar.
- Storage: Proper storage is essential to prevent spoilage. Always store elderberry syrup in a cool, dark place, and refrigerate after opening.
- Adjust Sweetness: Feel free to adjust the amount of honey or maple syrup to your liking. Some people prefer a sweeter syrup, while others prefer a more tart flavor.
Troubleshooting:
- Syrup is Too Thin: If your syrup is too thin, you can simmer it for a longer period of time to reduce the liquid. Be careful not to burn it.
- Syrup is Too Thick: If your syrup is too thick, you can add a little water to thin it out.
- Syrup is Cloudy: A cloudy syrup is usually caused by pectin in the berries. This is harmless and does not affect the quality of the syrup. You can reduce cloudiness by using a jelly bag to strain the mixture.
- Syrup is Moldy: If you see any signs of mold, discard the syrup immediately. This indicates that the syrup has spoiled.
Variations:
- Spiced Elderberry Syrup: Add other spices to your elderberry syrup, such as star anise, cardamom pods, or orange peel.
- Elderberry and Lemon Syrup: Add the juice and zest of one lemon to the elderberry mixture while simmering.
- Elderberry and Echinacea Syrup: Add 1 tablespoon of dried echinacea root to the elderberry mixture while simmering. Echinacea is another herb that is known for its immune-boosting properties.
- Elderberry Gummies: Use your homemade elderberry syrup to make elderberry gummies. There are many recipes available online.
Elderberry Syrup Benefits:
Elderberry syrup is a popular natural remedy for colds and flu. It is rich in antioxidants and has been shown to have antiviral properties. Some studies have suggested that elderberry syrup can reduce the duration and severity of cold and flu symptoms. While more research is needed, elderberry syrup is generally considered to be a safe and effective way to support the immune system.
Disclaimer:
This recipe and information are for educational purposes only and are not intended to diagnose, treat, cure, or prevent any disease. Always consult with a qualified healthcare professional before using any herbal remedy, especially if you are pregnant, breastfeeding, have a medical condition, or are taking any medications.
Conclusion:
So, there you have it! This elderberry syrup recipe isn’t just another concoction; it’s a powerhouse of goodness, a delicious shield against the sniffles, and a comforting treat all rolled into one. I truly believe that once you experience the difference this homemade syrup makes, you’ll never go back to store-bought versions. The vibrant flavor, the natural ingredients, and the peace of mind knowing exactly what you’re putting into your body it’s simply unmatched. But why is this recipe a must-try? Beyond the incredible elderberry syrup benefits, it’s surprisingly easy to make. Seriously! The process is straightforward, requiring minimal effort for maximum reward. Imagine the satisfaction of creating something so beneficial and delicious from scratch. Plus, it’s a fantastic way to utilize fresh or dried elderberries, especially if you’re lucky enough to have access to them. Think of it as a little bit of kitchen magic, transforming simple ingredients into a potent elixir. And the versatility! Oh, the possibilities are endless! While a spoonful straight from the jar is a perfectly acceptable (and often necessary!) way to enjoy it, don’t limit yourself. Drizzle it over pancakes or waffles for a healthy and flavorful breakfast. Stir it into your morning yogurt or oatmeal for an extra boost of antioxidants. Mix it with sparkling water for a refreshing and immune-boosting soda. You can even use it as a glaze for roasted chicken or pork for a unique and savory-sweet flavor combination. Looking for variations? Get creative! Add a cinnamon stick or two during the simmering process for a warm and spicy flavor. A few slices of fresh ginger will add a zesty kick. For a more complex flavor profile, try incorporating star anise or cloves. And if you’re feeling adventurous, a splash of brandy or rum after the syrup has cooled will add a delightful warmth and help preserve it even longer. Remember to adjust the sweetness to your liking by adding more or less honey. Serving Suggestions: * Take a tablespoon daily as a preventative measure. * Increase the dosage to every few hours when feeling under the weather. * Mix with hot water and lemon for a soothing tea. * Drizzle over ice cream or desserts. * Use as a natural sweetener in smoothies. I’m genuinely excited for you to try this recipe and experience the amazing elderberry syrup benefits for yourself. It’s more than just a recipe; it’s an investment in your health and well-being. So, gather your ingredients, put on some music, and get ready to create something truly special. Once you’ve made your own batch of this incredible syrup, I’d absolutely love to hear about your experience! Did you make any variations? How did you enjoy using it? Share your thoughts, tips, and photos in the comments below. Let’s build a community of elderberry enthusiasts and spread the word about this amazing natural remedy. Happy syrup-making! I can’t wait to hear from you! Print
Elderberry Syrup Benefits: Boost Immunity & Fight Colds
- Total Time: 75 minutes
- Yield: 4 cups 1x
Description
Homemade elderberry syrup, a natural remedy packed with antioxidants, traditionally used to support the immune system and ease cold and flu symptoms.
Ingredients
- 4 cups fresh elderberries, stemmed (or 2 cups dried elderberries)
- 4 cups water
- 1 cup raw honey (or maple syrup for a vegan option)
- 1 cinnamon stick
- 1 tablespoon fresh ginger, sliced
- ½ teaspoon cloves (whole or ground)
- Optional: ¼ cup brandy or vodka (as a preservative)
Instructions
- Rinse the Elderberries: Carefully rinse the elderberries under cool running water. Remove any remaining stems or unripe berries. It’s important to only use ripe, dark purple elderberries, as unripe berries can cause nausea.
- Combine Ingredients in a Pot: In a large saucepan or pot, combine the rinsed elderberries, water, cinnamon stick, ginger slices, and cloves.
- Bring to a Boil: Place the pot over medium-high heat and bring the mixture to a rolling boil.
- Simmer: Once boiling, reduce the heat to low, cover the pot, and let the mixture simmer for at least 45 minutes to 1 hour. The longer it simmers, the more potent the syrup will be. Stir occasionally to prevent sticking. The berries should become very soft and release their juices.
- Mash the Berries: After simmering, use a potato masher or the back of a spoon to gently mash the elderberries. This will help to extract even more of their beneficial compounds.
- Strain the Mixture: Place a fine-mesh sieve or cheesecloth-lined colander over a large bowl. Carefully pour the elderberry mixture into the sieve, allowing the liquid to drain through. Use a spoon to gently press on the solids to extract as much juice as possible. Discard the solids (berries, cinnamon stick, ginger, and cloves). You can also use a jelly bag for this step, which will result in a clearer syrup.
- Measure the Liquid: Measure the amount of elderberry juice you have. This will help you determine the amount of honey or maple syrup to add.
- Add Sweetener: Return the strained elderberry juice to the saucepan. For every 4 cups of juice, add 1 cup of raw honey (or maple syrup). Adjust the amount of sweetener to your taste preference. Remember that honey also has its own beneficial properties.
- Heat Gently: Place the saucepan over low heat and gently warm the mixture, stirring constantly until the honey or maple syrup is completely dissolved. Do not boil the mixture at this stage, as boiling can destroy some of the beneficial properties of the honey.
- Optional: Add Preservative: If you want to extend the shelf life of your elderberry syrup, you can add ¼ cup of brandy or vodka. Stir it in well. The alcohol acts as a preservative and will help prevent spoilage. This step is optional, especially if you plan to store the syrup in the refrigerator and use it within a few weeks.
- Sterilize Bottles: While the syrup is simmering, sterilize your bottles. You can do this by boiling them in water for 10 minutes, or by running them through a hot cycle in your dishwasher. Make sure the bottles are completely dry before filling them.
- Fill the Bottles: Carefully pour the hot elderberry syrup into the sterilized bottles, leaving about ½ inch of headspace at the top. Use a funnel to prevent spills.
- Seal the Bottles: If you are using canning jars, wipe the rims clean with a damp cloth and place the lids and rings on the jars. Tighten the rings finger-tight. If you are using other types of bottles, make sure they are properly sealed.
- Process for Shelf Stability (Optional): If you want to make the syrup shelf-stable, you can process the filled jars in a boiling water bath for 10 minutes. This will create a vacuum seal and help prevent spoilage. However, this step is not necessary if you plan to store the syrup in the refrigerator.
- Cool and Store: Let the bottles cool completely. If you processed them in a boiling water bath, you should hear a “pop” as the lids seal. Store the sealed bottles in a cool, dark place. Unopened bottles of elderberry syrup can last for up to a year. Once opened, store the syrup in the refrigerator, where it will last for several weeks. If you did not add alcohol, it is especially important to refrigerate the syrup.
Notes
- Important: Raw elderberries are toxic and must be cooked.
- Adjust sweetness to your preference.
- Consult your doctor if pregnant, breastfeeding, have an autoimmune disorder, or are taking medications.
- Use high-quality ingredients, especially raw honey.
- Proper storage is essential to prevent spoilage.
- Dosage: Adults: 1 tablespoon, 2-3 times per day for symptoms. Children (over 1 year): 1 teaspoon, 2-3 times per day for symptoms. Consult a pediatrician for infants under 1 year.
- Preventative Use: Adults: 1 teaspoon per day. Children: ½ teaspoon per day.
- Variations: Spiced, Lemon, Echinacea, Gummies.
- Prep Time: 15 minutes
- Cook Time: 45 minutes