
Fried Apples Southern style just the name conjures up images of cozy kitchens, the sweet aroma of cinnamon, and the comforting warmth of home. Have you ever tasted something that instantly transports you back to a cherished memory? For me, these apples do exactly that! They remind me of my grandmother’s kitchen, where she would whip up a batch on cool autumn afternoons, the scent mingling with the crisp air coming in from the orchard.
This simple yet delightful dish has deep roots in Southern culinary tradition. It’s a testament to resourcefulness and the ability to create something extraordinary from humble ingredients. While variations exist, the core remains the same: tender apples, caramelized in butter and sugar, infused with the warm spice of cinnamon. It’s a dish that speaks of simpler times, of family gatherings, and of savoring the sweet moments in life.
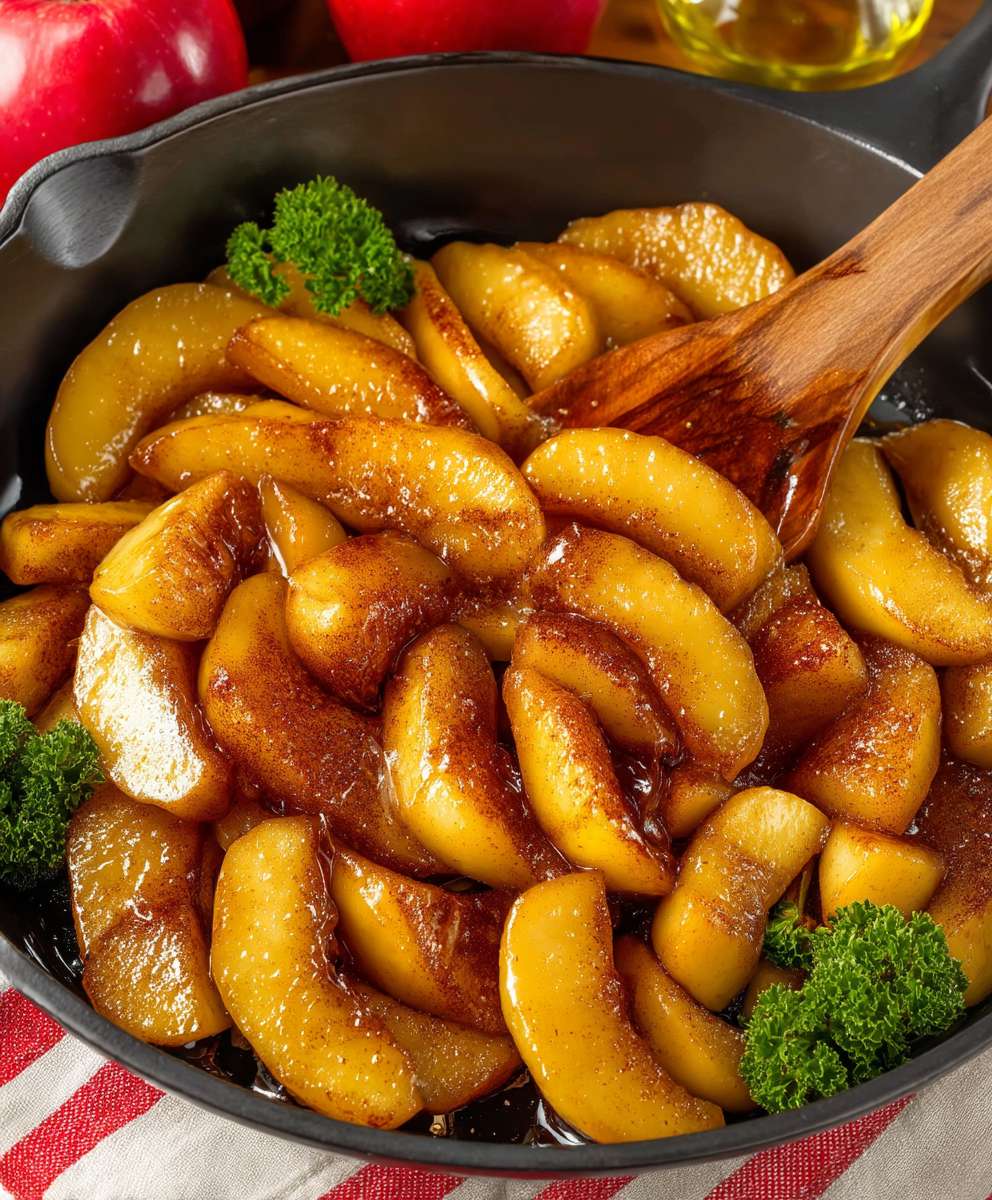
What makes Fried Apples Southern so irresistible? It’s the perfect balance of textures and flavors. The apples are soft but still retain a slight bite, the buttery sauce is rich and decadent, and the cinnamon adds a touch of warmth that lingers on your palate. Plus, it’s incredibly easy to make! Whether you’re looking for a comforting breakfast side, a delightful dessert topping, or a sweet snack, these apples are sure to satisfy. Get ready to experience a taste of Southern hospitality with every bite!

Ingredients:
- 6 medium-sized apples (Granny Smith, Honeycrisp, or Fuji work well), peeled, cored, and sliced about 1/4 inch thick
- 1/2 cup unsalted butter
- 1/2 cup granulated sugar
- 1/4 cup packed light brown sugar
- 1 teaspoon ground cinnamon
- 1/4 teaspoon ground nutmeg
- 1/4 teaspoon ground allspice (optional, but adds a nice warmth)
- 1/4 cup water or apple cider
- 1 tablespoon lemon juice (optional, helps prevent browning and adds a touch of brightness)
- Pinch of salt
- 1 tablespoon cornstarch (optional, for thickening the sauce if needed)
- 2 tablespoons cold water (optional, for cornstarch slurry)
Preparing the Apples:
Before we even think about heating up the pan, let’s get those apples ready. This is a crucial step because uniformly sliced apples will cook evenly, giving you that perfect tender-crisp texture we’re after. I like to use a combination of Granny Smith and Honeycrisp for a balance of tartness and sweetness, but feel free to experiment with your favorite varieties!
- Peel the Apples: Using a vegetable peeler, carefully remove the skin from all six apples. Make sure you get all the peel off, as it can be a bit tough and detract from the overall texture.
- Core the Apples: You can use an apple corer for this, or simply cut the apples in half and then use a small knife to remove the core from each half. I find the knife method gives me a bit more control.
- Slice the Apples: Now, the most important part! Slice the apples into approximately 1/4-inch thick slices. Aim for consistency here. If some slices are too thick, they’ll take longer to cook, and you’ll end up with some mushy and some crunchy apples.
- Lemon Juice (Optional): If you’re worried about the apples browning while you’re prepping, toss them with a tablespoon of lemon juice. This will help keep them looking fresh and bright.
Cooking the Fried Apples:
Alright, now for the fun part! This is where the magic happens, and those apples transform into a warm, comforting, and utterly delicious treat. The key here is to cook them low and slow, allowing the flavors to meld together and the apples to soften without becoming completely mushy.
- Melt the Butter: In a large skillet (cast iron is ideal, but any large skillet will work), melt the butter over medium heat. Make sure the butter is fully melted and coats the bottom of the pan evenly. This will prevent the apples from sticking and ensure they cook properly.
- Add the Apples: Carefully add the sliced apples to the skillet in a single layer if possible. If you have too many apples to fit in one layer, you may need to cook them in batches. Overcrowding the pan will steam the apples instead of frying them, which we don’t want.
- Sprinkle with Sugar and Spices: Sprinkle the granulated sugar, brown sugar, cinnamon, nutmeg, and allspice (if using) evenly over the apples. The sugar will caramelize and create a beautiful, flavorful sauce.
- Cook and Stir: Cook the apples, stirring occasionally, for about 10-15 minutes, or until they are tender-crisp and slightly browned. The exact cooking time will depend on the type of apples you’re using and the heat of your stove. Be careful not to overcook them, as they will become mushy. You want them to still have a little bit of bite.
- Add Water or Apple Cider: Pour in the water or apple cider. This will help create a delicious sauce and prevent the apples from sticking to the pan.
- Simmer: Reduce the heat to low and simmer for another 5-10 minutes, or until the sauce has thickened slightly. Stir occasionally to prevent sticking.
- Thicken the Sauce (Optional): If you prefer a thicker sauce, you can make a cornstarch slurry. In a small bowl, whisk together the cornstarch and cold water until smooth. Pour the slurry into the skillet and stir constantly until the sauce thickens. This should only take a minute or two.
- Taste and Adjust: Taste the fried apples and adjust the sweetness or spices as needed. If they’re not sweet enough, add a little more sugar. If they need a little more warmth, add a pinch more cinnamon or nutmeg.
Serving Suggestions:
Now that your fried apples are ready, it’s time to enjoy them! There are so many ways to serve these delicious apples. Here are a few of my favorites:
- As a Side Dish: Fried apples are a classic Southern side dish that pairs perfectly with pork chops, ham, or chicken.
- As a Dessert: Serve them warm with a scoop of vanilla ice cream or a dollop of whipped cream for a simple and satisfying dessert.
- For Breakfast: Top pancakes, waffles, or French toast with fried apples for a special breakfast treat.
- With Oatmeal or Yogurt: Add a spoonful of fried apples to your morning oatmeal or yogurt for a burst of flavor and sweetness.
- As a Filling: Use them as a filling for pies, tarts, or turnovers.
Tips and Tricks for Perfect Fried Apples:
Here are a few extra tips to help you make the best fried apples ever:
- Choose the Right Apples: As I mentioned earlier, Granny Smith, Honeycrisp, and Fuji apples are all great choices for fried apples. They hold their shape well during cooking and have a nice balance of tartness and sweetness.
- Don’t Overcrowd the Pan: If you have too many apples to fit in a single layer, cook them in batches. Overcrowding the pan will steam the apples instead of frying them.
- Use Real Butter: Don’t substitute margarine or oil for butter. Butter adds a richness and flavor that can’t be replicated.
- Don’t Overcook the Apples: You want the apples to be tender-crisp, not mushy. Keep a close eye on them while they’re cooking and remove them from the heat when they’re done to your liking.
- Adjust the Sweetness to Your Taste: If you prefer a sweeter dish, add more sugar. If you prefer a less sweet dish, reduce the amount of sugar.
- Add a Pinch of Salt: A pinch of salt helps to balance the sweetness and enhance the other flavors.
- Get Creative with Spices: Feel free to experiment with different spices. A little bit of ginger, cardamom, or cloves can add a unique twist to your fried apples.
- Make Ahead: Fried apples can be made ahead of time and reheated. Store them in an airtight container in the refrigerator for up to 3 days. Reheat them gently in a skillet over low heat or in the microwave.
Variations:
Want to mix things up a bit? Here are a few variations you can try:
- Bourbon Fried Apples: Add a splash of bourbon to the skillet along with the water or apple cider for a boozy twist.
- Caramel Fried Apples: Drizzle caramel sauce over the fried apples before serving for an extra decadent treat.
- Pecan Fried Apples: Add chopped pecans to the skillet during the last few minutes of cooking for a nutty crunch.
- Cranberry Fried Apples: Add dried cranberries to the skillet along with the apples for a festive and flavorful dish.
- Spiced Rum Fried Apples: Substitute spiced rum for the water or apple cider for a warm and flavorful variation.
Storage Instructions:
If you happen to have any leftover fried apples (which is unlikely!), here’s how to store them:
- Refrigerate: Store the fried apples in an airtight container in the refrigerator for up to 3 days.
- Reheat: Reheat the fried apples gently in a skillet over low heat or in the microwave. Add a splash of water or apple cider if they seem dry.
Nutritional Information (Approximate):
Please note that the nutritional information is an estimate and may vary depending on the specific ingredients used.
- Calories: Approximately 250-300 per serving
- Fat: 15-20 grams
- Saturated Fat: 10-12 grams
- Cholesterol: 40-50 mg
- Sodium: 50-75 mg
- Carbohydrates: 30-40 grams
- Fiber: 3-5 grams
-
Conclusion:
So there you have it! My take on classic Southern Fried Apples. Honestly, after making this recipe countless times, I can confidently say it’s a must-try for anyone craving a comforting, sweet, and slightly tangy side dish or dessert. The simplicity of the ingredients combined with the incredible depth of flavor is what makes it so special. It’s the kind of dish that evokes memories of cozy kitchens and family gatherings, and I truly believe it has the power to brighten anyone’s day.
But why is this particular recipe a standout? It’s all about the balance. We’re not just throwing apples into a pan with butter and sugar. We’re carefully layering flavors, allowing the apples to caramelize beautifully without becoming mushy, and adding just the right amount of spice to create a truly unforgettable experience. The touch of lemon juice brightens everything up, preventing it from becoming overly sweet, and the cinnamon and nutmeg provide that warm, comforting aroma that fills your kitchen and makes your mouth water.
Now, let’s talk serving suggestions! While these Fried Apples Southern are absolutely divine on their own, they’re also incredibly versatile. For a truly decadent dessert, try serving them warm over a scoop of vanilla ice cream or a slice of pound cake. The contrast between the warm apples and the cold ice cream is simply heavenly. You could also top them with a dollop of whipped cream and a sprinkle of cinnamon for an extra touch of elegance.
But don’t limit yourself to just dessert! These fried apples are also a fantastic accompaniment to savory dishes. Imagine serving them alongside grilled pork chops or roasted chicken. The sweetness of the apples perfectly complements the savory flavors of the meat, creating a truly balanced and satisfying meal. They’re also a delicious addition to breakfast. Try serving them with pancakes, waffles, or even oatmeal for a sweet and comforting start to your day.
And speaking of variations, feel free to get creative! If you’re feeling adventurous, try adding a splash of bourbon or rum to the pan while the apples are cooking. This will add a warm, boozy note that’s perfect for a special occasion. You could also experiment with different types of apples. Granny Smith apples will provide a tart contrast to the sweetness of the dish, while Honeycrisp apples will offer a more balanced flavor. And if you’re looking for a healthier option, you can reduce the amount of butter and sugar used in the recipe. You can even substitute the butter with coconut oil for a vegan-friendly version.
Ultimately, the best way to enjoy these fried apples is to make them your own. Don’t be afraid to experiment with different flavors and ingredients until you find the perfect combination that suits your taste. The most important thing is to have fun and enjoy the process!
So, what are you waiting for? Head to your kitchen, gather your ingredients, and give this recipe a try. I promise you won’t be disappointed. And when you do, I’d love to hear about your experience! Share your photos and comments on social media using #SouthernFriedApples or tag me in your posts. I can’t wait to see what delicious creations you come up with!
Happy cooking!
Fried Apples Southern: A Delicious and Easy Recipe
Warm, comforting fried apples with cinnamon and spices, perfect as a side dish, dessert, or breakfast topping.
Ingredients
- 6 medium apples (Granny Smith, Honeycrisp, or Fuji), peeled, cored, and sliced 1/4 inch thick
- 1/2 cup unsalted butter
- 1/2 cup granulated sugar
- 1/4 cup packed light brown sugar
- 1 teaspoon ground cinnamon
- 1/4 teaspoon ground nutmeg
- 1/4 teaspoon ground allspice (optional)
- 1/4 cup water or apple cider
- 1 tablespoon lemon juice (optional)
- Pinch of salt
- 1 tablespoon cornstarch (optional, for thickening)
- 2 tablespoons cold water (optional, for cornstarch slurry)
Instructions
- Peel, core, and slice the apples into approximately 1/4-inch thick slices. Toss with lemon juice (optional) to prevent browning.
- In a large skillet (cast iron preferred), melt the butter over medium heat.
- Carefully add the sliced apples to the skillet in a single layer. If necessary, cook in batches.
- Sprinkle the granulated sugar, brown sugar, cinnamon, nutmeg, and allspice (if using) evenly over the apples.
- Cook, stirring occasionally, for 10-15 minutes, or until the apples are tender-crisp and slightly browned.
- Pour in the water or apple cider.
- Reduce heat to low and simmer for 5-10 minutes, or until the sauce has thickened slightly, stirring occasionally.
- If desired, make a cornstarch slurry by whisking together cornstarch and cold water. Pour into the skillet and stir constantly until the sauce thickens.
- Taste and adjust sweetness or spices as needed.
- Serve warm as a side dish, dessert, or topping.
Notes
- Choose apples that hold their shape well during cooking.
- Don’t overcrowd the pan; cook in batches if needed.
- Use real butter for the best flavor.
- Don’t overcook the apples; they should be tender-crisp.
- Adjust sweetness and spices to your preference.
- A pinch of salt balances the sweetness.
- Experiment with other spices like ginger, cardamom, or cloves.
- Fried apples can be made ahead and reheated.
- Variations: Bourbon, Caramel, Pecan, Cranberry, Spiced Rum.
- Storage: Refrigerate leftovers in an airtight container for up to 3 days. Reheat gently.