
Gluten Free Strawberry Snack: craving a delightful treat that won’t leave you feeling weighed down? Imagine sinking your teeth into a burst of sweet, juicy strawberries nestled in a light and airy, gluten-free base. This isn’t just a snack; it’s a celebration of simple pleasures and mindful eating!
Strawberries have been enjoyed for centuries, with evidence suggesting their cultivation dates back to ancient Rome. While the modern strawberry we know and love is a hybrid, its inherent sweetness and vibrant color have always made it a prized ingredient. Today, strawberries are enjoyed worldwide, and incorporating them into gluten-free recipes allows everyone to partake in their deliciousness.
What makes this Gluten Free Strawberry Snack so irresistible? It’s the perfect combination of textures the soft, yielding strawberries against the slightly chewy, gluten-free base. The natural sweetness of the strawberries means you don’t need excessive amounts of added sugar, making it a healthier option than many other desserts. Plus, it’s incredibly easy to make, requiring minimal ingredients and effort. Whether you’re gluten-free by choice or necessity, this snack is a guaranteed crowd-pleaser. Get ready to experience a guilt-free indulgence that will leave you wanting more!

Ingredients:
- For the Strawberry Puree:
- 1 pound fresh strawberries, hulled
- 2 tablespoons water
- 1 tablespoon lemon juice (optional, for brightness)
- For the Gluten-Free Oat Bars:
- 2 cups gluten-free rolled oats (certified gluten-free)
- 1 cup almond flour
- ½ cup chopped walnuts or pecans (optional, for added texture)
- ½ teaspoon baking soda
- ¼ teaspoon salt
- ½ cup unsalted butter, melted (or coconut oil for a dairy-free option)
- ½ cup honey or maple syrup
- 2 large eggs
- 1 teaspoon vanilla extract
- For the Cream Cheese Filling (Optional):
- 4 ounces cream cheese, softened
- 2 tablespoons powdered sugar
- ½ teaspoon vanilla extract
Preparing the Strawberry Puree:
- Wash and Hull the Strawberries: Thoroughly wash the strawberries under cold water. Remove the green hulls from each strawberry. This is important because the hulls can be bitter.
- Combine Ingredients: Place the hulled strawberries, water, and lemon juice (if using) in a blender or food processor.
- Blend Until Smooth: Blend the mixture until it is completely smooth. You should have a vibrant red puree with no chunks of strawberries remaining.
- Strain (Optional): If you prefer a very smooth puree, you can strain it through a fine-mesh sieve to remove any seeds. This step is optional but can improve the texture.
- Set Aside: Set the strawberry puree aside while you prepare the oat bars.
Making the Gluten-Free Oat Bars:
- Preheat the Oven: Preheat your oven to 350°F (175°C). This is a crucial step to ensure even baking.
- Prepare the Baking Pan: Grease and flour (using gluten-free flour) an 8×8 inch baking pan. Alternatively, you can line the pan with parchment paper, leaving an overhang on the sides for easy removal. This will prevent the bars from sticking.
- Combine Dry Ingredients: In a large bowl, combine the gluten-free rolled oats, almond flour, chopped nuts (if using), baking soda, and salt. Whisk these ingredients together to ensure they are evenly distributed. This helps with even baking and flavor.
- Combine Wet Ingredients: In a separate bowl, whisk together the melted butter (or coconut oil), honey or maple syrup, eggs, and vanilla extract. Make sure the butter isn’t too hot, or it might cook the eggs.
- Combine Wet and Dry Ingredients: Pour the wet ingredients into the dry ingredients and mix until just combined. Be careful not to overmix, as this can result in tough bars. A few streaks of flour are okay.
- Divide the Oat Mixture: Press half of the oat mixture into the prepared baking pan, creating an even layer. Use the back of a spoon or your fingers to firmly press the mixture down. This forms the base of the bars.
- Spread the Strawberry Puree: Carefully spread the strawberry puree evenly over the oat base. Leave a small border around the edges to prevent the puree from sticking to the pan.
- Top with Remaining Oat Mixture: Crumble the remaining oat mixture over the strawberry puree. You don’t need to press it down; just sprinkle it evenly.
- Bake: Bake in the preheated oven for 25-30 minutes, or until the top is golden brown and the strawberry puree is bubbly. A toothpick inserted into the center should come out with moist crumbs, not wet batter.
- Cool Completely: Remove the pan from the oven and let the bars cool completely in the pan before cutting. This is important because the bars will be too crumbly to cut while they are still warm. Cooling allows them to set properly.
Optional Cream Cheese Filling:
- Soften the Cream Cheese: Ensure the cream cheese is softened to room temperature. This will make it easier to mix.
- Combine Ingredients: In a medium bowl, beat the softened cream cheese, powdered sugar, and vanilla extract together until smooth and creamy. An electric mixer works best, but you can also use a whisk.
- Spread Over Cooled Bars (Optional): Once the oat bars have cooled completely, spread the cream cheese filling evenly over the top.
- Chill (Optional): For best results, chill the bars in the refrigerator for at least 30 minutes after adding the cream cheese filling. This will help the filling set and make the bars easier to cut.
Cutting and Serving:
- Cut into Bars: Once the bars are completely cooled (and chilled, if using the cream cheese filling), cut them into squares or rectangles. A sharp knife is essential for clean cuts.
- Serve: Serve the gluten-free strawberry snack bars immediately or store them in an airtight container in the refrigerator for up to 3 days.
Tips and Variations:
- Nut-Free Option: If you have a nut allergy, you can omit the walnuts or pecans and replace them with sunflower seeds or pumpkin seeds.
- Dairy-Free Option: Use coconut oil instead of butter and omit the cream cheese filling or use a dairy-free cream cheese alternative.
- Add Chocolate Chips: For an extra touch of sweetness, sprinkle some gluten-free chocolate chips over the oat mixture before baking.
- Different Berries: You can substitute the strawberries with other berries, such as raspberries, blueberries, or blackberries. Adjust the amount of sugar as needed, depending on the sweetness of the berries.
- Lemon Zest: Add a teaspoon of lemon zest to the oat mixture for a brighter flavor.
- Spice it Up: A pinch of cinnamon or nutmeg in the oat mixture adds warmth and depth of flavor.
- Storage: Store the bars in an airtight container in the refrigerator to maintain their freshness. They can also be frozen for longer storage. Wrap them individually in plastic wrap before freezing.
- Serving Suggestions: These bars are delicious on their own as a snack or dessert. You can also serve them with a scoop of vanilla ice cream or a dollop of whipped cream.
Troubleshooting:
- Bars are too crumbly: Make sure you are pressing the oat mixture firmly into the pan. Also, ensure the bars are completely cooled before cutting.
- Strawberry puree is too watery: If your strawberries are very juicy, you may need to cook the puree down slightly in a saucepan over medium heat until it thickens.
- Bars are too dry: Add an extra tablespoon of melted butter or honey to the oat mixture.
- Bars are burning: Reduce the oven temperature by 25 degrees and check the bars more frequently.
Health Benefits:
- Gluten-Free: Suitable for individuals with gluten intolerance or celiac disease.
- Oats: A good source of fiber, which can help lower cholesterol and regulate blood sugar levels.
- Strawberries: Rich in antioxidants and vitamin C, which can boost the immune system.
- Nuts: Provide healthy fats, protein, and fiber.
Enjoy your delicious and healthy gluten-free strawberry snack bars!
Conclusion:
So there you have it! This Gluten Free Strawberry Snack is more than just a recipe; it’s a delightful experience waiting to happen. I truly believe this is a must-try for anyone looking for a healthy, delicious, and satisfying treat, regardless of whether you follow a gluten-free diet or not. The combination of the sweet, juicy strawberries with the subtly sweet and perfectly textured base is simply irresistible. Its quick to prepare, requires minimal ingredients, and is endlessly customizable to suit your personal preferences. What’s not to love?
But why is this particular recipe so special? Well, beyond the obvious deliciousness, it’s the versatility that really shines. It’s perfect as an afternoon pick-me-up, a guilt-free dessert, or even a light breakfast. The natural sweetness of the strawberries means you don’t need to load it up with refined sugars, making it a healthier option compared to many other snacks. And the gluten-free aspect ensures that everyone can enjoy it without worry.
Looking for serving suggestions? I’ve got you covered! For a simple yet elegant presentation, try arranging the strawberry snacks on a platter with a dollop of coconut whipped cream and a sprinkle of chopped nuts. If you’re feeling adventurous, drizzle a little dark chocolate over the top for an extra layer of indulgence. Or, for a refreshing twist, add a few fresh mint leaves.
And the variations are endless! Swap out the strawberries for other berries like blueberries, raspberries, or blackberries. You could even use a combination of different fruits for a colorful and flavorful snack. If you’re not a fan of the base I suggested, feel free to experiment with other gluten-free options like almond flour or coconut flour. You can also add spices like cinnamon or nutmeg to the base for a warm and comforting flavor. A little lemon zest can also brighten up the flavors.
For a more decadent version, consider adding a layer of cream cheese frosting between the base and the strawberries. This will add a rich and creamy element that complements the sweetness of the fruit perfectly. You could also add a sprinkle of shredded coconut to the base for a tropical twist.
Don’t be afraid to get creative and experiment with different flavors and textures until you find your perfect combination. The most important thing is to have fun and enjoy the process!
I’m so excited for you to try this recipe and experience the joy of this Gluten Free Strawberry Snack for yourself. I’m confident that it will become a new favorite in your household.
So, what are you waiting for? Head to the kitchen, gather your ingredients, and get ready to create something truly special. And once you’ve made it, I would absolutely love to hear about your experience! Share your photos, your variations, and your thoughts in the comments below. Let me know what you loved about it, what you changed, and how you made it your own. Your feedback is invaluable and helps me to continue creating recipes that you’ll love. Happy baking (or should I say, happy snacking!) and I can’t wait to see what you create!
Gluten Free Strawberry Snack: The Ultimate Guide to Delicious & Healthy Options
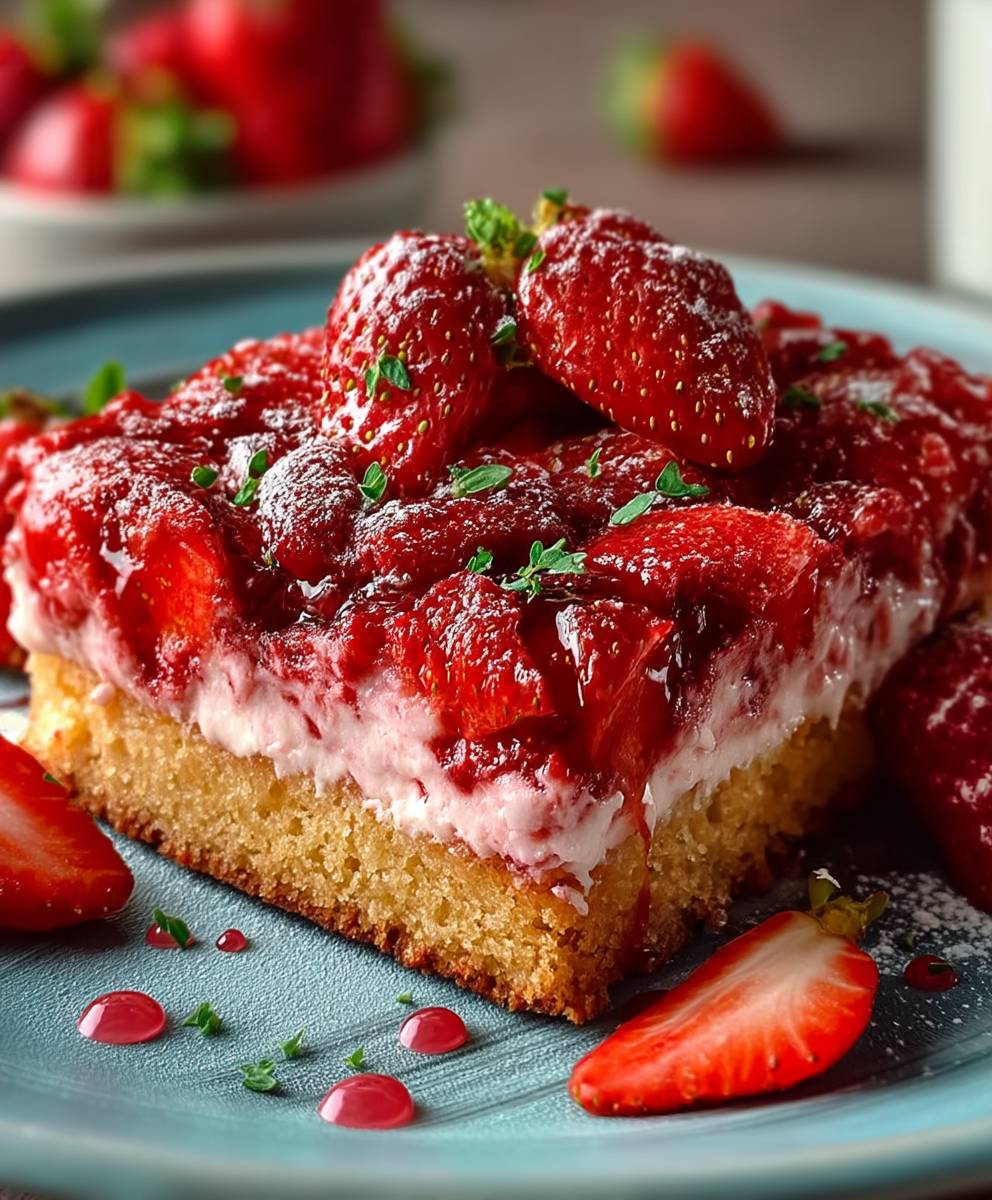
Delicious and easy gluten-free oat bars filled with a vibrant strawberry puree. A perfect healthy snack or dessert!
Ingredients
- 1 pound fresh strawberries, hulled
- 2 tablespoons water
- 1 tablespoon lemon juice (optional, for brightness)
- 2 cups gluten-free rolled oats (certified gluten-free)
- 1 cup almond flour
- ½ cup chopped walnuts or pecans (optional, for added texture)
- ½ teaspoon baking soda
- ¼ teaspoon salt
- ½ cup unsalted butter, melted (or coconut oil for a dairy-free option)
- ½ cup honey or maple syrup
- 2 large eggs
- 1 teaspoon vanilla extract
- 4 ounces cream cheese, softened
- 2 tablespoons powdered sugar
- ½ teaspoon vanilla extract
Instructions
- Wash and Hull the Strawberries: Thoroughly wash the strawberries under cold water. Remove the green hulls from each strawberry.
- Combine Ingredients: Place the hulled strawberries, water, and lemon juice (if using) in a blender or food processor.
- Blend Until Smooth: Blend the mixture until it is completely smooth.
- Strain (Optional): If you prefer a very smooth puree, you can strain it through a fine-mesh sieve to remove any seeds.
- Set Aside: Set the strawberry puree aside while you prepare the oat bars.
- Preheat the Oven: Preheat your oven to 350°F (175°C).
- Prepare the Baking Pan: Grease and flour (using gluten-free flour) an 8×8 inch baking pan. Alternatively, you can line the pan with parchment paper.
- Combine Dry Ingredients: In a large bowl, combine the gluten-free rolled oats, almond flour, chopped nuts (if using), baking soda, and salt. Whisk these ingredients together.
- Combine Wet Ingredients: In a separate bowl, whisk together the melted butter (or coconut oil), honey or maple syrup, eggs, and vanilla extract.
- Combine Wet and Dry Ingredients: Pour the wet ingredients into the dry ingredients and mix until just combined. Be careful not to overmix.
- Divide the Oat Mixture: Press half of the oat mixture into the prepared baking pan, creating an even layer.
- Spread the Strawberry Puree: Carefully spread the strawberry puree evenly over the oat base. Leave a small border around the edges.
- Top with Remaining Oat Mixture: Crumble the remaining oat mixture over the strawberry puree.
- Bake: Bake in the preheated oven for 25-30 minutes, or until the top is golden brown and the strawberry puree is bubbly. A toothpick inserted into the center should come out with moist crumbs.
- Cool Completely: Remove the pan from the oven and let the bars cool completely in the pan before cutting.
- Soften the Cream Cheese: Ensure the cream cheese is softened to room temperature.
- Combine Ingredients: In a medium bowl, beat the softened cream cheese, powdered sugar, and vanilla extract together until smooth and creamy.
- Spread Over Cooled Bars (Optional): Once the oat bars have cooled completely, spread the cream cheese filling evenly over the top.
- Chill (Optional): For best results, chill the bars in the refrigerator for at least 30 minutes after adding the cream cheese filling.
- Cut into Bars: Once the bars are completely cooled (and chilled, if using the cream cheese filling), cut them into squares or rectangles.
- Serve: Serve the gluten-free strawberry snack bars immediately or store them in an airtight container in the refrigerator for up to 3 days.
Notes
- Nut-Free Option: Omit the walnuts or pecans and replace them with sunflower seeds or pumpkin seeds.
- Dairy-Free Option: Use coconut oil instead of butter and omit the cream cheese filling or use a dairy-free cream cheese alternative.
- Add Chocolate Chips: Sprinkle some gluten-free chocolate chips over the oat mixture before baking.
- Different Berries: Substitute the strawberries with other berries, such as raspberries, blueberries, or blackberries. Adjust the amount of sugar as needed.
- Lemon Zest: Add a teaspoon of lemon zest to the oat mixture for a brighter flavor.
- Spice it Up: A pinch of cinnamon or nutmeg in the oat mixture adds warmth and depth of flavor.
- Storage: Store the bars in an airtight container in the refrigerator to maintain their freshness. They can also be frozen for longer storage. Wrap them individually in plastic wrap before freezing.
- Serving Suggestions: These bars are delicious on their own as a snack or dessert. You can also serve them with a scoop of vanilla ice cream or a dollop of whipped cream.
- Bars are too crumbly: Make sure you are pressing the oat mixture firmly into the pan. Also, ensure the bars are completely cooled before cutting.
- Strawberry puree is too watery: If your strawberries are very juicy, you may need to cook the puree down slightly in a saucepan over medium heat until it thickens.
- Bars are too dry: Add an extra tablespoon of melted butter or honey to the oat mixture.
- Bars are burning: Reduce the oven temperature by 25 degrees and check the bars more frequently.