
Grinder Salad Sandwich: Prepare to experience a culinary revelation! Imagine a sandwich so packed with flavor, so vibrant with textures, that it transcends the ordinary and becomes an instant obsession. This isn’t just lunch; it’s an event.
While the exact origins of the Grinder Salad Sandwich are debated, its recent surge in popularity can be attributed to social media, where its customizable nature and visually appealing layers have captivated food lovers worldwide. Think of it as a modern twist on the classic Italian sub, elevated with a tangy, crunchy salad that takes it to a whole new level.
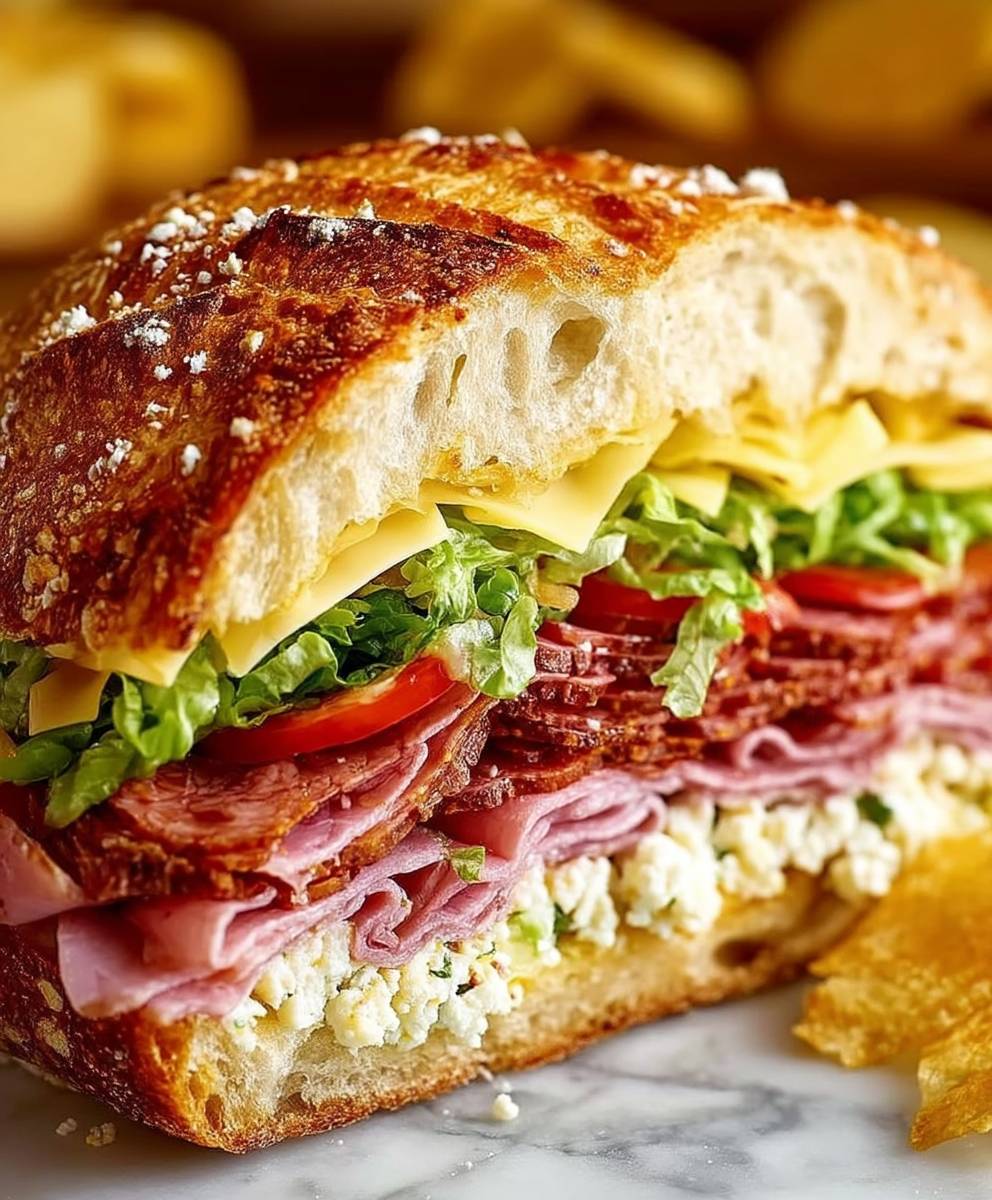
What makes the Grinder Salad Sandwich so irresistible? It’s the perfect harmony of salty cured meats, creamy provolone cheese, and a vibrant, vinegary salad that provides a delightful crunch with every bite. The combination of textures soft bread, crisp lettuce, and chewy salami is simply divine. Plus, it’s incredibly versatile! You can tailor the ingredients to your liking, making it a crowd-pleasing option for any occasion. Whether you’re looking for a quick and easy weeknight dinner or a show-stopping sandwich to impress your friends, this recipe is guaranteed to deliver. Get ready to discover your new favorite sandwich!

Ingredients:
- 1 loaf (12-14 inches) Italian or hoagie bread, crusty
- 1/2 cup mayonnaise
- 1/4 cup red wine vinegar
- 2 tablespoons olive oil
- 1 tablespoon dried oregano
- 1 teaspoon garlic powder
- 1/2 teaspoon red pepper flakes (optional, for heat)
- Salt and freshly ground black pepper to taste
- 8 ounces thinly sliced provolone cheese
- 6 ounces thinly sliced Genoa salami
- 4 ounces thinly sliced capicola (or other spicy Italian ham)
- 4 ounces thinly sliced ham
- 1/2 cup shredded iceberg lettuce
- 1/4 cup thinly sliced red onion
- 1/4 cup thinly sliced banana peppers (or pepperoncini)
- 2 tablespoons grated Parmesan cheese
Preparing the Grinder Salad:
Okay, let’s get started with the heart of this sandwich the grinder salad! This is where all the flavor explosion happens, and trust me, it’s worth the effort.
- Make the Dressing: In a medium-sized bowl, whisk together the mayonnaise, red wine vinegar, olive oil, dried oregano, garlic powder, and red pepper flakes (if using). Don’t be shy with the red pepper flakes if you like a kick! Season generously with salt and freshly ground black pepper. Taste and adjust the seasonings as needed. I usually add a little extra oregano because I love that Italian flavor. The dressing should be tangy, slightly spicy, and super flavorful.
- Prep the Lettuce: Shred the iceberg lettuce into thin ribbons. You can use a knife, but I find it easier to just tear it with my hands. Make sure it’s nice and fine so it mixes well with the other ingredients. Nobody wants big chunks of lettuce falling out of their sandwich!
- Slice the Red Onion: Thinly slice the red onion. If you’re sensitive to the sharpness of red onion, you can soak the slices in cold water for about 10 minutes. This will mellow out the flavor a bit. Drain them well before adding them to the salad.
- Slice the Banana Peppers: Thinly slice the banana peppers. If you are using pepperoncini, you can just chop them roughly.
- Combine the Ingredients: In the bowl with the dressing, add the shredded lettuce, sliced red onion, and sliced banana peppers. Toss everything together until the lettuce is evenly coated with the dressing. This is your grinder salad! Give it a taste and adjust the seasonings if needed. Sometimes I add a little extra red wine vinegar for a bit more tang.
Assembling the Grinder Salad Sandwich:
Now for the fun part building our masterpiece! This is where all the delicious components come together to create sandwich perfection.
- Prepare the Bread: Carefully slice the loaf of Italian bread horizontally, creating a top and bottom half. Be careful not to cut all the way through you want to keep the two halves connected like a hinge. If your bread is particularly dense, you can scoop out some of the inside to make more room for the fillings. This also helps prevent the sandwich from being too bready.
- Layer the Cheese: On the bottom half of the bread, layer the provolone cheese. Make sure to cover the entire surface of the bread so that every bite has that cheesy goodness. I like to overlap the slices slightly to create a nice, even layer.
- Add the Meats: Next, layer the Genoa salami, capicola, and ham on top of the provolone cheese. Again, make sure to distribute the meats evenly across the bread. I like to alternate the different types of meat to create a variety of flavors in each bite. Don’t be afraid to be generous with the meat this is a grinder, after all!
- Pile on the Grinder Salad: Now, generously pile the grinder salad on top of the meats. Make sure to distribute it evenly so that every bite has a good balance of lettuce, onion, and banana peppers. Don’t be shy this is what makes the sandwich so special!
- Sprinkle with Parmesan Cheese: Sprinkle the grated Parmesan cheese over the grinder salad. This adds a nice salty and savory flavor to the sandwich.
- Close the Sandwich: Carefully close the sandwich by folding the top half of the bread over the fillings.
Pressing and Serving the Sandwich:
This step is optional, but I highly recommend it! Pressing the sandwich helps to meld all the flavors together and creates a more cohesive and satisfying eating experience.
- Wrap the Sandwich: Wrap the entire sandwich tightly in plastic wrap or parchment paper. This will help to hold everything together while it’s being pressed.
- Press the Sandwich: Place the wrapped sandwich on a cutting board. Place another cutting board on top of the sandwich and weigh it down with something heavy, like a cast iron skillet or a few cans of food. Let the sandwich press for at least 30 minutes, or even longer if you have the time. The longer it presses, the better the flavors will meld together.
- Slice and Serve: After the sandwich has been pressed, remove the weight and unwrap it. Using a sharp serrated knife, slice the sandwich into individual portions. I usually cut it into halves or thirds, depending on how hungry I am.
- Enjoy! Serve the grinder salad sandwich immediately and enjoy! This sandwich is best enjoyed fresh, but it can also be made ahead of time and stored in the refrigerator for a few hours. Just be aware that the bread may become a little soggy if it sits for too long.
Tips and Variations:
Want to customize your grinder salad sandwich? Here are a few ideas to get you started:
- Add Different Meats: Feel free to experiment with different types of Italian meats, such as prosciutto, mortadella, or soppressata.
- Change the Cheese: Instead of provolone, try using mozzarella, fontina, or even a sharp cheddar cheese.
- Add More Veggies: Consider adding other vegetables to the grinder salad, such as chopped tomatoes, cucumbers, or bell peppers.
- Spice it Up: If you like things really spicy, add some chopped jalapeños or a few dashes of hot sauce to the grinder salad.
- Make it Vegetarian: Omit the meats and add some grilled vegetables, such as zucchini, eggplant, and bell peppers. You can also add some marinated artichoke hearts or roasted red peppers.
- Use Different Bread: While Italian bread is traditional, you can use other types of bread, such as ciabatta or a baguette. Just make sure the bread is sturdy enough to hold all the fillings.
- Make it a Wrap: For a lighter option, use a large tortilla wrap instead of bread.
Make-Ahead Instructions:
This sandwich is great for parties or picnics because you can prepare it ahead of time. Here’s how:
- Prepare the Grinder Salad: Make the grinder salad as directed and store it in an airtight container in the refrigerator for up to 24 hours.
- Assemble the Sandwich: Assemble the sandwich as directed, but do not slice it.
- Wrap and Refrigerate: Wrap the assembled sandwich tightly in plastic wrap and refrigerate for up to 8 hours.
- Press and Serve: When ready to serve, press the sandwich as directed and slice into portions.
Serving Suggestions:
This grinder salad sandwich is a meal in itself, but here are a few ideas for sides to complete your meal:
- Potato Chips: A classic pairing!
- Pasta Salad: A light and refreshing side dish.
- Coleslaw: A creamy and tangy complement to the sandwich.
- Pickles: Add a bit of crunch and acidity.
- Fruit Salad: A sweet and refreshing option.
I hope you enjoy this recipe as much as I do! It’s a guaranteed crowd-pleaser and a perfect way to satisfy your sandwich cravings.
Conclusion:
And there you have it! This isn’t just another sandwich; it’s a flavor explosion waiting to happen. I truly believe this Grinder Salad Sandwich is a must-try for anyone who loves a vibrant, satisfying, and customizable meal. The combination of the tangy, crunchy salad with the savory meats and cheese is simply irresistible. Its the kind of sandwich that makes you close your eyes and savor every single bite.
But why is it a must-try? Beyond the incredible taste, it’s incredibly versatile. It’s perfect for a quick lunch, a picnic in the park, or even a casual dinner with friends. Plus, it’s a fantastic way to use up leftover deli meats and cheeses, making it both delicious and economical. The best part? You can easily adapt it to your own preferences.
Serving Suggestions and Variations:
Think of this recipe as a starting point, a blank canvas for your culinary creativity! Here are a few ideas to get you started:
* Spice it up: Add a pinch of red pepper flakes to the salad dressing for a little extra heat. Or, incorporate some sliced jalapeños into the salad itself.
* Go vegetarian: Swap out the deli meats for grilled vegetables like zucchini, eggplant, and bell peppers. Add some marinated artichoke hearts for extra flavor.
* Cheese, please!: Experiment with different cheeses! Provolone, mozzarella, pepper jack, or even a creamy goat cheese would all be delicious additions.
* Bread is key: While I love a crusty Italian loaf, feel free to use your favorite type of bread. Ciabatta, sourdough, or even a hearty whole-wheat bread would work well.
* Make it a wrap: For a lighter option, skip the bread altogether and wrap the salad in a large lettuce leaf or a whole-wheat tortilla.
* Serving sides: Serve your Grinder Salad Sandwich with a side of crispy potato chips, a simple green salad, or some creamy coleslaw. A pickle spear is always a welcome addition!
* Make it ahead: The salad can be made a day in advance, allowing the flavors to meld together even more. Just be sure to keep it refrigerated until you’re ready to assemble the sandwich.
* Elevate the experience: Toast the bread lightly before assembling the sandwich for added texture and warmth. A little bit of warmth can really bring out the flavors of the cheese and meats.
I’m confident that once you try this recipe, it will become a regular in your rotation. It’s the perfect combination of flavors and textures, and it’s so easy to customize to your own liking. It’s a guaranteed crowd-pleaser, and I can’t wait to hear what you think!
So, what are you waiting for? Gather your ingredients, get in the kitchen, and prepare to be amazed. I’m so excited for you to experience the deliciousness of this Grinder Salad Sandwich.
And most importantly, don’t forget to share your creations! I’d love to see your photos and hear about your variations. Tag me in your posts on social media and let me know what you think. Happy sandwich-making! I hope you enjoy this recipe as much as I do. Let me know in the comments below what you thought of this recipe!
Grinder Salad Sandwich: The Ultimate Guide to Making the Perfect One
Flavor-packed Italian Grinder Sandwich with tangy grinder salad, Italian meats, and provolone on crusty bread.
Ingredients
- 1 loaf (12-14 inches) Italian or hoagie bread, crusty
- 1/2 cup mayonnaise
- 1/4 cup red wine vinegar
- 2 tablespoons olive oil
- 1 tablespoon dried oregano
- 1 teaspoon garlic powder
- 1/2 teaspoon red pepper flakes (optional, for heat)
- Salt and freshly ground black pepper to taste
- 8 ounces thinly sliced provolone cheese
- 6 ounces thinly sliced Genoa salami
- 4 ounces thinly sliced capicola (or other spicy Italian ham)
- 4 ounces thinly sliced ham
- 1/2 cup shredded iceberg lettuce
- 1/4 cup thinly sliced red onion
- 1/4 cup thinly sliced banana peppers (or pepperoncini)
- 2 tablespoons grated Parmesan cheese
Instructions
- Make the Dressing: In a medium bowl, whisk together mayonnaise, red wine vinegar, olive oil, oregano, garlic powder, and red pepper flakes (if using). Season with salt and pepper to taste.
- Prep the Lettuce: Shred the iceberg lettuce into thin ribbons.
- Slice the Red Onion: Thinly slice the red onion. Soak in cold water for 10 minutes to mellow the flavor, if desired. Drain well.
- Slice the Banana Peppers: Thinly slice the banana peppers. If using pepperoncini, chop roughly.
- Combine the Ingredients: In the bowl with the dressing, add the shredded lettuce, sliced red onion, and sliced banana peppers. Toss to coat. Season to taste.
- Prepare the Bread: Slice the Italian bread horizontally, leaving the two halves connected like a hinge. Scoop out some of the inside if desired.
- Layer the Cheese: On the bottom half of the bread, layer the provolone cheese.
- Add the Meats: Layer the Genoa salami, capicola, and ham on top of the cheese.
- Pile on the Grinder Salad: Generously pile the grinder salad on top of the meats.
- Sprinkle with Parmesan Cheese: Sprinkle the grated Parmesan cheese over the grinder salad.
- Close the Sandwich: Carefully close the sandwich by folding the top half of the bread over the fillings.
- Wrap the Sandwich: Wrap the entire sandwich tightly in plastic wrap or parchment paper.
- Press the Sandwich: Place the wrapped sandwich on a cutting board. Place another cutting board on top of the sandwich and weigh it down with something heavy, like a cast iron skillet or a few cans of food. Let the sandwich press for at least 30 minutes, or even longer if you have the time. The longer it presses, the better the flavors will meld together.
- Slice and Serve: After the sandwich has been pressed, remove the weight and unwrap it. Using a sharp serrated knife, slice the sandwich into individual portions.
- Enjoy! Serve immediately.
Notes
- Spice Level: Adjust the amount of red pepper flakes to your preference.
- Onion Sharpness: Soaking red onion in cold water mellows its flavor.
- Bread Density: Scooping out some of the bread’s interior prevents it from being too bready.
- Pressing: Pressing the sandwich is optional but highly recommended for flavor melding.
- Make-Ahead: The grinder salad can be made up to 24 hours in advance. The assembled sandwich can be refrigerated for up to 8 hours before pressing and serving.
- Variations: Experiment with different meats, cheeses, and vegetables.