
Hasselback Potatoes: Prepare to elevate your potato game to a whole new level! Imagine crispy, golden-brown edges giving way to a tender, melt-in-your-mouth interior, all infused with your favorite herbs and seasonings. This isn’t just another potato recipe; it’s a culinary experience that’s surprisingly easy to create.
These elegantly fanned potatoes, also known as “Hasselbackspotatis” in their native Swedish, originated at the Hasselbacken Restaurant in Stockholm way back in the 1950s. Legend has it that a culinary student, seeking a way to make potatoes more appealing, devised this ingenious slicing technique. The result? A potato that cooks more evenly and absorbs flavors beautifully.
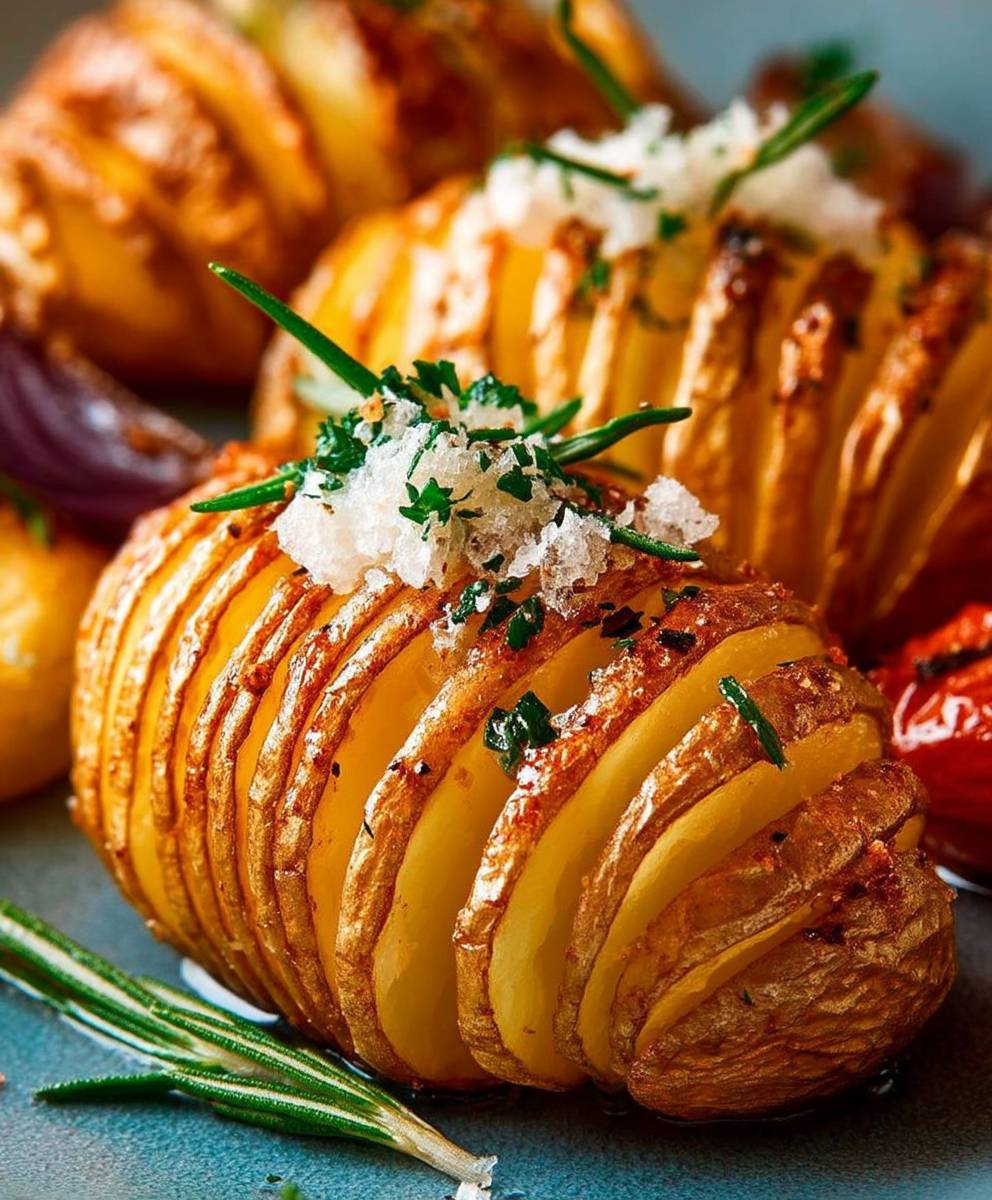
What makes Hasselback Potatoes so irresistible? It’s the perfect marriage of textures. The thin slices crisp up in the oven, creating a delightful crunch with every bite, while the base of the potato remains soft and fluffy. People love them because they are incredibly versatile. You can customize them with various toppings, from classic garlic and herbs to more adventurous combinations like parmesan and truffle oil. Plus, they are a stunning side dish that’s sure to impress your guests, yet simple enough for a weeknight meal. Get ready to discover your new favorite way to enjoy potatoes!

Ingredients:
- 6 medium Yukon Gold potatoes, scrubbed and dried
- 4 tablespoons unsalted butter, melted
- 2 cloves garlic, minced
- 1/4 cup olive oil
- 1 teaspoon dried thyme
- 1/2 teaspoon dried rosemary
- 1/4 teaspoon smoked paprika
- Salt and freshly ground black pepper to taste
- 1/4 cup grated Parmesan cheese (optional)
- Fresh parsley, chopped, for garnish (optional)
Preparing the Potatoes: The Key to Hasselback Perfection
Okay, let’s get started! The most important part of Hasselback potatoes is, well, the hasselbacking! We need to make those beautiful, thin slices without cutting all the way through. Here’s how I do it:
- Prep Your Potatoes: First, give your potatoes a good scrub under cold water to remove any dirt. Pat them completely dry. This helps them get nice and crispy in the oven.
- The Chopstick Trick: This is my secret weapon! Place a potato between two chopsticks (or wooden spoons). The chopsticks will prevent you from accidentally cutting all the way through the potato.
- Slice Away: Using a sharp knife, make thin slices across the potato, about 1/8 inch apart. Cut down until your knife hits the chopsticks. Don’t worry if the first few aren’t perfect; you’ll get the hang of it!
- Repeat: Repeat this process for all the potatoes. If you don’t have chopsticks, you can carefully slice the potatoes, stopping just before you cut all the way through. Just be extra cautious!
- Fan Them Out: Gently fan out the slices of each potato. This will help the butter and seasonings penetrate all those lovely layers. If some slices are stuck together, carefully separate them with your fingers.
Making the Garlic Herb Butter: Flavor Explosion!
Now, let’s create the magical garlic herb butter that will transform these potatoes into something truly special. This is where the flavor really comes alive!
- Melt the Butter: In a small bowl, melt the butter in the microwave or in a saucepan over low heat. Make sure it’s completely melted but not browned.
- Add the Garlic: Add the minced garlic to the melted butter. The heat from the butter will gently infuse the garlic flavor.
- Spice It Up: Stir in the olive oil, dried thyme, dried rosemary, and smoked paprika. The smoked paprika adds a wonderful depth of flavor, but you can use regular paprika if you don’t have any on hand.
- Season Generously: Season the mixture with salt and freshly ground black pepper to taste. Don’t be shy with the seasoning; it’s important to flavor the potatoes properly.
Basting and Baking: Crispy Edges, Tender Inside
Time to get these potatoes into the oven! The key here is to baste them generously with the garlic herb butter to ensure they get crispy and flavorful.
- Preheat the Oven: Preheat your oven to 400°F (200°C).
- Prepare the Baking Sheet: Line a baking sheet with parchment paper. This will prevent the potatoes from sticking and make cleanup a breeze.
- Arrange the Potatoes: Place the prepared potatoes on the baking sheet, cut-side up.
- Baste Generously: Using a brush, generously baste the potatoes with the garlic herb butter mixture, making sure to get the butter in between all the slices.
- First Bake: Bake for 30 minutes.
- More Basting: Remove the baking sheet from the oven and baste the potatoes again with the remaining garlic herb butter. This is crucial for maximum flavor and crispiness.
- Second Bake: Return the baking sheet to the oven and bake for another 20-30 minutes, or until the potatoes are tender and the edges are golden brown and crispy. The exact baking time will depend on the size of your potatoes.
- Check for Doneness: To check if the potatoes are done, insert a fork into the center of one of the potatoes. It should be easily pierced with little resistance.
Adding the Cheese (Optional): A Cheesy Delight
If you’re a cheese lover like me, adding Parmesan cheese takes these potatoes to the next level. It adds a salty, savory flavor that complements the garlic and herbs perfectly.
- Sprinkle the Cheese: Remove the baking sheet from the oven and sprinkle the grated Parmesan cheese over the potatoes.
- Final Bake (Optional): Return the baking sheet to the oven for another 5 minutes, or until the cheese is melted and slightly golden brown. Keep a close eye on them to prevent the cheese from burning.
Serving and Garnishing: The Grand Finale
Almost there! Now it’s time to plate these beauties and add the finishing touches.
- Garnish with Parsley: Sprinkle the chopped fresh parsley over the potatoes for a pop of color and freshness.
- Serve Immediately: Serve the Hasselback potatoes immediately while they are still hot and crispy. They are delicious on their own as a side dish or as part of a larger meal.
Tips for Perfect Hasselback Potatoes:
- Potato Choice: Yukon Gold potatoes are my favorite because they have a creamy texture and hold their shape well. Russet potatoes also work, but they tend to be a bit drier.
- Sharp Knife: A sharp knife is essential for making clean, even slices.
- Don’t Overcrowd: Make sure the potatoes are not overcrowded on the baking sheet. This will allow them to crisp up properly.
- Adjust Seasoning: Feel free to adjust the seasoning to your liking. You can add other herbs like oregano or basil, or a pinch of red pepper flakes for a little heat.
- Variations: Get creative with your toppings! You can add bacon bits, sour cream, chives, or even a drizzle of balsamic glaze.
Troubleshooting:
- Potatoes Not Crispy Enough: If your potatoes aren’t crispy enough, try increasing the oven temperature slightly or baking them for a few more minutes. Make sure you’re basting them generously with the garlic herb butter.
- Potatoes Slicing Issues: If you are having trouble slicing the potatoes evenly, make sure your knife is sharp and use the chopstick trick.
- Potatoes Sticking: If the potatoes are sticking to the baking sheet, make sure you’re using parchment paper.
Conclusion:
And there you have it! These Hasselback potatoes are truly a game-changer. They’re not just potatoes; they’re a culinary experience, a symphony of textures and flavors that will elevate any meal. The crispy, golden edges give way to a soft, fluffy interior, and the infused garlic-herb butter seeps into every crevice, creating an irresistible taste sensation. I know, I know, I’m gushing, but trust me, once you try them, you’ll understand the hype!
Why are these a must-try? Well, beyond the incredible taste, they’re surprisingly easy to make. Yes, the slicing takes a little patience, but the results are well worth the effort. Plus, they’re incredibly versatile. They can be a show-stopping side dish for a fancy dinner party or a comforting addition to a casual weeknight meal. They’re also naturally gluten-free, making them a great option for those with dietary restrictions. Honestly, what’s not to love?
But the fun doesn’t stop there! Feel free to get creative with your Hasselback potatoes. Want to add a little heat? Sprinkle some red pepper flakes or a dash of cayenne pepper into the butter mixture. Craving something cheesy? Grate some Parmesan or Gruyere over the potatoes during the last few minutes of baking. For a smoky flavor, try using smoked paprika instead of regular paprika. You could even top them with crumbled bacon and sour cream after they come out of the oven for an extra indulgent treat.
Serving suggestions? The possibilities are endless! These potatoes pair perfectly with roasted chicken, grilled steak, or pan-seared salmon. They’re also fantastic alongside a hearty salad or as part of a vegetarian feast. I personally love serving them with a dollop of Greek yogurt and a sprinkle of fresh chives. They also make a fantastic appetizer, especially if you cut them into smaller, bite-sized portions.
Don’t be intimidated by the fancy name or the intricate slicing. This recipe is designed to be approachable and achievable for cooks of all skill levels. Just follow the instructions carefully, and you’ll be rewarded with a dish that’s both visually stunning and incredibly delicious. I promise, you’ll impress your family and friends with your newfound potato prowess!
So, what are you waiting for? Grab some potatoes, preheat your oven, and get ready to embark on a culinary adventure. I’m confident that these Hasselback potatoes will become a new favorite in your household.
And now, for the most important part: I want to hear about your experience! Did you try the recipe? What variations did you make? What did your family and friends think? Share your photos and stories in the comments below. I can’t wait to see your creations and hear all about your potato-perfecting journey! Happy cooking!
Hasselback Potatoes: The Ultimate Guide to Crispy, Delicious Perfection
Crispy, flavorful Hasselback potatoes, thinly sliced and infused with garlic herb butter, baked to golden perfection.
Ingredients
- 6 medium Yukon Gold potatoes, scrubbed and dried
- 4 tablespoons unsalted butter, melted
- 2 cloves garlic, minced
- 1/4 cup olive oil
- 1 teaspoon dried thyme
- 1/2 teaspoon dried rosemary
- 1/4 teaspoon smoked paprika
- Salt and freshly ground black pepper to taste
- 1/4 cup grated Parmesan cheese (optional)
- Fresh parsley, chopped, for garnish (optional)
Instructions
- Prep Potatoes: Scrub and dry potatoes. Place a potato between two chopsticks. Make thin slices (1/8 inch apart) across the potato, stopping when the knife hits the chopsticks. Repeat for all potatoes. Fan out the slices.
- Garlic Herb Butter: In a small bowl, melt butter. Add minced garlic, olive oil, dried thyme, dried rosemary, and smoked paprika. Season with salt and pepper.
- Bake: Preheat oven to 400°F (200°C). Line a baking sheet with parchment paper. Arrange potatoes on the sheet, cut-side up. Baste generously with garlic herb butter.
- First Bake: Bake for 30 minutes.
- More Basting: Remove from oven, baste again with remaining butter.
- Second Bake: Return to oven and bake for another 20-30 minutes, or until tender and golden brown. Check for doneness with a fork.
- Cheese (Optional): Sprinkle with Parmesan cheese. Bake for 5 minutes, or until cheese is melted and golden brown.
- Serve: Garnish with chopped parsley and serve immediately.
Notes
- Yukon Gold potatoes are recommended for their creamy texture. Russet potatoes can also be used.
- A sharp knife is essential for even slices.
- Don’t overcrowd the baking sheet.
- Adjust seasoning to your liking.
- Variations: Add bacon bits, sour cream, chives, or balsamic glaze.
- If potatoes aren’t crispy enough, increase oven temperature or bake longer.
- Use parchment paper to prevent sticking.