
Homemade Peanut Butter Cups: Prepare to embark on a delightful culinary adventure that will redefine your perception of this classic treat! Forget the store-bought versions we’re diving headfirst into creating melt-in-your-mouth peanut butter cups right in your own kitchen. Imagine sinking your teeth into a rich, dark chocolate shell that gives way to a creamy, perfectly sweet peanut butter center. Are you drooling yet?
The allure of the peanut butter cup is undeniable. While its exact origins are debated, the combination of chocolate and peanut butter has captivated taste buds for generations. Some say it emerged from the early 20th-century candy boom, a testament to American ingenuity and a love for all things sweet and satisfying. Others believe it was a happy accident, a serendipitous collision of flavors that was simply meant to be. Regardless of its history, the peanut butter cup has become a beloved staple, a symbol of simple pleasures and comforting indulgence.
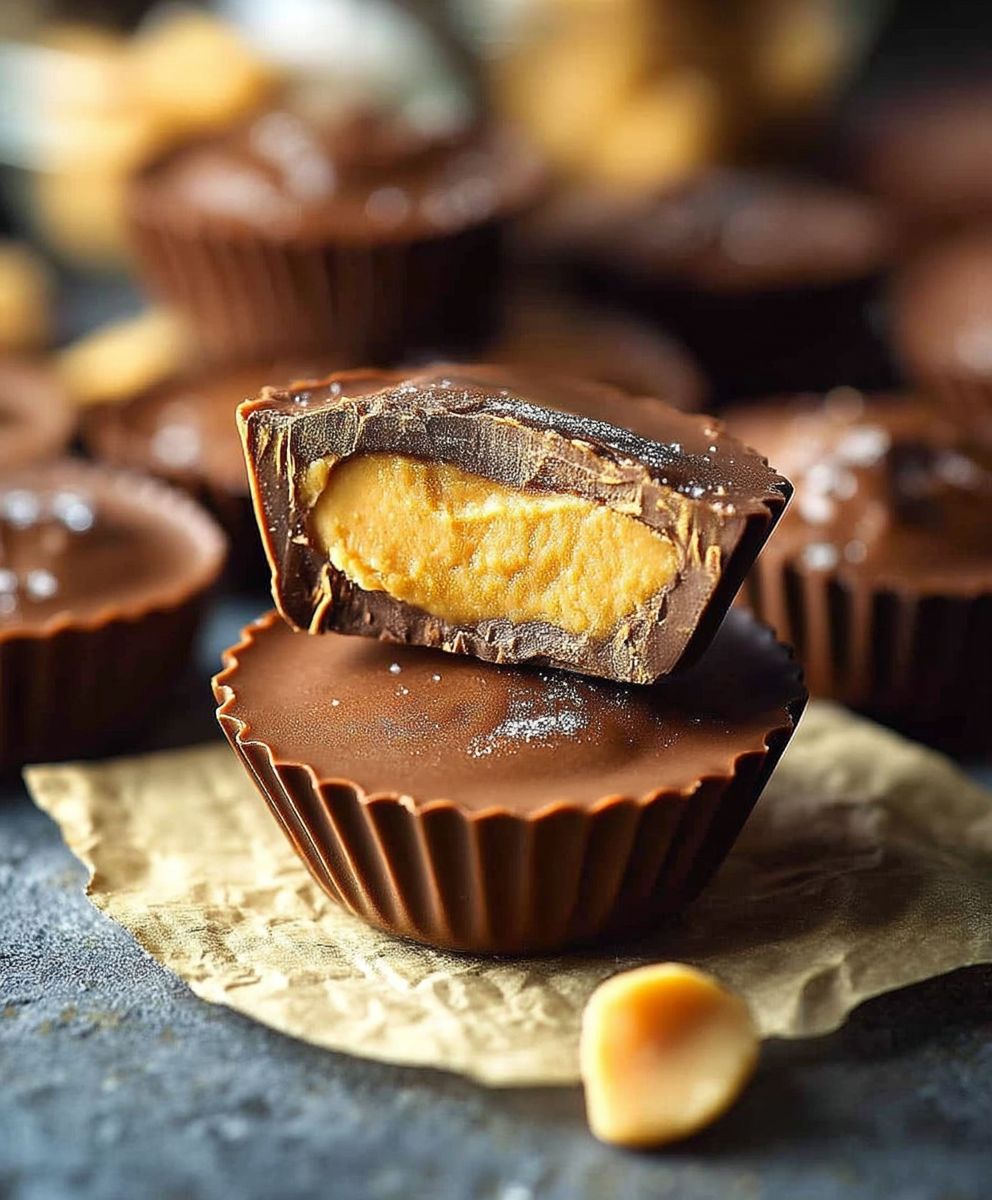
What makes these homemade peanut butter cups so irresistible? It’s the perfect balance of textures and tastes. The smooth, velvety chocolate contrasts beautifully with the slightly salty, nutty peanut butter filling. Plus, making them at home allows you to customize every aspect, from the type of chocolate you use to the sweetness of the peanut butter. And let’s be honest, there’s something incredibly satisfying about creating something so delicious from scratch. So, gather your ingredients, and let’s get ready to make some magic!

Ingredients:
- For the Peanut Butter Filling:
- 1 cup creamy peanut butter (I prefer natural, but any kind works!)
- 1/2 cup powdered sugar
- 1/4 cup (4 tablespoons) unsalted butter, softened
- 1/4 teaspoon salt
- 1 teaspoon vanilla extract
- 2-4 tablespoons milk (start with 2 and add more as needed)
- For the Chocolate Shell:
- 12 ounces semi-sweet chocolate chips (or dark chocolate, if you prefer!)
- 1 tablespoon coconut oil (this helps the chocolate melt smoothly and gives it a nice shine)
- Equipment:
- Muffin tin (standard size or mini, depending on your preference)
- Paper liners (again, standard or mini to match your muffin tin)
- Microwave-safe bowls
- Spoons or spatulas for mixing
Preparing the Peanut Butter Filling:
- Combine the Ingredients: In a medium-sized bowl, add the peanut butter, powdered sugar, softened butter, salt, and vanilla extract. Make sure your butter is truly softened this will make it much easier to mix everything together.
- Mix Until Smooth: Using a spoon or spatula, mix all the ingredients together. It will likely be quite thick and crumbly at first. Don’t worry, that’s normal!
- Adjust the Consistency: This is where the milk comes in. Start by adding 2 tablespoons of milk to the mixture. Mix well. If the filling is still too dry and crumbly, add another tablespoon of milk. Continue adding milk, one tablespoon at a time, until the filling is smooth, creamy, and easily scoopable. You want it to be firm enough to hold its shape, but soft enough to spread easily. Be careful not to add too much milk, or the filling will be too runny.
- Taste Test: Now for the fun part! Give the peanut butter filling a taste. Adjust the sweetness or saltiness to your liking. If you want it sweeter, add a little more powdered sugar. If you want it saltier, add a tiny pinch more salt.
Melting the Chocolate:
- Combine Chocolate and Coconut Oil: In a microwave-safe bowl, combine the chocolate chips and coconut oil. The coconut oil is crucial for achieving a smooth, glossy chocolate shell.
- Microwave in Intervals: Microwave the chocolate in 30-second intervals, stirring well after each interval. This prevents the chocolate from burning. Keep a close eye on it!
- Stir Until Smooth: Continue microwaving and stirring until the chocolate is completely melted and smooth. If there are still a few small lumps, keep stirring the residual heat should melt them. Be patient and avoid overheating the chocolate. Overheated chocolate can become grainy and difficult to work with.
Assembling the Peanut Butter Cups:
- Prepare the Muffin Tin: Line your muffin tin with paper liners. This will make it easy to remove the peanut butter cups later.
- First Layer of Chocolate: Spoon about 1-2 teaspoons of melted chocolate into the bottom of each paper liner. Use the back of a spoon to spread the chocolate evenly, covering the entire bottom of the liner. You want a nice, even layer of chocolate.
- Chill the First Layer: Place the muffin tin in the refrigerator or freezer for about 5-10 minutes, or until the chocolate is firm. This will create a solid base for the peanut butter filling. You can test the firmness by gently touching the chocolate it should be solid to the touch.
- Add the Peanut Butter Filling: Once the chocolate is firm, remove the muffin tin from the refrigerator or freezer. Scoop a spoonful of the peanut butter filling into each cup, on top of the hardened chocolate. Gently press the filling down to flatten it slightly. Leave a little space at the top for the final layer of chocolate.
- Second Layer of Chocolate: Spoon the remaining melted chocolate over the peanut butter filling in each cup. Spread the chocolate evenly, covering the entire peanut butter filling. You can gently tap the muffin tin on the counter to help the chocolate settle and create a smooth surface.
- Optional Toppings: If you want to add any toppings, now is the time! Sprinkle with sea salt, chopped nuts, sprinkles, or anything else you like.
- Chill to Set: Place the muffin tin back in the refrigerator or freezer for at least 30 minutes, or until the chocolate is completely set. This is important to ensure that the peanut butter cups hold their shape.
- Remove and Enjoy: Once the chocolate is set, carefully remove the peanut butter cups from the muffin tin. Peel off the paper liners and enjoy!
Tips and Variations:
- Chocolate Variations: Feel free to experiment with different types of chocolate. Dark chocolate, milk chocolate, or even white chocolate would all be delicious. You can also use a combination of chocolates for a unique flavor.
- Peanut Butter Variations: Use crunchy peanut butter for a bit of texture. You can also try other nut butters, such as almond butter or cashew butter.
- Add-Ins: Mix chopped nuts, pretzels, or chocolate chips into the peanut butter filling for added flavor and texture.
- Sea Salt: A sprinkle of sea salt on top of the chocolate adds a delicious salty-sweet contrast.
- Storage: Store the peanut butter cups in an airtight container in the refrigerator for up to a week. They can also be frozen for longer storage.
- Mini Peanut Butter Cups: Use a mini muffin tin and mini paper liners to make bite-sized peanut butter cups. Adjust the amount of chocolate and peanut butter filling accordingly.
- Vegan Peanut Butter Cups: Use vegan chocolate chips and vegan butter to make these peanut butter cups vegan.
- Sweetness Level: Adjust the amount of powdered sugar in the peanut butter filling to suit your taste. If you prefer a less sweet filling, reduce the amount of powdered sugar.
- Melting Chocolate in a Double Boiler: If you prefer not to use a microwave, you can melt the chocolate in a double boiler. Fill a saucepan with about an inch of water and bring it to a simmer. Place a heatproof bowl on top of the saucepan, making sure the bottom of the bowl doesn’t touch the water. Add the chocolate chips and coconut oil to the bowl and stir until melted and smooth.
- Preventing Chocolate Bloom: Chocolate bloom is a white, powdery coating that can sometimes appear on chocolate. It’s caused by changes in temperature and humidity. To prevent chocolate bloom, store the peanut butter cups in a cool, dry place. Avoid storing them in the refrigerator or freezer for extended periods of time.
Troubleshooting:
- Chocolate is Seizing: If your chocolate seizes (becomes thick and grainy), it’s likely because it got too hot or came into contact with water. Unfortunately, there’s not much you can do to fix seized chocolate. It’s best to start over with a fresh batch.
- Peanut Butter Filling is Too Dry: If your peanut butter filling is too dry, add more milk, one tablespoon at a time, until it reaches the desired consistency.
- Peanut Butter Filling is Too Runny: If your peanut butter filling is too runny, add a little more powdered sugar, one tablespoon at a time, until it thickens up.
- Chocolate is Not Setting: If your chocolate is not setting, it’s likely because it’s not cold enough. Place the muffin tin back in the refrigerator or freezer for a longer period of time.
Enjoy your homemade peanut butter cups! I hope you love them as much as I do!
Conclusion:
So there you have it! These Homemade Peanut Butter Cups are truly a must-try for anyone who loves that classic combination of chocolate and peanut butter. Forget the store-bought versions loaded with preservatives and questionable ingredients. This recipe gives you complete control over what goes into your treat, allowing you to create a healthier, tastier, and utterly satisfying dessert. The rich, creamy peanut butter filling nestled inside a shell of decadent chocolate is a symphony of flavors and textures that will leave you craving more.
But the best part? It’s surprisingly easy to make! You don’t need any fancy equipment or advanced baking skills. Just a few simple ingredients, a little bit of patience, and you’ll be rewarded with a batch of these irresistible cups. I promise, once you taste the difference between homemade and store-bought, you’ll never go back.
And the possibilities are endless! Feel free to get creative with your Homemade Peanut Butter Cups. Want to add a little crunch? Mix some chopped peanuts or pretzels into the peanut butter filling. Craving something a bit more decadent? Drizzle some melted white chocolate over the top. For a healthier twist, use dark chocolate with a high cocoa content and natural peanut butter without added sugar or oil. You can even experiment with different types of chocolate, like milk chocolate, semi-sweet chocolate, or even flavored chocolate like mint or caramel.
Serving suggestions? These peanut butter cups are perfect as an after-dinner treat, a midday snack, or even a homemade gift for friends and family. Package them in cute little boxes or cellophane bags for a thoughtful and delicious present. They’re also a great addition to any dessert platter or party spread. Imagine serving these at your next gathering they’re guaranteed to be a hit!
For a fun variation, try adding a layer of marshmallow fluff between the peanut butter and chocolate. This creates a gooey, sweet surprise that’s sure to delight. Or, if you’re feeling adventurous, try making mini peanut butter cups using a mini muffin tin. These bite-sized treats are perfect for portion control and are great for kids.
Don’t be intimidated by the thought of making your own candy. This recipe is foolproof and the results are well worth the effort. I truly believe that everyone should experience the joy of making their own Homemade Peanut Butter Cups at least once.
So, what are you waiting for? Gather your ingredients, preheat your oven (if you’re toasting the peanut butter), and get ready to embark on a delicious adventure. I’m confident that you’ll love this recipe as much as I do.
I’m so excited for you to try this recipe and experience the magic of homemade peanut butter cups! Once you’ve made them, I would absolutely love to hear about your experience. Did you make any variations? What did you think of the taste and texture? Share your photos and comments in the comments section below. I can’t wait to see your creations and hear your feedback! Happy baking (or should I say, happy candy-making!) and enjoy your delicious Homemade Peanut Butter Cups! Let me know if you have any questions along the way I’m here to help!
Homemade Peanut Butter Cups: Easy Recipe & Tips
Homemade peanut butter cups with a creamy peanut butter filling and a smooth chocolate shell. Easy to customize with different chocolates, nut butters, and toppings!
Ingredients
- 1 cup creamy peanut butter (natural or regular)
- 1/2 cup powdered sugar
- 1/4 cup (4 tablespoons) unsalted butter, softened
- 1/4 teaspoon salt
- 1 teaspoon vanilla extract
- 2-4 tablespoons milk
- 12 ounces semi-sweet chocolate chips (or dark chocolate)
- 1 tablespoon coconut oil
Instructions
- Combine the peanut butter, powdered sugar, softened butter, salt, and vanilla extract in a medium bowl.
- Mix until smooth.
- Add milk, 1 tablespoon at a time, until the filling is smooth, creamy, and easily scoopable.
- Taste and adjust sweetness or saltiness as needed.
- Combine chocolate chips and coconut oil in a microwave-safe bowl.
- Microwave in 30-second intervals, stirring well after each interval, until melted and smooth.
- Line a muffin tin with paper liners.
- Spoon 1-2 teaspoons of melted chocolate into the bottom of each liner and spread evenly.
- Chill in the refrigerator or freezer for 5-10 minutes, or until firm.
- Scoop a spoonful of peanut butter filling into each cup, on top of the hardened chocolate.
- Spoon the remaining melted chocolate over the peanut butter filling and spread evenly.
- (Optional) Add toppings like sea salt, chopped nuts, or sprinkles.
- Chill in the refrigerator or freezer for at least 30 minutes, or until the chocolate is completely set.
- Remove from the muffin tin, peel off the paper liners, and enjoy!
Notes
- Chocolate Variations: Experiment with dark, milk, or white chocolate.
- Peanut Butter Variations: Use crunchy peanut butter or other nut butters.
- Add-Ins: Mix chopped nuts, pretzels, or chocolate chips into the peanut butter filling.
- Sea Salt: A sprinkle of sea salt on top adds a delicious contrast.
- Storage: Store in an airtight container in the refrigerator for up to a week or freeze for longer storage.
- Mini Peanut Butter Cups: Use a mini muffin tin and adjust the amounts accordingly.
- Vegan Option: Use vegan chocolate chips and vegan butter.
- Sweetness Level: Adjust the amount of powdered sugar to taste.
- Double Boiler: Melt chocolate in a double boiler if preferred.
- Preventing Chocolate Bloom: Store in a cool, dry place.