
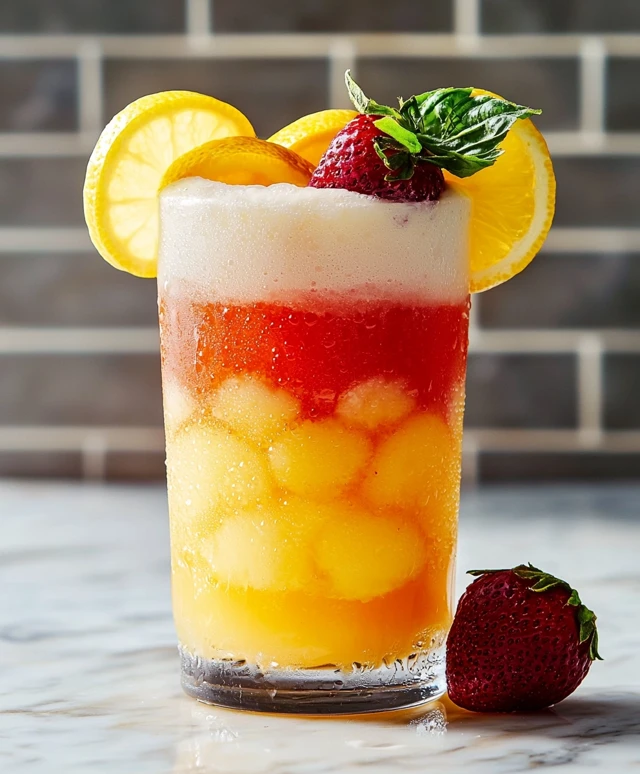
Layered Ombre Lemonade is not just a drink; its a vibrant celebration of summer in a glass! This visually stunning beverage captures the essence of sunny days and warm evenings, making it the perfect refreshment for gatherings, picnics, or simply to enjoy at home. The art of creating layered drinks dates back centuries, often seen in festive occasions and cultural celebrations around the world. With its refreshing citrus flavor and eye-catching gradient, Layered Ombre Lemonade has become a favorite among both kids and adults alike.
People love this delightful drink not only for its taste but also for its striking presentation. The combination of sweet and tart flavors, along with the smooth texture, makes each sip a refreshing experience. Plus, its incredibly easy to make, allowing you to impress your guests without spending hours in the kitchen. Join me as we dive into the world of Layered Ombre Lemonade and discover how to create this beautiful beverage that will surely brighten up any occasion!

Ingredients:
- 1 cup freshly squeezed lemon juice (about 6-8 lemons)
- 1 cup granulated sugar
- 4 cups cold water
- 1 cup raspberry puree (fresh or frozen raspberries blended and strained)
- 1 cup blue curaçao syrup (or blue food coloring mixed with simple syrup)
- Ice cubes
- Fresh lemon slices and raspberries for garnish
Preparing the Lemonade Base
First things first, lets get our lemonade base ready. This is the foundation of our layered ombre lemonade, and its super simple to make!
- In a medium-sized mixing bowl, combine the freshly squeezed lemon juice and granulated sugar. Stir well until the sugar is completely dissolved. This might take a few minutes, but its essential for a smooth lemonade.
- Once the sugar is dissolved, add in the cold water. Stir again until everything is well mixed. Taste your lemonade; if you prefer it sweeter, feel free to add more sugar, a tablespoon at a time, until it reaches your desired sweetness.
- Now, divide the lemonade mixture into three equal parts. You can use measuring cups for accuracy, or just eyeball it if youre feeling confident!
Creating the Raspberry Layer
Next up, were going to make the beautiful raspberry layer that will give our drink a vibrant color and delicious flavor.
- Take one of the portions of lemonade and add the raspberry puree to it. Stir gently to combine. The raspberry puree will give this layer a lovely pink hue.
- Once mixed, taste the raspberry lemonade. If you want it a bit sweeter, you can add a teaspoon of sugar and stir until dissolved.
- Set this raspberry lemonade aside for now. Well be pouring it into our glasses shortly!
Making the Blue Layer
Now, lets create that stunning blue layer that will contrast beautifully with the raspberry layer.
- Take another portion of the lemonade and add the blue curaçao syrup (or your homemade blue syrup). Stir gently to combine. The blue color should be vibrant and eye-catching!
- Again, taste this layer. If you want it sweeter, add a teaspoon of sugar and mix until dissolved. Remember, the sweetness should balance well with the tartness of the lemon.
- Set this blue lemonade aside as well. Were almost ready to assemble our drink!
Assembling the Layered Ombre Lemonade
Now comes the fun partassembling our layered ombre lemonade! This is where we get to show off those beautiful colors.
- Grab your favorite clear glasses. I love using tall glasses for this, as it really showcases the layers.
- Start by filling each glass with ice cubes. Fill them about halfway, as this will help keep the layers separate.
- Pour the raspberry lemonade mixture into each glass first. Fill it about one-third of the way up. Pour slowly over the back of a spoon to help maintain the layer if you want to be extra careful.
- Next, take the plain lemonade (the third portion you set aside) and slowly pour it over the back of a spoon into each glass, filling it until it reaches about two-thirds full. This will create a beautiful transition between the raspberry and the plain lemonade.
- Finally, pour the blue lemonade on top, again using the back of a spoon to help keep the layers distinct. Fill the glass to the top.
Garnishing Your Drink
Now that our layered ombre lemonade is assembled, lets make it look even more inviting with some garnishes!
- Take a fresh lemon and slice it into thin rounds. You can also cut a few wedges if you prefer.
- Place a lemon slice on the rim of each glass for a pop of color and a hint of freshness.
- If you have fresh raspberries, drop a few into each glass. Theyll float beautifully on top and add a lovely touch.
- For an extra special touch, you can add a sprig of mint to each
Conclusion:
In summary, this Layered Ombre Lemonade is an absolute must-try for anyone looking to impress their friends and family with a stunning and refreshing drink. The vibrant colors and delightful flavors not only make it a feast for the eyes but also a treat for the taste buds. Whether you’re hosting a summer barbecue, a birthday party, or simply enjoying a sunny afternoon, this lemonade will surely be the star of the show. For serving suggestions, consider garnishing your glasses with fresh mint leaves or lemon slices for an extra pop of color and flavor. You can also experiment with different fruit juices to create your own unique ombre effectthink raspberry, blueberry, or even tropical flavors like pineapple or mango. The possibilities are endless, and each variation can bring a new twist to this classic drink. I encourage you to give this Layered Ombre Lemonade a try and share your experience with friends and family. I would love to hear how your version turns out and any creative twists you add to make it your own. So grab your ingredients, get mixing, and let the vibrant layers of flavor brighten your day! Cheers to delicious drinks and unforgettable moments! Print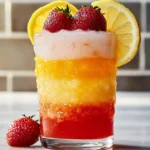
Layered Ombre Lemonade: A Refreshing Summer Drink Recipe to Impress
- Total Time: 15 minutes
- Yield: 4 servings 1x
Description
This Layered Ombre Lemonade features a refreshing blend of tart lemon, sweet raspberry, and vibrant blue curaçao syrup, creating a visually stunning drink perfect for summer gatherings. Easy to make and delightful to sip, it’s sure to impress your guests with its beautiful layers and refreshing flavors.
Ingredients
- 1 cup freshly squeezed lemon juice (about 6–8 lemons)
- 1 cup granulated sugar
- 4 cups cold water
- 1 cup raspberry puree (fresh or frozen raspberries blended and strained)
- 1 cup blue curaçao syrup (or blue food coloring mixed with simple syrup)
- Ice cubes
- Fresh lemon slices for garnish
- Fresh raspberries for garnish
Instructions
- In a medium-sized mixing bowl, combine the freshly squeezed lemon juice and granulated sugar. Stir well until the sugar is completely dissolved.
- Once the sugar is dissolved, add in the cold water. Stir again until everything is well mixed. Taste your lemonade; if you prefer it sweeter, feel free to add more sugar, a tablespoon at a time, until it reaches your desired sweetness.
- Divide the lemonade mixture into three equal parts.
- Take one of the portions of lemonade and add the raspberry puree to it. Stir gently to combine.
- Taste the raspberry lemonade. If you want it a bit sweeter, you can add a teaspoon of sugar and stir until dissolved.
- Set this raspberry lemonade aside.
- Take another portion of the lemonade and add the blue curaçao syrup (or your homemade blue syrup). Stir gently to combine.
- Taste this layer. If you want it sweeter, add a teaspoon of sugar and mix until dissolved.
- Set this blue lemonade aside.
- Grab your favorite clear glasses and fill each with ice cubes halfway.
- Pour the raspberry lemonade mixture into each glass first, filling it about one-third of the way up. Pour slowly over the back of a spoon to help maintain the layer.
- Next, take the plain lemonade and slowly pour it over the back of a spoon into each glass, filling it until it reaches about two-thirds full.
- Finally, pour the blue lemonade on top, again using the back of a spoon to help keep the layers distinct. Fill the glass to the top.
- Slice a fresh lemon into thin rounds and place a lemon slice on the rim of each glass.
- Drop a few fresh raspberries into each glass for a lovely touch.
- For an extra special touch, add a sprig of mint to each glass.
Notes
- Adjust the sweetness of each layer according to your taste preference.
- For a non-alcoholic version, simply use blue food coloring mixed with simple syrup instead of blue curaçao syrup.
- This drink is best served immediately to maintain the distinct layers.
- Prep Time: 15 minutes
- Cook Time: 0 minutes