
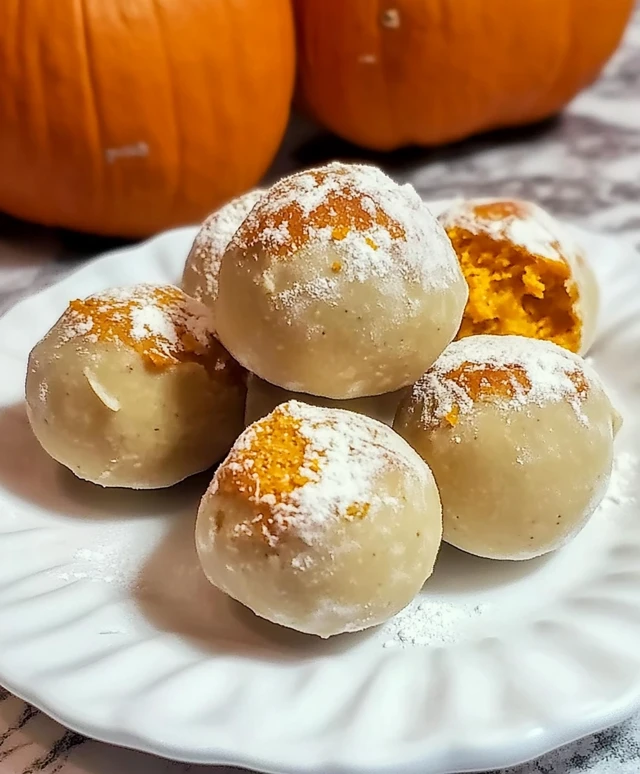
No Bake Pumpkin Balls are the perfect treat to celebrate the flavors of fall without the hassle of baking. These delightful bites combine the rich, earthy taste of pumpkin with warm spices, creating a mouthwatering experience that captures the essence of the season. Originating from the traditional pumpkin pie, this no-bake variation has gained popularity for its simplicity and convenience, making it an ideal choice for busy families and dessert lovers alike.
People adore No Bake Pumpkin Balls not only for their delicious taste and creamy texture but also for their versatility. They can be enjoyed as a quick snack, a festive dessert, or even a healthy treat packed with nutrients. With just a few ingredients, you can whip up these delightful morsels in no time, allowing you to savor the comforting flavors of pumpkin without turning on the oven. Whether youre hosting a gathering or simply indulging in a sweet craving, No Bake Pumpkin Balls are sure to impress and satisfy!

Ingredients:
- 1 cup pumpkin puree (canned or fresh)
- 1 cup rolled oats
- 1/2 cup almond butter (or peanut butter)
- 1/4 cup honey or maple syrup
- 1 teaspoon vanilla extract
- 1 teaspoon pumpkin pie spice
- 1/2 teaspoon cinnamon
- 1/4 teaspoon salt
- 1/2 cup chocolate chips (optional)
- 1/4 cup shredded coconut (optional)
- 1/4 cup chopped nuts (optional)
Preparing the Mixture
- In a large mixing bowl, combine the pumpkin puree and almond butter. Use a spatula or wooden spoon to mix them together until they are well blended and smooth.
- Add the honey (or maple syrup) and vanilla extract to the pumpkin and almond butter mixture. Stir until fully incorporated.
- In a separate bowl, combine the rolled oats, pumpkin pie spice, cinnamon, and salt. Mix these dry ingredients together to ensure even distribution of the spices.
- Gradually add the dry mixture to the wet mixture. Stir continuously until all the dry ingredients are fully incorporated into the wet mixture. The mixture should be thick and sticky.
- If you are using chocolate chips, shredded coconut, or chopped nuts, fold them into the mixture at this stage. Ensure they are evenly distributed throughout the batter.
Chilling the Mixture
- Once the mixture is well combined, cover the bowl with plastic wrap or a lid. Place it in the refrigerator for at least 30 minutes. This chilling time will help the mixture firm up, making it easier to roll into balls.
- While the mixture is chilling, prepare a baking sheet or plate by lining it with parchment paper. This will prevent the pumpkin balls from sticking once they are formed.
Forming the Pumpkin Balls
- After the mixture has chilled, remove it from the refrigerator. Using your hands, scoop out about 1 tablespoon of the mixture and roll it into a ball. The size can be adjusted according to your preference, but keeping them around 1 inch in diameter is ideal.
- Place the formed ball onto the prepared baking sheet or plate. Repeat this process until all the mixture has been rolled into balls. You should have approximately 20-25 pumpkin balls, depending on the size you choose.
- If desired, you can roll the pumpkin balls in additional shredded coconut, crushed nuts, or cocoa powder for added flavor and texture. Simply place your coating of choice in a shallow dish and roll each ball until fully coated.
Final Chilling and Serving
- Once all the pumpkin balls are formed and coated, return them to the refrigerator for an additional 30 minutes. This final chilling will help them set and firm up even more.
- After the chilling period, your no-bake pumpkin balls are ready to serve! You can enjoy them immediately or store them in an airtight container in the refrigerator for up to one week.
- For serving, you can present them on a platter or in a decorative bowl. They make a great snack, dessert, or even a healthy treat for gatherings and parties.
Storage Tips
- To store the pumpkin balls, place them in an airtight container. They can be kept in the refrigerator for up to one week. If you want to keep them longer, consider freezing them.
- To freeze, place the pumpkin balls in a single layer on a baking sheet and freeze until solid. Once frozen, transfer them to a freezer-safe bag or container. They can be stored in the freezer for up to three months.
- When ready to enjoy, simply remove the desired number of pumpkin balls from the freezer and let them thaw in the refrigerator for a few hours or at room temperature for about 30 minutes.
Variations and Customizations
- For a different flavor profile, consider adding a tablespoon of cocoa powder to the mixture for chocolate pumpkin balls.
- You can substitute the almond butter with other nut but
Conclusion:
In summary, these No Bake Pumpkin Balls are a must-try for anyone looking to indulge in a delicious, healthy treat that captures the essence of fall. With their delightful blend of pumpkin, oats, and warm spices, they not only satisfy your sweet tooth but also provide a nutritious snack option thats perfect for any time of the day. Whether youre preparing for a festive gathering, a cozy night in, or simply need a quick energy boost, these pumpkin balls are versatile enough to fit any occasion. For serving suggestions, consider pairing these No Bake Pumpkin Balls with a warm cup of chai tea or a creamy pumpkin spice latte for a truly autumnal experience. You can also roll them in crushed nuts, coconut flakes, or even a sprinkle of cocoa powder for added texture and flavor. If youre feeling adventurous, try adding a dash of maple syrup or a handful of chocolate chips to the mixture for a sweet twist that will delight your taste buds. We encourage you to give this recipe a try and experience the joy of creating these delightful No Bake Pumpkin Balls in your own kitchen. Dont forget to share your experience with friends and family, and let us know how your version turned out! Your feedback and creativity can inspire others to enjoy this delicious treat as well. Happy cooking! Print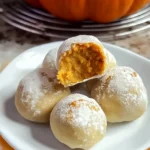
No Bake Pumpkin Balls: Easy and Delicious Fall Treats
- Total Time: 60 minutes
- Yield: 20–25 pieces 1x
Description
These No-Bake Pumpkin Balls are a healthy and delicious fall treat made with pumpkin puree, oats, and nut butter. Easy to prepare and customizable with your favorite mix-ins, they make a perfect snack or dessert. Enjoy them chilled or at room temperature!
Ingredients
Scale- 1 cup pumpkin puree (canned or fresh)
- 1 cup rolled oats
- 1/2 cup almond butter (or peanut butter)
- 1/4 cup honey or maple syrup
- 1 teaspoon vanilla extract
- 1 teaspoon pumpkin pie spice
- 1/2 teaspoon cinnamon
- 1/4 teaspoon salt
- 1/2 cup chocolate chips (optional)
- 1/4 cup shredded coconut (optional)
- 1/4 cup chopped nuts (optional)
Instructions
- In a large mixing bowl, combine the pumpkin puree and almond butter. Mix until well blended and smooth.
- Add the honey (or maple syrup) and vanilla extract to the mixture. Stir until fully incorporated.
- In a separate bowl, combine the rolled oats, pumpkin pie spice, cinnamon, and salt. Mix these dry ingredients together.
- Gradually add the dry mixture to the wet mixture, stirring continuously until fully incorporated. The mixture should be thick and sticky.
- If using chocolate chips, shredded coconut, or chopped nuts, fold them into the mixture.
- Cover the bowl with plastic wrap or a lid and refrigerate for at least 30 minutes to firm up the mixture.
- Prepare a baking sheet or plate by lining it with parchment paper.
- After chilling, scoop out about 1 tablespoon of the mixture and roll it into a ball (about 1 inch in diameter).
- Place the formed ball onto the prepared baking sheet. Repeat until all the mixture is rolled into balls (approximately 20-25).
- Optionally, roll the pumpkin balls in additional shredded coconut, crushed nuts, or cocoa powder for added flavor.
- Return the formed and coated pumpkin balls to the refrigerator for an additional 30 minutes to set.
- Serve immediately or store in an airtight container in the refrigerator for up to one week. They can also be presented on a platter for gatherings.
Notes
- Der Teig darf während der Ruhezeit nicht bewegt werden.
- Für ein intensiveres Knoblaucharoma können mehr Zehen verwendet werden.
- Die Kürbisbällchen können in einer luftdichten Verpackung bis zu einer Woche im Kühlschrank aufbewahrt werden.
- Für eine längere Lagerung die Kürbisbällchen in einer einzelnen Schicht auf einem Backblech einfrieren, bis sie fest sind, und dann in einen gefriergeeigneten Beutel oder Behälter für bis zu drei Monate umfüllen.
- Fügen Sie einen Esslöffel Kakaopulver für schokoladige Kürbisbällchen hinzu.
- Ersetzen Sie Mandelbutter durch andere Nussbutter für unterschiedliche Geschmäcker.
- Prep Time: 15 minutes
- Cook Time: 0 minutes