
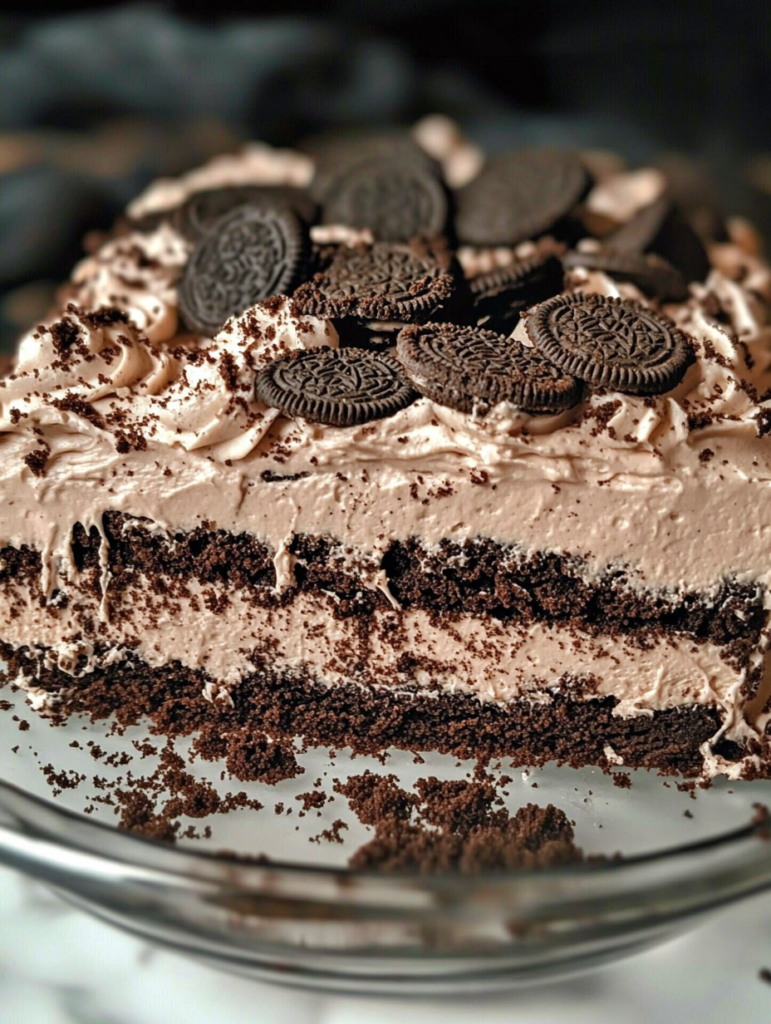
Oreo Dirt Cake is a nostalgic, no-bake dessert that’s perfect for any occasion. With its creamy layers of pudding and cream cheese filling, paired with the crunch of Oreo cookie crumbs, this dessert is a guaranteed crowd-pleaser. Whether you’re hosting a birthday party, a family get-together, or just looking to treat yourself, this dessert offers a fun and delicious twist on the traditional cake.
The beauty of Oreo Dirt Cake is in its simplicity. It requires no baking, and it’s incredibly easy to put together. The layers come together quickly, and once refrigerated, the dessert is ready to serve. Not only is it delicious, but it’s also visually appealing. The “dirt” layer made from crushed Oreos can be topped with fun, creative garnishes like gummy worms, making it a hit with kids and adults alike.
Best of all, Oreo Dirt Cake is highly customizable. You can switch up the pudding flavor, experiment with different kinds of Oreos, or add additional ingredients like chocolate chips or candy. It’s the ultimate versatile dessert that you can make your own!

Ingredients: What You’ll Need to Make Oreo Dirt Cake
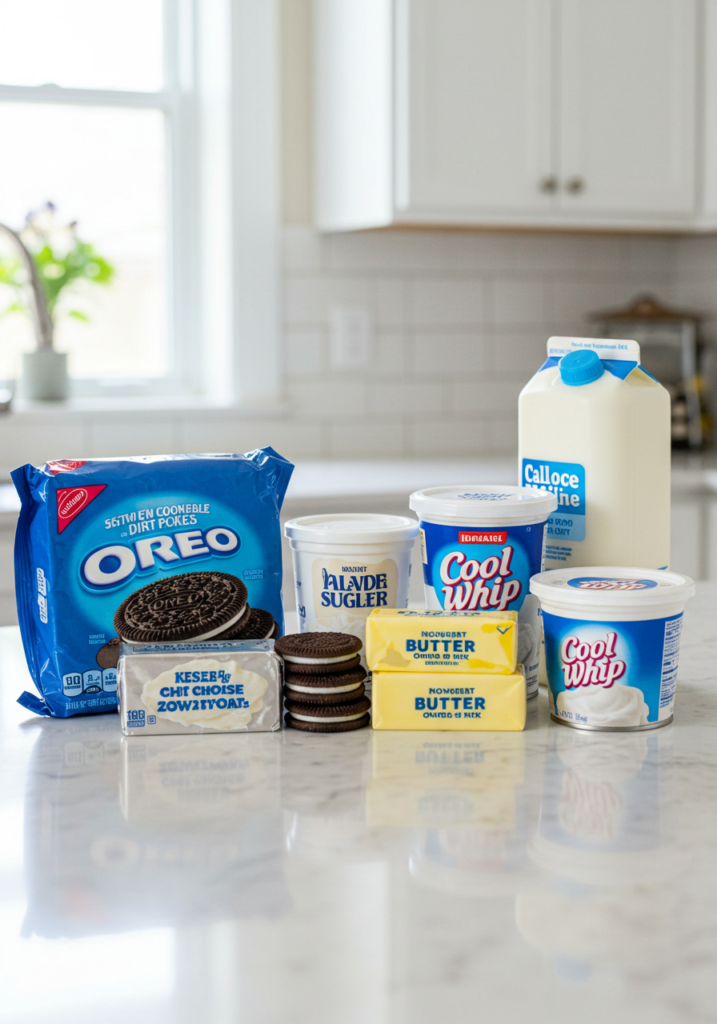
Before you get started, it’s important to gather the right ingredients for this delicious dessert. The good news is, Oreo Dirt Cake doesn’t require any complex or hard-to-find ingredients. Most of what you need can be found in your kitchen pantry or local grocery store. Here’s a breakdown of everything you’ll need:
Oreo Cookies
Oreos are the star of this dessert, providing the essential “dirt” texture. You’ll need about 36 Oreo cookies, which will be crushed to form the crust and topping. For the best results, stick with classic Oreos. You can also experiment with different varieties like Golden Oreos or Mint Oreos for unique flavor variations.
Cream Cheese
Softened cream cheese adds a creamy, tangy base to the pudding layer. It helps balance out the sweetness of the sugar and pudding mix, giving the dessert a rich and velvety texture. Make sure the cream cheese is at room temperature to ensure it blends smoothly into the filling.
Butter
Butter helps bind the cream cheese mixture and adds richness to the overall flavor of the dessert. It’s best to use unsalted butter, as this gives you better control over the sweetness and saltiness of the dish.
Powdered Sugar
Powdered sugar (also known as confectioners’ sugar) is perfect for making smooth fillings and frostings without the graininess that regular granulated sugar would create. It sweetens the cream cheese mixture and helps it achieve that smooth consistency.
Instant Vanilla Pudding Mix
Instant vanilla pudding mix is used to create the creamy, custard-like layer in the dessert. The instant version thickens on its own when mixed with milk, saving you time and effort. While vanilla is the classic choice, feel free to experiment with other pudding flavors such as chocolate or butterscotch.
Cool Whip (Whipped Topping)
Cool Whip (or any whipped topping) is what makes this dessert light and fluffy. It creates an airy contrast to the denser cream cheese and pudding layers. If you prefer, you can also use homemade whipped cream as a substitute for a more natural option.
Milk
Milk is essential for the pudding layer. It’s mixed with the instant pudding to form the creamy texture that will combine with the cream cheese layer. Whole milk works best for a rich and creamy texture, though you can use lower-fat milk if you prefer a lighter dessert.
Optional Garnishes
To enhance the presentation and add a fun twist, you can garnish the top of the dessert with more crushed Oreos, gummy worms, chocolate chips, or even mini candy decorations. These additions not only make the dessert look appealing but also add a bit of extra flavor and texture.
Preparation: Step-by-Step Guide to Making Oreo Dirt Cake
Making Oreo Dirt Cake is easy and fun! You don’t need baking skills or any complicated techniques. The recipe comes together quickly, but patience is key—especially when it comes to chilling the dessert. Follow these steps, and you’ll have a delicious treat ready to serve.
Step 1: Crush the Oreos for the Base
Start by crushing the Oreos into fine crumbs. You can do this by placing the cookies in a food processor or a Ziploc bag, and then using a rolling pin to crush them. Aim for crumbs that are a mix of fine and slightly larger pieces to give the “dirt” layer its authentic look. Once crushed, set aside half of the crumbs to use as the bottom layer. Press these crumbs gently into the bottom of a 9×13-inch dish to form a solid base.
Step 2: Make the Cream Cheese Layer
In a mixing bowl, beat the softened cream cheese, butter, and powdered sugar until smooth and fluffy. This will form the creamy, tangy filling of the dessert. Once well combined, fold in the Cool Whip or whipped topping, making sure the mixture is light and airy. The key here is to create a smooth, uniform texture without overmixing. This layer will provide a nice contrast to the crunch of the Oreos.
Step 3: Combine the Pudding Mixture
In a separate bowl, whisk together the instant vanilla pudding mix and milk. Stir until it thickens—this should only take a few minutes. Once the pudding has thickened, fold it into the cream cheese and Cool Whip mixture. Stir gently to avoid deflating the whipped topping, ensuring that the pudding and cream cheese mixture remain fluffy and creamy.
Step 4: Layer the Dessert
Now it’s time to assemble the cake! Spread half of the Oreo crumbs over the bottom of your prepared dish. Then, add the creamy pudding mixture, smoothing it out with a spatula so that it covers the Oreos completely. Finally, top with the remaining Oreo crumbs. For an extra touch, you can garnish the cake with gummy worms, extra Oreos, or even mini chocolate chips.
Step 5: Refrigerate to Set
Once assembled, refrigerate the dessert for at least 4 hours—ideally overnight. This chilling time is essential as it allows the pudding layer to firm up and meld with the crushed Oreos, making it easier to cut and serve. Don’t rush this step! The longer it chills, the better the flavor and texture will be.
Mistakes to Avoid: Common Errors When Making Oreo Dirt Cake
While Oreo Dirt Cake is an easy dessert to make, there are a few common mistakes that could affect the outcome. Here are some things to watch out for:
Not Softening the Cream Cheese
One of the most common mistakes people make is using cold cream cheese. When cream cheese is too cold, it can form lumps when mixed with butter and powdered sugar. This results in a lumpy filling instead of a smooth, creamy texture. Always let the cream cheese sit out at room temperature for at least 30 minutes before you begin. This will ensure that it blends seamlessly with the other ingredients.
Overmixing the Pudding Mixture
It’s important not to overmix the pudding after you add the milk. Instant pudding is designed to thicken on its own, so excessive stirring can lead to a grainy texture. After mixing the pudding and milk, only stir until it thickens. This will help maintain a smooth and silky texture in the final dessert.
Not Allowing Enough Chilling Time
Chilling the Oreo Dirt Cake is crucial to its success. Without enough time in the fridge, the pudding layer won’t set properly, and the dessert may be too runny when served. While the recipe only requires a minimum of 4 hours in the refrigerator, allowing it to chill overnight will yield the best results. The extra time lets the flavors meld and ensures a firmer, more cohesive texture.
Using the Wrong Type of Oreos
For the best flavor and texture, it’s recommended to use regular, classic Oreos. While you can experiment with flavored Oreos, such as Golden Oreos or Mint Oreos, the flavor profile will change. Classic Oreos have a perfect balance of sweetness and crunch, making them ideal for the “dirt” layers in this dessert.
Alternative Ingredients
One of the great things about Oreo Dirt Cake is its versatility. While the classic recipe is delicious, there are many ways to swap out ingredients and add your own unique twist. Whether you want to accommodate dietary preferences or simply try something new, here are some alternative ingredients you can use to customize your Oreo Dirt Cake.
Dairy-Free Options
If you’re looking to make a dairy-free version of Oreo Dirt Cake, you can easily swap out the dairy-based ingredients. For the cream cheese layer, use a dairy-free cream cheese alternative made from coconut or almond milk. Many stores offer vegan butter that can replace regular butter, and you can opt for coconut whipped cream instead of Cool Whip to keep it dairy-free. For the pudding layer, there are instant vanilla pudding mixes available that are made without dairy, or you can create your own pudding using plant-based milk like almond or oat milk.
Gluten-Free Oreo Dirt Cake
For a gluten-free version, simply swap regular Oreos with gluten-free Oreos. Many major brands, including Oreo, offer gluten-free cookies that work perfectly for this dessert. Additionally, make sure that any pudding mix you choose is gluten-free, although most instant vanilla puddings are naturally gluten-free. With these substitutions, your Oreo Dirt Cake will be both gluten-free and just as delicious.
Flavored Oreos for a Twist
While classic Oreos are always a fan favorite, why not switch things up with a fun flavor? Try using Golden Oreos for a lighter flavor and color contrast, or even Mint Oreos to add a refreshing minty twist to the dessert. You can also experiment with other limited-edition Oreo flavors, like birthday cake or peanut butter, for a fun variation.
Substitute Whipped Cream for Cool Whip
If you prefer to avoid processed ingredients, homemade whipped cream is an excellent substitute for Cool Whip. You can make it by whipping heavy cream with a bit of powdered sugar and vanilla extract until stiff peaks form. Homemade whipped cream offers a fresher taste and gives the cake a more natural, rich texture.
Tips & Tricks
Making Oreo Dirt Cake is simple, but with a few tips and tricks, you can elevate your dessert and make it even more delicious. Here are some helpful suggestions to ensure your Oreo Dirt Cake turns out perfectly every time.
Use a Springform Pan for Easy Serving
If you want to make your Oreo Dirt Cake extra special or serve it at a party, consider using a springform pan. This allows for easy removal and presentation, especially if you plan to layer it beautifully. The springform pan will help maintain the shape of the dessert and give it a professional appearance. Simply layer the crumbs and filling inside the pan, refrigerate, and then release the sides for a clean and polished look.
Add a Layer of Chocolate Chips or Mini Candies
For an extra burst of flavor and texture, sprinkle chocolate chips, mini M&Ms, or small candy pieces on top of the Oreo Dirt Cake. This will give the dessert a more decadent finish. Adding mini chocolate chips or candy can also make it more visually appealing, especially if you’re making this dessert for kids or themed events.
Make Individual Servings
If you’re serving a crowd and want to offer individual portions, consider assembling the Oreo Dirt Cake in small mason jars, cups, or individual bowls. This gives a fun, rustic feel to the dessert and makes it easy to serve. Plus, you can layer the ingredients creatively, adding a bit more personality to each portion.
Don’t Skimp on Chilling Time
One of the most important tips for making Oreo Dirt Cake is to be patient with the chilling process. While 4 hours in the fridge is the minimum, allowing the dessert to chill overnight will ensure that the pudding sets perfectly, and the layers hold together. This also enhances the flavor, as the ingredients have time to meld together and reach their peak deliciousness.
FAQ: Frequently Asked Questions
As one of the most fun and easy desserts to prepare, Oreo Dirt Cake often generates a lot of questions. Whether you’re making it for the first time or you’ve made it before, here are some frequently asked questions that may help clarify any concerns.
Can I make Oreo Dirt Cake ahead of time?
Yes! In fact, Oreo Dirt Cake is best when made ahead of time. The chilling process helps the layers set and enhances the flavors. You can prepare it a day or two in advance and keep it covered in the fridge until you’re ready to serve. Just make sure the dessert is well-covered to prevent it from absorbing any other odors in the fridge.
How long does Oreo Dirt Cake last?
Oreo Dirt Cake can last for about 3-4 days when stored in an airtight container in the refrigerator. If you want to store it for longer, you can freeze it for up to a month. Just be aware that the texture might change slightly once thawed, so it’s best to eat it fresh for the best results.
Can I make this dessert without pudding?
While pudding is a key ingredient for the creamy texture, it’s possible to make a version without it. You can substitute with a homemade custard or simply use extra whipped cream and cream cheese for a rich, creamy filling. The texture will be slightly different, but it will still be delicious!
Can I use different cookies for the base?
Absolutely! While Oreos are the traditional choice, you can experiment with other cookies. Try using chocolate chip cookies, graham crackers, or even biscotti for a different twist. Keep in mind that the flavor and texture will change, but the overall dessert will still be delightful.
Conclusion
Oreo Dirt Cake is a delightful dessert that combines simplicity, flavor, and fun. Whether you’re making it for a special occasion or simply as a treat to enjoy at home, this no-bake dessert is sure to be a hit. The combination of creamy pudding, tangy cream cheese, and crunchy Oreos creates the perfect balance of textures and flavors. Plus, it’s incredibly customizable—feel free to experiment with different Oreos, pudding flavors, and toppings to make it your own!
This dessert is perfect for parties, picnics, or just a weekend indulgence with family. The best part is how easy it is to prepare, making it the ideal recipe for bakers of all skill levels. So, next time you’re in the mood for something sweet and fun, give Oreo Dirt Cake a try—you won’t be disappointed!
Print
Oreo Dirt Cake Recipe | Easy, No-Bake Dessert
- Total Time: 4 hours 20 minutes
- Yield: 12 servings 1x
Description
Oreo Dirt Cake is a fun, no-bake dessert that’s perfect for all ages. Layers of creamy pudding, tangy cream cheese, and crushed Oreos come together for a delicious treat. Customize with your favorite Oreo flavors and toppings!
Ingredients
- 36 Oreo cookies (classic variety)
- 8 oz cream cheese, softened
- 1/2 cup butter, softened
- 1 cup powdered sugar
- 1 (8 oz) tub Cool Whip (or whipped cream)
- 1 (3.4 oz) package instant vanilla pudding mix
- 2 cups milk
- Optional toppings: Gummy worms, mini chocolate chips, extra crushed Oreos, or candy
Instructions
- Crush the Oreos: Use a food processor or place the Oreos in a Ziploc bag and crush them using a rolling pin until fine crumbs form. Set aside half of the crumbs for the topping and use the other half for the crust.
- Make the Cream Cheese Mixture: In a large mixing bowl, beat the softened cream cheese, butter, and powdered sugar until smooth. Fold in the Cool Whip (or homemade whipped cream) and mix until light and fluffy.
- Prepare the Pudding Layer: In a separate bowl, whisk the instant vanilla pudding mix and milk together until it thickens (about 2-3 minutes). Gently fold the pudding into the cream cheese mixture, stirring until fully combined.
- Assemble the Cake: Spread half of the crushed Oreos in the bottom of a 9×13-inch baking dish. Pour the pudding mixture on top, spreading it evenly. Top with the remaining Oreo crumbs.
- Chill: Refrigerate the cake for at least 4 hours (overnight is best) to allow the layers to set.
- Serve: Top with optional garnishes like gummy worms, extra Oreos, or mini chocolate chips before serving.
Notes
- You can make Oreo Dirt Cake ahead of time and refrigerate it for up to 2 days before serving.
- For a gluten-free version, use gluten-free Oreos.
- Dairy-free? Substitute with dairy-free cream cheese, butter, and whipped cream, and use a plant-based milk for the pudding.
- Prep Time: 20 minutes
- Chill Time: 4 hours
- Category: Dessert
- Method: No-Bake
- Cuisine: American
Nutrition
- Serving Size: per serving
- Calories: 330