
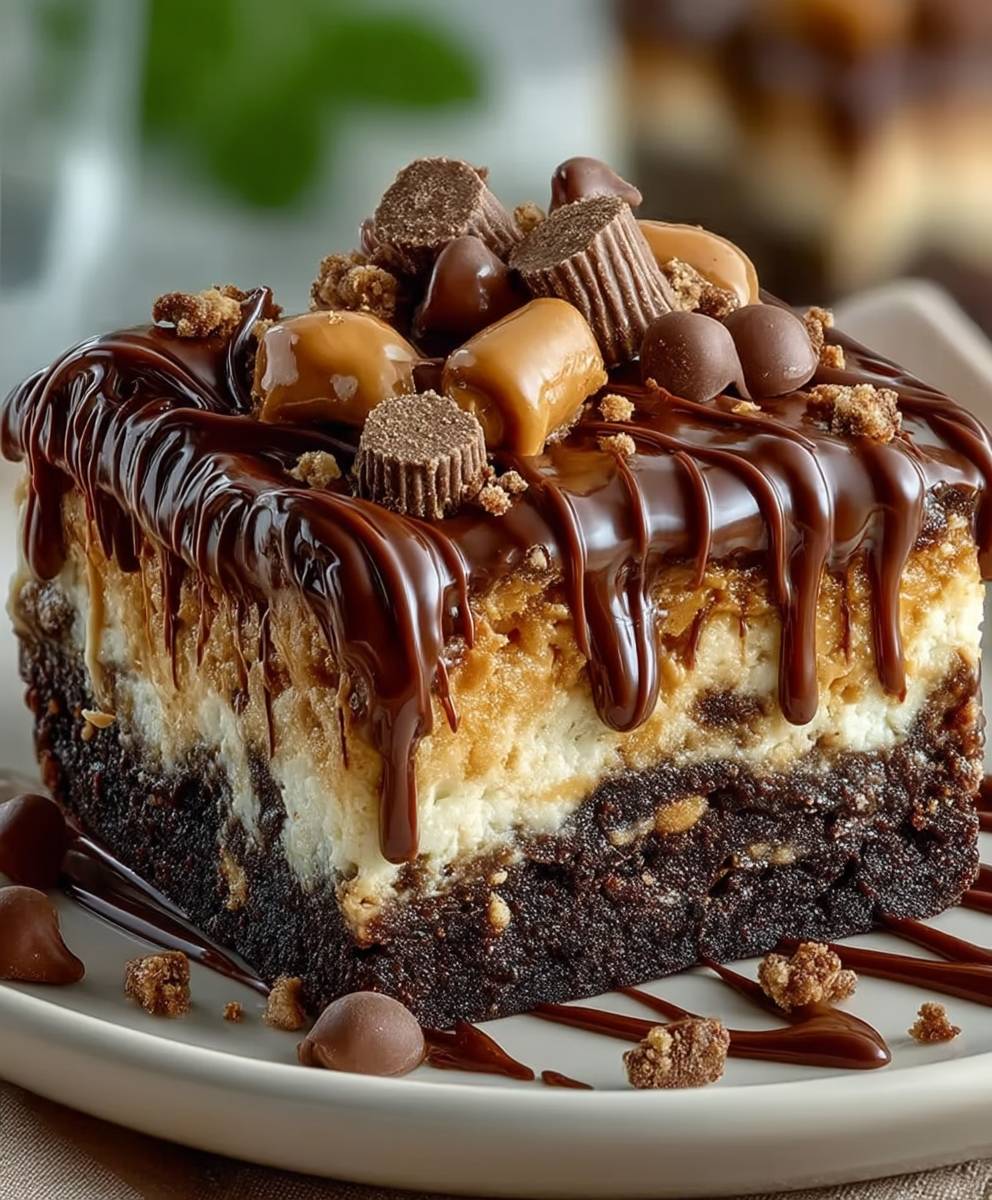
Peanut Butter Earthquake Cake: Just the name alone conjures up images of decadent deliciousness, doesn’t it? Get ready to experience a dessert that’s as fun to make as it is to devour! This isn’t your average cake; it’s a geological wonder of chocolate, cream cheese, and, of course, glorious peanut butter. Imagine sinking your fork into a moist, rich chocolate cake, swirled with a creamy, tangy filling and pockets of melted peanut butter a true explosion of flavor in every bite.
While the exact origins of Peanut Butter Earthquake Cake remain shrouded in mystery (unlike the cake itself, which rarely lasts long!), its popularity has spread like wildfire across potlucks and family gatherings. It’s a modern classic, a testament to the enduring love affair between chocolate and peanut butter. This cake is more than just a dessert; it’s a conversation starter, a crowd-pleaser, and a guaranteed hit at any event.
People adore this cake for its incredible texture the fudgy cake, the smooth cream cheese, and the gooey peanut butter create a symphony of sensations in your mouth. Plus, it’s surprisingly easy to make! Forget fussy layers and complicated frosting techniques. This recipe is all about simple ingredients and straightforward instructions, making it perfect for both beginner bakers and seasoned pros. Get ready to bake up a storm (or rather, an earthquake!) of flavor!

Ingredients:
- 1 box (18.25 ounces) chocolate cake mix, plus ingredients called for on the box (usually eggs, oil, and water)
- 8 ounces cream cheese, softened
- 1 cup creamy peanut butter
- 1 cup powdered sugar
- 1/2 cup milk
- 1 teaspoon vanilla extract
- 1/2 cup mini chocolate chips
- 1/2 cup chopped peanuts, for garnish (optional)
Preparing the Cake Batter
Okay, let’s get started! First things first, we need to prepare the chocolate cake batter according to the instructions on the box. This is usually pretty straightforward, but I’ll walk you through it just in case. Make sure your oven is preheating to the temperature specified on the cake mix box usually around 350°F (175°C). This is crucial for even baking!
- Combine Dry Ingredients: In a large mixing bowl, pour in the chocolate cake mix. Make sure there aren’t any lumps! If you find any, just whisk it gently to break them up.
- Add Wet Ingredients: Now, add the wet ingredients called for on the box. This typically includes eggs, oil (vegetable or canola works best), and water. Follow the exact measurements listed on the box for the best results.
- Mix the Batter: Using an electric mixer (handheld or stand mixer), start mixing the ingredients on low speed until they are just combined. Be careful not to overmix at this stage, as it can lead to a tough cake. Once the ingredients are combined, increase the speed to medium and mix for about 2 minutes, or until the batter is smooth and creamy.
Preparing the Peanut Butter Filling
While the cake batter is ready, let’s move on to the star of the show the peanut butter filling! This is what gives the Earthquake Cake its signature gooey and delicious center. Make sure your cream cheese is softened to room temperature; this will make it much easier to work with and prevent any lumps in the filling.
- Cream Cheese and Peanut Butter: In a separate large mixing bowl, add the softened cream cheese and creamy peanut butter. Using an electric mixer, beat these two ingredients together on medium speed until they are completely smooth and well combined. This usually takes about 2-3 minutes. Scrape down the sides of the bowl occasionally to ensure everything is evenly mixed.
- Add Powdered Sugar: Gradually add the powdered sugar to the cream cheese and peanut butter mixture, beating on low speed until it is incorporated. Be careful not to add the powdered sugar all at once, as it can create a cloud of dust! Add it in about 1/2 cup increments, mixing well after each addition.
- Add Milk and Vanilla: Pour in the milk and vanilla extract. Increase the mixer speed to medium and beat for another 1-2 minutes, or until the filling is light, fluffy, and smooth. The consistency should be thick but pourable. If the filling seems too thick, you can add a tablespoon or two more of milk until you reach the desired consistency.
Assembling the Earthquake Cake
Now comes the fun part assembling the Earthquake Cake! This is where the magic happens and the cake starts to take its unique shape. You’ll need a 9×13 inch baking pan. Grease it well with cooking spray or butter to prevent the cake from sticking.
- Pour the Cake Batter: Pour the chocolate cake batter evenly into the prepared 9×13 inch baking pan. Spread it out so that it covers the entire bottom of the pan.
- Dollop the Peanut Butter Filling: Now, using a spoon or a small ice cream scoop, dollop the peanut butter filling evenly over the top of the chocolate cake batter. Try to distribute the dollops so that they are spaced out across the entire surface of the cake. Don’t worry about making it perfect; the “earthquake” effect comes from the uneven distribution of the filling.
- Create the Swirls: Using a knife or a skewer, gently swirl the peanut butter filling into the chocolate cake batter. Don’t overmix it; you want to create a marbled effect, not completely blend the two layers together. The goal is to have pockets of peanut butter filling throughout the cake.
- Sprinkle Chocolate Chips: Sprinkle the mini chocolate chips evenly over the top of the cake. This adds a little extra chocolatey goodness and a nice texture to the finished cake.
Baking the Earthquake Cake
Alright, almost there! Now it’s time to bake the Earthquake Cake and let the magic happen in the oven. Remember that preheated oven we talked about earlier? Make sure it’s ready to go!
- Bake the Cake: Carefully place the baking pan in the preheated oven. Bake for 35-40 minutes, or until a wooden skewer inserted into the center of the cake comes out with moist crumbs attached. The cake should be set around the edges, but the center may still appear slightly soft that’s okay! That’s part of what makes it an Earthquake Cake.
- Cooling Time: Once the cake is done baking, remove it from the oven and let it cool completely in the pan. This is important because the cake needs time to set and firm up. If you try to cut into it while it’s still warm, it will be too gooey and messy. I usually let it cool for at least 2-3 hours, or even overnight.
Garnishing and Serving
The cake is cooled, and now it’s time for the final touches! This step is optional, but I think it adds a nice visual appeal to the Earthquake Cake.
- Garnish with Peanuts (Optional): If you like, sprinkle the chopped peanuts over the top of the cooled cake. This adds a little crunch and a nutty flavor that complements the peanut butter and chocolate perfectly.
- Cut and Serve: Once the cake is completely cooled, cut it into squares and serve. Be prepared for a gooey, delicious, and slightly messy experience! That’s what makes Earthquake Cake so much fun.
Tips and Variations
Here are a few extra tips and variations to make your Earthquake Cake even more amazing:
- Use Different Cake Mixes: Feel free to experiment with different cake mix flavors! Vanilla, yellow, or even red velvet cake mix would all work well with the peanut butter filling.
- Add Chocolate Frosting: For an extra decadent treat, frost the cooled cake with chocolate frosting. This will add even more chocolatey goodness and make it perfect for special occasions.
- Use Different Nut Butters: If you’re not a fan of peanut butter, you can substitute it with almond butter, cashew butter, or even sunflower seed butter.
- Add a Caramel Swirl: Drizzle caramel sauce over the top of the cake before baking for a sweet and salty twist.
- Make it Gluten-Free: Use a gluten-free chocolate cake mix to make this recipe gluten-free.
- Storage: Store leftover Earthquake Cake in an airtight container at room temperature for up to 3 days, or in the refrigerator for up to 5 days.
Enjoy!
I hope you enjoy making and eating this Peanut Butter Earthquake Cake as much as I do! It’s a fun, easy, and incredibly delicious dessert that’s sure to be a hit with everyone. Don’t be afraid to get creative and experiment with different variations to make it your own. Happy baking!
Conclusion:
Well, there you have it! This Peanut Butter Earthquake Cake is truly a showstopper, and I wholeheartedly believe it deserves a spot in your regular baking rotation. Why? Because it’s ridiculously easy to make, intensely flavorful, and guaranteed to impress anyone who takes a bite. The combination of the rich chocolate cake, the creamy peanut butter swirl, and that decadent cream cheese frosting is simply divine. It’s the kind of dessert that makes you close your eyes and savor every single mouthful.
But beyond the incredible taste, this cake is also incredibly forgiving. Don’t worry if your swirl isn’t perfect, or if the top cracks a little that’s part of the charm! It’s meant to look a little rustic and imperfect, just like an earthquake! The beauty of this recipe lies in its simplicity and the fact that it’s almost impossible to mess up. Trust me, even if you’re a novice baker, you can absolutely nail this.
And the best part? It’s incredibly versatile! While I’ve presented my favorite version, feel free to experiment and make it your own.
Serving Suggestions and Variations:
* Go Nuts! Add chopped peanuts to the batter or sprinkle them on top of the frosting for extra crunch and peanut butter flavor.
* Chocolate Overload: Drizzle melted chocolate over the frosted cake for an even more decadent treat. Use dark, milk, or white chocolate the choice is yours!
* Coffee Kick: Add a tablespoon of instant coffee granules to the cake batter to enhance the chocolate flavor.
* Ice Cream Dream: Serve a slice of this cake warm with a scoop of vanilla ice cream for the ultimate dessert experience.
* Caramel Craze: Drizzle caramel sauce over the frosting for a sweet and salty combination.
* Mini Cakes: Bake the batter in muffin tins for individual servings. Reduce the baking time accordingly.
* Frosting Fun: If you’re not a fan of cream cheese frosting, try a chocolate ganache or a simple buttercream frosting instead.
* Spice it Up: Add a pinch of cinnamon or chili powder to the cake batter for a subtle kick.
I truly believe that this Peanut Butter Earthquake Cake is a must-try for anyone who loves peanut butter and chocolate. It’s the perfect dessert for birthdays, holidays, or any occasion that calls for a little bit of indulgence. It’s also a great way to impress your friends and family with your baking skills (even if it only took you a few minutes to prepare!).
So, what are you waiting for? Gather your ingredients, preheat your oven, and get ready to bake up a storm! I promise you won’t regret it. And once you’ve tried it, I’d love to hear what you think! Share your photos and comments with me I’m always eager to see your creations and hear about your experiences. Did you make any variations? Did you serve it with ice cream? Did your family devour it in minutes? Let me know! Happy baking! I can’t wait to hear about your Peanut Butter Earthquake Cake success!
Peanut Butter Earthquake Cake: The Ultimate Recipe and Baking Guide
Gooey, decadent Peanut Butter Earthquake Cake with a rich chocolate base and a creamy peanut butter swirl. A fun and easy dessert that's sure to impress!
Ingredients
- 1 box (18.25 ounces) chocolate cake mix, plus ingredients called for on the box (usually eggs, oil, and water)
- 8 ounces cream cheese, softened
- 1 cup creamy peanut butter
- 1 cup powdered sugar
- 1/2 cup milk
- 1 teaspoon vanilla extract
- 1/2 cup mini chocolate chips
- 1/2 cup chopped peanuts, for garnish (optional)
Instructions
- Prepare Cake Batter: Preheat oven to temperature specified on cake mix box (usually 350°F/175°C). Combine dry cake mix ingredients in a large bowl. Add wet ingredients (eggs, oil, water) as directed on the box. Mix on low speed until just combined, then on medium speed for 2 minutes until smooth.
- Prepare Peanut Butter Filling: In a separate bowl, beat softened cream cheese and peanut butter on medium speed until smooth. Gradually add powdered sugar, beating on low speed until incorporated. Add milk and vanilla extract; beat on medium speed until light and fluffy. Add more milk if needed to reach desired consistency.
- Assemble the Cake: Grease a 9×13 inch baking pan. Pour chocolate cake batter into the pan. Dollop peanut butter filling evenly over the batter. Use a knife or skewer to gently swirl the filling into the batter, creating a marbled effect. Sprinkle mini chocolate chips over the top.
- Bake: Bake for 35-40 minutes, or until a wooden skewer inserted into the center comes out with moist crumbs attached.
- Cool: Let the cake cool completely in the pan (at least 2-3 hours or overnight).
- Garnish (Optional): Sprinkle chopped peanuts over the cooled cake.
- Serve: Cut into squares and serve.
Notes
- Use softened cream cheese for a smooth filling.
- Don’t overmix the cake batter.
- Don’t overmix the peanut butter filling into the cake batter; aim for a marbled effect.
- Cool the cake completely before cutting to prevent it from being too gooey.
- Experiment with different cake mix flavors, nut butters, or add-ins like caramel sauce.
- Store leftover cake in an airtight container at room temperature for up to 3 days, or in the refrigerator for up to 5 days.