
Pumpkin Spice Creamer: the mere mention of it conjures images of cozy autumn mornings, the scent of cinnamon and nutmeg swirling in the air, and the promise of a perfectly spiced cup of coffee. But what if I told you that you could ditch the store-bought versions, often laden with artificial flavors and preservatives, and create your own, incredibly delicious Pumpkin Spice Creamer right in your kitchen?
Pumpkin spice, as a flavor profile, has a surprisingly long history, drawing inspiration from the spices used in pumpkin pie since the 18th century. While the “pumpkin spice” craze is a relatively recent phenomenon, its roots are firmly planted in American culinary tradition. It’s a celebration of warmth, comfort, and the flavors we associate with harvest time.
People adore pumpkin spice for its comforting aroma and the way it transforms ordinary beverages and treats into something truly special. The blend of cinnamon, ginger, nutmeg, and cloves creates a symphony of flavors that dance on your tongue. This homemade version is particularly appealing because it allows you to control the sweetness and spice levels, tailoring it perfectly to your preferences. Plus, the creamy texture adds a luxurious touch to your morning coffee, making it a truly indulgent experience. Get ready to elevate your coffee game with this easy and delightful recipe!

Ingredients:
- 1 (14 ounce) can sweetened condensed milk
- 2 cups heavy cream
- 1 cup milk (whole milk recommended for richness, but 2% or skim will work)
- 1/2 cup pumpkin puree (not pumpkin pie filling)
- 2 tablespoons pumpkin pie spice
- 1 teaspoon vanilla extract
- Optional: 1/4 teaspoon ground cinnamon (for extra warmth)
- Optional: 1/4 teaspoon ground nutmeg (for extra depth of flavor)
- Optional: 1-2 tablespoons brown sugar (for a deeper caramel-like sweetness)
- Optional: Pinch of salt (to enhance the flavors)
Preparing the Pumpkin Spice Base
Okay, let’s get started! The beauty of this pumpkin spice creamer is how incredibly simple it is to make. No complicated cooking or fancy equipment needed. Just a few ingredients and a little bit of mixing, and you’ll have a delicious, homemade creamer that rivals anything you can buy at the store.
- Combine Sweetened Condensed Milk and Pumpkin Puree: In a medium-sized saucepan, pour in the entire can of sweetened condensed milk. This is the key to the creamer’s sweetness and rich texture. Add the pumpkin puree to the saucepan as well. Make sure you’re using pure pumpkin puree, not pumpkin pie filling, which already has spices and sugar added.
- Whisk Until Smooth: Place the saucepan over medium-low heat. Using a whisk, continuously stir the sweetened condensed milk and pumpkin puree together until they are completely combined and the mixture is smooth. This usually takes about 2-3 minutes. You want to ensure there are no lumps of pumpkin puree remaining.
- Incorporate the Pumpkin Pie Spice: Now, add the pumpkin pie spice to the mixture. This is where that classic pumpkin spice flavor comes from! Whisk the spice into the sweetened condensed milk and pumpkin puree until it’s evenly distributed. Continue to heat gently for another minute, allowing the spices to bloom and release their aroma. Be careful not to let the mixture boil.
- Add Optional Spices (Cinnamon and Nutmeg): If you’re using the optional cinnamon and nutmeg, add them now. These spices will add an extra layer of warmth and complexity to the creamer. Whisk them in thoroughly.
- Incorporate Optional Brown Sugar: If you prefer a deeper, caramel-like sweetness, add the brown sugar at this stage. Whisk until the brown sugar is fully dissolved into the mixture.
- Add Optional Salt: A tiny pinch of salt can really enhance the other flavors. If you’re using it, add it now and stir well.
- Remove from Heat: Once everything is well combined and heated through, remove the saucepan from the heat.
Cooling and Finishing the Creamer
Now that we’ve created the flavorful pumpkin spice base, it’s time to cool it down and add the remaining ingredients. This step is crucial to prevent the creamer from curdling when you add the cold dairy.
- Allow to Cool Slightly: Let the pumpkin spice mixture cool down for about 10-15 minutes. You don’t want it to be completely cold, but it shouldn’t be piping hot either. This will help prevent the heavy cream and milk from curdling when you add them.
- Add Vanilla Extract: Stir in the vanilla extract. Vanilla enhances the overall flavor profile and adds a touch of sweetness.
- Gradually Add Heavy Cream and Milk: In a separate bowl or a large measuring cup, combine the heavy cream and milk. Slowly pour the cream and milk mixture into the slightly cooled pumpkin spice base, whisking constantly. This gradual addition helps to ensure that the ingredients combine smoothly and prevents curdling.
- Whisk Until Well Combined: Continue whisking until all the ingredients are thoroughly combined and the creamer is smooth and homogenous.
Storing and Using Your Homemade Creamer
Congratulations! You’ve just made your own delicious pumpkin spice creamer. Now, let’s talk about how to store it and, most importantly, how to enjoy it!
- Transfer to an Airtight Container: Pour the creamer into a clean, airtight container. A glass jar or a plastic container with a tight-fitting lid works perfectly.
- Refrigerate for at Least 2 Hours: Refrigerate the creamer for at least 2 hours, or preferably overnight. This allows the flavors to meld together and the creamer to thicken slightly.
- Shake Well Before Using: Before each use, give the creamer a good shake. This will ensure that the ingredients are evenly distributed and the creamer is smooth.
- Enjoy in Your Favorite Coffee or Tea: Add a splash (or more!) of the pumpkin spice creamer to your favorite coffee or tea. You can also use it in lattes, cappuccinos, or even hot chocolate.
- Storage Information: The homemade pumpkin spice creamer will keep in the refrigerator for up to 7-10 days. Be sure to check for any signs of spoilage before using.
Tips and Variations:
- Adjust the Sweetness: If you prefer a less sweet creamer, you can reduce the amount of sweetened condensed milk. Alternatively, if you like it sweeter, add a little more brown sugar or a touch of maple syrup.
- Make it Dairy-Free: For a dairy-free version, substitute the heavy cream and milk with coconut cream and almond milk or oat milk. Be aware that this will slightly alter the flavor and texture.
- Spice it Up: If you want a spicier creamer, add a pinch of ground ginger or cloves to the pumpkin pie spice mixture.
- Add a Touch of Maple: For a maple-pumpkin spice flavor, add 1-2 tablespoons of pure maple syrup to the mixture.
- Make it Vegan: Use vegan sweetened condensed milk (available at many health food stores) and substitute the heavy cream and milk with plant-based alternatives like coconut cream and almond milk.
- Experiment with Extracts: Try adding a few drops of almond extract or butter extract for a unique flavor twist.
- For a Thicker Creamer: Use more heavy cream and less milk. You can also add a teaspoon of cornstarch mixed with a tablespoon of cold water to the saucepan while heating the pumpkin spice base. This will help to thicken the creamer.
- For a Thinner Creamer: Use more milk and less heavy cream.
Serving Suggestions:
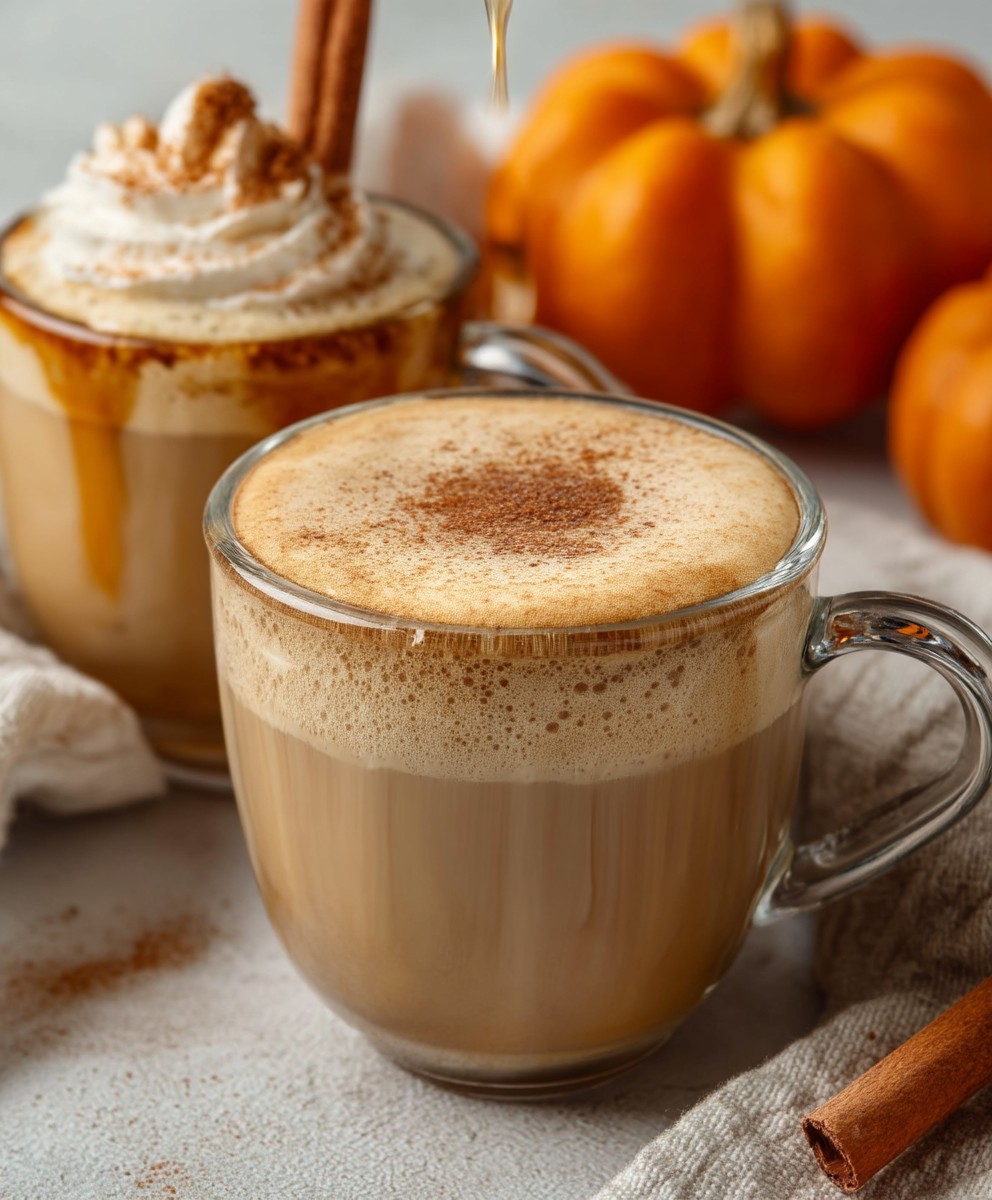
- Pumpkin Spice Latte: Add a generous amount of the creamer to your espresso or strong coffee. Top with whipped cream and a sprinkle of pumpkin pie spice.
- Pumpkin Spice Iced Coffee: Pour the creamer over ice and add your favorite cold brew coffee.
- Pumpkin Spice Hot Chocolate: Stir the creamer into hot chocolate for a cozy and comforting treat.
- Pumpkin Spice Oatmeal: Add a splash of the creamer to your oatmeal for a delicious and flavorful breakfast.
- Pumpkin Spice Pancakes or Waffles: Use the creamer in your pancake or waffle batter for a hint of pumpkin spice flavor.
I hope you enjoy this homemade pumpkin spice creamer as much as I do! It’s the perfect way to add a touch of fall flavor to your favorite beverages and treats. Happy brewing!
Conclusion:
Well, there you have it! This Pumpkin Spice Creamer recipe is truly a game-changer, and I genuinely believe it’s a must-try for anyone who loves the cozy flavors of fall. Forget those store-bought versions loaded with artificial ingredients and questionable preservatives. This homemade creamer is not only healthier but also bursting with authentic pumpkin spice goodness that will elevate your morning coffee (or afternoon tea!) to a whole new level.
Why is it a must-try? Because it’s incredibly easy to make, requiring minimal effort and readily available ingredients. You’re in complete control of the sweetness and spice levels, allowing you to customize it to your exact preferences. Plus, the aroma that fills your kitchen while it simmers is simply divine a true sensory experience that embodies the spirit of autumn.
But the best part? The taste! The creamy texture, the warm spices, the subtle sweetness of the pumpkin it all comes together in perfect harmony. It’s like a warm hug in a mug, and trust me, you’ll be reaching for it every single day.
Now, let’s talk serving suggestions and variations. While it’s absolutely perfect in coffee, don’t limit yourself! Try adding it to your chai latte for an extra layer of spice. Drizzle it over pancakes or waffles for a decadent breakfast treat. Stir it into your oatmeal for a cozy and flavorful start to your day. You can even use it as a base for a pumpkin spice milkshake the possibilities are endless!
For variations, consider adding a splash of vanilla extract for a richer flavor. If you prefer a stronger spice profile, increase the amount of cinnamon, ginger, or nutmeg. For a vegan version, simply substitute the heavy cream with coconut cream or cashew cream it works beautifully! And if you’re feeling adventurous, try adding a pinch of cardamom or cloves for a unique twist.
I’m so confident that you’ll love this recipe, and I can’t wait to hear about your experience. Seriously, ditch the store-bought stuff and give this homemade Pumpkin Spice Creamer a try. You won’t regret it!
I encourage you to experiment with different variations and find your perfect blend. Don’t be afraid to get creative and make it your own. After all, cooking should be fun and enjoyable!
Once you’ve made your batch of delicious pumpkin spice creamer, please share your creations with me! I’d love to see your photos and hear about your favorite ways to use it. Tag me on social media or leave a comment below I’m always eager to connect with fellow food lovers.
So, what are you waiting for? Gather your ingredients, put on some cozy music, and get ready to create a little bit of autumn magic in your kitchen. Happy cooking, and enjoy every sip! I hope this recipe brings you as much joy as it brings me. I know you will love this homemade version of pumpkin spice creamer. Let me know what you think!
Pumpkin Spice Creamer: Your Ultimate Guide to Fall's Favorite Flavor
Easy homemade pumpkin spice creamer for coffee, tea, and more! Rich, creamy, and bursting with fall flavors.
Ingredients
- 1 (14 ounce) can sweetened condensed milk
- 2 cups heavy cream
- 1 cup milk (whole milk recommended for richness, but 2% or skim will work)
- 1/2 cup pumpkin puree (not pumpkin pie filling)
- 2 tablespoons pumpkin pie spice
- 1 teaspoon vanilla extract
- Optional: 1/4 teaspoon ground cinnamon (for extra warmth)
- Optional: 1/4 teaspoon ground nutmeg (for extra depth of flavor)
- Optional: 1-2 tablespoons brown sugar (for a deeper caramel-like sweetness)
- Optional: Pinch of salt (to enhance the flavors)
Instructions
- Combine Sweetened Condensed Milk and Pumpkin Puree: In a medium-sized saucepan, pour in the sweetened condensed milk and add the pumpkin puree.
- Whisk Until Smooth: Place the saucepan over medium-low heat. Whisk continuously until completely combined and smooth (2-3 minutes).
- Incorporate Pumpkin Pie Spice: Add the pumpkin pie spice and whisk until evenly distributed. Heat gently for another minute, allowing the spices to bloom. Be careful not to boil.
- Add Optional Spices (Cinnamon and Nutmeg): If using, add cinnamon and nutmeg and whisk thoroughly.
- Incorporate Optional Brown Sugar: If using, add brown sugar and whisk until fully dissolved.
- Add Optional Salt: If using, add a pinch of salt and stir well.
- Remove from Heat: Once everything is well combined and heated through, remove the saucepan from the heat.
- Allow to Cool Slightly: Let the pumpkin spice mixture cool down for about 10-15 minutes.
- Add Vanilla Extract: Stir in the vanilla extract.
- Gradually Add Heavy Cream and Milk: In a separate bowl, combine the heavy cream and milk. Slowly pour the cream and milk mixture into the slightly cooled pumpkin spice base, whisking constantly.
- Whisk Until Well Combined: Continue whisking until all the ingredients are thoroughly combined and the creamer is smooth and homogenous.
- Transfer to an Airtight Container: Pour the creamer into a clean, airtight container.
- Refrigerate for at Least 2 Hours: Refrigerate the creamer for at least 2 hours, or preferably overnight.
- Shake Well Before Using: Before each use, give the creamer a good shake.
- Enjoy: Add a splash of the pumpkin spice creamer to your favorite coffee or tea.
- Storage: The homemade pumpkin spice creamer will keep in the refrigerator for up to 7-10 days.
Notes
- Adjust sweetness to taste by adding more or less brown sugar or maple syrup.
- For a dairy-free version, substitute heavy cream and milk with coconut cream and almond milk or oat milk.
- Spice it up by adding a pinch of ground ginger or cloves.
- For a thicker creamer, use more heavy cream and less milk, or add a teaspoon of cornstarch mixed with a tablespoon of cold water while heating the pumpkin spice base.
- For a thinner creamer, use more milk and less heavy cream.
- Shake well before each use.