
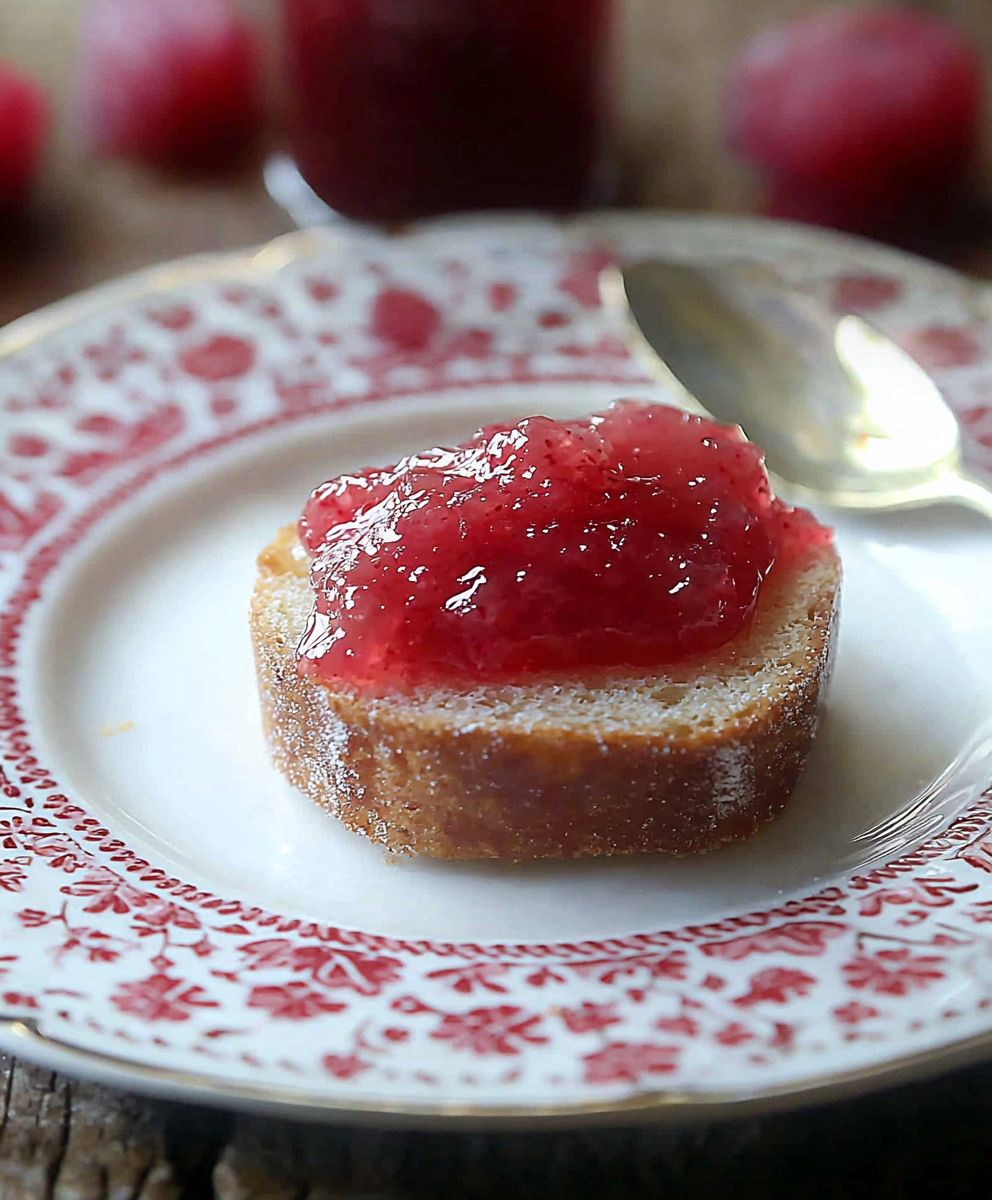
Rhubarb Jam: that vibrant, tangy-sweet spread that instantly elevates your morning toast or scones. Have you ever tasted something so simple, yet so utterly captivating? I remember the first time I tried it, slathered generously on a warm biscuit at my grandmother’s house. The bright pink hue and the unique flavor profile were unlike anything I’d ever experienced, and I was instantly hooked.
While rhubarb is often mistaken for a fruit, it’s actually a vegetable! Its use in jams and desserts dates back centuries, particularly in regions with cooler climates where rhubarb thrives. It was often used as a substitute for fruits that were harder to come by. This makes rhubarb jam not just a delicious treat, but also a little piece of culinary history.
People adore rhubarb jam for its delightful balance of tartness and sweetness. It’s not cloyingly sweet like some jams can be, but rather offers a refreshing zing that awakens the taste buds. The slightly chunky texture, achieved through careful cooking, adds another layer of appeal. Plus, making your own rhubarb jam is surprisingly easy and rewarding. The vibrant color and unique flavor make it a wonderful homemade gift or a special treat to enjoy yourself. So, let’s get started and create a batch of this irresistible preserve!

Ingredients:
- 4 lbs fresh rhubarb, washed and trimmed
- 6 cups granulated sugar
- 1/2 cup water
- 1 lemon, juiced
- 1/4 teaspoon ground ginger (optional, but I highly recommend it!)
- Pinch of salt
Preparing the Rhubarb:
Okay, let’s get started! First things first, we need to prep our rhubarb. This is a pretty simple process, but it’s important to get it right for the best jam consistency.
- Wash the Rhubarb: Give your rhubarb stalks a good rinse under cold water. Make sure to remove any dirt or debris. Rhubarb grows close to the ground, so it can sometimes be a bit gritty.
- Trim the Ends: Chop off the very ends of the stalks, both the top and the bottom. These parts can be a little tough and stringy, and we want our jam to be nice and smooth.
- Chop the Rhubarb: Now, chop the rhubarb into 1/2-inch to 1-inch pieces. The size doesn’t have to be exact, but try to keep them relatively uniform so they cook evenly. I usually aim for around 3/4-inch.
Cooking the Jam:
Now for the fun part cooking the jam! This is where the magic happens, and the rhubarb transforms into a sweet and tangy delight. Be patient, and don’t rush the process. The key to a good jam is allowing it to cook down properly.
- Combine Ingredients: In a large, heavy-bottomed pot (stainless steel or enamel-coated cast iron is ideal), combine the chopped rhubarb, sugar, water, lemon juice, ginger (if using), and salt. Give everything a good stir to make sure the sugar is evenly distributed.
- Bring to a Boil: Place the pot over medium-high heat and bring the mixture to a rolling boil. A “rolling boil” means that the mixture continues to boil even when you stir it.
- Cook and Stir: Once the mixture is boiling, reduce the heat to medium (or medium-low, depending on your stove) so that the jam continues to simmer gently. Stir frequently to prevent sticking and burning. This is crucial! Burnt jam is no fun.
- Skim the Foam: As the jam cooks, you’ll notice some foam forming on the surface. Use a spoon to skim off this foam and discard it. This will help to create a clearer, more beautiful jam.
- Test for Doneness: This is the most important step! The cooking time will vary depending on the heat of your stove and the moisture content of your rhubarb, but it usually takes around 20-40 minutes. To test for doneness, place a small spoonful of jam on a chilled plate (I usually put a plate in the freezer before I start cooking). Let it sit for about 30 seconds, then gently push it with your finger. If the jam wrinkles and forms a skin, it’s ready. If it’s still runny, continue cooking for a few more minutes and test again. Another method is to use a candy thermometer. The jam is ready when it reaches 220°F (104°C). Remember to place the thermometer in the jam without touching the bottom of the pot for an accurate reading.
Canning the Jam (Optional, but Recommended):
If you want to store your rhubarb jam for longer than a few weeks, canning is the way to go. It’s a safe and effective way to preserve your jam and enjoy it all year round. If you don’t want to can it, you can store it in the refrigerator for up to 3 weeks.
- Prepare Jars and Lids: Wash your canning jars and lids in hot, soapy water. Rinse them thoroughly. Sterilize the jars by placing them in a boiling water bath for 10 minutes. Keep the jars hot until you’re ready to fill them. You can also sterilize them in the dishwasher if it has a sterilize setting. Place the lids in a small saucepan and simmer them in hot water (not boiling) to soften the sealing compound.
- Fill the Jars: Ladle the hot jam into the hot jars, leaving 1/4 inch of headspace (the space between the top of the jam and the top of the jar). Use a clean, damp cloth to wipe the rims of the jars to remove any spills or drips.
- Seal the Jars: Place the lids on the jars and screw on the bands until they are fingertip tight (not too tight, just snug).
- Process in a Boiling Water Bath: Place the filled jars in a boiling water bath canner. Make sure the jars are completely covered with water (at least 1 inch above the tops of the jars). Bring the water to a rolling boil and process for 10 minutes for half-pint (8 oz) jars and 15 minutes for pint (16 oz) jars. Adjust processing time for altitude.
- Cool and Check Seals: Turn off the heat and let the jars sit in the canner for 5 minutes before removing them. Carefully remove the jars from the canner and place them on a towel-lined surface to cool completely. As the jars cool, you should hear a “pop” sound as the lids seal. After the jars have cooled completely (usually 12-24 hours), check the seals by pressing down on the center of each lid. If the lid doesn’t flex or pop back up, it’s sealed properly. If the lid flexes, the jar didn’t seal and should be refrigerated and used within a few weeks.
- Store the Jars: Store your sealed jars of rhubarb jam in a cool, dark place. Properly canned jam will last for at least a year, and often longer.
No-Canning Option (Refrigerated Storage):
If you prefer not to can your jam, that’s perfectly fine! You can still enjoy your homemade rhubarb jam, just with a shorter storage time. Here’s how to store it in the refrigerator:
- Cool the Jam: Allow the jam to cool slightly after cooking.
- Transfer to Jars or Containers: Pour the jam into clean jars or airtight containers.
- Refrigerate: Store the jam in the refrigerator for up to 3 weeks.
Tips and Tricks for Perfect Rhubarb Jam:
Here are a few extra tips and tricks I’ve learned over the years to help you make the best rhubarb jam possible:
- Use Fresh Rhubarb: The fresher the rhubarb, the better the flavor of your jam. Look for firm, crisp stalks with a vibrant pink or red color.
- Adjust the Sugar: Rhubarb can be quite tart, so the amount of sugar you need will depend on your personal preference and the tartness of your rhubarb. Start with the amount specified in the recipe and adjust to taste. You can always add more sugar, but you can’t take it away!
- Don’t Overcook: Overcooked jam can become too thick and sticky. Be sure to test for doneness regularly and remove the jam from the heat as soon as it’s ready.
- Add Other Fruits: Get creative and add other fruits to your rhubarb jam! Strawberries, raspberries, and ginger all pair well with rhubarb.
- Use a Heavy-Bottomed Pot: A heavy-bottomed pot will help to prevent the jam from sticking and burning.
- Stir Frequently: Stirring the jam frequently will also help to prevent sticking and burning, and it will ensure that the sugar dissolves evenly.
- Be Patient: Making jam takes time, so be patient and don’t rush the process. The results are well worth the effort!
Serving Suggestions:
Now that you’ve made your delicious rhubarb jam, it’s time to enjoy it! Here are a few of my favorite ways to serve it:
- On Toast or Biscuits: This is the classic way to enjoy jam, and it’s always a winner.
- With Scones or Muffins: Rhubarb jam is the perfect accompaniment to scones or muffins.
- As a Filling for Cakes or Pastries: Use rhubarb jam as a filling for cakes, pastries, or tarts.
- With Yogurt or Oatmeal: Add a spoonful of rhubarb jam to yogurt or oatmeal for a sweet and tangy breakfast.
- As a Glaze for Meats: Rhubarb jam can also be used as a glaze for meats, such as pork or chicken.
- With Cheese and Crackers: Serve rhubarb jam with cheese and crackers for a sophisticated appetizer.
Troubleshooting:
Sometimes, things don’t go exactly as planned
Conclusion:
And there you have it! I truly believe this Rhubarb Jam recipe is a must-try for anyone who loves a burst of tangy-sweet flavor. It’s not just a jam; it’s a taste of sunshine bottled up, ready to brighten your mornings or add a special touch to your afternoon tea. The vibrant color alone is enough to make you smile, and the taste? Well, that’s just pure magic.
Why is it a must-try? Because it’s incredibly easy to make, even if you’ve never made jam before. The ingredients are simple and readily available, especially during rhubarb season. Plus, the satisfaction of creating something so delicious from scratch is simply unbeatable. Forget store-bought jam filled with artificial flavors and preservatives; this homemade version is bursting with fresh, natural goodness. It’s a taste of home, a taste of tradition, and a taste of pure, unadulterated deliciousness.
But the best part? The versatility! While it’s absolutely divine spread on a warm, crusty piece of bread or a freshly baked scone, the possibilities are endless. Imagine swirling a spoonful into your morning yogurt or oatmeal for a tangy twist. Or, use it as a glaze for roasted chicken or pork for a sweet and savory delight. It’s also fantastic as a filling for thumbprint cookies or a topping for cheesecake. For a truly decadent treat, try layering it with whipped cream and crumbled meringue for a quick and easy Eton Mess.
If you’re feeling adventurous, you can easily adapt this recipe to your own taste. Add a pinch of ginger or a dash of cinnamon for a warm, spicy note. A squeeze of lemon juice will enhance the tartness and brighten the flavor even further. For a more sophisticated twist, try adding a splash of elderflower liqueur or a few drops of rosewater. And if you’re a fan of heat, a tiny pinch of chili flakes will add a subtle kick that complements the sweetness perfectly.
Serving suggestions? Oh, where do I even begin? Think beyond the classic toast and scones. This Rhubarb Jam is incredible with cheese try it with a sharp cheddar or a creamy brie for a delightful contrast of flavors. It’s also a fantastic accompaniment to grilled meats, adding a touch of sweetness and acidity that cuts through the richness. And don’t forget about desserts! Use it as a filling for cakes, tarts, or even homemade ice cream. The possibilities are truly endless.
I’m so excited for you to try this recipe and experience the joy of homemade jam. It’s a simple pleasure that can bring so much happiness. So, gather your ingredients, put on some music, and get ready to create something truly special.
I’m confident that you’ll love this Rhubarb Jam as much as I do. And I can’t wait to hear about your experience! Please, please, please try this recipe and then come back and share your thoughts in the comments below. Did you make any variations? What did you serve it with? What did your family and friends think? I’m eager to hear all about it! Happy jamming!
Rhubarb Jam: The Ultimate Guide to Making Delicious Homemade Jam
Tangy and sweet homemade rhubarb jam, perfect on toast, scones, or as a filling for baked goods. Easy to make and can be canned for long-term storage.
Ingredients
- 4 lbs fresh rhubarb, washed and trimmed
- 6 cups granulated sugar
- 1/2 cup water
- 1 lemon, juiced
- 1/4 teaspoon ground ginger (optional)
- Pinch of salt
Instructions
- Prepare Rhubarb: Wash rhubarb, trim ends, and chop into 1/2-inch to 1-inch pieces.
- Combine Ingredients: In a large, heavy-bottomed pot, combine rhubarb, sugar, water, lemon juice, ginger (if using), and salt. Stir well.
- Bring to a Boil: Bring the mixture to a rolling boil over medium-high heat.
- Cook and Stir: Reduce heat to medium (or medium-low) and simmer gently, stirring frequently to prevent sticking.
- Skim the Foam: Skim off any foam that forms on the surface.
- Test for Doneness: After 20-40 minutes, test for doneness by placing a spoonful of jam on a chilled plate. If it wrinkles when pushed, it’s ready. Alternatively, use a candy thermometer; the jam is ready at 220°F (104°C).
- Canning (Optional):
- Sterilize jars and lids.
- Ladle hot jam into hot jars, leaving 1/4 inch headspace.
- Wipe rims, place lids on jars, and screw on bands fingertip tight.
- Process in a boiling water bath for 10 minutes (half-pint jars) or 15 minutes (pint jars), adjusting for altitude.
- Turn off heat, let jars sit in canner for 5 minutes, then remove and cool completely.
- Check seals after cooling. Store in a cool, dark place.
- No-Canning Option (Refrigerated Storage): Cool jam slightly, transfer to clean jars or containers, and refrigerate for up to 3 weeks.
Notes
- Use fresh rhubarb for the best flavor.
- Adjust sugar to taste based on the tartness of the rhubarb.
- Don’t overcook the jam.
- A heavy-bottomed pot is recommended to prevent sticking.
- Stir frequently during cooking.
- Optional additions: Strawberries, raspberries, or more ginger.