
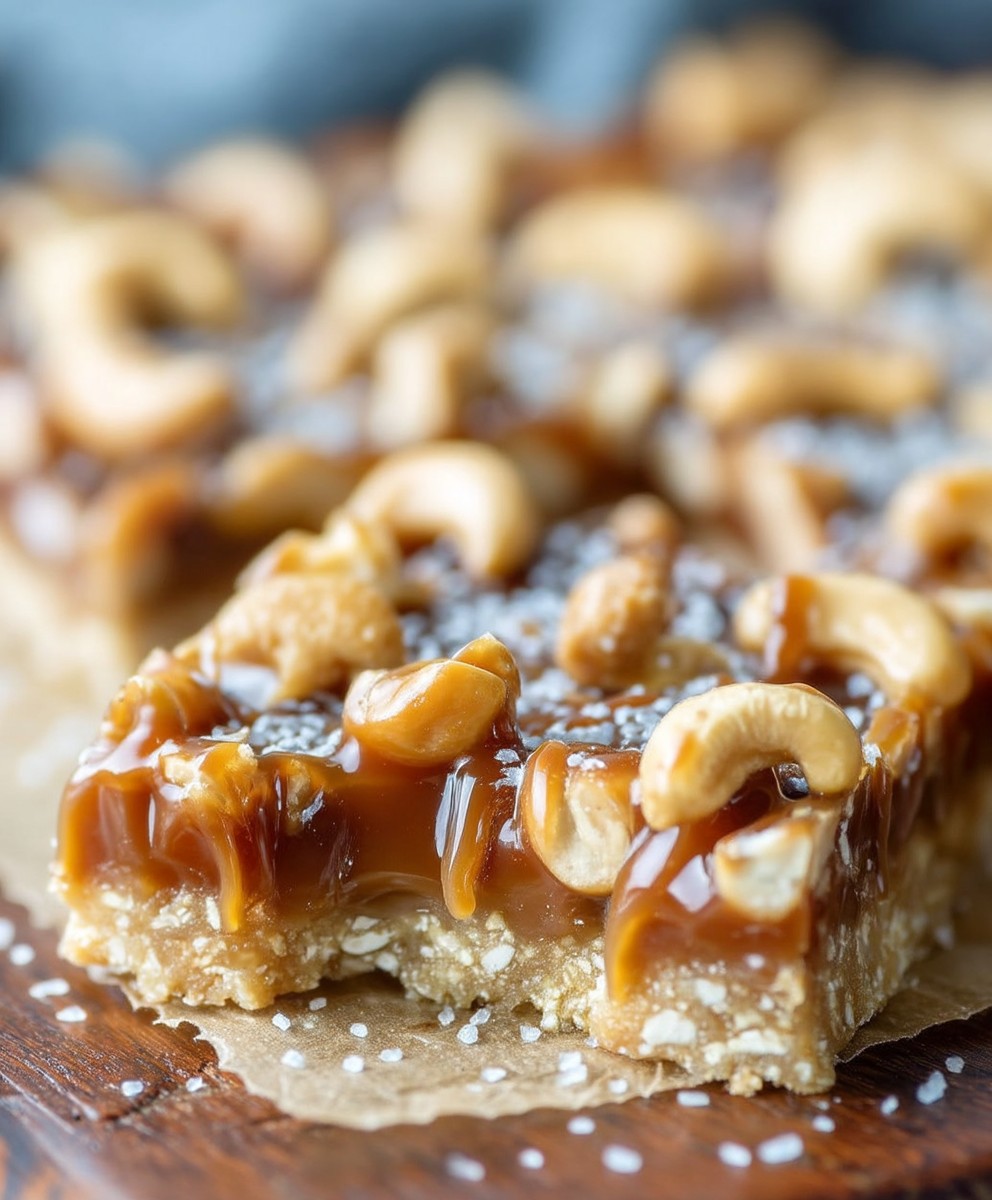
Salted Caramel Cashew Bars: Prepare to be utterly captivated by these decadent treats! Imagine sinking your teeth into a symphony of textures a buttery, crumbly base, a chewy, luscious salted caramel center, and the satisfying crunch of roasted cashews. These aren’t just bars; they’re an experience, a delightful journey for your taste buds that will leave you craving more.
While the exact origins of salted caramel are debated, its modern resurgence can be traced back to French pastry chefs who daringly combined sweet caramel with the contrasting saltiness. This ingenious pairing quickly gained popularity worldwide, becoming a beloved flavor profile in everything from chocolates to ice cream. The addition of cashews, known for their creamy texture and subtly sweet flavor, elevates these bars to a whole new level of indulgence.
People adore Salted Caramel Cashew Bars for a multitude of reasons. The interplay of sweet and salty is undeniably addictive, while the varying textures provide a delightful sensory experience. They’re also incredibly convenient perfect for a quick dessert, a satisfying afternoon snack, or a thoughtful homemade gift. Plus, let’s be honest, who can resist the allure of homemade caramel? Get ready to create a batch of these irresistible bars and watch them disappear in minutes!

Ingredients:
- For the Crust:
- 1 1/2 cups all-purpose flour
- 1/2 cup (1 stick) unsalted butter, cold and cubed
- 1/4 cup granulated sugar
- 1/4 teaspoon salt
- 4-6 tablespoons ice water
- For the Caramel:
- 1 cup granulated sugar
- 1/4 cup water
- 1/2 cup (1 stick) unsalted butter, cut into pieces
- 1/2 cup heavy cream
- 1 teaspoon vanilla extract
- 1/2 teaspoon sea salt, or to taste
- For the Cashew Topping:
- 2 cups roasted cashews, coarsely chopped
- 2 tablespoons unsalted butter
- 2 tablespoons brown sugar, packed
- 1/4 teaspoon sea salt
Preparing the Crust:
- In a large bowl, whisk together the flour, sugar, and salt.
- Cut in the cold butter using a pastry blender or your fingertips until the mixture resembles coarse crumbs. The smaller the butter pieces, the flakier the crust will be, so don’t overmix! You want to see small bits of butter throughout the flour mixture.
- Gradually add the ice water, one tablespoon at a time, mixing gently after each addition. Stop adding water when the dough just comes together. You don’t want a sticky dough, just one that holds its shape when pressed. I usually start with 4 tablespoons and add more if needed.
- Form the dough into a disc, wrap it in plastic wrap, and refrigerate for at least 30 minutes. This chilling time is crucial as it allows the gluten to relax, resulting in a tender crust.
- Preheat your oven to 350°F (175°C).
- On a lightly floured surface, roll out the dough to fit a 9×13 inch baking pan. If the dough is sticking, add a little more flour to your surface. Try to roll it out evenly so the crust bakes uniformly.
- Carefully transfer the dough to the baking pan and press it into the bottom and up the sides. Use a fork to prick the bottom of the crust several times. This prevents the crust from puffing up during baking.
- Bake the crust for 18-20 minutes, or until lightly golden brown. Keep a close eye on it, as oven temperatures can vary. You want it to be cooked through but not overly browned.
- Let the crust cool completely before adding the caramel. This is important because adding the hot caramel to a hot crust could make the crust soggy.
Making the Salted Caramel:
- In a medium saucepan, combine the granulated sugar and water.
- Cook over medium heat, without stirring, until the sugar dissolves and turns into a deep amber color. This process requires patience. Don’t stir the mixture, as this can cause the sugar to crystallize. You can gently swirl the pan if needed to ensure even heating.
- Once the caramel is a deep amber color, remove the saucepan from the heat and carefully whisk in the butter until melted and smooth. Be careful, as the mixture will bubble vigorously when you add the butter.
- Slowly pour in the heavy cream, whisking constantly. The mixture will bubble up again, so be prepared.
- Return the saucepan to low heat and cook, stirring constantly, for 1-2 minutes, or until the caramel is smooth and thickened. This step ensures that the caramel is properly emulsified and won’t separate later.
- Remove from heat and stir in the vanilla extract and sea salt. Taste and adjust the salt to your liking. I like a pronounced salty flavor, but you can reduce the amount if you prefer.
- Pour the caramel evenly over the cooled crust.
Preparing the Cashew Topping:
- In a medium skillet, melt the butter over medium heat.
- Add the brown sugar and salt and cook, stirring constantly, until the sugar is melted and the mixture is smooth.
- Add the chopped cashews and stir to coat them evenly with the butter-sugar mixture.
- Cook for 2-3 minutes, stirring frequently, until the cashews are lightly toasted and fragrant. Be careful not to burn the cashews.
- Immediately sprinkle the cashew mixture evenly over the caramel layer.
Cooling and Cutting:
- Let the bars cool completely at room temperature. This will take several hours. The caramel needs time to set properly.
- For cleaner cuts, refrigerate the bars for at least 1 hour before cutting. This will firm up the caramel and make it easier to slice.
- Use a sharp knife to cut the bars into squares or rectangles. You may need to wipe the knife clean between cuts to prevent the caramel from sticking.
- Store the bars in an airtight container at room temperature for up to 3 days, or in the refrigerator for up to a week.
Tips for Success:
- Use cold butter for the crust: Cold butter is essential for creating a flaky crust. The cold butter creates pockets of steam as it bakes, resulting in layers of flaky dough.
- Don’t overmix the crust dough: Overmixing develops the gluten in the flour, which can result in a tough crust. Mix just until the dough comes together.
- Use a heavy-bottomed saucepan for the caramel: A heavy-bottomed saucepan will help to distribute the heat evenly and prevent the caramel from burning.
- Don’t stir the sugar while it’s caramelizing: Stirring can cause the sugar to crystallize. You can gently swirl the pan if needed to ensure even heating.
- Be careful when adding the butter and cream to the caramel: The mixture will bubble vigorously when you add these ingredients, so be prepared.
- Let the bars cool completely before cutting: This will allow the caramel to set properly and make it easier to slice.
- Add a sprinkle of flaky sea salt on top after cutting: This adds a nice visual appeal and enhances the salty-sweet flavor.
Variations:
- Use different nuts: You can substitute other nuts for the cashews, such as pecans, walnuts, or almonds.
- Add chocolate: Drizzle melted chocolate over the bars after they have cooled.
- Add spices: Add a pinch of cinnamon or nutmeg to the crust or caramel for a warm, spiced flavor.
- Make it gluten-free: Use a gluten-free flour blend for the crust.
Conclusion:
These Salted Caramel Cashew Bars are truly something special, and I wholeheartedly believe you need to experience them for yourself! From the satisfying crunch of the cashew base to the gooey, decadent salted caramel swirl, every bite is an explosion of textures and flavors that will leave you craving more. They’re surprisingly easy to make, requiring no fancy equipment or complicated techniques, making them the perfect treat for both seasoned bakers and kitchen novices alike. Seriously, if you’re looking for a dessert that’s guaranteed to impress, this is it.
But what makes these bars a must-try? It’s the perfect balance of sweet and salty, the rich caramel notes dancing with the earthy cashews, all held together by a buttery, crumbly base. They’re not overly sweet, which means you can indulge without feeling guilty (well, maybe just a little!). And the best part? They’re incredibly versatile.
Looking for serving suggestions? These bars are fantastic on their own, of course, but they also pair beautifully with a scoop of vanilla ice cream for an extra decadent dessert. Try crumbling them over a warm brownie sundae for an added layer of texture and flavor. Or, for a truly sophisticated treat, serve them alongside a strong cup of coffee or a glass of dessert wine.
And if you’re feeling adventurous, there are plenty of ways to customize this recipe to your liking. Swap out the cashews for pecans or walnuts for a different nutty flavor profile. Add a sprinkle of sea salt on top for an extra burst of saltiness. Drizzle with melted dark chocolate for an even richer, more indulgent treat. You could even add a layer of chopped dates or dried cranberries to the base for a chewy, fruity twist. The possibilities are endless!
Here are a few more ideas to get your creative juices flowing:
* Chocolate Chunk Addition: Fold in some dark chocolate chunks into the cashew base for a chocolatey surprise.
* Espresso Infusion: Add a teaspoon of instant espresso powder to the caramel sauce for a mocha-flavored delight.
* Spice It Up: A pinch of cayenne pepper in the caramel adds a subtle kick that complements the sweetness perfectly.
* Nut Butter Swirl: Swirl in a tablespoon of your favorite nut butter (peanut, almond, or cashew) into the caramel for an extra layer of flavor and richness.
* Pretzel Crunch: Crush some pretzels and sprinkle them on top of the bars before baking for a salty and crunchy contrast.
I’m so confident that you’ll love these Salted Caramel Cashew Bars that I urge you to give them a try. Don’t be intimidated by the caramel it’s easier than you think! Follow the recipe carefully, and you’ll be rewarded with a batch of irresistible bars that will disappear in no time.
Once you’ve made them, I’d love to hear about your experience! Did you make any variations? What did you think of the flavor combination? Share your photos and comments on social media using #SaltedCaramelCashewBars so I can see your creations. I can’t wait to see what you come up with! Happy baking!
Salted Caramel Cashew Bars: The Ultimate Sweet & Salty Treat
Buttery shortbread crust topped with luscious homemade salted caramel and crunchy, toasted cashews. These Salted Caramel Cashew Bars are an irresistible treat!
Ingredients
- 1 1/2 cups all-purpose flour
- 1/2 cup (1 stick) unsalted butter, cold and cubed
- 1/4 cup granulated sugar
- 1/4 teaspoon salt
- 4-6 tablespoons ice water
- 1 cup granulated sugar
- 1/4 cup water
- 1/2 cup (1 stick) unsalted butter, cut into pieces
- 1/2 cup heavy cream
- 1 teaspoon vanilla extract
- 1/2 teaspoon sea salt, or to taste
- 2 cups roasted cashews, coarsely chopped
- 2 tablespoons unsalted butter
- 2 tablespoons brown sugar, packed
- 1/4 teaspoon sea salt
Instructions
- In a large bowl, whisk together the flour, sugar, and salt.
- Cut in the cold butter using a pastry blender or your fingertips until the mixture resembles coarse crumbs. The smaller the butter pieces, the flakier the crust will be, so don’t overmix! You want to see small bits of butter throughout the flour mixture.
- Gradually add the ice water, one tablespoon at a time, mixing gently after each addition. Stop adding water when the dough just comes together. You don’t want a sticky dough, just one that holds its shape when pressed. I usually start with 4 tablespoons and add more if needed.
- Form the dough into a disc, wrap it in plastic wrap, and refrigerate for at least 30 minutes. This chilling time is crucial as it allows the gluten to relax, resulting in a tender crust.
- Preheat your oven to 350°F (175°C).
- On a lightly floured surface, roll out the dough to fit a 9×13 inch baking pan. If the dough is sticking, add a little more flour to your surface. Try to roll it out evenly so the crust bakes uniformly.
- Carefully transfer the dough to the baking pan and press it into the bottom and up the sides. Use a fork to prick the bottom of the crust several times. This prevents the crust from puffing up during baking.
- Bake the crust for 18-20 minutes, or until lightly golden brown. Keep a close eye on it, as oven temperatures can vary. You want it to be cooked through but not overly browned.
- Let the crust cool completely before adding the caramel. This is important because adding the hot caramel to a hot crust could make the crust soggy.
- In a medium saucepan, combine the granulated sugar and water.
- Cook over medium heat, without stirring, until the sugar dissolves and turns into a deep amber color. This process requires patience. Don’t stir the mixture, as this can cause the sugar to crystallize. You can gently swirl the pan if needed to ensure even heating.
- Once the caramel is a deep amber color, remove the saucepan from the heat and carefully whisk in the butter until melted and smooth. Be careful, as the mixture will bubble vigorously when you add the butter.
- Slowly pour in the heavy cream, whisking constantly. The mixture will bubble up again, so be prepared.
- Return the saucepan to low heat and cook, stirring constantly, for 1-2 minutes, or until the caramel is smooth and thickened. This step ensures that the caramel is properly emulsified and won’t separate later.
- Remove from heat and stir in the vanilla extract and sea salt. Taste and adjust the salt to your liking. I like a pronounced salty flavor, but you can reduce the amount if you prefer.
- Pour the caramel evenly over the cooled crust.
- In a medium skillet, melt the butter over medium heat.
- Add the brown sugar and salt and cook, stirring constantly, until the sugar is melted and the mixture is smooth.
- Add the chopped cashews and stir to coat them evenly with the butter-sugar mixture.
- Cook for 2-3 minutes, stirring frequently, until the cashews are lightly toasted and fragrant. Be careful not to burn the cashews.
- Immediately sprinkle the cashew mixture evenly over the caramel layer.
- Let the bars cool completely at room temperature. This will take several hours. The caramel needs time to set properly.
- For cleaner cuts, refrigerate the bars for at least 1 hour before cutting. This will firm up the caramel and make it easier to slice.
- Use a sharp knife to cut the bars into squares or rectangles. You may need to wipe the knife clean between cuts to prevent the caramel from sticking.
- Store the bars in an airtight container at room temperature for up to 3 days, or in the refrigerator for up to a week.
Notes
- Use cold butter for the crust: Cold butter is essential for creating a flaky crust. The cold butter creates pockets of steam as it bakes, resulting in layers of flaky dough.
- Don’t overmix the crust dough: Overmixing develops the gluten in the flour, which can result in a tough crust. Mix just until the dough comes together.
- Use a heavy-bottomed saucepan for the caramel: A heavy-bottomed saucepan will help to distribute the heat evenly and prevent the caramel from burning.
- Don’t stir the sugar while it’s caramelizing: Stirring can cause the sugar to crystallize. You can gently swirl the pan if needed to ensure even heating.
- Be careful when adding the butter and cream to the caramel: The mixture will bubble vigorously when you add these ingredients, so be prepared.
- Let the bars cool completely before cutting: This will allow the caramel to set properly and make it easier to slice.
- Add a sprinkle of flaky sea salt on top after cutting: This adds a nice visual appeal and enhances the salty-sweet flavor.