
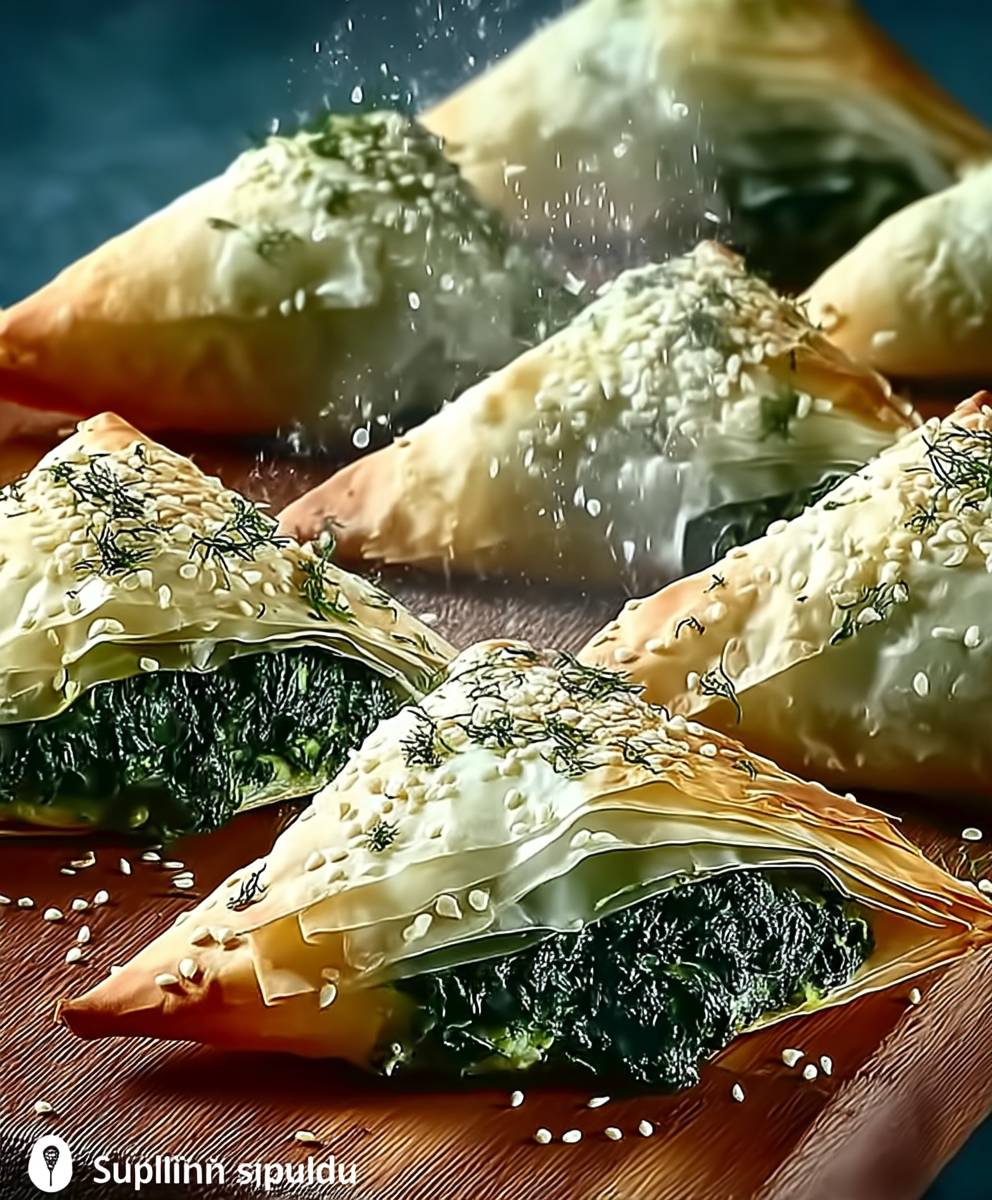
Spanakopita Triangles: These aren’t just a snack; they’re a little piece of Greek sunshine baked into flaky, golden perfection! Imagine biting into layers of crispy phyllo dough, giving way to a savory, creamy filling of spinach and feta cheese. It’s a flavor explosion that will transport you straight to a taverna overlooking the Aegean Sea.
Spanakopita, in its various forms, has been a staple in Greek cuisine for centuries. While the exact origins are shrouded in history, spinach pies were likely enjoyed in ancient Greece, evolving over time into the beloved dish we know today. Its more than just food; it’s a symbol of Greek hospitality and family gatherings, often shared during celebrations and festive occasions.
What makes Spanakopita Triangles so irresistible? It’s the perfect balance of textures and tastes. The delicate crunch of the phyllo contrasts beautifully with the soft, flavorful filling. The salty feta cheese complements the earthy spinach, creating a symphony of flavors that dance on your palate. Plus, these individual triangles are incredibly convenient perfect for appetizers, lunchboxes, or a quick and satisfying snack. I find that once I start eating them, it’s hard to stop!

Ingredients:
- 1 pound phyllo dough, thawed overnight in the refrigerator
- 1/2 cup olive oil, plus more for brushing
- 1 large onion, finely chopped
- 2 cloves garlic, minced
- 1 pound fresh spinach, thoroughly washed and chopped
- 1/2 cup chopped fresh dill
- 1/4 cup chopped fresh parsley
- 4 large eggs, lightly beaten
- 1 pound feta cheese, crumbled
- 1/2 cup ricotta cheese
- 1/4 cup grated Parmesan cheese
- 1/4 teaspoon ground nutmeg
- Salt and freshly ground black pepper to taste
Preparing the Spinach Filling
Okay, let’s get started with the heart of our spanakopita the delicious spinach filling! This is where all the flavor comes from, so we want to make sure we do it right. Don’t worry, it’s easier than it sounds!
- Sauté the Aromatics: In a large skillet, heat 2 tablespoons of olive oil over medium heat. Add the chopped onion and cook until softened and translucent, about 5-7 minutes. You don’t want them to brown, just become nice and tender. Then, add the minced garlic and cook for another minute until fragrant. Be careful not to burn the garlic, as it can become bitter.
- Wilt the Spinach: Add the chopped spinach to the skillet in batches. It will seem like a lot at first, but it wilts down considerably. Cook, stirring frequently, until all the spinach is wilted and tender. This usually takes about 5-10 minutes. If there’s excess moisture in the pan, cook it off by increasing the heat slightly and stirring until the liquid evaporates. You don’t want a soggy filling!
- Cool the Spinach Mixture: Remove the skillet from the heat and transfer the spinach mixture to a large bowl. Let it cool slightly before proceeding. This is important because you don’t want to cook the eggs when you add them later.
- Add the Herbs and Cheeses: Once the spinach mixture has cooled a bit, add the chopped dill, parsley, crumbled feta cheese, ricotta cheese, and grated Parmesan cheese to the bowl.
- Incorporate the Eggs and Season: Pour the lightly beaten eggs into the bowl. Add the ground nutmeg, salt, and pepper. Mix everything together thoroughly until well combined. Taste the filling and adjust the seasoning as needed. Remember that feta cheese can be quite salty, so be careful not to over-salt. I usually add a pinch more pepper than salt.
Assembling the Spanakopita Triangles
Now for the fun part assembling our spanakopita triangles! This is where a little patience comes in handy, but trust me, the end result is worth it. We’ll be working with phyllo dough, which can be a bit delicate, so handle it with care.
- Prepare Your Workspace: Preheat your oven to 375°F (190°C). Lightly grease a baking sheet with olive oil. Have a clean, dry surface to work on. I like to use a large cutting board.
- Unwrap the Phyllo Dough: Carefully unwrap the phyllo dough and lay it flat on your work surface. Keep the stack of phyllo dough covered with a damp (not wet!) kitchen towel to prevent it from drying out. Phyllo dries out very quickly, and dry phyllo will crack and be difficult to work with.
- Layer the Phyllo: Take one sheet of phyllo dough and place it on your work surface. Brush it lightly with olive oil. Place another sheet of phyllo on top of the first and brush it with olive oil again. Repeat this process until you have a stack of about 6-8 sheets of phyllo dough. The more layers, the flakier your spanakopita will be!
- Cut into Strips: Using a sharp knife or pizza cutter, cut the stack of phyllo dough lengthwise into strips about 2-3 inches wide. The exact width isn’t crucial, but try to keep them relatively uniform.
- Add the Filling: Place a spoonful (about 1-2 tablespoons) of the spinach filling at the bottom of each strip of phyllo dough.
- Fold into Triangles: Fold the bottom corner of the phyllo strip over the filling to form a triangle. Continue folding the triangle up the strip, alternating sides, until you reach the end. It’s like folding a flag! Try to keep the filling enclosed as you fold.
- Place on Baking Sheet: Place the assembled spanakopita triangles on the prepared baking sheet, seam-side down.
- Brush with Olive Oil: Brush the tops of the spanakopita triangles generously with olive oil. This will help them brown beautifully in the oven.
Baking the Spanakopita Triangles
Almost there! Now it’s time to bake our spanakopita triangles until they’re golden brown and crispy. The aroma that fills your kitchen will be absolutely irresistible!
- Bake: Place the baking sheet in the preheated oven and bake for 20-25 minutes, or until the spanakopita triangles are golden brown and crispy. Keep an eye on them, as baking times may vary depending on your oven. If they start to brown too quickly, you can loosely tent them with foil.
- Cool Slightly: Remove the baking sheet from the oven and let the spanakopita triangles cool slightly on the baking sheet before serving. This will help them firm up a bit.
- Serve and Enjoy!: Serve the spanakopita triangles warm or at room temperature. They’re delicious as an appetizer, snack, or even a light meal. Enjoy! They are also great the next day.
Tips for Success
Here are a few extra tips to help you make the perfect spanakopita triangles:
- Thaw the Phyllo Dough Properly: Make sure to thaw the phyllo dough overnight in the refrigerator. Don’t try to thaw it at room temperature, as this can cause it to become sticky and difficult to work with.
- Keep the Phyllo Dough Covered: As mentioned earlier, phyllo dough dries out very quickly. Always keep the stack of phyllo dough covered with a damp kitchen towel while you’re working with it.
- Don’t Overfill the Triangles: Be careful not to overfill the spanakopita triangles, as this can cause them to burst open during baking. A tablespoon or two of filling per strip is usually sufficient.
- Use Good Quality Ingredients: The quality of your ingredients will affect the flavor of your spanakopita. Use fresh spinach, good quality feta cheese, and extra virgin olive oil for the best results.
- Get Creative with the Filling: Feel free to experiment with different variations of the filling. You can add other vegetables, such as zucchini or leeks, or different herbs, such as mint or oregano.
- Make Ahead: You can assemble the spanakopita triangles ahead of time and store them in the refrigerator for up to 24 hours before baking. Just be sure to cover them tightly to prevent the phyllo dough from drying out. You can also freeze them before baking. Place the unbaked triangles on a baking sheet and freeze until solid. Then, transfer them to a freezer bag or container. Bake from frozen, adding a few extra minutes to the baking time.
Serving Suggestions
Spanakopita triangles are incredibly versatile and can be served in a variety of ways:
- Appetizer: Serve them as an appetizer at your next party or gathering. They’re always a crowd-pleaser!
- Snack: Enjoy them as a satisfying snack any time of day.
- Light Meal: Pair them with a salad for a light and healthy meal.
- Side Dish: Serve them as a side dish with grilled chicken, fish, or lamb.
- Brunch: Include them as part of a delicious brunch spread.
Storage Instructions
Store leftover spanakopita triangles in an airtight container in the refrigerator for up to 3 days. Reheat them in the oven or microwave before serving.
Conclusion:
And there you have it! These Spanakopita Triangles are more than just a recipe; they’re a little piece of Greek sunshine baked into a flaky, savory package. I truly believe this is a must-try recipe for anyone who loves flavorful appetizers, easy entertaining, or simply wants to add a touch of Mediterranean magic to their kitchen. The combination of the crisp, golden phyllo dough, the creamy, cheesy filling, and the earthy spinach is simply irresistible. It’s a symphony of textures and tastes that will have everyone reaching for seconds (and thirds!).
But why is this particular Spanakopita recipe so special? It’s all about the balance. We’ve carefully crafted the filling to ensure it’s not too wet, not too dry, and perfectly seasoned. The addition of fresh herbs like dill and parsley elevates the flavor profile, while the feta cheese provides that signature tangy bite. And let’s not forget the importance of brushing each layer of phyllo with butter that’s the secret to achieving that incredibly flaky and satisfying crunch.
Serving Suggestions and Variations:
These Spanakopita Triangles are incredibly versatile. They’re perfect as an appetizer for a dinner party, a snack for a casual get-together, or even a light lunch paired with a fresh Greek salad. For a more substantial meal, you could serve them alongside grilled chicken or fish.
Looking for variations? Feel free to experiment with different cheeses. Try adding a little ricotta cheese for extra creaminess, or substitute some of the feta with kasseri for a sharper flavor. You can also add other vegetables to the filling, such as sautéed onions, leeks, or even mushrooms. For a spicier kick, add a pinch of red pepper flakes.
Another fun variation is to make individual Spanakopita rolls instead of triangles. Simply roll the filling up in the phyllo dough like a cigar before baking. This is a great option for a more elegant presentation.
Ready to Bake?
I know that working with phyllo dough can seem intimidating, but trust me, it’s easier than you think! Just remember to keep the dough covered with a damp towel to prevent it from drying out, and don’t be afraid to tear a sheet or two it’s all part of the process. And even if they aren’t perfect, they will still taste amazing!
I’m so confident that you’ll love this recipe, and I can’t wait to hear about your experience. So, gather your ingredients, preheat your oven, and get ready to create some delicious Spanakopita Triangles.
Share Your Spanakopita Success!
Once you’ve tried this recipe, please come back and share your thoughts in the comments below. Did you make any variations? What did you serve them with? I’m always eager to learn from your culinary adventures. And don’t forget to snap a photo of your finished Spanakopita Triangles and tag me on social media I’d love to see your creations! Happy baking, and Kali Orexi! (Good appetite!) I hope you enjoy making and eating this classic Greek treat as much as I do. This Spanakopita recipe is a guaranteed crowd-pleaser!
Spanakopita Triangles: A Delicious & Easy Recipe
Flaky and savory Spanakopita triangles filled with a delicious mixture of spinach, feta, ricotta, and herbs. A classic Greek appetizer or snack!
Ingredients
- 1 pound phyllo dough, thawed overnight in the refrigerator
- 1/2 cup olive oil, plus more for brushing
- 1 large onion, finely chopped
- 2 cloves garlic, minced
- 1 pound fresh spinach, thoroughly washed and chopped
- 1/2 cup chopped fresh dill
- 1/4 cup chopped fresh parsley
- 4 large eggs, lightly beaten
- 1 pound feta cheese, crumbled
- 1/2 cup ricotta cheese
- 1/4 cup grated Parmesan cheese
- 1/4 teaspoon ground nutmeg
- Salt and freshly ground black pepper to taste
Instructions
- In a large skillet, heat 2 tablespoons of olive oil over medium heat. Add the chopped onion and cook until softened and translucent, about 5-7 minutes. Add the minced garlic and cook for another minute until fragrant.
- Add the chopped spinach to the skillet in batches. Cook, stirring frequently, until all the spinach is wilted and tender, about 5-10 minutes. If there’s excess moisture, cook it off by increasing the heat slightly and stirring until the liquid evaporates.
- Remove from heat and transfer the spinach mixture to a large bowl. Let it cool slightly.
- Add the chopped dill, parsley, crumbled feta cheese, ricotta cheese, and grated Parmesan cheese to the bowl.
- Pour in the lightly beaten eggs. Add the ground nutmeg, salt, and pepper. Mix everything together thoroughly. Taste and adjust seasoning as needed.
- Preheat oven to 375°F (190°C). Lightly grease a baking sheet with olive oil.
- Carefully unwrap the phyllo dough and lay it flat on your work surface. Keep the stack of phyllo dough covered with a damp kitchen towel to prevent it from drying out.
- Take one sheet of phyllo dough and place it on your work surface. Brush it lightly with olive oil. Place another sheet of phyllo on top of the first and brush it with olive oil again. Repeat this process until you have a stack of about 6-8 sheets of phyllo dough.
- Using a sharp knife or pizza cutter, cut the stack of phyllo dough lengthwise into strips about 2-3 inches wide.
- Place a spoonful (about 1-2 tablespoons) of the spinach filling at the bottom of each strip of phyllo dough.
- Fold the bottom corner of the phyllo strip over the filling to form a triangle. Continue folding the triangle up the strip, alternating sides, until you reach the end.
- Place the assembled spanakopita triangles on the prepared baking sheet, seam-side down.
- Brush the tops of the spanakopita triangles generously with olive oil.
- Bake for 20-25 minutes, or until golden brown and crispy. If they start to brown too quickly, you can loosely tent them with foil.
- Cool slightly on the baking sheet before serving.
Notes
- Thaw phyllo dough overnight in the refrigerator.
- Keep phyllo dough covered with a damp towel while working.
- Don’t overfill the triangles.
- Use good quality ingredients for the best flavor.
- Assemble ahead of time and refrigerate for up to 24 hours before baking, or freeze for longer storage.
- Serve as an appetizer, snack, light meal, or side dish.
- Store leftovers in an airtight container in the refrigerator for up to 3 days. Reheat in the oven or microwave.
- Get creative with the filling by adding other vegetables or herbs.