
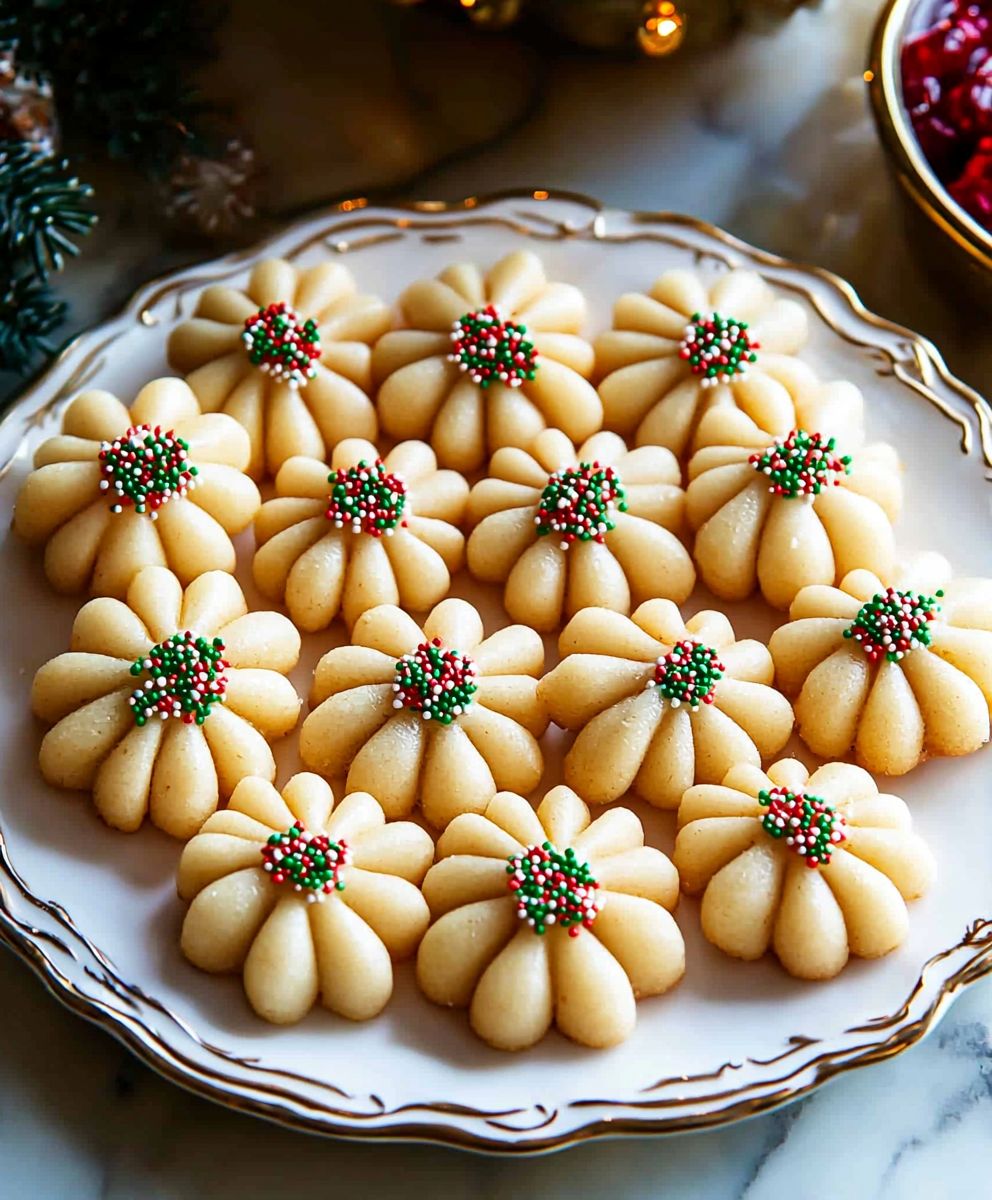
Spritz Cookies: These delicate, buttery cookies are more than just a sweet treat; they’re a symbol of holiday cheer and cherished family traditions. Have you ever wondered about the origin of these delightful little morsels? Spritz cookies, derived from the German word “spritzen,” meaning “to squirt,” perfectly describes the process of pressing the dough through a cookie press to create their charming shapes.
The history of Spritz Cookies dates back centuries, with variations found across Europe. They gained immense popularity in America during the Victorian era and have remained a beloved Christmas staple ever since. What makes these cookies so irresistible? It’s the melt-in-your-mouth texture, the rich buttery flavor, and the endless possibilities for decorating them with colorful sprinkles and festive icing.
Beyond their delicious taste, Spritz cookies are incredibly versatile. They’re perfect for holiday cookie exchanges, gifting to friends and neighbors, or simply enjoying with a warm cup of cocoa on a cold winter evening. The ease of making them, especially with a cookie press, makes them a fun and engaging activity for bakers of all skill levels. So, whether you’re a seasoned baker or a novice in the kitchen, get ready to create some magic with these classic and delightful cookies!

Ingredients:
- 1 cup (2 sticks) unsalted butter, softened
- ¾ cup granulated sugar
- 1 large egg
- 1 teaspoon vanilla extract
- ¼ teaspoon almond extract (optional, but highly recommended!)
- 2 ¼ cups all-purpose flour
- ¼ teaspoon salt
- Food coloring (gel or liquid, your choice of colors)
- Sprinkles, for decorating
Preparing the Dough:
- First things first, make sure your butter is properly softened. I like to leave mine out on the counter for about an hour before I start baking. You want it soft enough that you can easily press a finger into it, but not so melted that it’s greasy.
- In a large bowl (or the bowl of your stand mixer), cream together the softened butter and granulated sugar. Beat on medium speed until the mixture is light and fluffy. This usually takes about 3-5 minutes. Don’t rush this step! A well-creamed butter and sugar mixture is key to a tender cookie.
- Add the egg and extracts (vanilla and almond, if using) to the butter mixture. Beat until well combined. Scrape down the sides of the bowl to ensure everything is evenly mixed.
- In a separate bowl, whisk together the flour and salt. This helps to distribute the salt evenly throughout the dough.
- Gradually add the dry ingredients to the wet ingredients, mixing on low speed until just combined. Be careful not to overmix the dough, as this can result in tough cookies. Mix until the flour is just incorporated and no streaks of flour remain.
- Now comes the fun part: coloring the dough! Divide the dough into as many portions as you want colors. I usually do 2-3 colors. Place each portion of dough in a separate bowl.
- Add a few drops of food coloring to each bowl and mix until the color is evenly distributed. Start with a small amount of food coloring and add more until you reach your desired shade. Remember, you can always add more, but you can’t take it away! Gel food coloring is generally preferred because it’s more concentrated and won’t add extra liquid to the dough, but liquid food coloring will work too.
- Once your dough is colored, cover each bowl with plastic wrap and chill in the refrigerator for at least 30 minutes. This will help the dough firm up and make it easier to work with. Chilling is crucial for preventing the cookies from spreading too much during baking.
Using a Cookie Press:
- Preheat your oven to 375°F (190°C). Line baking sheets with parchment paper or silicone baking mats. This will prevent the cookies from sticking and make cleanup a breeze.
- While the oven is preheating, prepare your cookie press. Select your desired cookie disc and insert it into the press according to the manufacturer’s instructions.
- Remove one portion of chilled dough from the refrigerator at a time. If the dough is too firm to press easily, let it sit at room temperature for a few minutes to soften slightly.
- Fill the cookie press with the dough. Make sure to pack the dough in tightly to avoid air pockets.
- Hold the cookie press directly over the prepared baking sheet. Press the handle of the cookie press to release the dough onto the baking sheet. You may need to experiment a bit to get the right amount of pressure and timing.
- Repeat this process, spacing the cookies about 1 inch apart on the baking sheet.
- Once the baking sheet is full, decorate the cookies with sprinkles. Gently press the sprinkles into the dough so they adhere during baking.
Baking and Cooling:
- Bake the cookies for 6-8 minutes, or until the edges are lightly golden brown. Keep a close eye on them, as they can burn easily.
- Remove the baking sheets from the oven and let the cookies cool on the baking sheets for a few minutes before transferring them to a wire rack to cool completely.
- Repeat the process with the remaining dough, chilling the dough in between batches if it becomes too soft.
Tips and Tricks for Perfect Spritz Cookies:
- Use high-quality butter: The flavor of the butter will really shine through in these cookies, so it’s worth using a good quality butter.
- Don’t overmix the dough: Overmixing can develop the gluten in the flour, resulting in tough cookies. Mix until just combined.
- Chill the dough: Chilling the dough is essential for preventing the cookies from spreading too much during baking.
- Use parchment paper or silicone baking mats: This will prevent the cookies from sticking to the baking sheets.
- Don’t overcrowd the baking sheets: Space the cookies about 1 inch apart to allow for even baking.
- Watch the baking time carefully: Spritz cookies can burn easily, so keep a close eye on them.
- Let the cookies cool completely before storing: This will prevent them from becoming soggy.
- Experiment with different flavors and colors: Get creative with your food coloring and extracts! You can also add other ingredients to the dough, such as chocolate chips, nuts, or spices.
- Troubleshooting: Dough too hard? If your dough is too hard to press, let it sit at room temperature for a few minutes to soften slightly. You can also try adding a teaspoon of milk or cream to the dough.
- Troubleshooting: Dough too soft? If your dough is too soft, chill it in the refrigerator for a longer period of time. You can also try adding a tablespoon of flour to the dough.
- Troubleshooting: Cookies spreading too much? Make sure your butter is not too soft. Also, ensure that you are chilling the dough adequately. If the problem persists, try adding a tablespoon of flour to the dough.
- Troubleshooting: Cookies not sticking to the baking sheet? Ensure your baking sheets are clean and dry. Parchment paper or silicone mats are your best friends here!
Storage:
Store the cooled cookies in an airtight container at room temperature for up to a week. They can also be frozen for longer storage. To freeze, place the cookies in a single layer on a baking sheet and freeze until solid. Then, transfer them to a freezer-safe bag or container. They can be frozen for up to 2-3 months.
Variations:
- Chocolate Spritz Cookies: Add ¼ cup of unsweetened cocoa powder to the dry ingredients.
- Lemon Spritz Cookies: Add 1 tablespoon of lemon zest to the wet ingredients.
- Peppermint Spritz Cookies: Add ¼ teaspoon of peppermint extract to the wet ingredients and crush some peppermint candies to sprinkle on top before baking.
- Spice Spritz Cookies: Add ½ teaspoon of ground cinnamon, ¼ teaspoon of ground nutmeg, and ¼ teaspoon of ground cloves to the dry ingredients.
Serving Suggestions:
Spritz cookies are perfect for holiday baking, parties, or any time you want a sweet treat. They’re also a great addition to a cookie platter or gift basket. Enjoy them with a glass of milk, a cup of coffee, or a scoop of ice cream.
Equipment Needed:
- Stand mixer or hand mixer
- Large mixing bowl
- Small mixing bowls
- Measuring cups and spoons
- Whisk
- Cookie press
- Baking sheets
- Parchment paper or silicone baking mats
- Wire rack
Nutritional Information (approximate, per cookie):
Calories: 75
Fat: 4g
Saturated Fat: 2.5g
Cholesterol: 20mg
Sodium: 20mg
Carbohydrates: 9g
Sugar: 4g
Protein: 1g
Conclusion:
This isn’t just another cookie recipe; it’s an invitation to create edible memories. These Spritz Cookies are a must-try because they offer a delightful combination of buttery richness, delicate sweetness, and endless creative possibilities. They’re surprisingly simple to make, yet they deliver a sophisticated and festive treat that will impress everyone. Forget store-bought cookies once you experience the joy of piping your own beautiful designs and savoring that melt-in-your-mouth texture, you’ll never look back! But the real magic of these cookies lies in their versatility. While the classic recipe is divine on its own, feel free to experiment with different flavor extracts. A touch of almond extract adds a nutty warmth, while lemon or orange extract brings a bright, citrusy zing. For chocolate lovers, a tablespoon or two of cocoa powder transforms the dough into a decadent chocolate Spritz cookie. And let’s talk about serving suggestions! These cookies are perfect for any occasion. Imagine a platter of colorful Spritz cookies gracing your holiday table, or a charming assortment presented as a homemade gift. They’re also wonderful enjoyed with a cup of hot cocoa on a chilly evening, or as a sweet accompaniment to your afternoon tea. Here are a few more ideas to spark your creativity:Serving and Variation Ideas:
* Dipping Delights: Dip the cooled cookies in melted chocolate (dark, milk, or white) and sprinkle with chopped nuts, sprinkles, or sea salt. * Sandwich Sensations: Create mini cookie sandwiches by filling two Spritz cookies with buttercream frosting, jam, or Nutella. * Iced Elegance: Decorate the cookies with royal icing in intricate designs. This is a fantastic way to personalize them for special events. * Coffee Companion: Serve alongside a rich espresso or cappuccino for an afternoon treat. * Gift Giving: Package the cookies in decorative tins or cellophane bags for a thoughtful and homemade gift. * Seasonal Sprinkles: Use different colored sprinkles to match the season or holiday. Red and green for Christmas, pastel colors for Easter, and so on. * Flavor Infusions: Experiment with different extracts like peppermint, anise, or even rosewater for a unique flavor profile. * Citrus Zest: Add lemon, orange, or lime zest to the dough for a burst of fresh citrus flavor. * Nutty Goodness: Incorporate finely ground nuts like almonds, pecans, or walnuts into the dough for added texture and flavor. * Spice it Up: Add a pinch of cinnamon, nutmeg, or cardamom to the dough for a warm and comforting flavor. I truly believe that this Spritz Cookies recipe will become a cherished tradition in your home. It’s more than just baking; it’s about creating moments of joy and connection with loved ones. The process of piping the cookies, decorating them, and sharing them with family and friends is incredibly rewarding. So, what are you waiting for? Gather your ingredients, preheat your oven, and get ready to embark on a delicious adventure. I’m confident that you’ll be delighted with the results. And most importantly, don’t be afraid to have fun and let your creativity shine! I’m so excited for you to try this recipe! Once you’ve had a chance to bake these delightful cookies, I’d love to hear about your experience. Share your photos, tips, and variations in the comments below. Let’s create a community of Spritz cookie enthusiasts and inspire each other with our baking creations! Happy baking! Print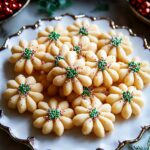
Spritz Cookies: The Ultimate Guide to Baking Perfect Holiday Treats
- Total Time: 60 minutes
- Yield: 3–4 dozen cookies 1x
Description
Buttery Spritz cookies, perfect for holidays! Use a cookie press to create festive shapes and customize with colors and sprinkles.
Ingredients
- 1 cup (2 sticks) unsalted butter, softened
- ¾ cup granulated sugar
- 1 large egg
- 1 teaspoon vanilla extract
- ¼ teaspoon almond extract (optional, but highly recommended!)
- 2 ¼ cups all-purpose flour
- ¼ teaspoon salt
- Food coloring (gel or liquid, your choice of colors)
- Sprinkles, for decorating
Instructions
- Ensure butter is properly softened. It should be soft enough to easily press a finger into, but not greasy.
- In a large bowl (or stand mixer), cream together the softened butter and granulated sugar. Beat on medium speed until light and fluffy (3-5 minutes).
- Add the egg and extracts (vanilla and almond, if using) to the butter mixture. Beat until well combined. Scrape down the sides of the bowl.
- In a separate bowl, whisk together the flour and salt.
- Gradually add the dry ingredients to the wet ingredients, mixing on low speed until just combined. Be careful not to overmix.
- Divide the dough into portions for each color you want.
- Add a few drops of food coloring to each portion and mix until the color is evenly distributed. Start with a small amount of food coloring and add more until you reach your desired shade.
- Cover each bowl with plastic wrap and chill in the refrigerator for at least 30 minutes.
- Preheat oven to 375°F (190°C). Line baking sheets with parchment paper or silicone baking mats.
- Prepare your cookie press. Select your desired cookie disc and insert it into the press according to the manufacturer’s instructions.
- Remove one portion of chilled dough from the refrigerator at a time. If the dough is too firm to press easily, let it sit at room temperature for a few minutes to soften slightly.
- Fill the cookie press with the dough. Make sure to pack the dough in tightly to avoid air pockets.
- Hold the cookie press directly over the prepared baking sheet. Press the handle of the cookie press to release the dough onto the baking sheet. You may need to experiment a bit to get the right amount of pressure and timing.
- Repeat this process, spacing the cookies about 1 inch apart on the baking sheet.
- Once the baking sheet is full, decorate the cookies with sprinkles. Gently press the sprinkles into the dough so they adhere during baking.
- Bake the cookies for 6-8 minutes, or until the edges are lightly golden brown.
- Remove the baking sheets from the oven and let the cookies cool on the baking sheets for a few minutes before transferring them to a wire rack to cool completely.
- Repeat the process with the remaining dough, chilling the dough in between batches if it becomes too soft.
Notes
- Use high-quality butter for the best flavor.
- Don’t overmix the dough.
- Chilling the dough is essential.
- Use parchment paper or silicone baking mats.
- Don’t overcrowd the baking sheets.
- Watch the baking time carefully.
- Let the cookies cool completely before storing.
- Experiment with different flavors and colors.
- Troubleshooting: Dough too hard? Let it sit at room temperature for a few minutes to soften slightly. You can also try adding a teaspoon of milk or cream to the dough.
- Troubleshooting: Dough too soft? Chill it in the refrigerator for a longer period of time. You can also try adding a tablespoon of flour to the dough.
- Troubleshooting: Cookies spreading too much? Make sure your butter is not too soft. Also, ensure that you are chilling the dough adequately. If the problem persists, try adding a tablespoon of flour to the dough.
- Troubleshooting: Cookies not sticking to the baking sheet? Ensure your baking sheets are clean and dry. Parchment paper or silicone mats are your best friends here!
- Prep Time: 30 minutes
- Cook Time: 6 minutes