
Swedish Visiting Cake: the name alone conjures images of cozy gatherings, warm hospitality, and the irresistible aroma of something delicious baking in the oven. Have you ever needed a simple, yet impressive dessert to share with friends or family on short notice? This cake is your answer! It’s a delightful treat that’s been gracing Swedish tables for generations, and for good reason.
While the exact origins are shrouded in a bit of mystery, the beauty of Swedish Visiting Cake lies in its simplicity and adaptability. Its a testament to the Swedish tradition of “fika,” that cherished coffee break where good company and good food are essential. This cake is often served during fika, making it the perfect accompaniment to a cup of coffee or tea.
What makes this cake so universally loved? It’s the perfect balance of textures: a tender, moist crumb topped with a satisfyingly crunchy, buttery streusel. The subtle sweetness isn’t overpowering, making it a crowd-pleaser for all ages. Plus, it’s incredibly easy to make, requiring minimal ingredients and effort. Whether you’re a seasoned baker or a novice in the kitchen, you can whip up this delightful cake in no time. Get ready to impress your guests with this classic Swedish treat!

Ingredients:
- 1 cup (2 sticks) unsalted butter, softened
- 2 cups granulated sugar
- 3 large eggs
- 1 teaspoon vanilla extract
- 3 cups all-purpose flour
- 1 teaspoon baking powder
- 1/2 teaspoon baking soda
- 1/4 teaspoon salt
- 1 cup sour cream
Preparing the Batter:
Okay, let’s get started! First things first, we need to cream together the butter and sugar. This is a crucial step, so don’t rush it. You want the mixture to be light and fluffy, which will ensure a tender and airy cake.
- In a large mixing bowl, combine the softened butter and granulated sugar. I like to use an electric mixer for this, but you can definitely do it by hand if you’re feeling ambitious! Beat the butter and sugar together on medium speed for about 3-5 minutes, or until the mixture is pale and fluffy. Scrape down the sides of the bowl occasionally to make sure everything is evenly incorporated.
- Now, it’s time to add the eggs. Crack the eggs one at a time into the bowl, beating well after each addition. This helps to emulsify the eggs into the butter and sugar mixture, which is essential for a smooth batter. Again, scrape down the sides of the bowl after each egg to ensure everything is well combined.
- Stir in the vanilla extract. The vanilla adds a lovely warmth and depth of flavor to the cake. Just a teaspoon is all you need!
Combining the Dry and Wet Ingredients:
Next, we’ll combine the dry ingredients and then gradually add them to the wet ingredients. This prevents overmixing, which can lead to a tough cake. We want a tender crumb, so be gentle!
- In a separate bowl, whisk together the all-purpose flour, baking powder, baking soda, and salt. Whisking ensures that the baking powder and baking soda are evenly distributed throughout the flour, which will help the cake rise properly.
- Gradually add the dry ingredients to the wet ingredients, alternating with the sour cream. Start by adding about one-third of the dry ingredients to the butter and sugar mixture, and mix on low speed until just combined. Then, add half of the sour cream and mix until just combined. Repeat with another third of the dry ingredients, followed by the remaining sour cream, and finally the remaining dry ingredients. Mix until just combined. Be careful not to overmix! Overmixing develops the gluten in the flour, which can result in a tough cake.
Baking the Cake:
Now for the fun part baking! Make sure your oven is preheated to the correct temperature, and your baking pan is properly prepared. This will ensure that the cake bakes evenly and releases easily from the pan.
- Preheat your oven to 350°F (175°C).
- Grease and flour a 9×13 inch baking pan. You can also use baking spray with flour. This will prevent the cake from sticking to the pan. I like to use a non-stick baking spray for extra insurance.
- Pour the batter into the prepared baking pan and spread it evenly.
- Bake for 30-35 minutes, or until a wooden skewer inserted into the center comes out clean. The baking time may vary depending on your oven, so start checking the cake after 30 minutes. If the top of the cake is browning too quickly, you can tent it with foil.
- Let the cake cool in the pan for 10-15 minutes before inverting it onto a wire rack to cool completely. This will prevent the cake from breaking apart.
Optional Glaze (But Highly Recommended!):
While the cake is cooling, you can prepare a simple glaze to drizzle over the top. This is totally optional, but I highly recommend it! It adds a touch of sweetness and makes the cake even more delicious.
Simple Vanilla Glaze:
- 1 cup powdered sugar
- 2-3 tablespoons milk
- 1/2 teaspoon vanilla extract
- In a small bowl, whisk together the powdered sugar, milk, and vanilla extract until smooth. Add more milk if needed to reach your desired consistency.
- Once the cake is completely cool, drizzle the glaze over the top.
Lemon Glaze Variation:
For a brighter, tangier glaze, try this lemon variation!
- 1 cup powdered sugar
- 2-3 tablespoons lemon juice
- 1/2 teaspoon lemon zest (optional)
- In a small bowl, whisk together the powdered sugar, lemon juice, and lemon zest (if using) until smooth. Add more lemon juice if needed to reach your desired consistency.
- Once the cake is completely cool, drizzle the glaze over the top.
Serving and Storing:
Once the cake is cooled and glazed (if you chose to glaze it), it’s ready to serve! This cake is delicious on its own, but it’s also great with a scoop of ice cream or a dollop of whipped cream.
To store the cake, wrap it tightly in plastic wrap or store it in an airtight container at room temperature. It will keep for up to 3-4 days. You can also freeze the cake for longer storage. Wrap it tightly in plastic wrap and then in foil, and it will keep in the freezer for up to 2-3 months. Thaw the cake overnight in the refrigerator before serving.
Enjoy your delicious Swedish Visiting Cake! I hope you love it as much as I do. It’s the perfect cake for any occasion, whether you’re having guests over or just want a little something sweet to enjoy yourself.
Conclusion:
This Swedish Visiting Cake isn’t just a recipe; it’s an invitation to create a moment of pure joy. From its incredibly moist texture to its delicate almond flavor, every bite is a testament to simple ingredients transformed into something truly special. I truly believe this is a must-try recipe for anyone who loves baking, or even just loves eating delicious cake! It’s the kind of cake that makes you want to linger over a cup of coffee, sharing stories and laughter with loved ones.
But what makes this cake so irresistible? It’s the perfect balance of flavors and textures. The almond extract provides a subtle, nutty aroma that complements the buttery richness of the cake. The sour cream keeps it incredibly moist, ensuring that each slice is melt-in-your-mouth delicious. And the simple glaze adds just the right amount of sweetness to tie everything together. It’s a classic for a reason!
Serving Suggestions and Variations:
While this cake is absolutely divine on its own, there are plenty of ways to customize it to your liking. For a more festive touch, try adding a handful of fresh berries to the batter before baking. Blueberries, raspberries, or even chopped strawberries would be a delightful addition. You could also experiment with different extracts, such as vanilla or lemon, to create a unique flavor profile.
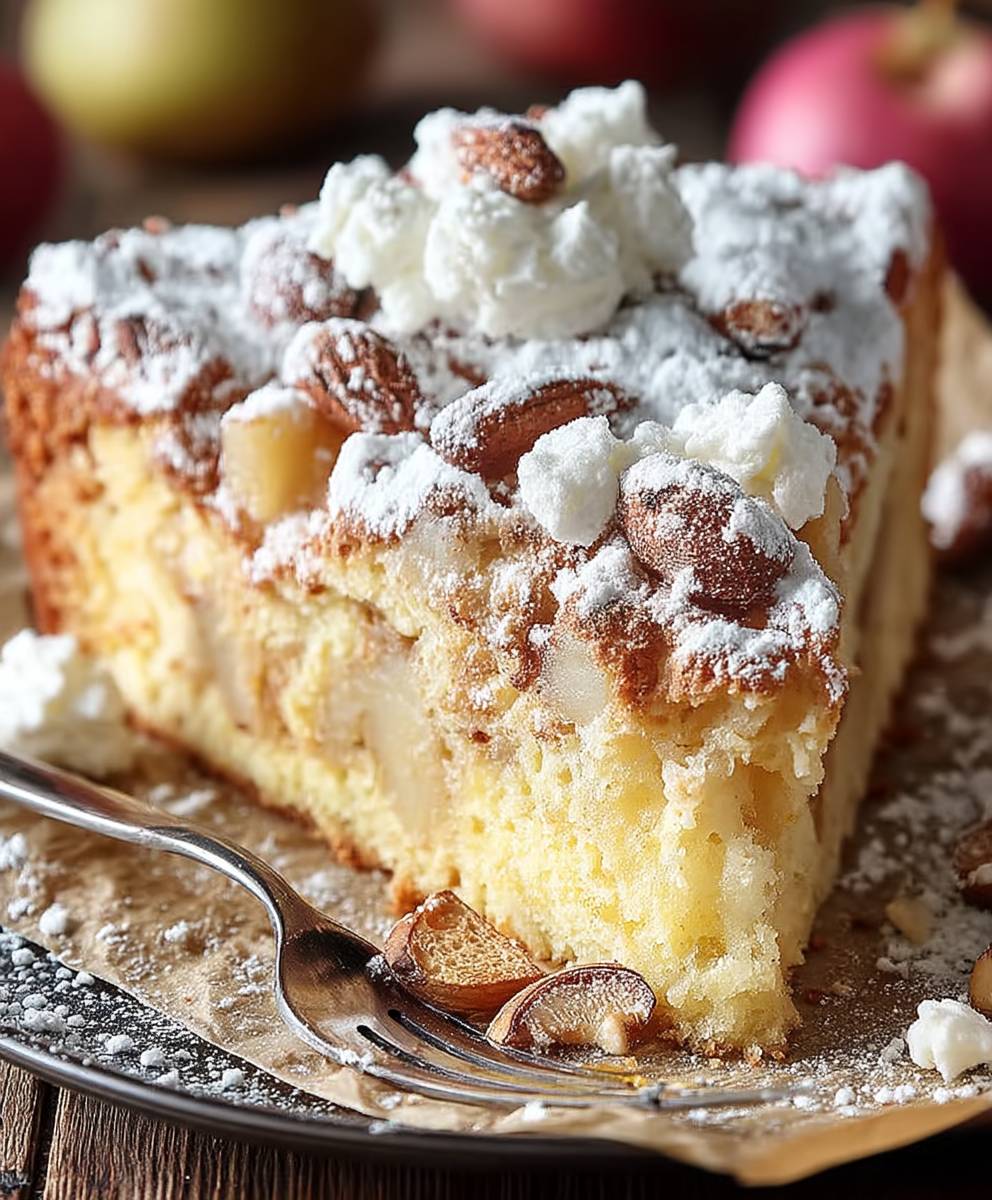
Another great option is to top the cake with a sprinkle of toasted almonds or a dusting of powdered sugar. If you’re feeling adventurous, you could even make a simple cream cheese frosting to spread over the top. For a truly decadent treat, serve a slice of warm cake with a scoop of vanilla ice cream or a dollop of whipped cream.
This cake is also incredibly versatile when it comes to serving. It’s perfect for a casual brunch with friends, a sophisticated afternoon tea, or even a simple weeknight dessert. It travels well, making it a great option for potlucks or picnics. And because it’s so easy to make, you can whip it up in no time whenever you need a quick and delicious treat.
Time to Bake!
I’m so excited for you to try this Swedish Visiting Cake recipe! I know you’ll love it as much as I do. It’s a guaranteed crowd-pleaser that’s sure to become a staple in your baking repertoire. Don’t be intimidated by baking; this recipe is incredibly straightforward and forgiving. Even if you’re a beginner baker, I’m confident that you can create a beautiful and delicious cake that everyone will enjoy.
So, gather your ingredients, preheat your oven, and get ready to experience the magic of this classic Swedish treat. And most importantly, don’t forget to have fun! Baking should be a joyful and relaxing experience. Let the aroma of the cake fill your kitchen and bring a smile to your face.
Once you’ve tried this recipe, I would absolutely love to hear about your experience! Share your photos and comments on social media using [Your Hashtag Here] or leave a comment below. Let me know what variations you tried and how they turned out. I’m always looking for new and creative ways to enjoy this amazing cake. Happy baking, and I can’t wait to see what you create! I am sure you will agree that this Swedish Visiting Cake is a winner!
Swedish Visiting Cake: A Delicious and Easy Recipe
A classic, tender, and moist cake perfect for any occasion. This easy-to-make cake is sure to impress your guests (or just satisfy your sweet tooth!).
Ingredients
- 1 cup (2 sticks) unsalted butter, softened
- 2 cups granulated sugar
- 3 large eggs
- 1 teaspoon vanilla extract
- 3 cups all-purpose flour
- 1 teaspoon baking powder
- 1/2 teaspoon baking soda
- 1/4 teaspoon salt
- 1 cup sour cream
- 1 cup powdered sugar
- 2-3 tablespoons milk
- 1/2 teaspoon vanilla extract
- 1 cup powdered sugar
- 2-3 tablespoons lemon juice
- 1/2 teaspoon lemon zest (optional)
Instructions
- Prepare the Batter: In a large mixing bowl, cream together the softened butter and granulated sugar on medium speed for 3-5 minutes, or until pale and fluffy. Scrape down the sides of the bowl occasionally.
- Add the eggs one at a time, beating well after each addition. Scrape down the sides of the bowl after each egg.
- Stir in the vanilla extract.
- Combine Dry and Wet Ingredients: In a separate bowl, whisk together the all-purpose flour, baking powder, baking soda, and salt.
- Gradually add the dry ingredients to the wet ingredients, alternating with the sour cream. Start with one-third of the dry ingredients, mix until just combined. Then, add half of the sour cream, mix until just combined. Repeat with another third of the dry ingredients, followed by the remaining sour cream, and finally the remaining dry ingredients. Mix until just combined. Be careful not to overmix.
- Bake the Cake: Preheat your oven to 350°F (175°C).
- Grease and flour a 9×13 inch baking pan.
- Pour the batter into the prepared baking pan and spread it evenly.
- Bake for 30-35 minutes, or until a wooden skewer inserted into the center comes out clean.
- Let the cake cool in the pan for 10-15 minutes before inverting it onto a wire rack to cool completely.
- Prepare the Glaze (Optional): For Vanilla Glaze: In a small bowl, whisk together the powdered sugar, milk, and vanilla extract until smooth. Add more milk if needed to reach your desired consistency. For Lemon Glaze: In a small bowl, whisk together the powdered sugar, lemon juice, and lemon zest (if using) until smooth. Add more lemon juice if needed to reach your desired consistency.
- Once the cake is completely cool, drizzle the glaze over the top.
Notes
- Creaming the butter and sugar well is crucial for a tender cake.
- Do not overmix the batter, as this can result in a tough cake.
- Baking time may vary depending on your oven. Check the cake after 30 minutes. If the top is browning too quickly, tent it with foil.
- The glaze is optional but highly recommended for added sweetness.
- Store the cake wrapped tightly in plastic wrap or in an airtight container at room temperature for up to 3-4 days.
- For longer storage, freeze the cake wrapped tightly in plastic wrap and then in foil for up to 2-3 months. Thaw overnight in the refrigerator before serving.