
Sweet onion, oh, how I adore you! Prepare to be amazed by the versatility and delightful sweetness of this humble vegetable. Today, we’re diving headfirst into a recipe that truly celebrates the star of the show: the sweet onion. Forget everything you thought you knew about onions bringing tears to your eyes; this recipe is all about unlocking their natural sugars and creating a culinary masterpiece.
Onions, in general, have a rich history, dating back thousands of years. They were revered in ancient Egypt and used for medicinal purposes. While the sweet onion, as we know it today, is a more modern cultivar, its lineage is steeped in tradition. Different varieties, like the Vidalia from Georgia or the Walla Walla from Washington State, have become regional treasures, each with its unique flavor profile.
But what makes people fall head over heels for dishes featuring sweet onion? It’s simple: the taste! When cooked, the sweet onion transforms, becoming incredibly tender and mellow. Its subtle sweetness adds a depth of flavor that elevates any dish. Whether it’s caramelized to perfection, adding a delicate sweetness to a savory tart, or used as a base for a flavorful soup, the sweet onion is a true culinary chameleon. Plus, it’s incredibly easy to work with, making it a convenient choice for busy weeknights or elegant dinner parties. Get ready to experience the magic!

Ingredients:
- 2 large sweet onions (like Vidalia or Walla Walla), peeled and thinly sliced
- 2 tablespoons olive oil
- 1 tablespoon butter
- 1 teaspoon granulated sugar
- 1/2 teaspoon salt, plus more to taste
- 1/4 teaspoon black pepper, plus more to taste
- 1/4 cup dry red wine (optional, but highly recommended!)
- 1/4 cup beef broth (or vegetable broth for a vegetarian option)
- 1 tablespoon balsamic vinegar
- 1 teaspoon fresh thyme leaves (or 1/2 teaspoon dried thyme)
- 1 bay leaf
- 1 baguette, sliced into 1-inch thick rounds
- 4 ounces Gruyère cheese, grated
- 2 ounces Parmesan cheese, grated
- 1 clove garlic, peeled and halved
Caramelizing the Onions: The Heart of the Dish
Okay, let’s get started! Caramelizing onions is a labor of love, but trust me, the sweet, savory flavor is totally worth the effort. This is where the magic happens, so be patient and don’t rush the process.
- Prepare the Onions: First, make sure your sweet onions are peeled and thinly sliced. I like to use a mandoline for this to get even slices, but a sharp knife works just fine. Aim for slices that are about 1/8 inch thick. Even thickness ensures they cook evenly.
- Sauté the Onions: In a large, heavy-bottomed skillet or Dutch oven, heat the olive oil and butter over medium heat. Once the butter is melted and the mixture is shimmering, add the sliced onions. Stir to coat them evenly with the oil and butter.
- Season and Sweeten: Sprinkle the onions with the sugar, salt, and pepper. The sugar helps with the caramelization process, and the salt draws out moisture from the onions, which helps them cook down. Stir well to combine.
- The Long, Slow Cook: Reduce the heat to low. This is crucial! You want the onions to cook slowly and evenly without burning. Cover the skillet or Dutch oven and let the onions cook for about 30 minutes, stirring occasionally. The onions will start to soften and release their moisture.
- Uncover and Continue Cooking: After 30 minutes, remove the lid. Continue cooking the onions, stirring frequently, for another 30-60 minutes, or until they are a deep golden brown color and very soft. This is where the caramelization really happens. The onions will shrink in size and become intensely sweet and flavorful. Be patient and keep stirring to prevent them from sticking and burning. If they start to stick, add a tablespoon of water or broth to the pan and scrape up any browned bits from the bottom. These browned bits are full of flavor!
- Deglaze the Pan (Optional but Recommended): Once the onions are deeply caramelized, pour in the red wine (if using). Scrape up any browned bits from the bottom of the pan. Let the wine simmer for a few minutes until it has reduced slightly. This adds a wonderful depth of flavor to the onions.
- Add Broth and Aromatics: Stir in the beef broth (or vegetable broth), balsamic vinegar, thyme, and bay leaf. Bring the mixture to a simmer and cook for another 5-10 minutes, or until the liquid has reduced slightly and the flavors have melded together.
- Taste and Adjust: Taste the caramelized onions and adjust the seasoning as needed. You may want to add more salt, pepper, or balsamic vinegar to taste. Remove the bay leaf before proceeding.
Preparing the Bread: A Crispy Foundation
While the onions are caramelizing (or after they’re done), let’s get the bread ready. We want nice, toasted slices that will hold up well under the weight of the onions and cheese.
- Slice the Baguette: Slice the baguette into 1-inch thick rounds.
- Toast the Bread: There are a few ways to toast the bread. You can use a toaster, a broiler, or a skillet.
- Toaster: Toast the bread slices in a toaster until they are lightly golden brown.
- Broiler: Preheat your broiler. Arrange the bread slices on a baking sheet and broil for 1-2 minutes per side, or until they are lightly golden brown. Watch them carefully, as they can burn quickly under the broiler.
- Skillet: Heat a dry skillet over medium heat. Add the bread slices and toast for 1-2 minutes per side, or until they are lightly golden brown.
- Garlic Rub (Optional but Delicious): Once the bread slices are toasted, rub each slice with the cut side of a garlic clove. This adds a subtle garlic flavor that complements the caramelized onions and cheese beautifully.
Assembling and Baking: The Grand Finale
Now for the fun part! We’re going to assemble the crostini and bake them until the cheese is melted and bubbly. Get ready for some serious deliciousness!
- Preheat the Oven: Preheat your oven to 375°F (190°C).
- Arrange the Bread: Arrange the toasted bread slices on a baking sheet.
- Top with Onions: Spoon a generous amount of the caramelized onions onto each bread slice. Make sure to distribute the onions evenly.
- Add the Cheese: Sprinkle the Gruyère and Parmesan cheese over the onions. Don’t be shy with the cheese! The more, the merrier.
- Bake: Bake the crostini in the preheated oven for 10-15 minutes, or until the cheese is melted, bubbly, and lightly golden brown.
- Broil (Optional): For an extra golden brown and bubbly top, you can broil the crostini for the last 1-2 minutes of baking. Watch them carefully to prevent burning.
- Cool Slightly and Serve: Remove the crostini from the oven and let them cool slightly before serving. This will allow the cheese to set up a bit and prevent you from burning your mouth.
Serving Suggestions: Enjoying Your Creation
These caramelized sweet onion crostini are delicious on their own as an appetizer or snack. They also pair well with:
- A simple green salad
- Tomato soup
- Grilled meats or vegetables
- A glass of your favorite wine
Tips and Variations:
- Type of Onion: While sweet onions are ideal for this recipe, you can also use yellow onions or red onions. Just be aware that they may not be as sweet and may require a longer cooking time.
- Cheese Variations: Feel free to experiment with different types of cheese. Fontina, provolone, or even goat cheese would be delicious.
- Add Some Heat: For a little kick, add a pinch of red pepper flakes to the caramelized onions.
- Make it Vegetarian: Use vegetable broth instead of beef broth.
- Make it Ahead: The caramelized onions can be made ahead of time and stored in the refrigerator for up to 3 days. Simply reheat them before assembling the crostini.
Enjoy your homemade caramelized sweet onion crostini! I hope you love them as much as I do.
Conclusion:
This isn’t just another recipe; it’s a culinary adventure waiting to happen! The incredible depth of flavor you get from caramelizing sweet onion to perfection is truly something special. It transforms a humble ingredient into a star, adding a touch of sweetness and savory richness that elevates any dish. I genuinely believe this recipe is a must-try for anyone who loves to cook and appreciates the magic of simple ingredients done well.
Think of the possibilities! This caramelized sweet onion is incredibly versatile. Serve it as a topping for grilled burgers or sausages, adding a gourmet touch to your backyard barbecue. Spoon it over creamy brie or goat cheese for an elegant appetizer that’s sure to impress your guests. It’s also fantastic stirred into risotto, adding a layer of complex flavor that will have everyone asking for seconds.
For a simple yet satisfying meal, try spreading it on toasted baguette slices with a drizzle of balsamic glaze. Or, get creative and incorporate it into your favorite quiche or frittata recipe. The sweetness of the onion pairs beautifully with eggs and cheese, creating a breakfast or brunch dish that’s both comforting and delicious.
If you’re feeling adventurous, consider these variations:
* Spicy Sweet Onion: Add a pinch of red pepper flakes during the caramelization process for a touch of heat.
* Balsamic Glazed Sweet Onion: Stir in a tablespoon of balsamic vinegar during the last few minutes of cooking for a tangy twist.
* Herb Infused Sweet Onion: Add fresh thyme or rosemary sprigs to the pan while the onions are caramelizing for an aromatic flavor boost.
* Sweet Onion Jam: Continue cooking the caramelized onions until they reach a jam-like consistency, perfect for spreading on sandwiches or crackers.
I’ve personally made this recipe countless times, and it never fails to impress. The aroma alone, as the sweet onions slowly caramelize, is enough to make your mouth water. It’s a labor of love, yes, but the end result is so worth the effort. The deep, rich flavor is unlike anything you can buy in a store.
Don’t be intimidated by the caramelization process. It simply requires patience and a little bit of attention. Keep the heat low and stir the onions frequently to prevent them from burning. The key is to allow them to slowly break down and release their natural sugars, resulting in that beautiful golden-brown color and intense sweetness.
I’m so confident that you’ll love this recipe as much as I do. It’s a simple yet elegant way to elevate your cooking and impress your friends and family. So, go ahead, give it a try! I promise you won’t be disappointed.
And most importantly, I’d love to hear about your experience! Did you try any of the variations? What did you serve it with? Share your photos and comments below. Let’s create a community of sweet onion lovers and inspire each other with our culinary creations! Happy cooking!
Sweet Onion: The Ultimate Guide to Varieties, Growing, and Cooking
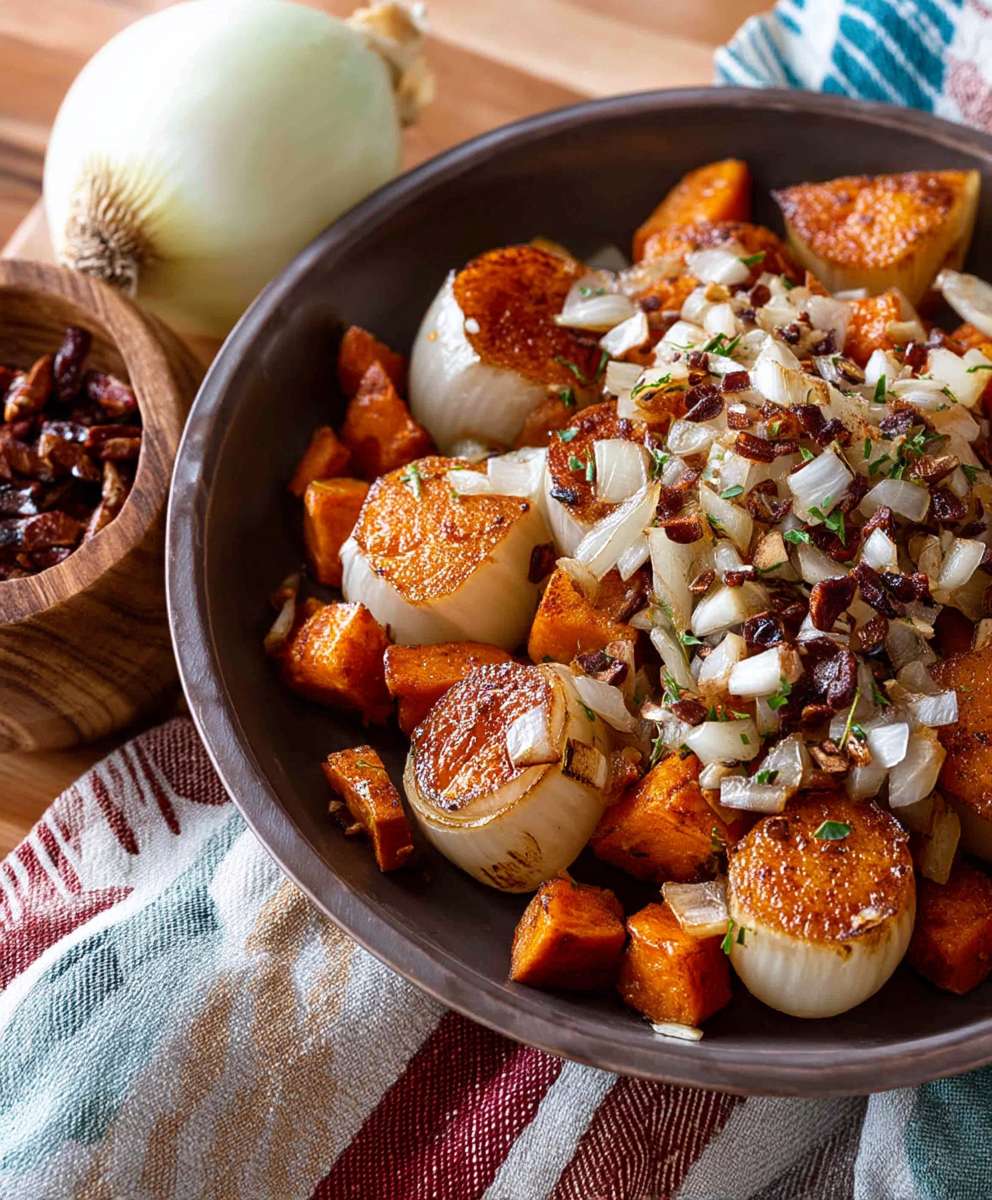
Sweet and savory caramelized onion crostini with Gruyère and Parmesan cheese, perfect as an appetizer or snack.
Ingredients
- 2 large sweet onions (like Vidalia or Walla Walla), peeled and thinly sliced
- 2 tablespoons olive oil
- 1 tablespoon butter
- 1 teaspoon granulated sugar
- 1/2 teaspoon salt, plus more to taste
- 1/4 teaspoon black pepper, plus more to taste
- 1/4 cup dry red wine (optional, but highly recommended!)
- 1/4 cup beef broth (or vegetable broth for a vegetarian option)
- 1 tablespoon balsamic vinegar
- 1 teaspoon fresh thyme leaves (or 1/2 teaspoon dried thyme)
- 1 bay leaf
- 1 baguette, sliced into 1-inch thick rounds
- 4 ounces Gruyère cheese, grated
- 2 ounces Parmesan cheese, grated
- 1 clove garlic, peeled and halved (optional, for rubbing on bread)
Instructions
- In a large, heavy-bottomed skillet or Dutch oven, heat the olive oil and butter over medium heat. Add the sliced onions, sugar, salt, and pepper. Stir to coat.
- Reduce heat to low, cover, and cook for 30 minutes, stirring occasionally.
- Uncover and continue cooking, stirring frequently, for another 30-60 minutes, or until the onions are a deep golden brown color and very soft. If they start to stick, add a tablespoon of water or broth to the pan and scrape up any browned bits from the bottom.
- (Optional) Deglaze the pan with red wine, scraping up any browned bits. Let simmer until reduced slightly.
- Stir in the beef broth (or vegetable broth), balsamic vinegar, thyme, and bay leaf. Bring to a simmer and cook for 5-10 minutes, or until the liquid has reduced slightly and the flavors have melded together.
- Taste and adjust seasoning as needed. Remove the bay leaf.
- Slice the baguette into 1-inch thick rounds.
- Toast the bread slices in a toaster, under a broiler (1-2 minutes per side), or in a dry skillet (1-2 minutes per side) until lightly golden brown.
- (Optional) Rub each toasted bread slice with the cut side of a garlic clove.
- Preheat oven to 375°F (190°C).
- Arrange the toasted bread slices on a baking sheet.
- Spoon a generous amount of the caramelized onions onto each bread slice.
- Sprinkle the Gruyère and Parmesan cheese over the onions.
- Bake for 10-15 minutes, or until the cheese is melted, bubbly, and lightly golden brown.
- (Optional) Broil for the last 1-2 minutes for an extra golden brown top, watching carefully to prevent burning.
- Cool slightly and serve.
Notes
- Sweet onions are best, but yellow or red onions can be used.
- Caramelizing onions takes time and patience; don’t rush the process.
- If the onions start to stick, add a tablespoon of water or broth to the pan and scrape up any browned bits from the bottom.
- The caramelized onions can be made ahead of time and stored in the refrigerator for up to 3 days. Simply reheat them before assembling the crostini.
- Experiment with different cheeses like Fontina, provolone, or goat cheese.
- Add a pinch of red pepper flakes for a little heat.
- Use vegetable broth for a vegetarian option.