
Toasted Ravioli Olive Garden style is a crave-worthy appetizer that you can easily recreate at home! Imagine biting into crispy, golden-brown pockets filled with savory, cheesy goodness. This isn’t just another fried snack; it’s a delightful explosion of textures and flavors that will have everyone reaching for more.
While Olive Garden may have popularized this dish on a national scale, the roots of toasted ravioli trace back to the Italian-American community of St. Louis, Missouri. Legend has it that this delectable treat was born from an accidental drop of ravioli into a fryer a happy accident indeed! Over time, it evolved from a local favorite to a beloved appetizer enjoyed across the country.
What makes toasted ravioli Olive Garden so irresistible? It’s the perfect combination of crispy exterior and soft, flavorful interior. The breading provides a satisfying crunch, while the ricotta cheese and herb filling offers a creamy, savory experience. Plus, it’s incredibly easy to prepare, making it a fantastic option for parties, game days, or a simple weeknight treat. Whether you’re a seasoned chef or a kitchen novice, you can easily master this recipe and impress your friends and family with your culinary skills. Get ready to experience the magic of homemade toasted ravioli!

Ingredients:
- For the Ravioli:
- 1 pound ground beef (80/20 blend recommended)
- 1/2 cup Italian breadcrumbs
- 1/4 cup grated Parmesan cheese
- 1 large egg, lightly beaten
- 1/4 cup chopped fresh parsley
- 1 teaspoon garlic powder
- 1/2 teaspoon dried oregano
- 1/4 teaspoon salt
- 1/4 teaspoon black pepper
- 48 wonton wrappers (square or round)
- Water, for sealing the ravioli
- For the Breading:
- 2 cups Italian breadcrumbs
- 1 cup grated Parmesan cheese
- 1 teaspoon garlic powder
- 1/2 teaspoon dried oregano
- 1/4 teaspoon salt
- 1/4 teaspoon black pepper
- 3 large eggs, lightly beaten
- 1/2 cup milk
- For Frying:
- Vegetable oil, for frying (about 4-6 cups)
- For Serving:
- Marinara sauce, warmed
- Grated Parmesan cheese, for garnish
- Chopped fresh parsley, for garnish
Preparing the Ravioli Filling:
Alright, let’s get started with the heart of our toasted ravioli the filling! This is where we build that delicious, savory flavor that everyone loves. Trust me, taking the time to get this right is totally worth it.
- Combine the Ingredients: In a large bowl, add the ground beef, Italian breadcrumbs, Parmesan cheese, egg, parsley, garlic powder, oregano, salt, and pepper.
- Mix Thoroughly: Use your hands (or a sturdy spoon) to mix all the ingredients together until they are evenly combined. Be careful not to overmix, as this can make the meat tough. You want everything just incorporated.
- Taste Test (Optional): If you’re feeling adventurous, you can cook a tiny bit of the mixture in a skillet to taste and adjust the seasonings as needed. This is a great way to ensure the filling is exactly to your liking before you start assembling the ravioli.
- Set Aside: Once the filling is mixed, cover the bowl with plastic wrap and set it aside while you prepare the wonton wrappers. This allows the flavors to meld together a bit.
Assembling the Ravioli:
Now comes the fun part putting our ravioli together! This might seem a little tedious at first, but once you get the hang of it, it goes pretty quickly. And the end result is so rewarding!
- Prepare Your Work Station: Lay out a clean, dry surface. Have a small bowl of water nearby, as well as a baking sheet lined with parchment paper to place the assembled ravioli on.
- Fill the Wonton Wrappers: Place a wonton wrapper on your work surface. Spoon about 1 teaspoon of the meat filling into the center of the wrapper. Don’t overfill them, or they’ll be difficult to seal.
- Seal the Ravioli: Dip your finger in the bowl of water and lightly moisten all four edges of the wonton wrapper. This will help the wrapper seal properly.
- Fold and Press: Carefully fold the wonton wrapper over the filling to form a triangle (if using square wrappers) or a half-moon shape (if using round wrappers). Gently press down around the edges of the filling to seal the ravioli. Make sure there are no air pockets inside.
- Crimp the Edges (Optional): For an extra secure seal and a more decorative look, you can use a fork to crimp the edges of the ravioli. This also helps to prevent the filling from leaking out during frying.
- Repeat: Continue filling and sealing the remaining wonton wrappers until all the filling is used. Place the assembled ravioli on the prepared baking sheet in a single layer, making sure they don’t touch each other.
- Chill (Optional): At this point, you can chill the assembled ravioli in the refrigerator for about 30 minutes. This helps them to firm up and makes them easier to handle during breading and frying.
Preparing the Breading:
The breading is what gives our toasted ravioli that irresistible crispy texture and golden-brown color. It’s super easy to prepare, and the combination of breadcrumbs, Parmesan cheese, and seasonings is just perfect.
- Combine Dry Ingredients: In a shallow dish or baking pan, combine the Italian breadcrumbs, Parmesan cheese, garlic powder, oregano, salt, and pepper. Mix well to ensure everything is evenly distributed.
- Prepare the Egg Wash: In a separate shallow dish or baking pan, whisk together the eggs and milk until well combined.
Breading the Ravioli:
Now we’re ready to coat our ravioli in that delicious breading! This is a crucial step for achieving that signature toasted ravioli texture. Don’t skip it!
- Dip in Egg Wash: Take one ravioli at a time and dip it into the egg wash, making sure it’s completely coated. Let any excess egg wash drip off.
- Coat in Breadcrumbs: Immediately transfer the ravioli to the breadcrumb mixture and press it gently to ensure it’s fully coated on all sides.
- Repeat: Repeat the dipping and breading process for all the remaining ravioli.
- Rest (Optional): For an even crispier result, you can let the breaded ravioli rest on a baking sheet for about 15-20 minutes before frying. This allows the breading to adhere better.
Frying the Ravioli:
Time to fry! This is where the magic happens, and our ravioli transform into golden-brown, crispy perfection. Be careful when working with hot oil, and always keep a close eye on the ravioli to prevent burning.
- Heat the Oil: Pour the vegetable oil into a large, deep skillet or pot. Heat the oil over medium-high heat until it reaches a temperature of 350-375°F (175-190°C). You can use a deep-fry thermometer to monitor the temperature. If you don’t have a thermometer, you can test the oil by dropping a small piece of breadcrumb into it. If the breadcrumb sizzles and turns golden brown in about 30 seconds, the oil is ready.
- Fry in Batches: Carefully add the breaded ravioli to the hot oil in batches, making sure not to overcrowd the skillet. Overcrowding will lower the oil temperature and result in soggy ravioli.
- Cook Until Golden Brown: Fry the ravioli for about 2-3 minutes per side, or until they are golden brown and crispy. Use a slotted spoon or spider to carefully flip them over halfway through cooking.
- Remove and Drain: Once the ravioli are cooked, remove them from the oil with a slotted spoon and place them on a wire rack lined with paper towels to drain any excess oil.
- Repeat: Repeat the frying process with the remaining ravioli, making sure to maintain the oil temperature.
Serving:
Finally, the moment we’ve all been waiting for serving our delicious toasted ravioli! This is the perfect appetizer or snack for any occasion. And trust me, they’ll disappear fast!
- Warm the Marinara Sauce: While the ravioli are frying, warm the marinara sauce in a saucepan over low heat or in the microwave.
- Arrange on a Plate: Arrange the toasted ravioli on a serving platter or individual plates.
- Serve with Marinara Sauce: Serve the ravioli immediately with warm marinara sauce for dipping.
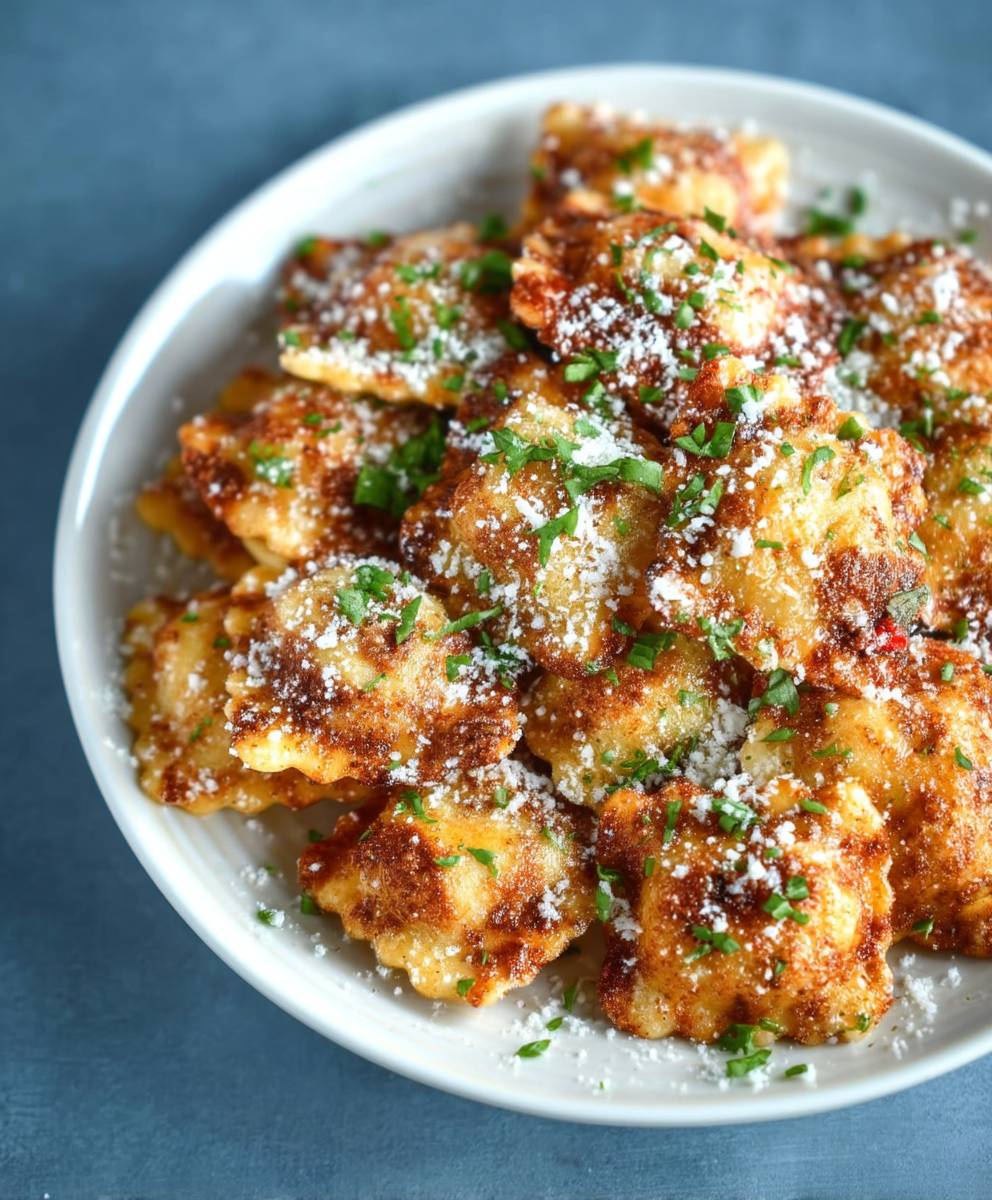
- Garnish: Garnish with grated Parmesan cheese and chopped fresh parsley for an extra touch of flavor and visual appeal.
- Enjoy!: Dig in and enjoy your homemade toasted ravioli! They’re best served hot and fresh.
Conclusion:
Well, there you have it! I truly believe this Toasted Ravioli Olive Garden copycat recipe is an absolute must-try. It’s quick, it’s easy, and it delivers that satisfying crunch and cheesy goodness you crave without having to leave the comfort of your own home. Forget waiting for a table; you can whip up a batch of these in under 30 minutes!
But why is it a must-try, you ask? Beyond the sheer convenience, it’s the flavor explosion that really seals the deal. The crispy exterior gives way to a warm, ricotta-filled center, perfectly complemented by the savory marinara sauce. It’s an appetizer that’s guaranteed to be a crowd-pleaser, whether you’re hosting a game night, a casual get-together, or simply treating yourself to a delicious snack. Plus, it’s surprisingly versatile!
Looking for serving suggestions? I love serving these toasted ravioli with a generous sprinkle of grated Parmesan cheese and a side of extra marinara for dipping. For a more substantial meal, you could pair them with a simple salad or a bowl of creamy tomato soup. They also make a fantastic addition to a buffet table or a potluck.
And speaking of versatility, don’t be afraid to experiment with variations! Try using different types of ravioli, such as spinach and cheese or mushroom. You could even add a little spice to the breadcrumb mixture with a pinch of red pepper flakes or a dash of cayenne pepper. For a truly decadent treat, consider dipping the finished ravioli in a creamy Alfredo sauce instead of marinara. The possibilities are endless!
Here are a few more ideas to get your creative juices flowing:
Serving and Variation Ideas:
* Spicy Toasted Ravioli: Add a pinch of red pepper flakes to the breadcrumb mixture for a kick.
* Garlic Parmesan Toasted Ravioli: Mix grated Parmesan cheese and garlic powder into the breadcrumbs.
* Herb-Infused Toasted Ravioli: Incorporate dried Italian herbs like oregano, basil, and thyme into the breadcrumbs.
* Creamy Pesto Dip: Serve the toasted ravioli with a homemade or store-bought pesto dip.
* Balsamic Glaze Drizzle: Drizzle a balsamic glaze over the finished ravioli for a touch of sweetness and acidity.
* Air Fryer Variation: For a slightly healthier option, try air frying the ravioli instead of baking. Simply spray the ravioli with cooking spray and air fry at 400°F (200°C) for 8-10 minutes, or until golden brown and crispy.
I’m so confident that you’ll love this recipe that I urge you to give it a try. It’s a simple yet satisfying dish that’s perfect for any occasion. And once you’ve made it, I’d love to hear about your experience! Did you try any variations? What did you serve it with? What did your family and friends think?
Please, don’t hesitate to leave a comment below and share your thoughts and photos. Your feedback is invaluable and helps me to continue creating delicious and easy-to-follow recipes that you’ll love. So go ahead, get in the kitchen, and whip up a batch of these irresistible Toasted Ravioli Olive Garden delights. Happy cooking! I can’t wait to hear from you!
Toasted Ravioli Olive Garden: A Delicious Copycat Recipe
Crispy, golden-brown toasted ravioli filled with a savory ground beef mixture. A St. Louis classic, perfect as an appetizer or snack, served with warm marinara sauce.
Ingredients
- 1 pound ground beef (80/20 blend recommended)
- 1/2 cup Italian breadcrumbs
- 1/4 cup grated Parmesan cheese
- 1 large egg, lightly beaten
- 1/4 cup chopped fresh parsley
- 1 teaspoon garlic powder
- 1/2 teaspoon dried oregano
- 1/4 teaspoon salt
- 1/4 teaspoon black pepper
- 48 wonton wrappers (square or round)
- Water, for sealing the ravioli
- 2 cups Italian breadcrumbs
- 1 cup grated Parmesan cheese
- 1 teaspoon garlic powder
- 1/2 teaspoon dried oregano
- 1/4 teaspoon salt
- 1/4 teaspoon black pepper
- 3 large eggs, lightly beaten
- 1/2 cup milk
- Vegetable oil, for frying (about 4-6 cups)
- Marinara sauce, warmed
- Grated Parmesan cheese, for garnish
- Chopped fresh parsley, for garnish
Instructions
- Prepare the Ravioli Filling: In a large bowl, combine ground beef, Italian breadcrumbs, Parmesan cheese, egg, parsley, garlic powder, oregano, salt, and pepper. Mix thoroughly until evenly combined, being careful not to overmix. Cover and set aside.
- Assemble the Ravioli: Lay out a clean, dry surface. Have a small bowl of water nearby. Place a wonton wrapper on your work surface. Spoon about 1 teaspoon of the meat filling into the center of the wrapper.
- Dip your finger in the bowl of water and lightly moisten all four edges of the wonton wrapper. Carefully fold the wonton wrapper over the filling to form a triangle (if using square wrappers) or a half-moon shape (if using round wrappers). Gently press down around the edges of the filling to seal the ravioli. Make sure there are no air pockets inside.
- For an extra secure seal and a more decorative look, you can use a fork to crimp the edges of the ravioli. This also helps to prevent the filling from leaking out during frying.
- Continue filling and sealing the remaining wonton wrappers until all the filling is used. Place the assembled ravioli on the prepared baking sheet in a single layer, making sure they don’t touch each other.
- Prepare the Breading: In a shallow dish, combine Italian breadcrumbs, Parmesan cheese, garlic powder, oregano, salt, and pepper. In a separate shallow dish, whisk together eggs and milk.
- Bread the Ravioli: Dip each ravioli in the egg wash, ensuring it’s completely coated. Let excess drip off. Immediately transfer to the breadcrumb mixture and press gently to coat all sides. Repeat for all ravioli.
- Fry the Ravioli: Pour vegetable oil into a large, deep skillet or pot. Heat over medium-high heat to 350-375°F (175-190°C).
- Carefully add breaded ravioli to the hot oil in batches, avoiding overcrowding. Fry for 2-3 minutes per side, until golden brown and crispy.
- Remove with a slotted spoon and place on a wire rack lined with paper towels to drain excess oil. Repeat with remaining ravioli.
- Serve: Warm marinara sauce. Arrange toasted ravioli on a serving platter. Serve immediately with warm marinara sauce for dipping. Garnish with grated Parmesan cheese and chopped fresh parsley.
Notes
- Don’t overmix the ground beef filling, as this can make it tough.
- Chilling the assembled ravioli for 30 minutes before breading helps them firm up.
- Letting the breaded ravioli rest for 15-20 minutes before frying can result in an even crispier texture.
- Maintain the oil temperature while frying to prevent soggy ravioli.
- Serve immediately for the best taste and texture.