
Vegan Carmelitas Dessert is a delightful treat that perfectly balances rich flavors and satisfying textures. As a passionate home cook, Ive always been drawn to desserts that not only taste amazing but also cater to various dietary preferences. The Vegan Carmelitas Dessert is a fantastic option for those who are looking for a sweet indulgence without compromising their values. This dessert has its roots in traditional caramel and oat recipes, but with a modern twist that makes it entirely plant-based.
People love this dish for its gooey caramel center, combined with the hearty crunch of oats and a hint of chocolate. The layers of flavor and texture create a mouthwatering experience that keeps you coming back for more. Plus, its incredibly convenient to make, allowing you to whip up a batch for any occasion, whether its a cozy night in or a gathering with friends. Trust me, once you try this Vegan Carmelitas Dessert, it will become a staple in your dessert repertoire!

Ingredients:
- 1 cup rolled oats
- 1 cup all-purpose flour
- 1/2 cup brown sugar
- 1/2 cup coconut oil, melted
- 1/4 cup maple syrup
- 1/2 teaspoon baking soda
- 1/4 teaspoon salt
- 1 cup dairy-free chocolate chips
- 1 cup pitted dates, chopped
- 1/2 cup almond milk (or any plant-based milk)
- 1 teaspoon vanilla extract
Preparing the Base
1. **Preheat the Oven**: Start by preheating your oven to 350°F (175°C). This ensures that your caramelitas will bake evenly and come out perfectly golden. 2. **Mix Dry Ingredients**: In a large mixing bowl, combine the rolled oats, all-purpose flour, brown sugar, baking soda, and salt. Stir these ingredients together until they are well mixed. The oats will give a nice chewy texture, while the flour will help bind everything together. 3. **Add Wet Ingredients**: In a separate bowl, whisk together the melted coconut oil, maple syrup, and vanilla extract. Make sure the coconut oil is not too hot, as you dont want to cook the other ingredients. 4. **Combine Mixtures**: Pour the wet mixture into the dry ingredients. Stir until everything is well combined. The mixture should be crumbly but hold together when pressed. If it feels too dry, you can add a splash of almond milk to help it come together. 5. **Prepare the Baking Dish**: Line an 8×8 inch baking dish with parchment paper, leaving some overhang for easy removal later. This will also help prevent sticking. 6. **Press the Base**: Take about two-thirds of the oat mixture and press it firmly into the bottom of the prepared baking dish. Use your hands or the back of a measuring cup to ensure its packed tightly and evenly.Making the Caramel Filling
7. **Prepare the Dates**: In a small saucepan, combine the chopped dates and almond milk. Heat over medium-low heat, stirring frequently until the dates soften and start to break down. This should take about 5-7 minutes. 8. **Blend the Mixture**: Once the dates are soft, transfer the mixture to a blender or food processor. Blend until smooth and creamy. If its too thick, add a little more almond milk until you reach a spreadable consistency. 9. **Add Chocolate Chips**: Stir in half of the dairy-free chocolate chips into the date mixture. This will add a delicious chocolatey flavor to the caramel filling.Assembling the Carmelitas
10. **Layer the Caramel**: Spread the date and chocolate chip mixture evenly over the pressed oat base in the baking dish. Use a spatula to smooth it out, ensuring it covers the entire base. 11. **Top with Remaining Oat Mixture**: Sprinkle the remaining oat mixture over the caramel layer. It doesnt have to be perfect; some gaps are fine as they will create a lovely texture when baked. 12. **Add More Chocolate Chips**: For an extra chocolatey touch, sprinkle the remaining chocolate chips on top of the oat mixture. This will melt beautifully while baking and create a delicious topping.Baking the Carmelitas
13. **Bake**: Place the baking dish in the preheated oven and bake for 25-30 minutes, or until the top is golden brown and the edges are slightly crispy. Keep an eye on it towards the end to prevent burning. 14. **Cool Down**: Once baked, remove the dish from the oven and let it cool in the pan for about 10-15 minutes. Then, carefully lift the parchment paper to remove the entire block of caramelitas from the dish. Allow it to cool completely on a wire rack. 15. **Cut into Squares**: Once cooled, use a sharp knife to cut the caramelitas into squares or bars. I like to cut them into 16 pieces, but you can adjust the size based on your preference.Serving Suggestions
16. **Serve**: These vegan caramelitas are delicious on their own, but you can also serve them warm with a scoop of dairy-free ice cream or a drizzle of extra maple syrup for an indulgent treat. 17. **Storage**: Store any leftovers in an airtight container at room temperature for up to 3 days, or in the refrigerator for up to a week.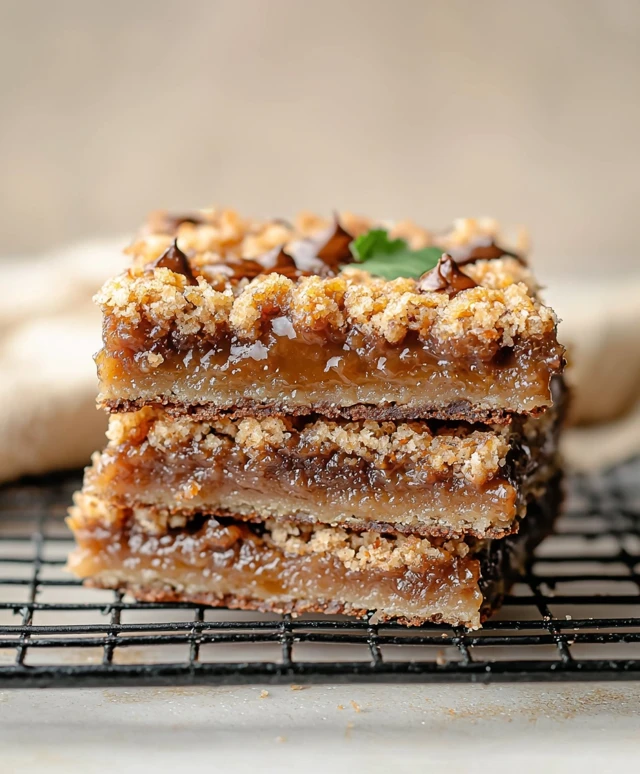
Conclusion:
In summary, this Vegan Carmelitas Dessert is an absolute must-try for anyone looking to indulge in a sweet treat thats both delicious and plant-based. The combination of rich, gooey caramel, hearty oats, and a hint of chocolate creates a dessert that is not only satisfying but also incredibly comforting. Whether youre vegan or simply looking to try something new, this recipe is sure to impress your taste buds and those of your friends and family. For serving suggestions, I love to enjoy these caramelitas warm, perhaps with a scoop of dairy-free vanilla ice cream on the side for that perfect contrast of temperatures. You can also drizzle a bit of melted dark chocolate on top for an extra touch of decadence. If youre feeling adventurous, consider adding some chopped nuts or dried fruits to the oat mixture for added texture and flavor. The possibilities are endless! I encourage you to give this Vegan Carmelitas Dessert a try and experience the delightful flavors for yourself. Once youve made it, Id love to hear about your experience! Share your thoughts, any variations you tried, or even a photo of your creation. Lets spread the joy of this delicious dessert together! Print
Vegan Carmelitas Dessert: Indulge in a Guilt-Free Sweet Treat
- Total Time: 45 minutes
- Yield: 16 squares 1x
Description
These Vegan Caramelitas feature a delicious blend of chewy oats, date-based caramel, and dairy-free chocolate chips. Easy to prepare, they make for a satisfying sweet treat or dessert that everyone will love!
Ingredients
- 1 cup rolled oats
- 1 cup all-purpose flour
- 1/2 cup brown sugar
- 1/2 cup coconut oil, melted
- 1/4 cup maple syrup
- 1/2 teaspoon baking soda
- 1/4 teaspoon salt
- 1 cup dairy-free chocolate chips
- 1 cup pitted dates, chopped
- 1/2 cup almond milk (or any plant-based milk)
- 1 teaspoon vanilla extract
Instructions
- Preheat your oven to 350°F (175°C).
- In a large mixing bowl, combine rolled oats, all-purpose flour, brown sugar, baking soda, and salt. Stir until well mixed.
- In a separate bowl, whisk together melted coconut oil, maple syrup, and vanilla extract.
- Pour the wet mixture into the dry ingredients and stir until combined. If too dry, add a splash of almond milk.
- Line an 8×8 inch baking dish with parchment paper.
- Press about two-thirds of the oat mixture into the bottom of the prepared baking dish.
- In a small saucepan, combine chopped dates and almond milk. Heat over medium-low, stirring until dates soften (about 5-7 minutes).
- Transfer the date mixture to a blender and blend until smooth, adding more almond milk if needed.
- Stir in half of the dairy-free chocolate chips into the date mixture.
- Spread the date and chocolate chip mixture over the pressed oat base.
- Sprinkle the remaining oat mixture over the caramel layer.
- Sprinkle the remaining chocolate chips on top.
- Bake for 25-30 minutes, or until the top is golden brown.
- Let cool in the pan for 10-15 minutes, then lift out using the parchment paper and cool completely on a wire rack.
- Cut into squares or bars, about 16 pieces.
- Enjoy warm or at room temperature, optionally with dairy-free ice cream or a drizzle of maple syrup.
- Store leftovers in an airtight container at room temperature for up to 3 days or in the refrigerator for up to a week.
Notes
- Ensure the coconut oil is not too hot when mixing with other ingredients to avoid cooking them.
- Feel free to adjust the size of the squares based on your preference.
- Prep Time: 15 minutes
- Cook Time: 30 minutes